
1. Introduction
This manual provides detailed instructions for the installation, operation, and maintenance of your SIXWIN Single Din Car Stereo. This multimedia player features a 7-inch touch screen, Wireless Carplay, Android Auto, Bluetooth connectivity, FM Radio, Mirror Link, and Steering Wheel Control compatibility. Please read this manual thoroughly before using the product to ensure proper function and safety.
2. Safety Information
- Always operate the device safely and responsibly. Distracted driving can lead to accidents.
- Do not attempt to install or repair the unit yourself if you are not qualified. Refer to a professional installer.
- Ensure all wiring is correctly connected to prevent damage to the unit or vehicle.
- Keep the volume at a level that allows you to hear outside traffic sounds.
- Avoid exposing the unit to extreme temperatures, direct sunlight for prolonged periods, or moisture.
- Clean the screen with a soft, dry cloth. Do not use abrasive cleaners.
3. Package Contents
Verify that all items are present in the package:
- 1 x Car Radio
- 1 x Horn Cable
- 1 x Power Cable
- 1 x Steering Wheel Control Remote
- 1 x User Manual (this document)
- Note: Additional accessories such as a rear view camera are sold separately.

Image 3.1: Overview of the car stereo unit, its dimensions, and included accessories like the horn cable, power cable, steering wheel control remote, and user manual. The unit measures 180mm (7.09 inches) wide and 104mm (4.09 inches) high.
4. Product Overview
The SIXWIN Single Din Car Stereo features a 7-inch retractable touch screen and a standard single DIN chassis. Below is an overview of its front panel controls and rear connections.
4.1 Front Panel Controls
Image 4.1: Detailed view of the car stereo's front panel, showing the 7-inch touch screen, power button, volume controls, AUX input, USB slot, and SD card slot. The screen displays icons for Radio, CarPlay, Android Auto, USB, and BT Music.
- MIC: Built-in microphone for hands-free calls.
- RES: Reset button (use a thin object to press).
- Power Button: Press to turn on/off, short press for mute.
- Vol+/-: Adjust volume levels.
- AUX: Auxiliary input for external audio devices.
- IR: Infrared receiver for remote control.
- SD Card Slot: For media playback from SD cards.
- USB Slot: For media playback from USB drives and charging.
4.2 Rear Connections
Image 4.2: Rear view of the car stereo showing various input/output ports and wiring harnesses. Labels indicate connections for microphone, audio output (left/right), video output, CVBS IN, rear view camera input, radio antenna, and USB port.
Refer to the diagram for specific wiring connections. Key connections include:
- Power Harness (A): Includes connections for Battery+, Ignition, Ground, ILL (illumination), Brake, Back-in, and Antenna.
- Speaker Harness (B): Connections for front and rear speakers (Left/Right, Positive/Negative).
- Audio/Video Outputs: RCA jacks for audio output (Left/Right), video output, and CVBS input.
- Rear View Camera Input: Dedicated input for a reversing camera.
- Radio Antenna: Standard antenna input.
- External Microphone: Input for an optional external microphone.
- USB Port: Rear USB connection for media or charging.
5. Setup and Installation
Proper installation is crucial for optimal performance and safety. It is recommended to have this unit installed by a qualified professional.
5.1 Pre-Installation Checks
- Ensure the vehicle's battery is disconnected before starting installation.
- Confirm the car stereo's dimensions (180mm x 104mm) fit your vehicle's single DIN opening.
- Gather all necessary tools (screwdrivers, wire strippers, electrical tape, etc.).
5.2 Wiring Connections
Connect the wiring harnesses as per the diagram in Section 4.2. Pay close attention to:
- Power (Yellow): Connect to constant 12V power (Battery+).
- Ignition (Red): Connect to switched 12V power (ACC/Ignition).
- Ground (Black): Connect to a good chassis ground point.
- Illumination (Orange/Brown): Connect to vehicle's illumination wire (optional, for dimming).
- Brake (Pink/Light Green): Connect to parking brake wire for safety features (e.g., video playback only when parked).
- Back-in (Brown/Purple): Connect to reverse light trigger for automatic rear camera display.
- Speakers: Connect each speaker wire (e.g., White/White-Black for Front Left) to the corresponding vehicle speaker. Ensure correct polarity.
- Antenna: Connect the vehicle's radio antenna.
- Rear Camera: If installing, connect the camera's video output to the "Rear View Camera Input" RCA jack and its power to the reverse light circuit.
5.3 Mounting the Unit
- Slide the metal mounting sleeve into the vehicle's dashboard opening. Bend the tabs to secure it.
- Carefully push the car stereo unit into the mounting sleeve until it clicks into place.
- Reconnect the vehicle's battery.
- Test all functions before fully reassembling the dashboard.
6. Operating Instructions
6.1 Basic Operation
- Power On/Off: Press the power button on the front panel.
- Volume Control: Use the Vol+/- buttons on the front panel or the steering wheel controls.
- Touch Screen: Navigate menus and select functions by tapping the 7-inch touch screen.
- Home Button: Tap the home icon on the screen to return to the main menu.
6.2 Wireless CarPlay and Android Auto
This unit supports both Wireless CarPlay for iPhone users and Wireless Android Auto for Android users, allowing seamless integration of your smartphone's features.

Image 6.1: The car stereo displaying both Android Auto and CarPlay interfaces, showing common apps like Maps, Music, Phone, and Messages. This illustrates the wireless connectivity feature.
- Ensure Bluetooth and Wi-Fi are enabled on your smartphone.
- On the car stereo, select the "CarPlay" or "Android Auto" icon from the main menu.
- Follow the on-screen prompts to pair your phone via Bluetooth. Once paired, the system will automatically connect for CarPlay or Android Auto functionality.
- You can now access navigation, make calls, send messages, and play music directly from your phone's interface on the car stereo screen.
6.3 Bluetooth Integration (BT Function)
Connect your smartphone via Bluetooth for hands-free calling and wireless audio streaming.
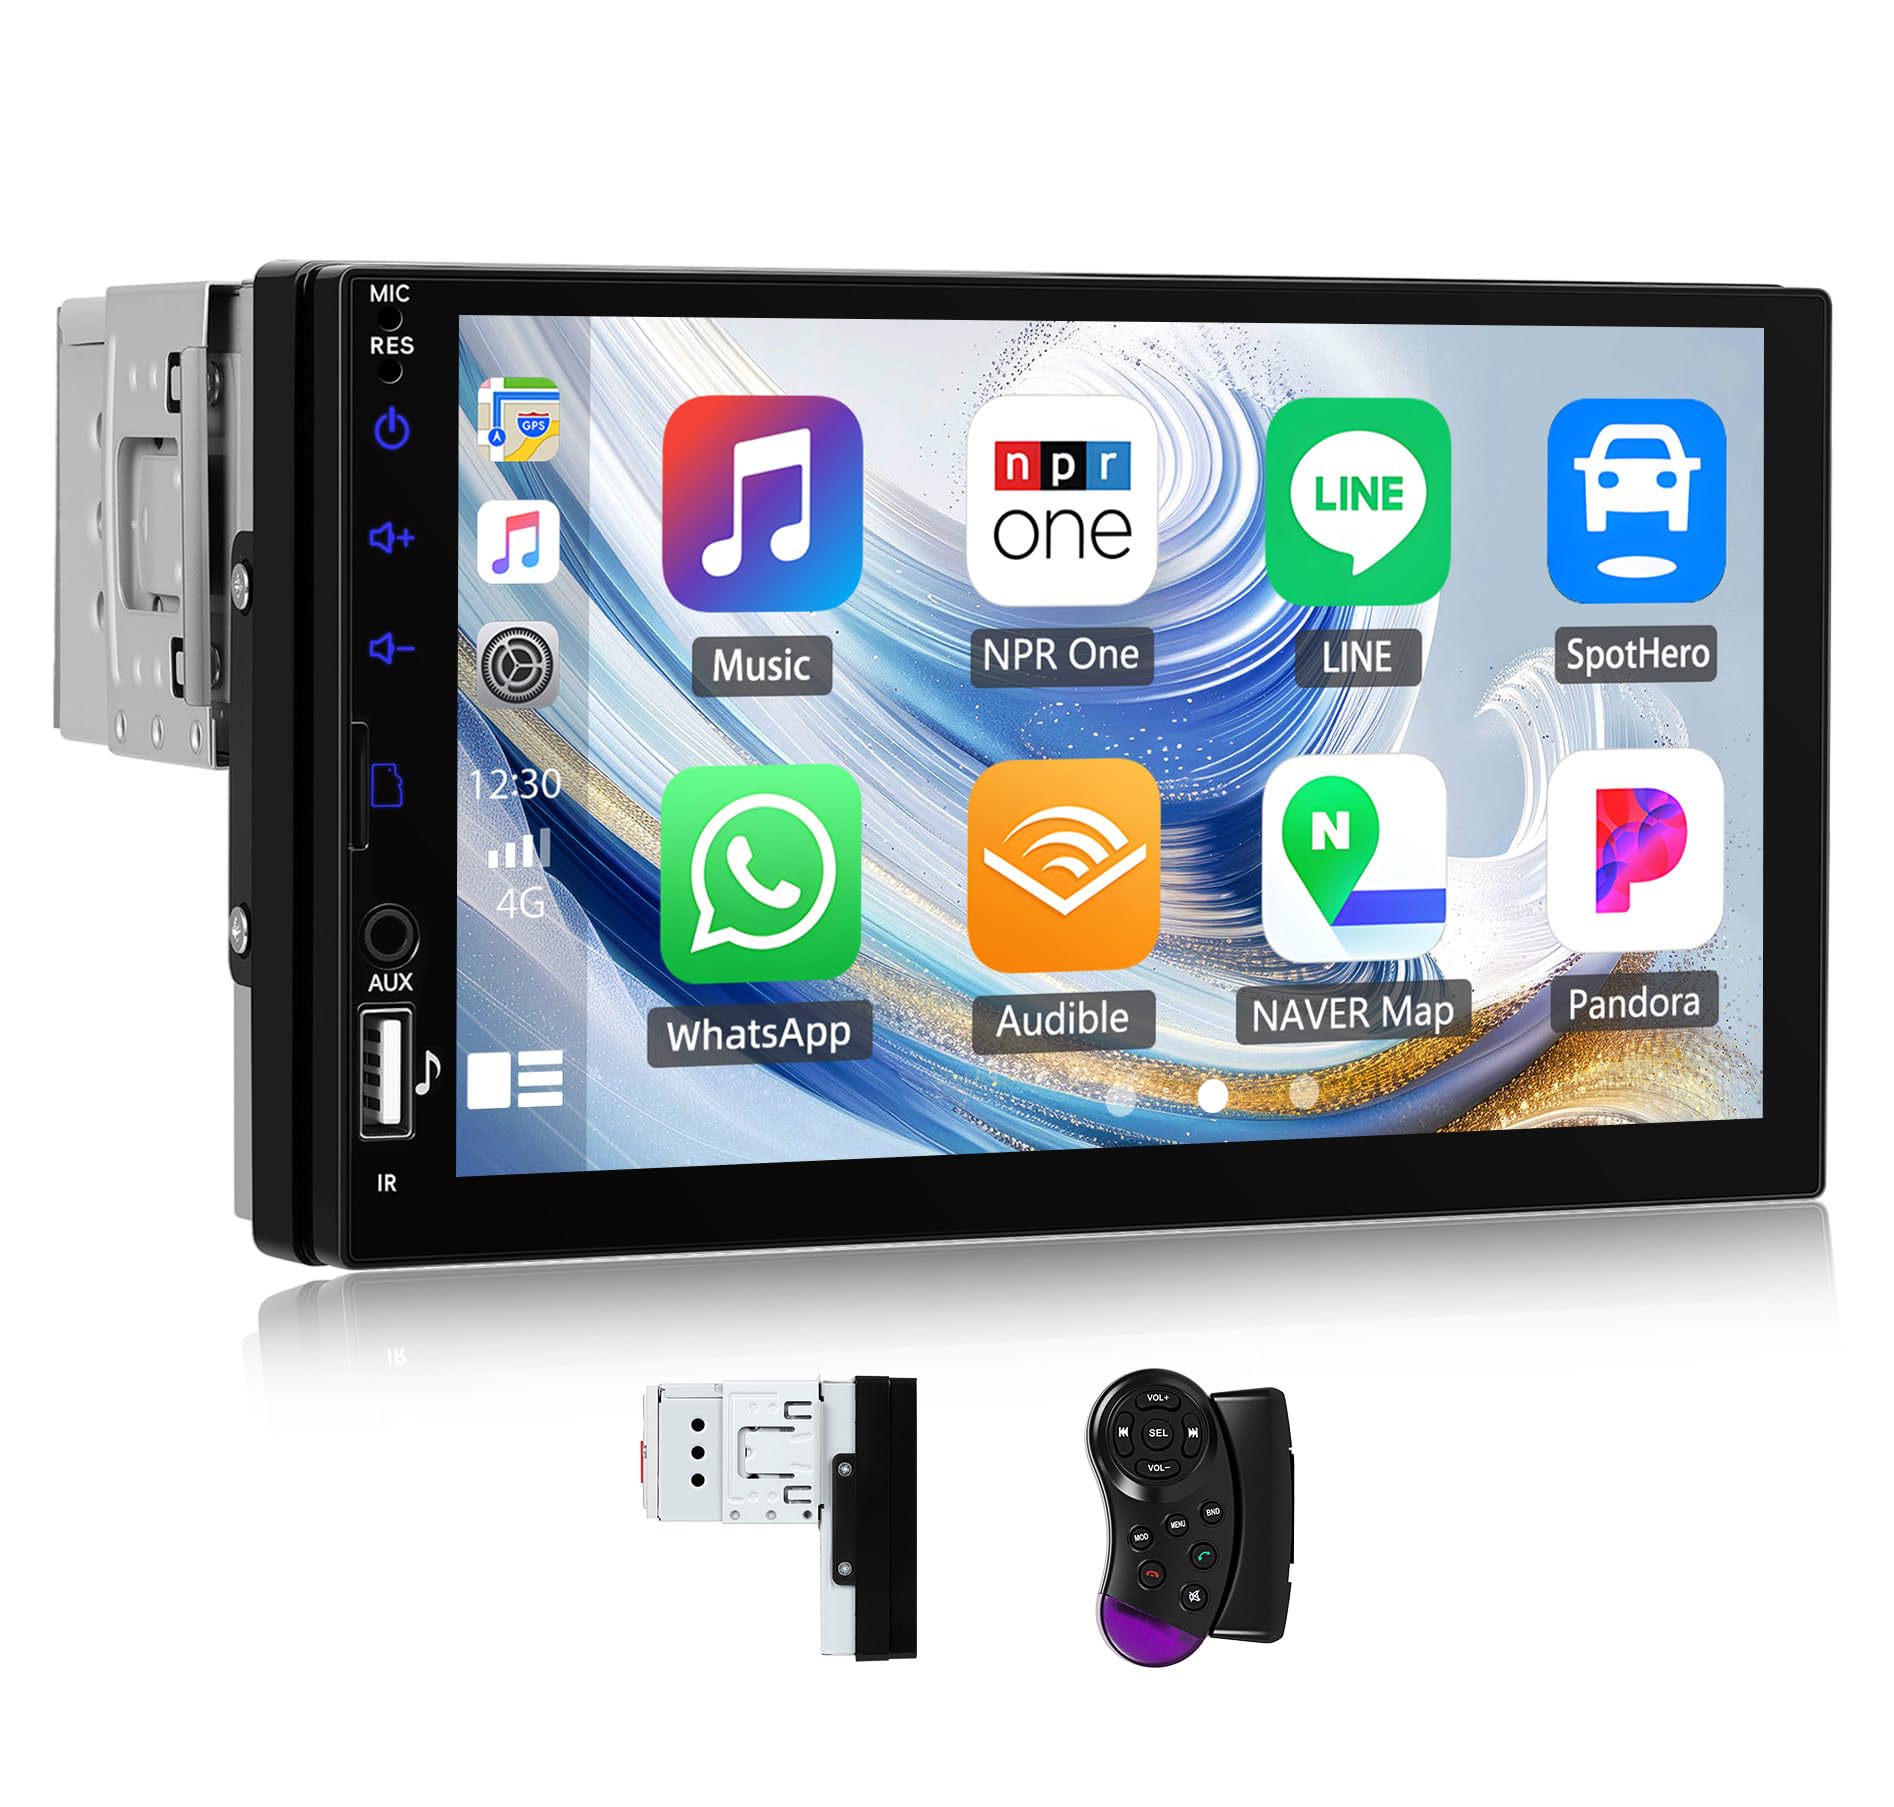
Image 6.2: The car stereo displaying a phone dialer interface, indicating active Bluetooth connection for hands-free calling. This feature allows users to dial numbers, access contacts, and manage calls safely while driving.
- On the car stereo, select the "BT Music" or "BT Phone" icon.
- Enable Bluetooth on your phone and search for available devices.
- Select "SIXWIN" (or similar device name) from your phone's Bluetooth list and pair.
- Once connected, you can make/receive calls using the touch screen dialer or stream audio from your phone.
6.4 Mirror Link
Mirror Link allows you to display your smartphone's screen directly onto the car stereo. This feature typically requires a wired USB connection for Android phones and may vary for iPhones.
- Connect your smartphone to the car stereo's USB port using a high-quality USB cable.
- On the car stereo, select the "Mirror Link" icon.
- Follow the on-screen instructions to enable screen mirroring. You may need to grant permissions on your phone.
6.5 FM Radio
Access and tune into your favorite FM radio stations.

Image 6.3: The car stereo screen showing the FM radio interface, including the current frequency (87.50MHz), station presets, and controls for scanning and tuning. The image also highlights the customizable color buttons.
- From the main menu, tap the "Radio" icon.
- Use the on-screen controls to scan for stations, manually tune, or select from saved presets.
6.6 Steering Wheel Control
If your vehicle supports steering wheel controls, you can configure them to operate the car stereo.

Image 6.4: The car stereo displaying the "Steering Wheel Control" setup menu, showing options to assign functions like Power, Next, Mute, Vol+, Vol-, Reject, Mode, Dial, Reset, and Enter to vehicle steering wheel buttons.
- Go to "Settings" or "System Settings" on the car stereo.
- Locate the "Steering Wheel Control" or "SWC" option.
- Follow the on-screen instructions to program each button on your steering wheel to the desired function (e.g., volume up, track skip, mode change).
6.7 USB Charging and Media Playback
The unit provides USB ports for charging your mobile devices and playing media files.

Image 6.5: A smartphone connected to the car stereo's USB port, showing a charging indicator on the phone screen. The car stereo's main menu is visible in the background, indicating simultaneous operation.
- Connect your device to the front or rear USB port.
- The unit supports 5V 2A current for charging.
- To play media, select the "USB" icon from the main menu and browse your files.
6.8 Equalizer Adjustment
Customize your audio experience with the built-in equalizer.

Image 6.6: The car stereo displaying the Equalizer Adjustment screen, showing multiple frequency bands (e.g., 30Hz, 60Hz, 125Hz, 250Hz, 500Hz, 1KHz, 2KHz, 4KHz, 8KHz, 16KHz) with adjustable gain sliders. Preset options like Jazz, Classic, Rock, Pop, Flat, and User are also visible.
- Access the "Sound Setup" or "Equalizer" option from the settings menu.
- Adjust the frequency bands to tailor the sound to your preference or select from preset modes like Jazz, Classic, Rock, Pop, or Flat.
- Enable or disable "Loudness" for enhanced bass and treble at low volumes.
6.9 HD Reversing Camera Input
When a compatible reversing camera (sold separately) is connected, the unit will automatically display the rear view when the vehicle is in reverse gear.

Image 6.7: The car stereo screen showing a clear view from a rear reversing camera, complete with colored parking guidelines to assist with safe maneuvering. A note indicates that the camera is an optional purchase.
- Ensure the reversing camera is correctly installed and connected to the "Rear View Camera Input" on the car stereo.
- The unit will automatically switch to the camera view when reverse gear is engaged.
6.10 Color Buttons
Customize the illumination color of the physical buttons on the unit.
Image 6.8: The car stereo's physical buttons illuminated in different colors (red, green, blue, yellow, cyan, purple, white), demonstrating the 7-color lighting cycle change feature. The main screen shows the FM radio interface.
- Navigate to "Settings" and find the "Display" or "Lighting" options.
- Select from the available 7 colors (Red, Green, Blue, Yellow, Cyan, Purple, White) to match your vehicle's interior lighting or personal preference.
7. Maintenance
- Cleaning the Screen: Use a soft, lint-free cloth to gently wipe the touch screen. For stubborn smudges, slightly dampen the cloth with water. Avoid harsh chemicals or abrasive materials.
- Cleaning the Unit: Wipe the exterior of the unit with a dry, soft cloth. Do not spray cleaners directly onto the unit.
- Temperature: Avoid leaving the unit in direct sunlight or extreme temperatures for extended periods, as this can affect its lifespan and performance.
- Software Updates: Check the manufacturer's website periodically for any available firmware updates to ensure optimal performance and compatibility.
8. Troubleshooting
If you encounter issues with your car stereo, refer to the following common problems and solutions:
| Problem | Possible Cause | Solution |
|---|---|---|
| No power/Unit does not turn on. | Incorrect wiring (power/ground), blown fuse, vehicle battery issue. | Check power and ground connections. Verify vehicle fuses. Ensure the red (ACC) and yellow (Battery+) wires have 12V power. |
| No sound. | Volume too low, mute activated, incorrect speaker wiring, faulty speakers. | Increase volume. Check if mute is active. Verify all speaker connections are correct and secure. Test with different audio sources. |
| Bluetooth not connecting. | Bluetooth not enabled on phone/unit, incorrect pairing process, interference. | Ensure Bluetooth is active on both devices. Delete previous pairings and re-pair. Move closer to the unit. Restart both devices. |
| CarPlay/Android Auto not working. | Incorrect connection, phone settings, incompatible phone, app issues. | Ensure Wi-Fi and Bluetooth are on. Check phone settings for CarPlay/Android Auto permissions. Try restarting the phone and unit. Use a different USB cable if wired. |
| Rear camera not displaying. | Camera not powered, incorrect video input, reverse trigger wire not connected. | Verify camera power and video connection. Ensure the "Back-in" wire is correctly connected to the reverse light trigger. |
| Touch screen unresponsive. | Temporary software glitch, screen calibration needed. | Press the RES (Reset) button with a thin object. If the issue persists, consult customer support. |
9. Specifications
| Feature | Detail |
|---|---|
| Brand | SIXWIN |
| Model Number | A4106-AM33UK-C123-0303 |
| Display | 7-inch Touch Screen |
| Connectivity Technology | Bluetooth, Wi-Fi |
| Controller Type | Touchscreen |
| Special Features | Wireless CarPlay, Android Auto, Mirror Link, Built-In Bluetooth, FM Radio, Steering Wheel Control, USB Charging, 7-Color Lighting |
| Compatible Devices | Smartphone, Tablet, Personal Computer |
| Audio Output Mode | Stereo |
| Product Dimensions (D x W x H) | 10D x 10W x 10H Millimeters (Note: This seems to be a placeholder, actual unit dimensions are 180mm W x 104mm H) |
| Item Weight | 1 Grams (Note: This seems to be a placeholder) |
| Output Power | 4 Watts |
| Number of Channels | 2 |
| Supported Internet Services | Spotify, Apple Music (via CarPlay/Android Auto) |
| Box Contents | 1 x Car Radio |
Note: Product specifications are subject to change without prior notice. Dimensions and weight provided in the source data (10D x 10W x 10H Millimeters, 1 Grams) appear to be generic placeholders and may not reflect the actual physical size and weight of the car stereo unit. Please refer to the "Size & Package Size" image for more accurate physical dimensions.
10. Warranty and Support
For warranty information and technical support, please refer to the documentation provided with your purchase or contact SIXWIN customer service through their official channels. Keep your purchase receipt as proof of purchase for warranty claims.