
1. Introduction
This manual provides essential instructions for the proper installation, operation, and maintenance of your FTYHFEFH Carburetor, specifically designed for Briggs & Stratton Engine Model 10T802-0547-B2. Adhering to these guidelines will help ensure optimal performance and longevity of the carburetor. Please read this manual thoroughly before proceeding with installation or use.
2. Product Overview
The FTYHFEFH Carburetor is a direct replacement component engineered to match the factory specifications of Briggs & Stratton Engine Model 10T802-0547-B2. It is designed for precise fuel-air mixture delivery, crucial for engine combustion efficiency.
2.1 Package Contents
The package includes the following components, exactly as depicted:
- FTYHFEFH Carburetor Assembly
- Mounting Screws (quantity as shown)
- Gaskets (quantity as shown)
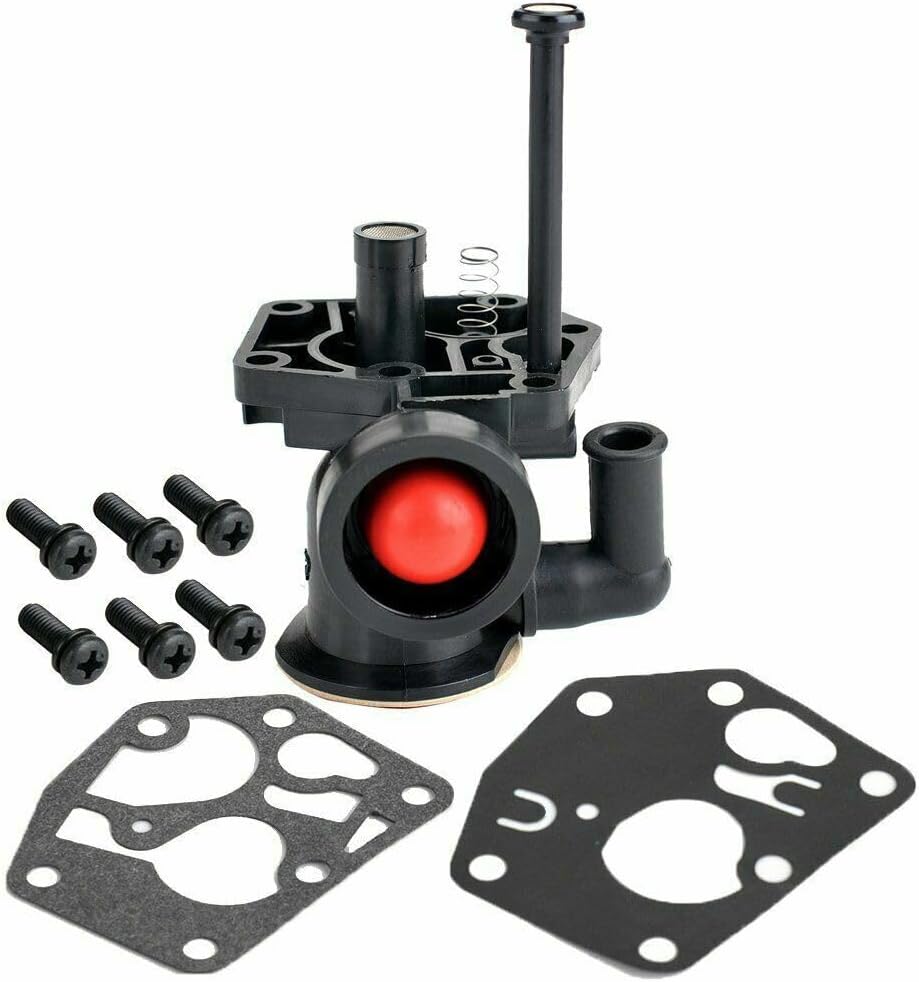
Figure 1: Complete FTYHFEFH Carburetor package, including the main carburetor unit, mounting screws, and gaskets.
3. Setup and Installation
Safety First: Before beginning any installation, ensure the engine is turned off, cooled down, and the spark plug wire is disconnected to prevent accidental starting. Wear appropriate personal protective equipment, such as gloves and eye protection.
3.1 Pre-Installation Checks
- Verify that the new carburetor matches the original unit in terms of mounting points and connections.
- Ensure all necessary tools are available.
- Inspect the new gaskets for any damage.
3.2 Installation Steps
- Remove Air Filter Assembly: Carefully detach the air filter housing and filter element to gain access to the carburetor.
- Disconnect Fuel Line: Pinch off the fuel line to prevent fuel leakage, then disconnect it from the old carburetor. Have a suitable container ready to catch any residual fuel.
- Disconnect Linkages: Detach any throttle and choke linkages connected to the old carburetor. Note their positions for correct reattachment.
- Remove Old Carburetor: Unscrew the mounting bolts or nuts holding the old carburetor in place. Carefully remove the old carburetor and its gaskets.
- Clean Mounting Surface: Thoroughly clean the engine's mounting surface to ensure a proper seal with the new gaskets.
- Install New Gaskets: Place the new gaskets in their correct positions on the engine and/or carburetor.
- Mount New Carburetor: Position the FTYHFEFH Carburetor onto the mounting studs, ensuring it aligns correctly. Secure it with the provided mounting screws, tightening them evenly to prevent warping.
- Reconnect Linkages: Reattach the throttle and choke linkages to the new carburetor in their original configurations. Ensure smooth operation.
- Reconnect Fuel Line: Reconnect the fuel line to the carburetor and remove the pinch-off clamp. Check for any leaks.
- Reinstall Air Filter Assembly: Reattach the air filter housing and filter element.

Figure 2: Side view of the carburetor, highlighting the primer bulb and fuel inlet.

Figure 3: Top view of the carburetor, showing the internal float chamber area and fuel filter.

Figure 4: Disassembled view, showing the main carburetor body and the primer bulb assembly.
4. Operating Instructions (Post-Installation)
After successful installation, perform the following checks before starting the engine:
- Fuel Level: Ensure there is sufficient fuel in the tank.
- Leak Check: Visually inspect all fuel line connections for any signs of leakage.
- Linkage Movement: Confirm that the throttle and choke linkages move freely and return to their correct positions.
- Primer Bulb: If equipped, press the primer bulb several times until it feels firm, indicating fuel has reached the carburetor.
- Spark Plug: Reconnect the spark plug wire.
Start the engine according to the manufacturer's instructions for your specific Briggs & Stratton engine model. Allow the engine to warm up and check for smooth operation and proper idle speed. Adjustments to idle speed or mixture may be necessary, referring to your engine's service manual for specific procedures.
5. Maintenance
Regular maintenance helps ensure the carburetor functions correctly and extends its lifespan.
- Fuel Quality: Always use fresh, clean fuel. Stale or contaminated fuel is a primary cause of carburetor issues. Consider using a fuel stabilizer if the engine will be stored for extended periods.
- Fuel Filter: Regularly inspect and replace the fuel filter (if present in your engine's fuel system) to prevent debris from reaching the carburetor.
- Air Filter: Keep the air filter clean and replace it as recommended by your engine manufacturer. A dirty air filter can restrict airflow and affect carburetor performance.
- External Cleaning: Periodically clean the exterior of the carburetor to remove dirt and grime. Avoid spraying water directly into carburetor openings.
- Seasonal Storage: Before long-term storage, run the engine until it runs out of fuel, or drain the fuel system to prevent gum and varnish buildup in the carburetor.
6. Troubleshooting
If you encounter issues after installing the carburetor, consider the following common problems and solutions:
- Engine Not Starting:
- Check Fuel: Ensure there is fresh fuel and the fuel line is connected without kinks.
- Primer Bulb: Confirm the primer bulb is firm (if applicable).
- Spark: Verify the spark plug is connected and producing a spark.
- Choke: Ensure the choke is set correctly for starting.
- Engine Runs Rough or Idles Poorly:
- Air Filter: Check if the air filter is clean and properly installed.
- Gaskets: Inspect for air leaks around the carburetor gaskets.
- Fuel Quality: Ensure fuel is fresh and not contaminated.
- Fuel Leaks:
- Connections: Tighten all fuel line connections.
- Gaskets: Ensure gaskets are properly seated and not damaged.
- Float Bowl: A leaking float bowl may indicate a faulty float or needle valve.
If these basic troubleshooting steps do not resolve the issue, it is recommended to consult a qualified service technician or refer to your engine's specific service manual.
7. Specifications
| Brand | FTYHFEFH |
| Model Number | 10T802-0547-B2 (Engine Compatibility) |
| Item Weight | Approximately 1 pound |
| Product Dimensions | Approximately 1 x 1 x 1 inches |
| UPC | 779603360278 |
| Manufacturer Part Number | 1 |
8. Warranty and Support
Specific warranty information for this FTYHFEFH Carburetor is not provided within the product details. For inquiries regarding warranty coverage, returns, or technical support, please contact the seller directly through your purchase platform. Ensure you retain your proof of purchase for any warranty claims.