
1. Introduction
This manual provides essential instructions for the safe and effective operation, maintenance, and troubleshooting of your Generic Pneumatic Dent Puller, Model 69718. This tool is designed to restore your vehicle's smooth finish by utilizing compressed air to create a strong vacuum, allowing for the gentle and effective removal of most common dents without damaging the existing paint finish. It eliminates the need for drilling, welding, or sanding, offering a clean and straightforward solution for auto body repair.
2. Safety Information
Always observe the following safety precautions to prevent injury and damage to the tool or vehicle.
- Eye Protection: Always wear ANSI-approved safety goggles or safety glasses with side shields when operating this tool.
- Hand Protection: Wear appropriate work gloves to protect hands from potential pinch points or sharp edges.
- Air Pressure: Do not exceed the maximum recommended air pressure for the tool. Refer to the specifications section for details.
- Clean Work Area: Keep the work area clean, well-lit, and free of obstructions.
- Tool Condition: Inspect the tool for damage or wear before each use. Do not operate a damaged tool.
- Air Compressor Safety: Follow all safety instructions provided with your air compressor. Ensure the air compressor is properly maintained and has a working pressure regulator.
- Vehicle Stability: Ensure the vehicle is stable and properly supported before beginning any repair work.
- Surface Preparation: Ensure the dented surface is clean and dry before applying the dent puller.
3. Package Contents
Verify that all items listed below are present and undamaged upon unpacking.
- Pneumatic Dent Puller Unit
- 4-inch Rubber Suction Cup
- 5-inch Rubber Suction Cup
- Urethane Air Supply Hose
- Built-in Check Valve (integrated into the unit)
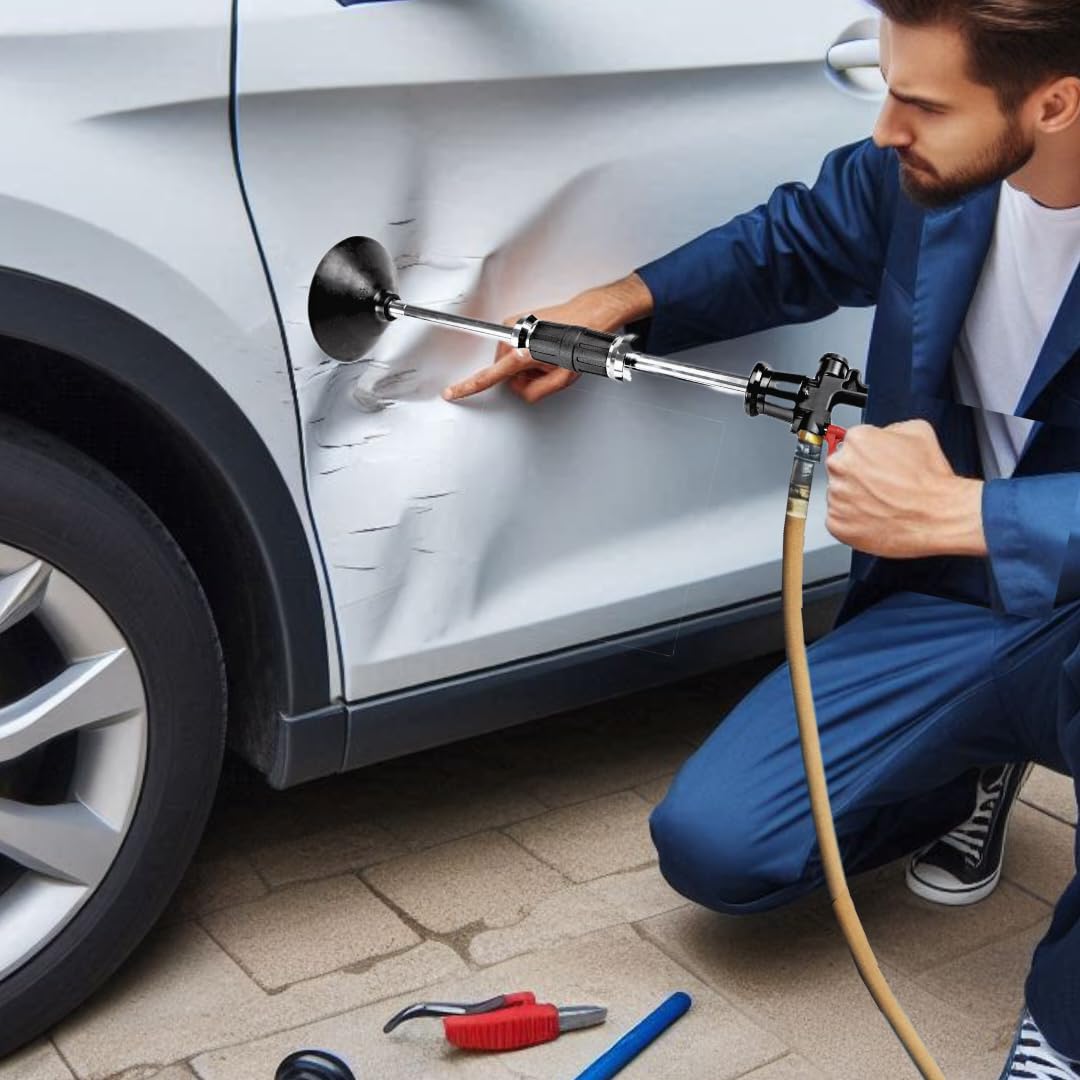
Image 3.1: The Generic Pneumatic Dent Puller, showing the main unit, two interchangeable suction cups (4-inch and 5-inch), and the urethane air supply hose. This image illustrates the primary components included in the package.
4. Setup
Follow these steps to prepare your pneumatic dent puller for operation.
- Connect to Air Compressor: Attach the urethane air supply hose to the air inlet fitting on the dent puller unit. Ensure the connection is secure to prevent air leaks.
- Connect to Air Source: Connect the other end of the air supply hose to your air compressor's regulated air outlet. Ensure your air compressor is capable of providing the required air pressure (refer to Specifications).
- Set Air Pressure: Adjust your air compressor's regulator to the recommended operating pressure. Do not exceed the maximum pressure.
- Select Suction Cup: Choose either the 4-inch or 5-inch rubber suction cup based on the size and contour of the dent. The 4-inch cup is generally suitable for smaller dents, while the 5-inch cup is better for larger or flatter dents. Attach the selected suction cup firmly to the dent puller head.
Image 4.1: The pneumatic dent puller with the air supply hose connected, ready for attachment to an air compressor. This illustrates the initial setup step.
5. Operating Instructions
Follow these steps for effective dent removal.
- Clean the Dented Surface: Thoroughly clean the area around the dent to ensure the suction cup can form a tight seal. Remove any dirt, grease, or wax.
- Position the Suction Cup: Place the chosen suction cup directly over the center of the dent. Ensure the entire surface of the suction cup makes full contact with the vehicle's panel.
- Activate Vacuum: With the suction cup firmly pressed against the dent, activate the vacuum by pressing the trigger or lever on the dent puller handle. You should hear the air compressor engage and feel the suction cup firmly grip the surface. The built-in check valve will help maintain consistent vacuum pressure.
- Pull the Dent: Once the vacuum is established, gently and steadily pull the dent puller handle outwards, away from the vehicle's surface. Apply consistent pressure. Avoid sudden, jerky movements.
- Inspect and Repeat (if necessary): Release the vacuum by disengaging the trigger/lever. Carefully remove the dent puller and inspect the dent. For larger or more complex dents, you may need to reposition the suction cup and repeat the process multiple times, working from the edges of the dent towards the center.
- Release Vacuum: After the dent is removed or you need to reposition, release the vacuum by pressing the appropriate release mechanism on the tool.
Image 5.1: A pneumatic dent puller applied to a vehicle panel, demonstrating the tool's operation during dent removal. The suction cup is firmly attached to the dented area.
6. Maintenance
Regular maintenance ensures the longevity and optimal performance of your dent puller.
- Cleaning: After each use, wipe down the dent puller unit and suction cups with a clean, damp cloth. Ensure no debris is left on the suction cups, as this can impair their sealing ability.
- Inspect Suction Cups: Regularly check the rubber suction cups for cracks, tears, or hardening. Replace damaged suction cups immediately to maintain effective suction.
- Air Hose Inspection: Inspect the urethane air supply hose for cuts, kinks, or leaks. Replace if damaged.
- Lubrication: If the tool has moving parts that require lubrication, refer to specific instructions if provided by the manufacturer. Generally, pneumatic tools benefit from a few drops of pneumatic tool oil in the air inlet before each use.
- Storage: Store the dent puller in a clean, dry place, away from direct sunlight and extreme temperatures. Protect the suction cups from being crushed or deformed during storage.
7. Troubleshooting
Refer to the table below for common issues and their solutions.
| Problem | Possible Cause | Solution |
|---|---|---|
| Loss of suction / Suction cup not holding | Dirty or uneven surface; Damaged suction cup; Insufficient air pressure; Air leak in hose or connections. | Clean the vehicle surface thoroughly; Inspect and replace suction cup if damaged; Check air compressor pressure and regulator settings; Tighten all air hose connections. |
| Dent not pulling out effectively | Dent too large or complex for tool; Incorrect suction cup size; Insufficient pulling force; Surface not clean. | This tool is for common dents, not severe damage; Try a different size suction cup; Ensure firm and consistent pull; Re-clean the surface. |
| Air leaks from tool | Loose fittings; Damaged O-rings or seals. | Check and tighten all air connections; Inspect internal seals and O-rings for wear and replace if necessary. |
8. Specifications
Technical details for the Generic Pneumatic Dent Puller, Model 69718.
- Model: 69718 (Air Dent Puller)
- Manufacturer: HFT
- Item Weight: 7.14 pounds
- Suction Cup Sizes: 4-inch, 5-inch
- Air Supply Hose: Urethane
- Air Compressor Required: Yes (not included)
- Compatibility: Compatible with Central Pneumatic Automotive Dent Pullers
9. Warranty and Support
For information regarding product warranty, please refer to the documentation provided at the time of purchase or contact your retailer. For technical support or inquiries, please reach out to the seller or manufacturer through the contact information provided with your purchase.