
Introduction
Thank you for purchasing the Dsoon HDV920Pro 4K Camcorder. This manual provides essential information for setting up, operating, and maintaining your device. Please read it thoroughly before use to ensure proper functionality and to maximize your recording experience.
The Dsoon HDV920Pro is a versatile 4K camcorder designed for capturing high-quality video and photos. Key features include 4K 60FPS video recording, 48MP photo resolution, night vision capabilities, an 18X digital zoom, and a rotatable touch screen for ease of use.
What's Included
Verify that all items are present in the package:
- Dsoon HDV920Pro 4K Camcorder
- 2 x Lithium Batteries
- Remote Control
- USB-C Cable
- 64GB TF Card
- External Microphone
- Lens Cap
- User Manual (this document)

Image: All components included with the Dsoon HDV920Pro camcorder, laid out for inspection.
Product Overview
Familiarize yourself with the main parts of your camcorder.
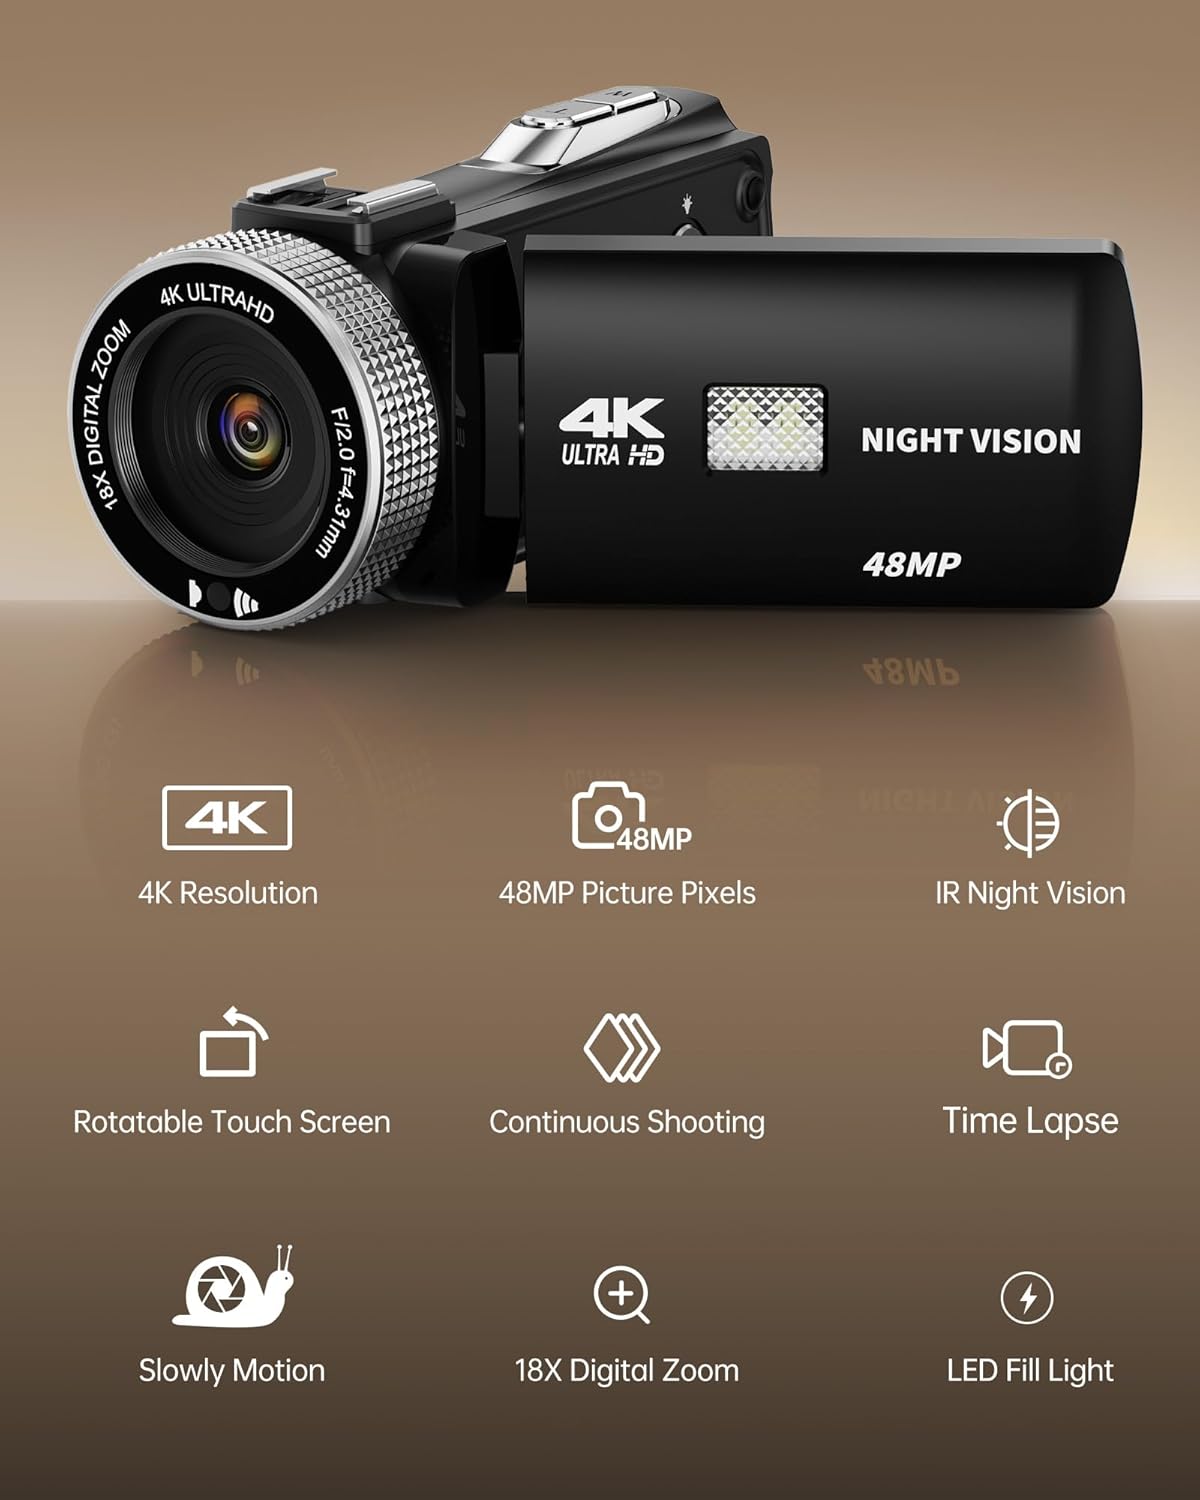
Image: Front view of the camcorder with its lens, night vision light, and the flip-out screen displaying key features like 4K resolution, 48MP, IR night vision, rotatable touch screen, continuous shooting, time lapse, slow motion, 18X digital zoom, and LED fill light.
Key Features:
- 4K Ultra HD Video: Records video at 4K resolution and 60 frames per second (FPS).
- 48 Megapixel Photos: Captures high-resolution still images.
- Night Vision: Infrared (IR) night vision for recording in low-light conditions.
- 18X Digital Zoom: Allows for magnification of subjects.
- 3.0-inch Rotatable Touch Screen: Provides intuitive control and flexible viewing angles.
- External Microphone Support: Enhances audio recording quality.
- LED Fill Light: Provides additional illumination for close-up shots.
Setup
1. Battery Installation
- Open the battery compartment cover on the bottom of the camcorder.
- Insert a fully charged lithium battery, ensuring the correct polarity.
- Close the battery compartment cover securely.
2. TF Card Installation
The camcorder supports Micro SD (TF) cards for storage. A 64GB TF card is included.
- Locate the TF card slot, usually on the side or bottom of the camcorder.
- Insert the TF card with the gold contacts facing the correct direction (refer to the diagram near the slot). Push until it clicks into place.
- To remove, gently push the card again until it springs out.
3. External Microphone Installation
For improved audio quality, attach the external microphone.
- Mount the microphone onto the hot shoe mount on top of the camcorder.
- Connect the microphone's 3.5mm audio jack into the microphone input port on the camcorder.

Image: The camcorder with an external microphone for clear voice recording and a user interacting with the 270-degree rotatable touch screen.
4. Powering On/Off
- To Power On: Open the LCD screen. The camcorder will automatically power on.
- To Power Off: Close the LCD screen. The camcorder will automatically power off. Alternatively, press and hold the power button.
5. Initial Settings
Upon first use or after a factory reset, you may need to set the date, time, and language. Navigate through the menu using the touch screen or physical buttons to adjust these settings.
Operating Instructions
1. Recording Video
- Ensure the camcorder is in video mode (indicated by an icon on the screen).
- Frame your shot using the LCD screen.
- Press the Record/Stop button to start recording. A red indicator light or on-screen icon will show that recording is in progress.
- Press the Record/Stop button again to stop recording.
2. Taking Photos
- Switch the camcorder to photo mode.
- Frame your shot.
- Press the Photo button (often a separate button or a half-press of the record button) to capture a still image.
3. Zoom Function
Use the zoom lever or on-screen controls to adjust the 18X digital zoom.
- Push the zoom lever forward (T) to zoom in.
- Pull the zoom lever backward (W) to zoom out.

Image: A visual representation of the 18X digital zoom capability, showing how a distant object can be magnified from 6X to 18X.
4. Night Vision Mode
Activate night vision for recording in dark environments.
- Access the menu and select the Night Vision option.
- Toggle Night Vision to ON. The camcorder will switch to infrared mode, displaying images in monochrome.

Image: A split image demonstrating the effect of night vision, showing a city bridge scene in color (off) and in black and white (on).
5. Touch Screen Operation
The 3.0-inch LCD screen is touch-sensitive for easy navigation.
- Tap icons to select options or confirm actions.
- Swipe to scroll through menus or review media.
- The screen can rotate 270 degrees for various shooting angles, including self-recording.
Image: A user interacting with the 270-degree rotatable touch screen while the camcorder is equipped with an external microphone.
6. Playback
- Switch the camcorder to playback mode.
- Use the touch screen or navigation buttons to browse through your recorded videos and photos.
- Tap or select a file to view it.
7. Connecting to Computer (USB)
To transfer files, connect the camcorder to a computer using the provided USB-C cable.
- Connect one end of the USB-C cable to the camcorder and the other to your computer.
- The camcorder will appear as a removable disk drive on your computer.
- Drag and drop files to transfer them.
8. Remote Control Usage
The included remote control allows for convenient operation from a distance.
- Point the remote control towards the camcorder's IR receiver.
- Use the buttons on the remote to start/stop recording, take photos, zoom, and navigate menus.
Maintenance
1. Cleaning
- Use a soft, dry cloth to clean the camcorder body.
- For the lens, use a specialized lens cleaning cloth and solution. Avoid touching the lens with your fingers.
- Do not use harsh chemicals or abrasive materials.
2. Battery Care
- Charge batteries fully before first use.
- Store batteries in a cool, dry place when not in use.
- Do not expose batteries to extreme temperatures or direct sunlight.
3. Storage
- When not in use for extended periods, remove the battery.
- Store the camcorder in a dry, dust-free environment, preferably in its original packaging or a protective case.
Troubleshooting
| Problem | Possible Cause | Solution |
|---|---|---|
| Camcorder does not power on. | Battery is dead or incorrectly inserted. | Charge the battery or re-insert it correctly. |
| Cannot record video/take photos. | TF card is full, not inserted, or corrupted. | Insert a TF card, delete files, or format the card (this will erase all data). |
| Poor image/video quality. | Lens is dirty; insufficient lighting; incorrect settings. | Clean the lens; use LED fill light or night vision; adjust resolution settings. |
| No sound during playback or recording. | Microphone not connected; volume too low; microphone settings. | Ensure external microphone is connected and enabled; check volume settings. |
| Remote control not working. | Battery dead; not pointing at IR receiver; obstruction. | Replace remote battery; ensure clear line of sight to camcorder. |
Specifications
| Feature | Detail |
|---|---|
| Model Number | HDV920Pro |
| Video Capture Resolution | 6K/12FPS, 5K/17FPS, 4K/60FPS, 4K/30FPS, 2.7K/60FPS, 2.7K/30FPS, 1080P/120FPS, 1080P/60FPS, 1080P/30FPS, 720P/240FPS, 720P/120FPS, 720P/60FPS, 720P/30FPS |
| Photo Resolution | 48MP |
| Digital Zoom | 18X |
| Screen Size | 3.0 Inches (270° Rotatable Touch Screen) |
| Special Features | 48MP Photo, Built-In Flash, Night Vision, Time Lapse, Touchscreen |
| Storage Media | Micro SD (TF) Card |
| Connectivity | USB |
| Battery Type | Lithium (2 included) |
| Item Weight | 9.9 ounces |
| Product Dimensions | 7.08 x 6.5 x 2.75 inches |
Warranty and Support
For warranty information and technical support, please refer to the documentation provided with your purchase or contact Dsoon customer service directly. Keep your proof of purchase for warranty claims.
If you encounter issues not covered in the troubleshooting section, please visit the official Dsoon website or contact their support team for assistance.