
1. Introduction
This manual provides essential information for the safe and efficient operation, installation, and maintenance of your CASTA DIVA CD-U010Pro Smart Toilet. Please read all instructions carefully before installation and use to ensure proper functionality and longevity of the product.
2. Important Safety Information
- Ensure all electrical connections comply with local codes and are connected to a Ground Fault Circuit Interrupter (GFCI) outlet.
- Do not immerse the product in water or spray water directly onto electrical components.
- Keep the product away from open flames or excessive heat sources.
- Children and individuals with reduced physical, sensory, or mental capabilities should be supervised when using the product.
- Disconnect power before performing any maintenance or cleaning.
3. Setup and Installation
The CASTA DIVA CD-U010Pro Smart Toilet is designed for straightforward installation. It is recommended to consult a professional plumber for installation to ensure compliance with all local plumbing and electrical codes.
3.1 Unpacking and Components
Carefully remove all components from the packaging. Verify that all parts are present according to the packing list. Included components typically are: the smart toilet unit, remote control, mounting kits, T-valve, and user manual.
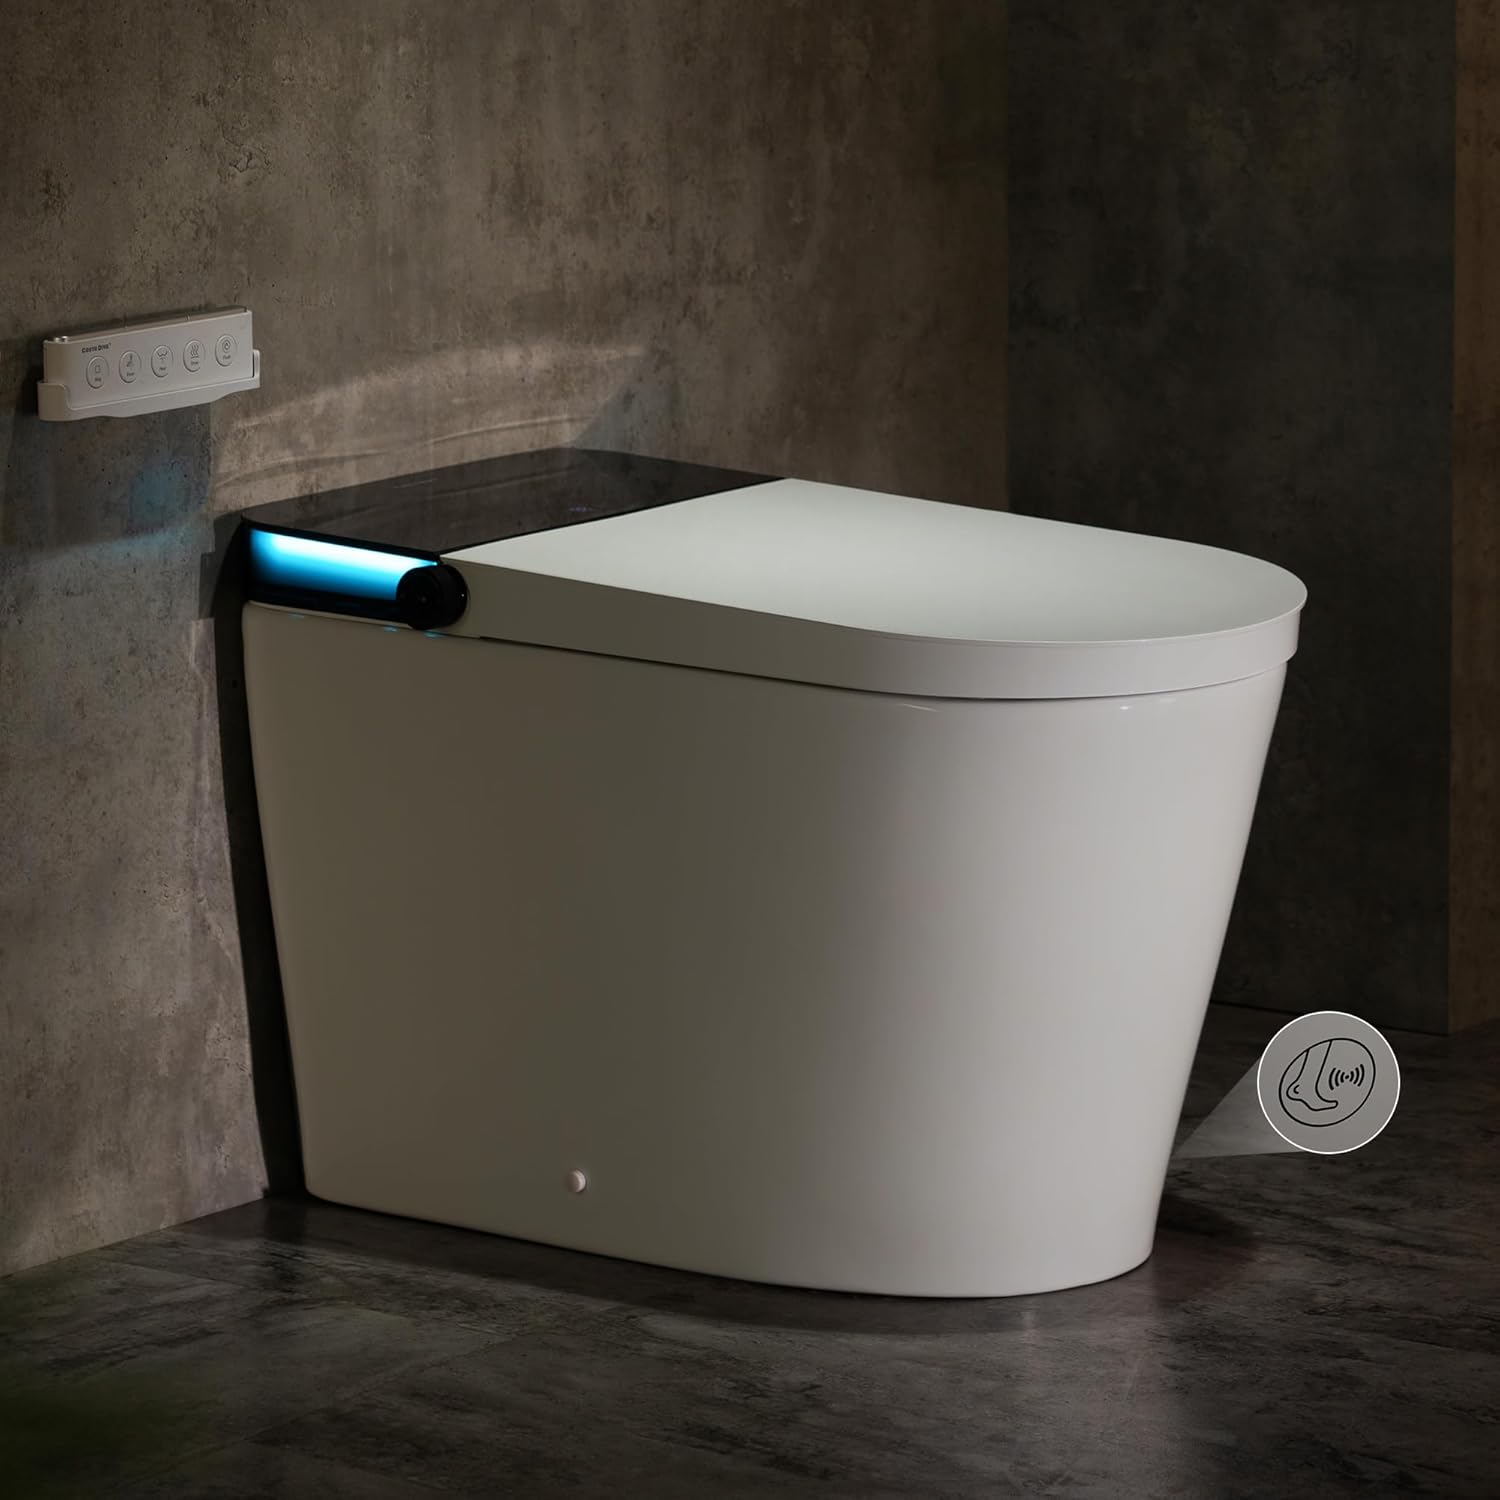
Figure 3.1: Overview of the Casta Diva CD-U010Pro Smart Toilet unit.
3.2 Plumbing and Electrical Connections
- Ensure the water supply is turned off before beginning installation.
- Connect the provided T-valve to your existing water supply line.
- Connect the toilet's water inlet to the T-valve using the provided flexible hose.
- The toilet requires a dedicated 120V GFCI outlet. Ensure the outlet is properly installed and accessible.
3.3 Mounting the Toilet
- Use the provided installation cardboard template to mark the drain outlet and mounting holes on the floor.
- Install the mounting brackets and secure them to the floor flange.
- Carefully place the toilet over the mounting brackets, aligning it with the drain.
- Secure the toilet to the floor using the provided screws and covers.
Video 3.1: Official product video demonstrating key features and functionality of the Casta Diva CD-U010Pro Smart Toilet.
4. Operating Instructions
4.1 Smart Display and Artistic Lighting
The interactive touchscreen display shows the current working status and modes. The toilet features cascading waterfall lighting with four seasonal hues (Green, Blue, Orange, White) that transition for ambiance. A softly diffused LED band provides a gentle nightlight.

Figure 4.1: Seasonal ambient lighting options for the smart toilet.
4.2 Adaptive Temperature Control
The intelligent toilet automatically adjusts seat, water, and air temperatures across 4 preset modes based on ambient conditions for optimal comfort. Note: The temperature function defaults to OFF and must be activated via the user manual instructions.

Figure 4.2: Temperature adjustment settings for the seat, water, and air dryer.
4.3 Multiple Cleaning Modes
The modern toilet seat features a warm water wash with options for rear, front, and oscillating massage cleaning. The self-cleaning nozzle automatically cleans before and after each use.

Figure 4.3: Illustration of front wash, rear wash, oscillating wash, and self-cleaning nozzle functions.
4.4 Advanced Foam Protection System
The smart toilet creates a dense foam barrier upon sitting, which reduces water splashes and minimizes odors. This lubricating foam layer also helps prevent surface stains and residue buildup. Compatible with most liquid soaps for foam solution preparation.
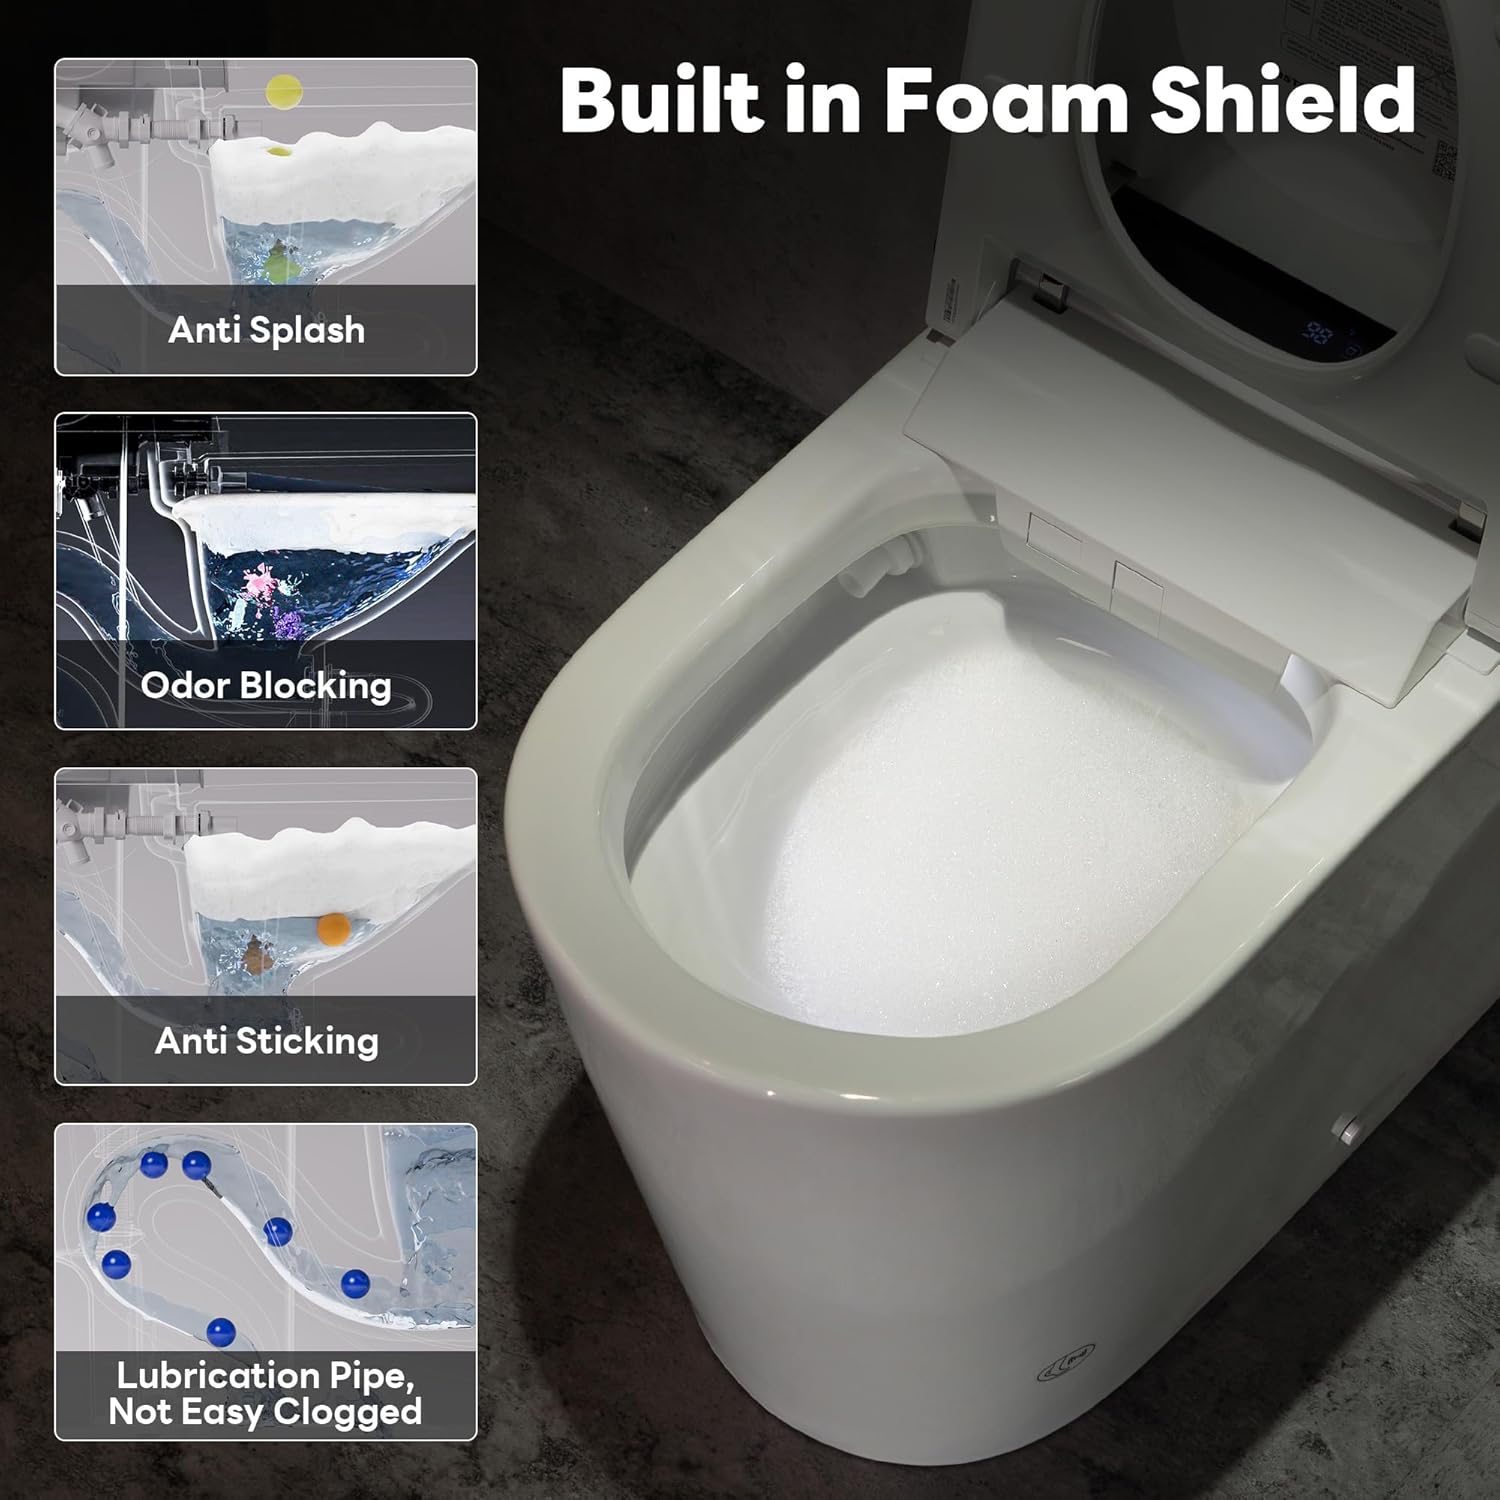
Figure 4.4: The foam shield system in action, demonstrating its anti-splash and odor-blocking properties.
4.5 Silent Operation and Motion-Activated Controls
Enjoy a whisper-quiet 45dB flush. The automatic bidet toilet combines proximity-sensing auto lid opening/closing with foot control. It detects users to auto-adjust the seat and enables hands-free flushing. A soft-glow nightlight assists navigation in the dark. All bidet functions are fully touchless via motion detection.

Figure 4.5: Motion-activated features including auto open/close and foot sensor controls.
4.6 360° Siphon Flush and Water-Saving
Our smart bidet toilet features built-in tank technology that eliminates reliance on external water pressure. Combining jet stream propulsion and siphon vortex action, it achieves 1,000g MaP-certified waste removal performance. The blackout flush function ensures continued operation even during power outages.

Figure 4.6: Internal view of the Turbo Siphon Flush system and water usage efficiency.
4.7 Short-wave Light Water Cleaning
This smart toilet features a short-wave light-treated water line that enhances water purity as it flows through, delivering a fresher and cleaner bidet experience compared to standard toilets.
5. Maintenance
5.1 Nozzle Cleaning
The bidet nozzle is self-cleaning, activating before and after each use. For deeper cleaning, the nozzle can be manually extended and cleaned with a soft brush and mild detergent. Refer to the detailed manual for specific instructions on nozzle removal and reinstallation.
5.2 Foam Dispenser Refill
To maintain the foam protection system, regularly check and refill the foam solution dispenser. Use a compatible liquid soap diluted according to the instructions in the full manual.
5.3 General Cleaning
Clean the exterior of the toilet with a soft, damp cloth and mild, non-abrasive cleaner. Avoid harsh chemicals that may damage the finish or electronic components. Always disconnect power before cleaning.
6. Troubleshooting
If you encounter any issues with your CASTA DIVA CD-U010Pro Smart Toilet, please refer to the detailed troubleshooting section in the complete user manual. Common issues and their solutions are typically covered there. If the problem persists, please contact customer support.
7. Specifications
| Feature | Specification |
|---|---|
| Model Number | CD-U010Pro |
| Product Dimensions | 26.5"D x 15.5"W x 20"H |
| Material | Ceramic |
| Item Weight | 97 Pounds |
| Installation Type | Floor Mounted |
| Seat Material Type | Plastic |
| Flushing Performance | 1000g MaP Certified |
| Noise Level | Less than 45dB |

Figure 7.1: Key dimensions and ADA Comfort Height of the toilet.
8. Warranty and Support
All components of the CASTA DIVA smart toilet have undergone rigorous standard durability testing to ensure quality and reliability. Should you encounter any issues during installation or use, please feel free to contact us at any time. We provide 24/7 comprehensive support.
For support, please refer to the contact information provided in your product packaging or visit the official CASTA DIVA website.


