
1. Introduction
Thank you for choosing the Fitvids SF R1 Wind Resistance Rowing Machine. This manual provides essential information for the safe assembly, operation, and maintenance of your new fitness equipment. Please read this manual thoroughly before using the machine to ensure proper function and to maximize your workout experience.
The Fitvids SF R1 is designed to provide an effective full-body workout, engaging leg, glute, back, arm, and core muscle groups simultaneously. Its wind resistance system offers 10 adjustable levels, and the ergonomic design ensures comfort during use. The integrated LCD display provides real-time workout data to help you track your progress.
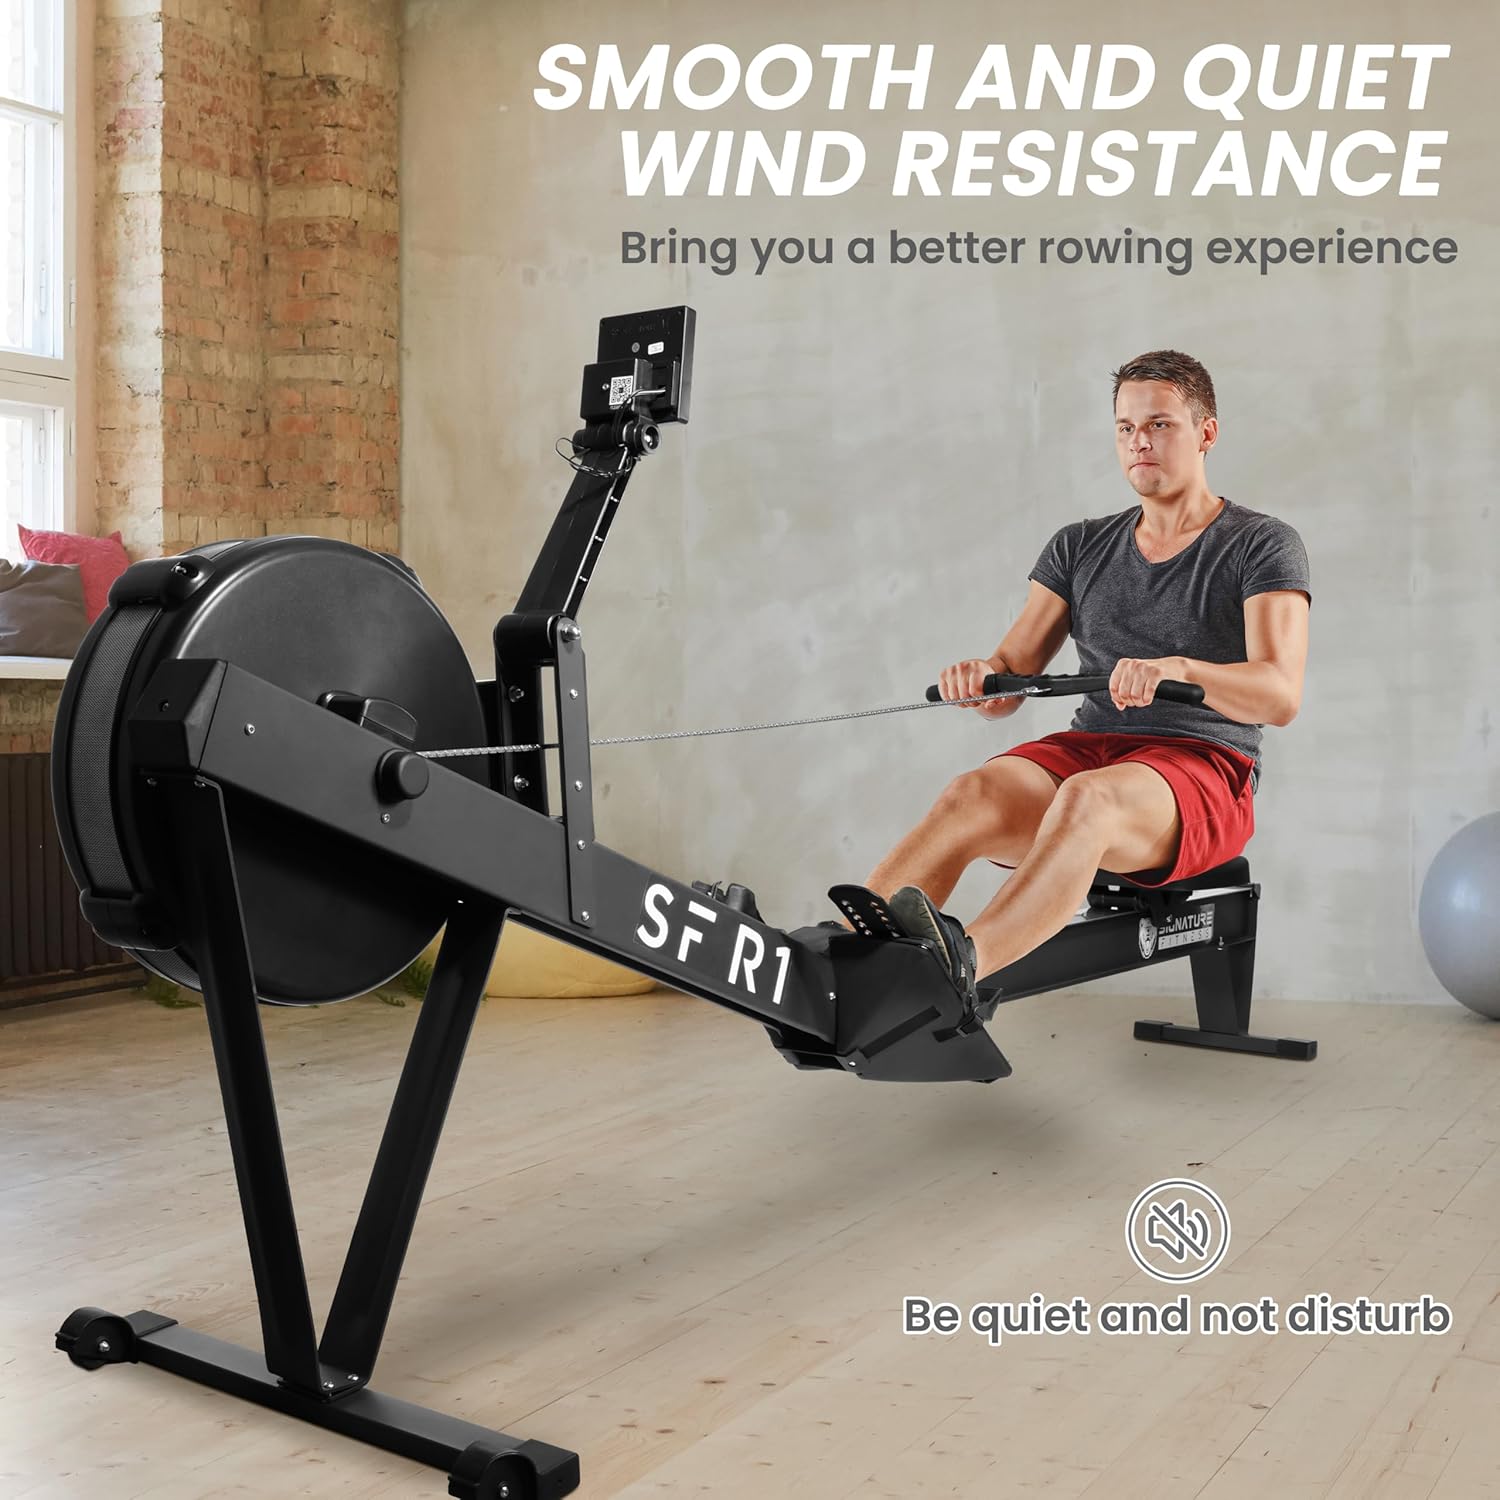
Image 1.1: User demonstrating proper rowing form on the Fitvids SF R1, highlighting activated muscle groups.
2. Safety Information
Before beginning any exercise program, consult with your physician. It is crucial to read and understand all instructions in this manual before assembling or using the Fitvids SF R1 Rowing Machine.
- Always place the rowing machine on a stable, level surface. Ensure adequate clear space around the machine (at least 0.6 meters or 2 feet).
- Keep children and pets away from the equipment during operation.
- Inspect the machine for loose parts, damage, or wear before each use. Do not use if any components are damaged.
- Wear appropriate athletic clothing and footwear. Avoid loose clothing that could get caught in moving parts.
- The maximum user weight capacity for this machine is 330 lbs (150 kg). Do not exceed this limit.
- Stop exercising immediately if you feel faint, dizzy, or experience pain.
- Ensure all bolts and nuts are securely tightened before and after each use.
3. Package Contents
Carefully unpack all components and verify that all parts are present. If any parts are missing or damaged, do not proceed with assembly and contact customer support.
- Main Frame Assembly (including flywheel and front stabilizer)
- Seat Rail
- Seat
- Rear Stabilizer
- Footrests (left and right)
- LCD Monitor
- Hardware Kit (bolts, washers, nuts, tools)
- User Manual
4. Assembly Instructions
Follow these steps to assemble your Fitvids SF R1 Rowing Machine. It is recommended to have two people for assembly.
- Attach the Rear Stabilizer: Secure the rear stabilizer to the main seat rail using the provided bolts and washers. Ensure it is firmly attached.
- Install the Seat: Slide the seat onto the seat rail. Ensure the rollers are properly seated in the rail grooves.
- Connect the Main Frame and Rail: Attach the seat rail assembly to the main frame (which includes the flywheel and front stabilizer). Align the connection points and secure with the designated bolts and nuts.
- Mount the Footrests: Attach the left and right footrests to the main frame using the appropriate hardware. Ensure they are oriented correctly and tightened securely.
- Install the LCD Monitor: Connect the monitor cable from the main frame to the back of the LCD monitor. Mount the monitor onto its designated bracket.
- Final Check: Review all connections to ensure all bolts and nuts are tightened. Test the seat glide and foot strap adjustments.
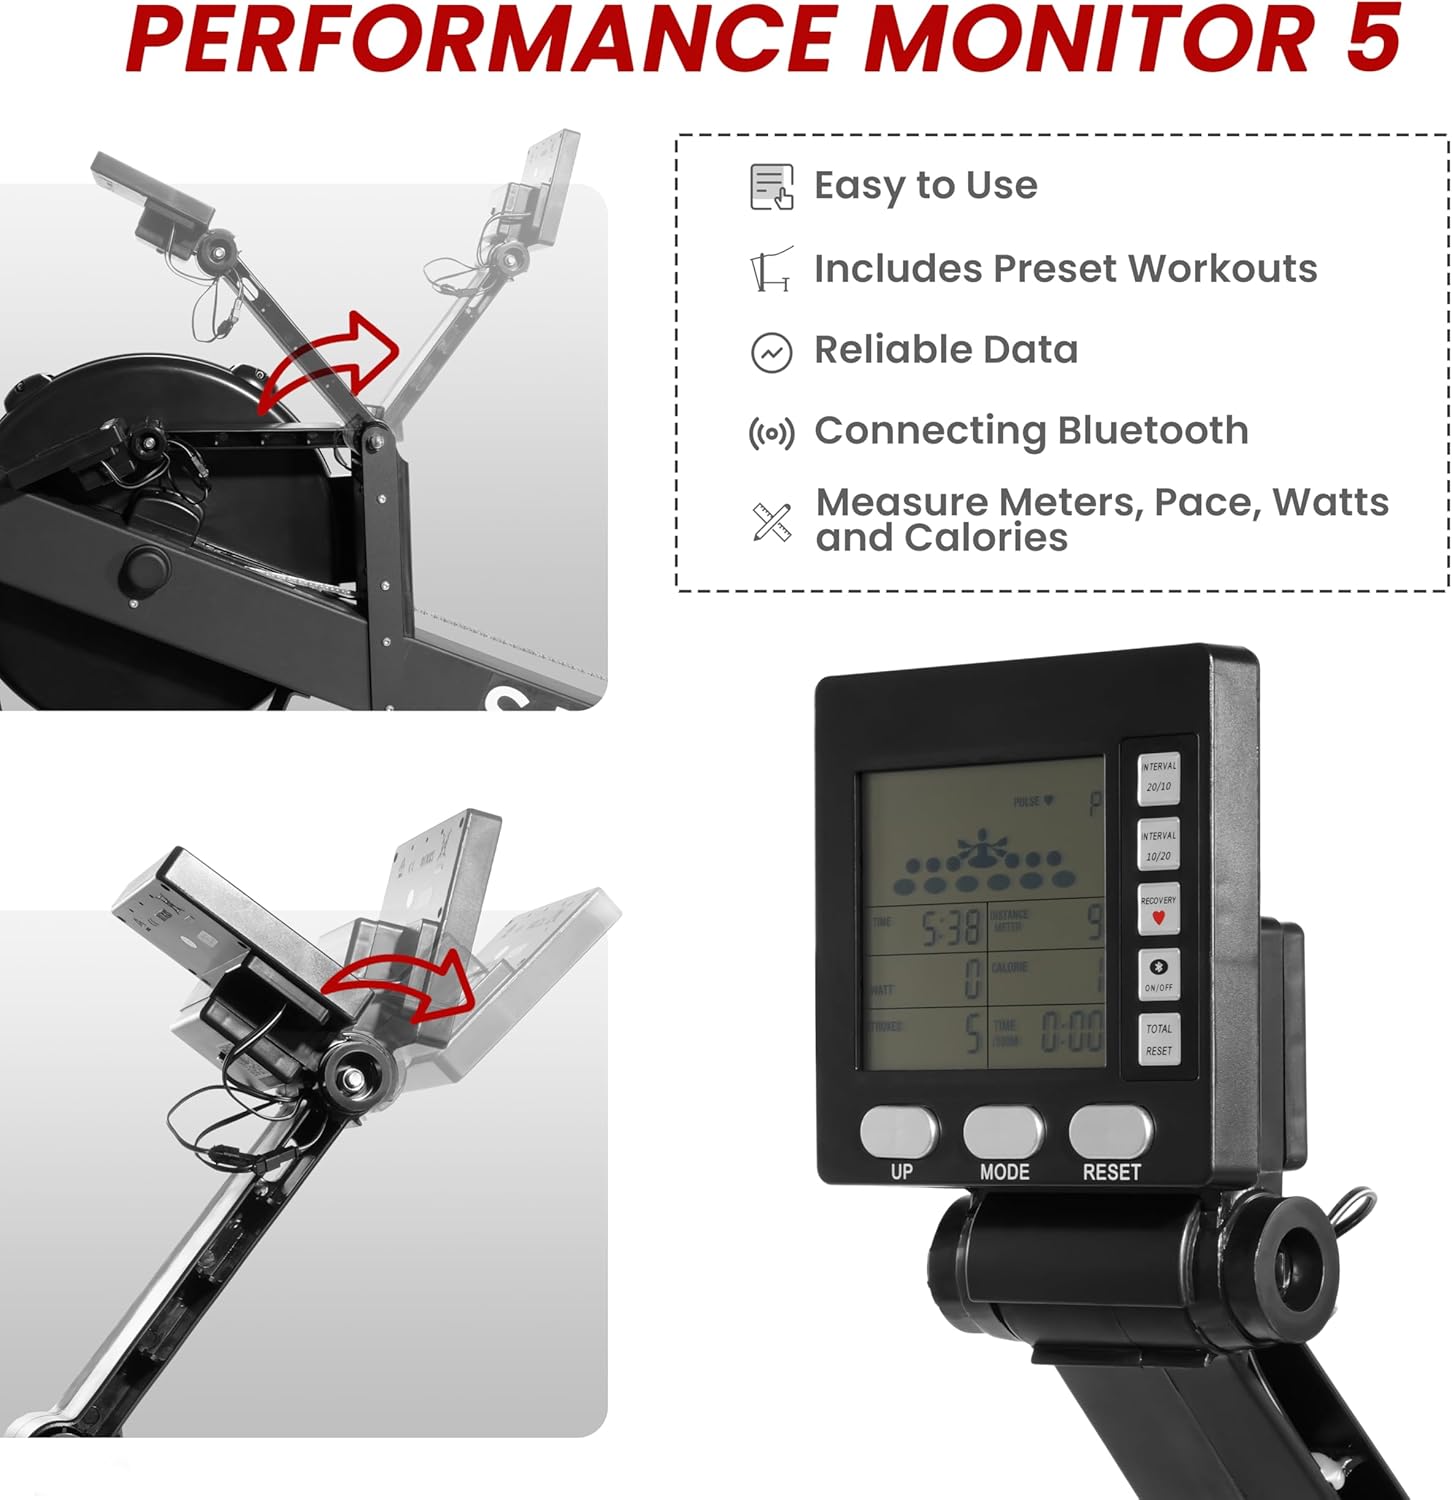
Image 4.1: Fully assembled Fitvids SF R1 Wind Resistance Rowing Machine.
5. Operating Instructions
5.1. Using the LCD Display
The Fitvids SF R1 is equipped with a rotatable LCD display to track your workout data. The display shows time, distance, calories, watts, and pace.
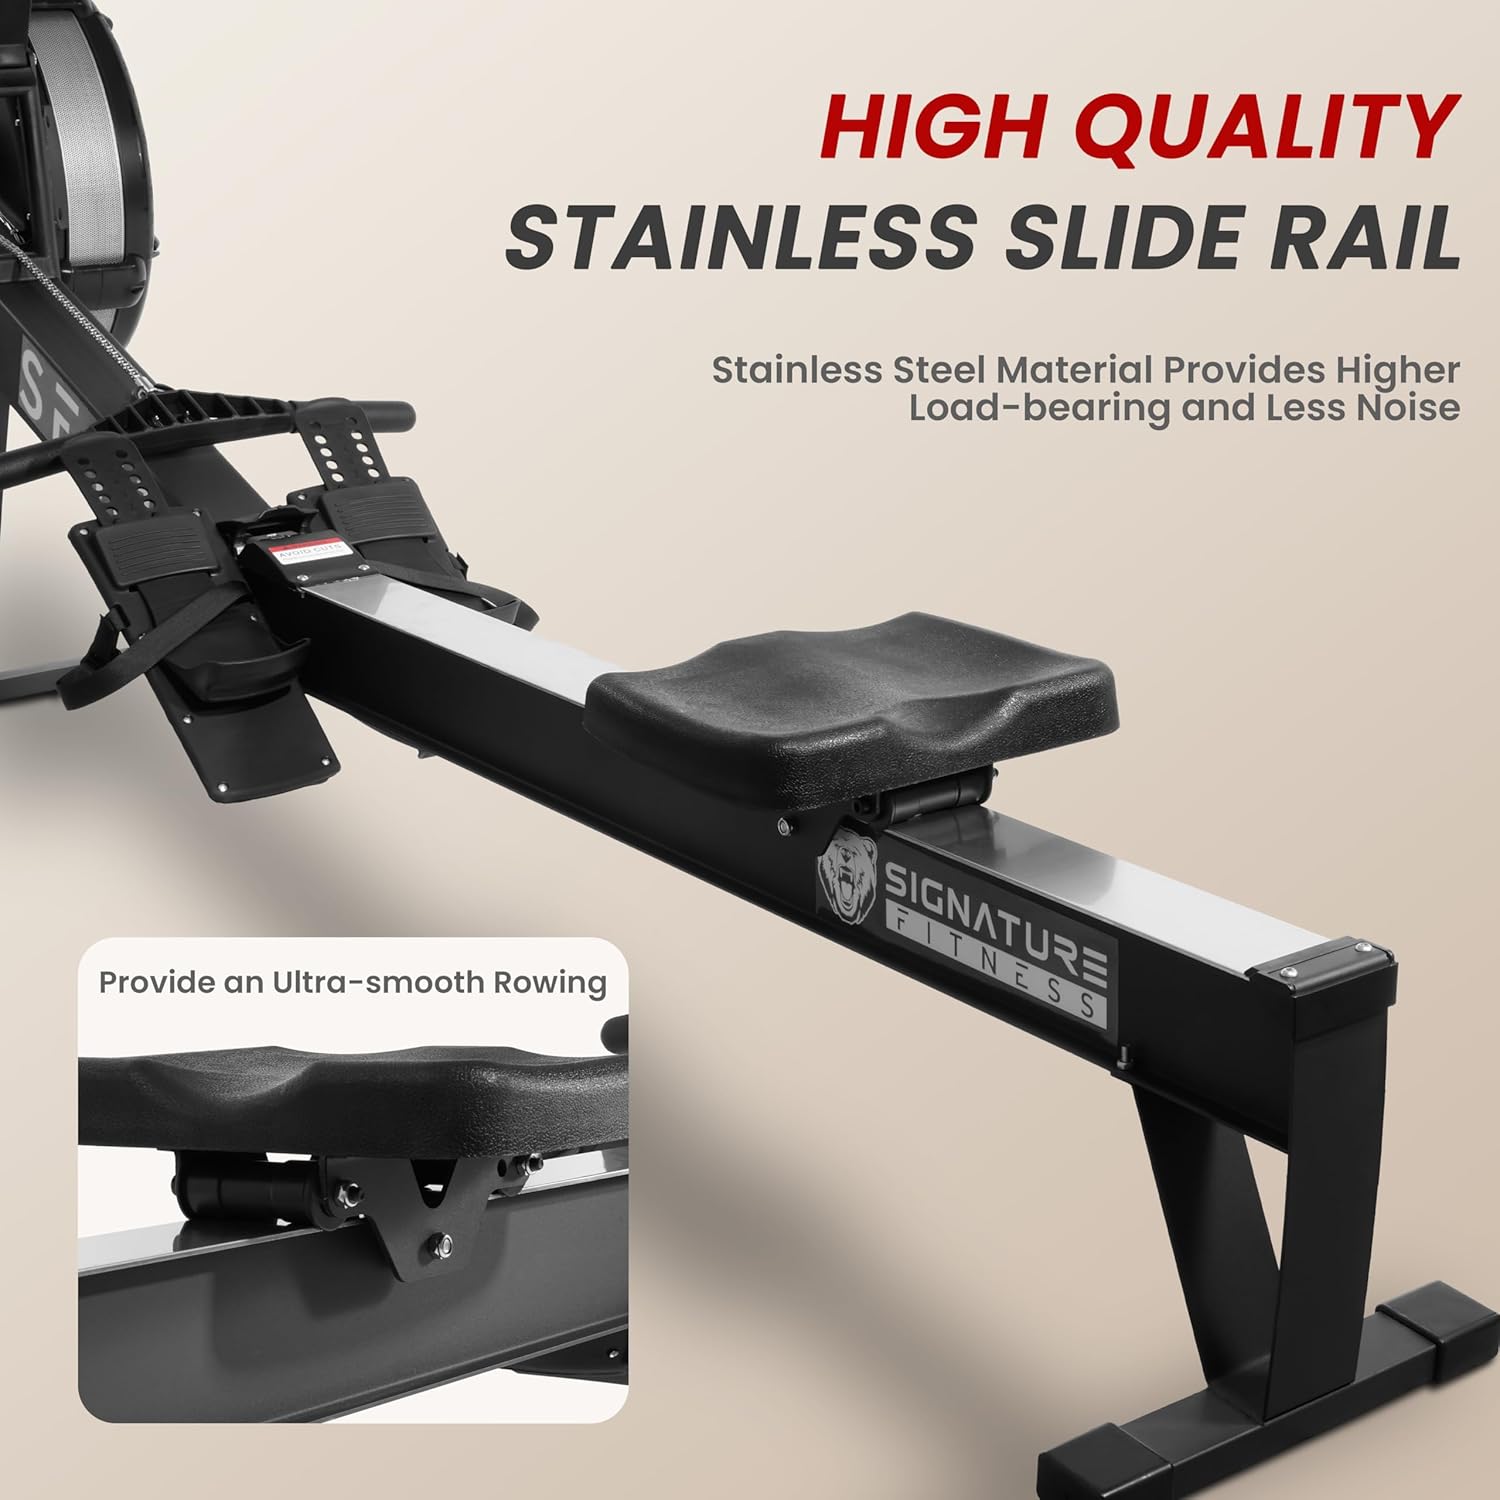
Image 5.1: Performance Monitor 5 LCD Display.
- Power On/Off: Press the 'ON/OFF' button to turn the display on or off. The display may also activate automatically when you begin rowing.
- Mode Selection: Press the 'MODE' button to cycle through different display modes (e.g., Time, Distance, Calories).
- Reset Data: Press and hold the 'RESET' button to clear all workout data.
- Adjust Settings: Use the 'UP' button to adjust certain settings or values within specific modes, if applicable.
5.2. Adjusting Wind Resistance
The Fitvids SF R1 features 10 levels of adjustable wind resistance. The resistance level is controlled by a lever or dial located near the flywheel. Adjusting this mechanism changes the amount of air entering the flywheel housing, thereby increasing or decreasing the resistance felt during your stroke.
- To increase resistance, move the lever to a higher number.
- To decrease resistance, move the lever to a lower number.
Start with a lower resistance level and gradually increase it as your fitness improves.
5.3. Adjusting Foot Pedals and Straps
The foot pedals are adjustable to accommodate various foot sizes, and the straps secure your feet during rowing.
- Foot Pedal Adjustment: The foot pedals typically have a sliding mechanism or pins to adjust their length. Select a position where the strap crosses the widest part of your foot.
- Foot Strap Adjustment: Place your feet on the pedals and pull the straps firmly over your instep. Ensure the straps are tight enough to hold your feet securely without causing discomfort. Re-tighten as needed during your workout.
5.4. Proper Rowing Technique
Correct technique is essential for an effective and safe workout. A rowing stroke consists of four phases: the Catch, the Drive, the Finish, and the Recovery.
- The Catch: Sit with knees bent, shins vertical, arms extended forward, and back straight.
- The Drive: Push off with your legs, then swing your back slightly, and finally pull the handle towards your abdomen with your arms.
- The Finish: Legs are extended, back is slightly reclined, and the handle is at your abdomen.
- The Recovery: Extend your arms forward, then pivot your hips forward, and finally bend your knees to slide back to the catch position.
Maintain a smooth, controlled motion throughout the entire stroke. Avoid jerking movements.
6. Maintenance
Regular maintenance ensures the longevity and optimal performance of your Fitvids SF R1 Rowing Machine.
- Cleaning: Wipe down the machine with a damp cloth after each use to remove sweat and dust. Avoid abrasive cleaners.
- Check Connections: Periodically check all bolts, nuts, and screws to ensure they are tight. Re-tighten as necessary.
- Seat Rail: Keep the stainless steel slide rail clean and free of debris. Wipe it regularly to ensure smooth seat movement.
- Seat Rollers: Inspect the seat rollers for wear and ensure they move freely along the rail.
- Chain/Belt: Check the chain or belt for any signs of wear or damage. If a chain, it may require occasional lubrication (refer to specific chain maintenance guidelines if applicable).
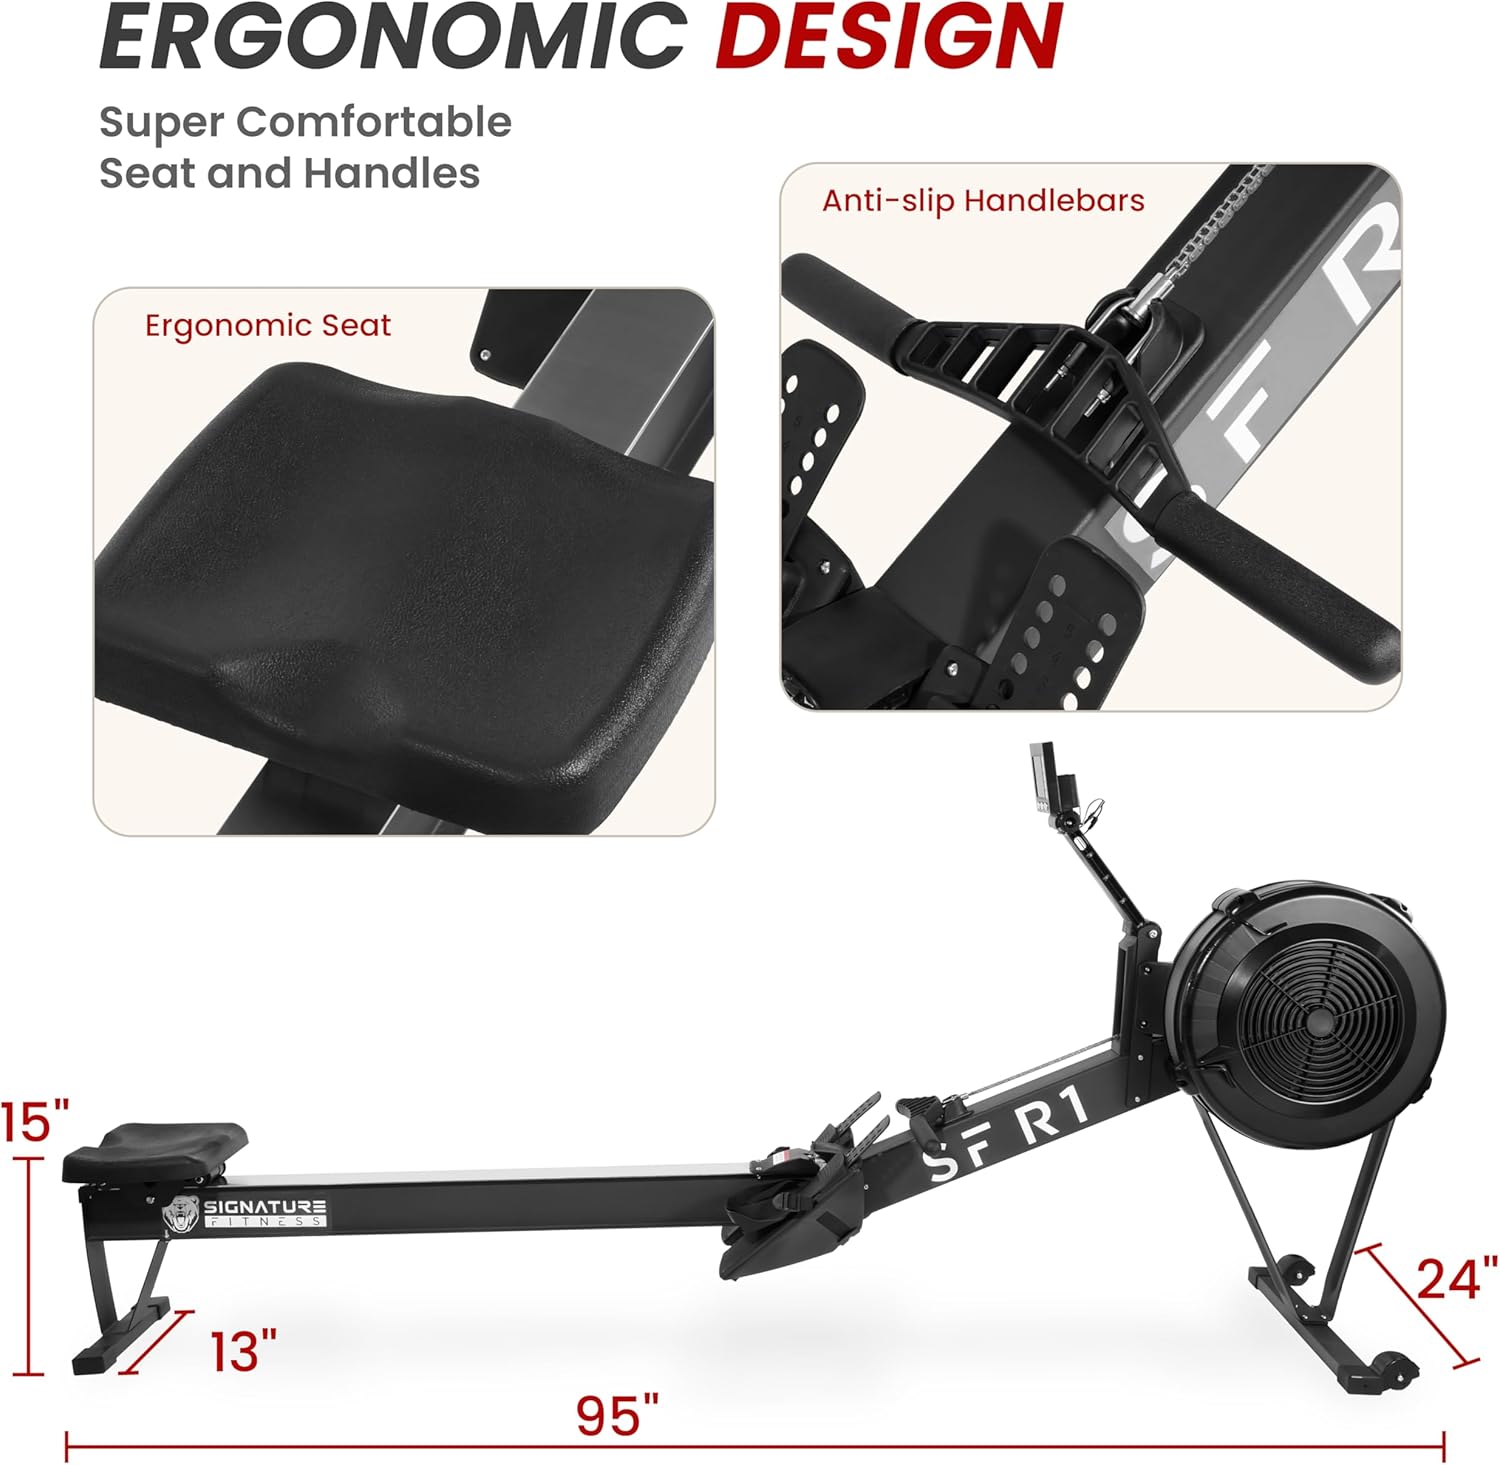
Image 6.1: High-quality stainless steel slide rail for smooth rowing.
7. Troubleshooting
This section addresses common issues you might encounter with your rowing machine.
- LCD Display Not Working:
Solution: Check the battery compartment for proper battery installation and charge. Ensure all cables connecting the monitor to the main unit are securely plugged in. - Unusual Noises During Operation:
Solution: Inspect the flywheel housing for any foreign objects. Check all bolts and connections for tightness, especially around the main frame and seat rail. Ensure the seat rollers and rail are clean. A loose flywheel may cause clicking sounds; ensure it is securely fastened. - Foot Straps Slipping:
Solution: Ensure the foot pedals are adjusted to the correct length for your feet. Pull the straps firmly and ensure they are threaded correctly through the buckles to prevent slipping. Re-tighten straps periodically during your workout. - Resistance Feels Inconsistent or Too Low/High:
Solution: Verify the resistance adjustment lever is set to your desired level. Check the flywheel for any obstructions that might impede air flow. - Seat Does Not Glide Smoothly:
Solution: Clean the seat rail thoroughly to remove any dust or debris. Inspect the seat rollers for damage or wear.
8. Specifications
| Model | SF R1 |
| Product Dimensions (L x W x H) | 241.3 cm x 60.96 cm x 38.1 cm (95" x 24" x 15") |
| Product Weight | 35 kg (77 lbs) |
| Maximum User Weight | 330 lbs (150 kg) |
| Resistance Type | Wind Resistance |
| Number of Resistance Levels | 10 |
| Material | Alloy Steel |
| Color | Black |
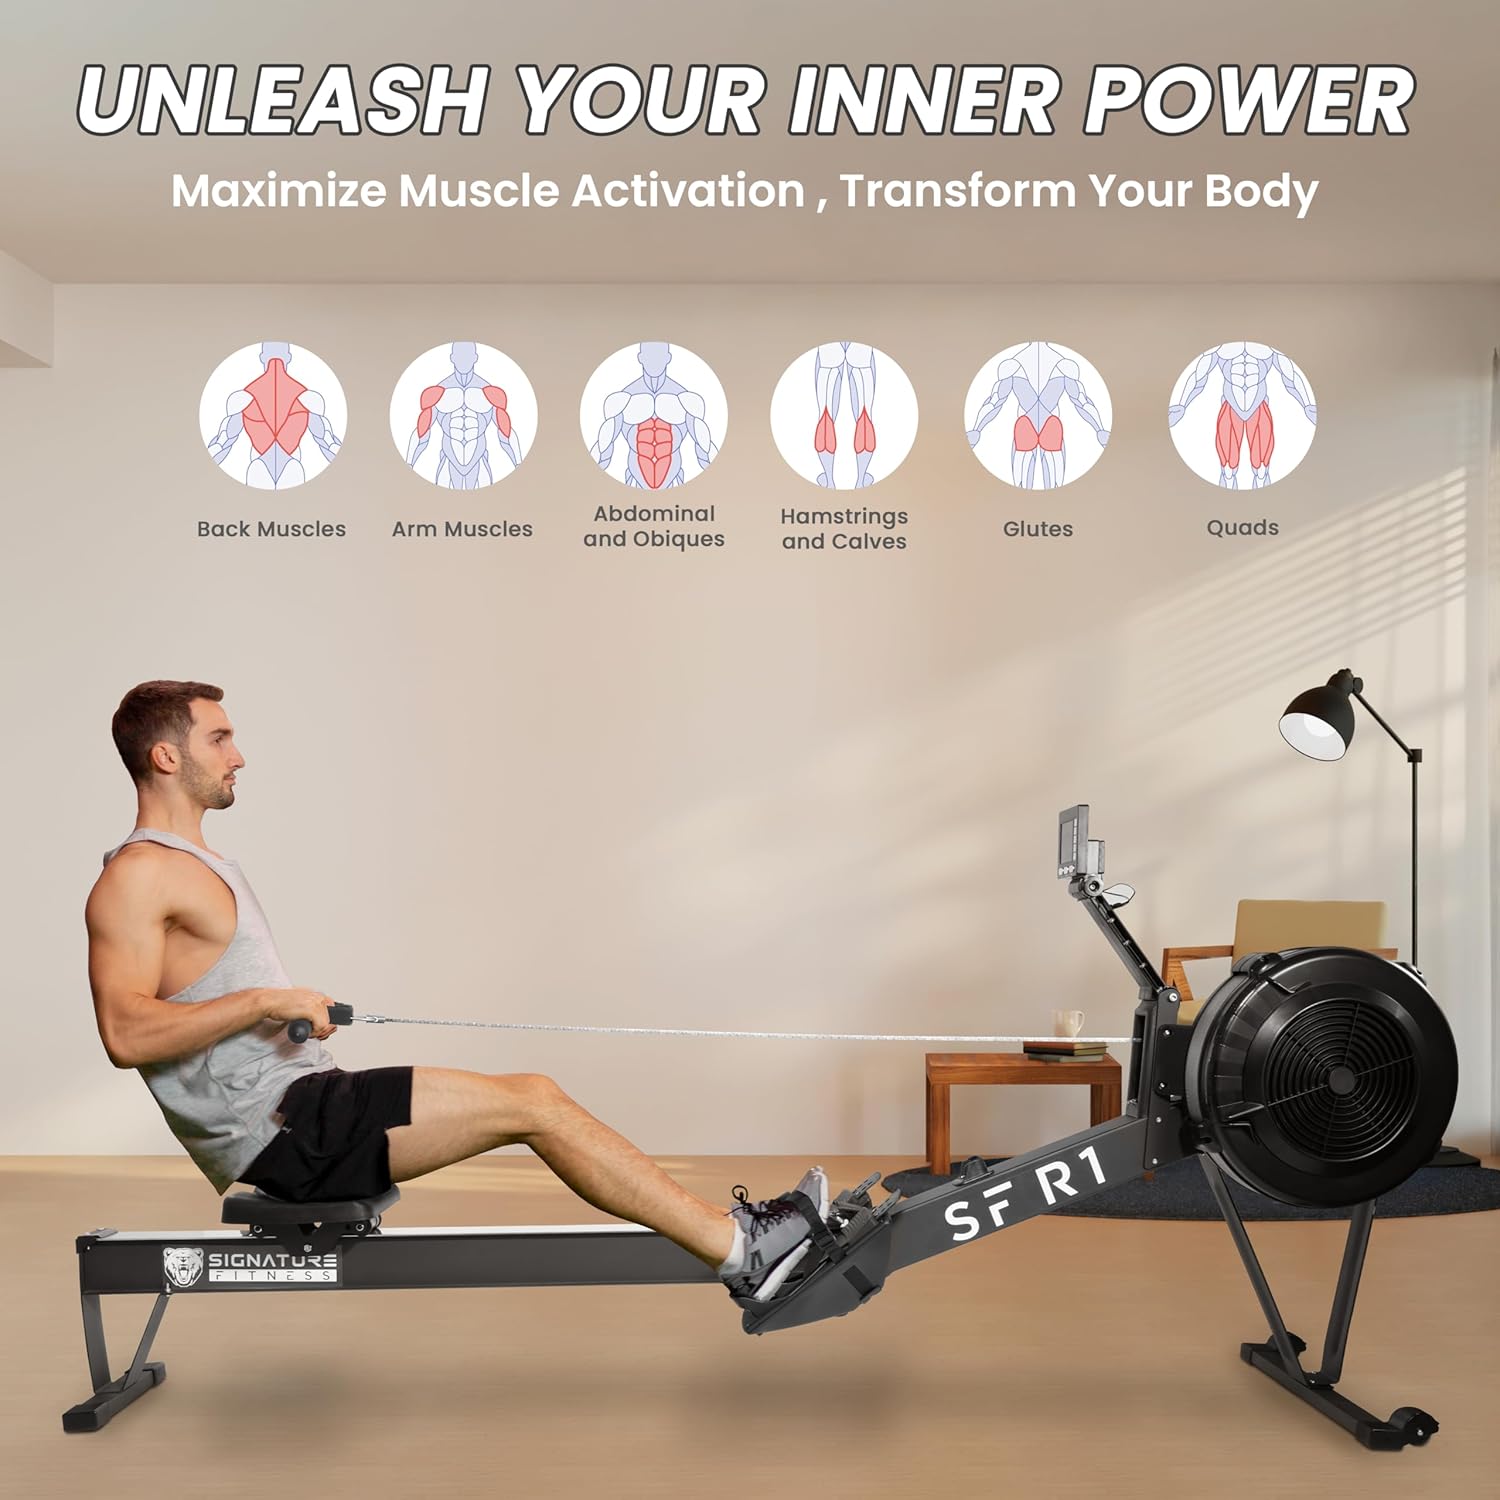
Image 8.1: Fitvids SF R1 Rowing Machine dimensions and ergonomic features.
9. Warranty and Support
Fitvids stands behind the quality of its products. For specific warranty information, please refer to the warranty card included with your purchase or visit the official Fitvids website. If you have any questions, require technical assistance, or need to order replacement parts, please contact Fitvids customer support through the contact information provided on our website or your purchase documentation.