
Introduction
This user manual provides comprehensive instructions for the operation and maintenance of your MURAUX 8K 64MP Video Camera Camcorder (Model: HDV01-8K). Please read this manual thoroughly before using the camcorder to ensure proper functionality and to maximize your user experience. Keep this manual for future reference.
Safety Information
- Do not expose the camcorder to extreme temperatures, direct sunlight, or high humidity.
- Avoid dropping or subjecting the camcorder to strong impacts.
- Keep the camcorder away from water and other liquids. If it gets wet, power it off immediately and allow it to dry completely before use.
- Use only the specified battery and charging accessories.
- Do not attempt to disassemble or repair the camcorder yourself. Refer to qualified service personnel.
- Clean the lens and screen with a soft, lint-free cloth. Avoid using harsh chemicals.
Package Contents
Upon opening the package, please verify that all the following items are included:
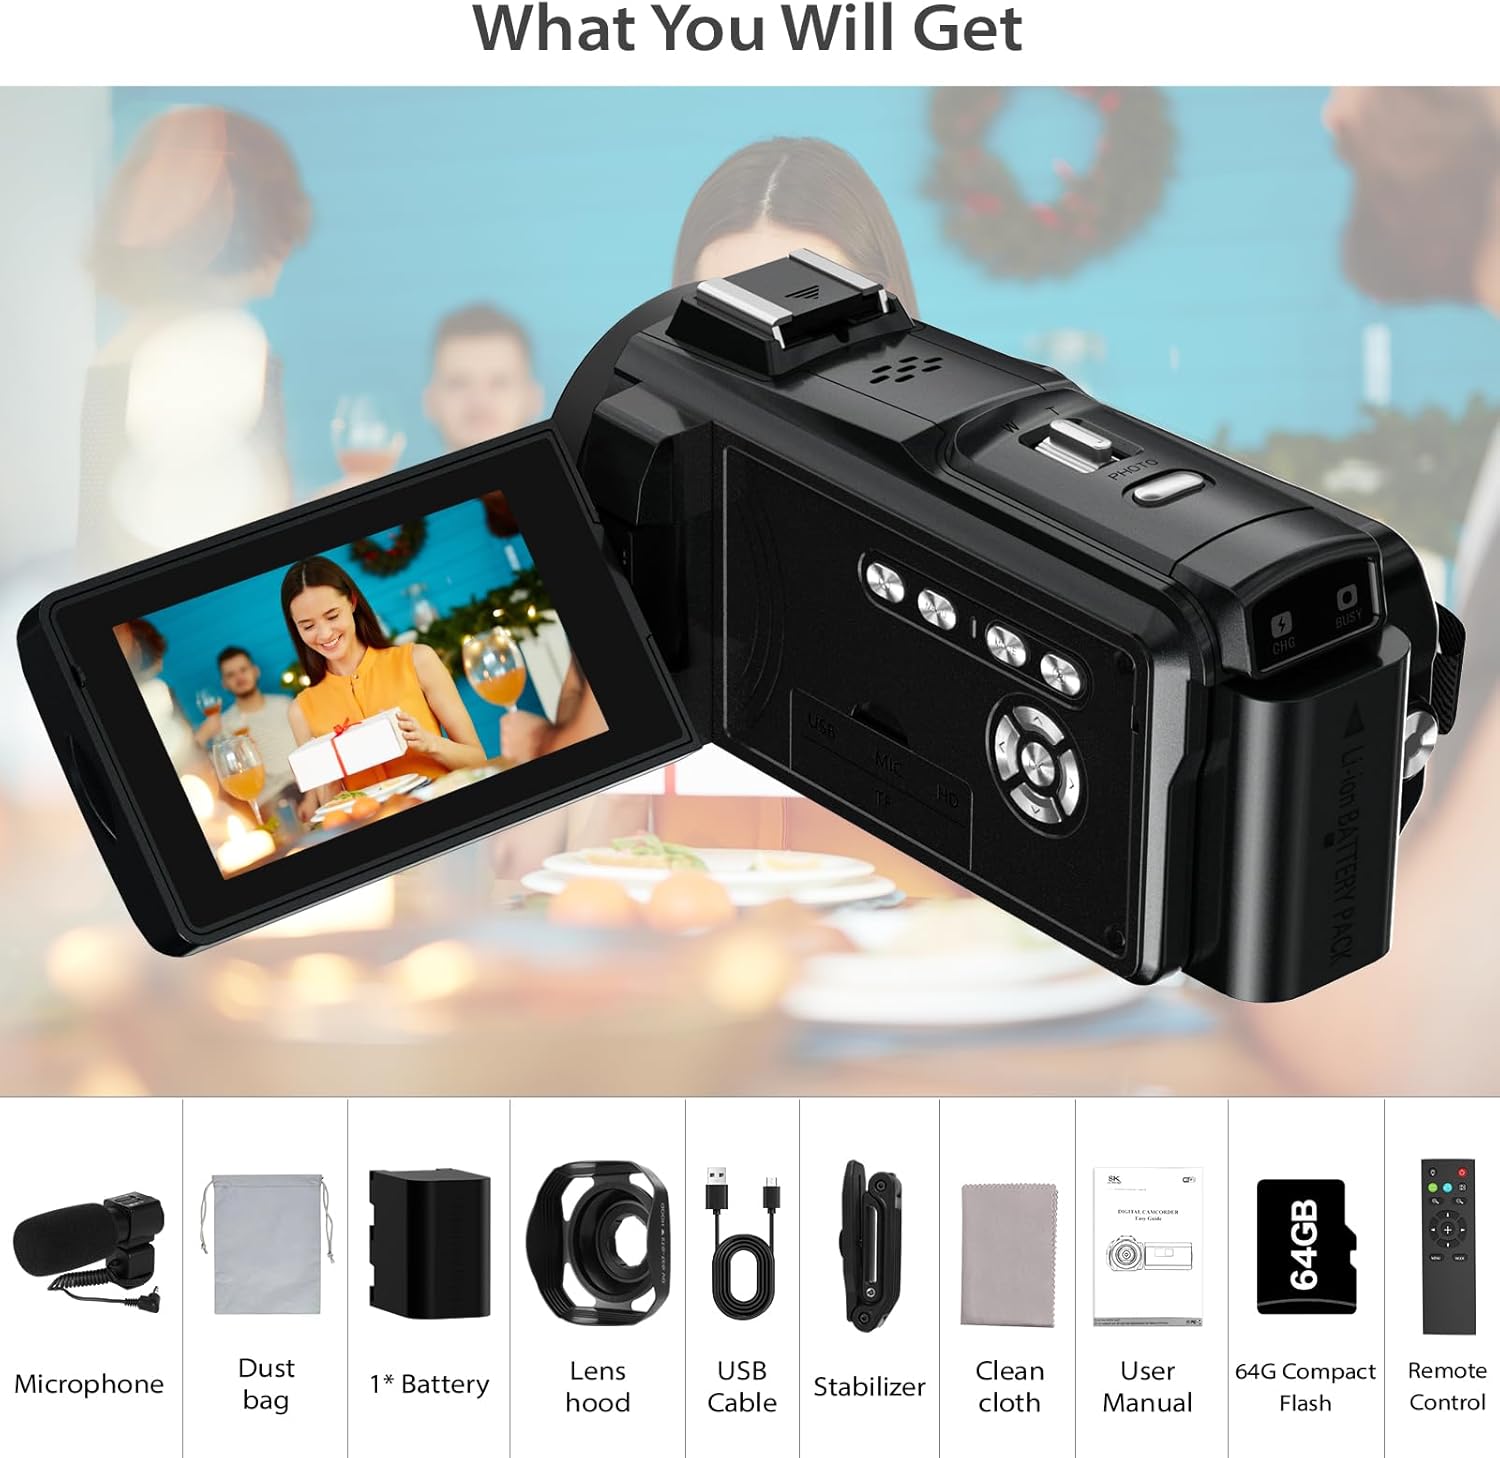
Figure 1: Included Accessories. This image displays the complete set of items you will receive with your MURAUX 8K 64MP Video Camera Camcorder, including the external microphone, dust bag, one 4500mAh battery, lens hood, USB charging cable, handheld stabilizer, cleaning cloth, user manual, 64GB SD card, and a remote control.
- MURAUX 8K 64MP Video Camera Camcorder
- External Microphone
- Dust Bag
- 1 x 4500mAh Lithium Polymer Battery
- Lens Hood
- USB Cable
- Handheld Stabilizer
- Cleaning Cloth
- User Manual (this document)
- 64GB SD Card
- Remote Control
Product Overview

Figure 2: Camcorder with Accessories. This image provides a comprehensive view of the MURAUX 8K 64MP Video Camera Camcorder, showcasing its main body, the attached external microphone, the lens hood, and a remote control held in a hand, along with a 64GB SD card. This illustrates the camcorder's compact design and key components.
The MURAUX 8K 64MP Video Camera Camcorder is designed for high-quality video recording and photography. It features an 8K video resolution, 64MP still image capability, IR night vision, 18x digital zoom, a 3.0-inch rotatable screen, and Wi-Fi connectivity for easy sharing.
Key Components:
- Lens: Main optical component for capturing images.
- IR LED Lights: For night vision functionality.
- 3.0" Rotatable LCD Screen: For viewing, menu navigation, and playback.
- Microphone Input: For connecting the external microphone.
- USB Port: For charging and data transfer.
- SD Card Slot: For inserting the memory card.
- Battery Compartment: For inserting the battery.
- Power Button: To turn the camcorder on/off.
- Record/Shutter Button: To start/stop recording or take a photo.
- Zoom Lever: To adjust digital zoom.
- Menu/Mode Buttons: For navigating settings and changing modes.
Setup
1. Charging the Battery
- Open the battery compartment cover.
- Insert the provided 4500mAh battery, ensuring correct polarity.
- Close the battery compartment cover.
- Connect the camcorder to a power source using the supplied USB cable. The charging indicator light will illuminate.
- Once fully charged, the indicator light will change or turn off. Disconnect the cable.
2. Inserting the SD Card
- Locate the SD card slot on the camcorder.
- Insert the 64GB SD card (or another compatible SD card, up to 256GB, Class 10 or higher recommended) into the slot with the metal contacts facing down, until it clicks into place.
- To remove, gently push the card in until it clicks, then release, and it will eject.
3. Attaching Accessories
- Microphone: Slide the external microphone into the hot shoe mount on top of the camcorder and connect its cable to the microphone input port.
- Lens Hood: Attach the lens hood to the front of the camcorder lens by twisting it clockwise until secure.
- Stabilizer: Mount the camcorder onto the handheld stabilizer using the standard tripod screw mount at the bottom of the camcorder.
4. Powering On/Off
Press and hold the Power Button for a few seconds to turn the camcorder on or off. The LCD screen will illuminate.
Operating Instructions
1. Basic Recording (Video/Photo)
- Turn on the camcorder.
- Rotate the LCD screen to your desired viewing angle.
- To record video, press the Record Button once. Press again to stop recording.
- To take a photo, switch to photo mode (if applicable via menu) and press the Shutter Button.
2. Zoom Function (18X Digital Zoom)

Figure 3: Digital Zoom and IR Night Vision. This image illustrates the camcorder's 18X digital zoom capability, showing progressive magnification of a subject. Below, it demonstrates the IR Night Vision feature by comparing a scene in normal lighting with its monochrome appearance under infrared illumination, highlighting its effectiveness in low-light conditions.
Use the Zoom Lever (W/T) to adjust the digital zoom. Push towards 'T' for telephoto (zoom in) and towards 'W' for wide-angle (zoom out). The camcorder supports up to 18X digital zoom.
3. IR Night Vision
The camcorder is equipped with IR (Infrared) Night Vision for recording in low-light or no-light conditions. To activate, navigate to the menu settings and enable the IR Night Vision mode. The image will appear in monochrome (black and white) when this feature is active.
4. Continuous Shooting, Pause Function, and Time Lapse
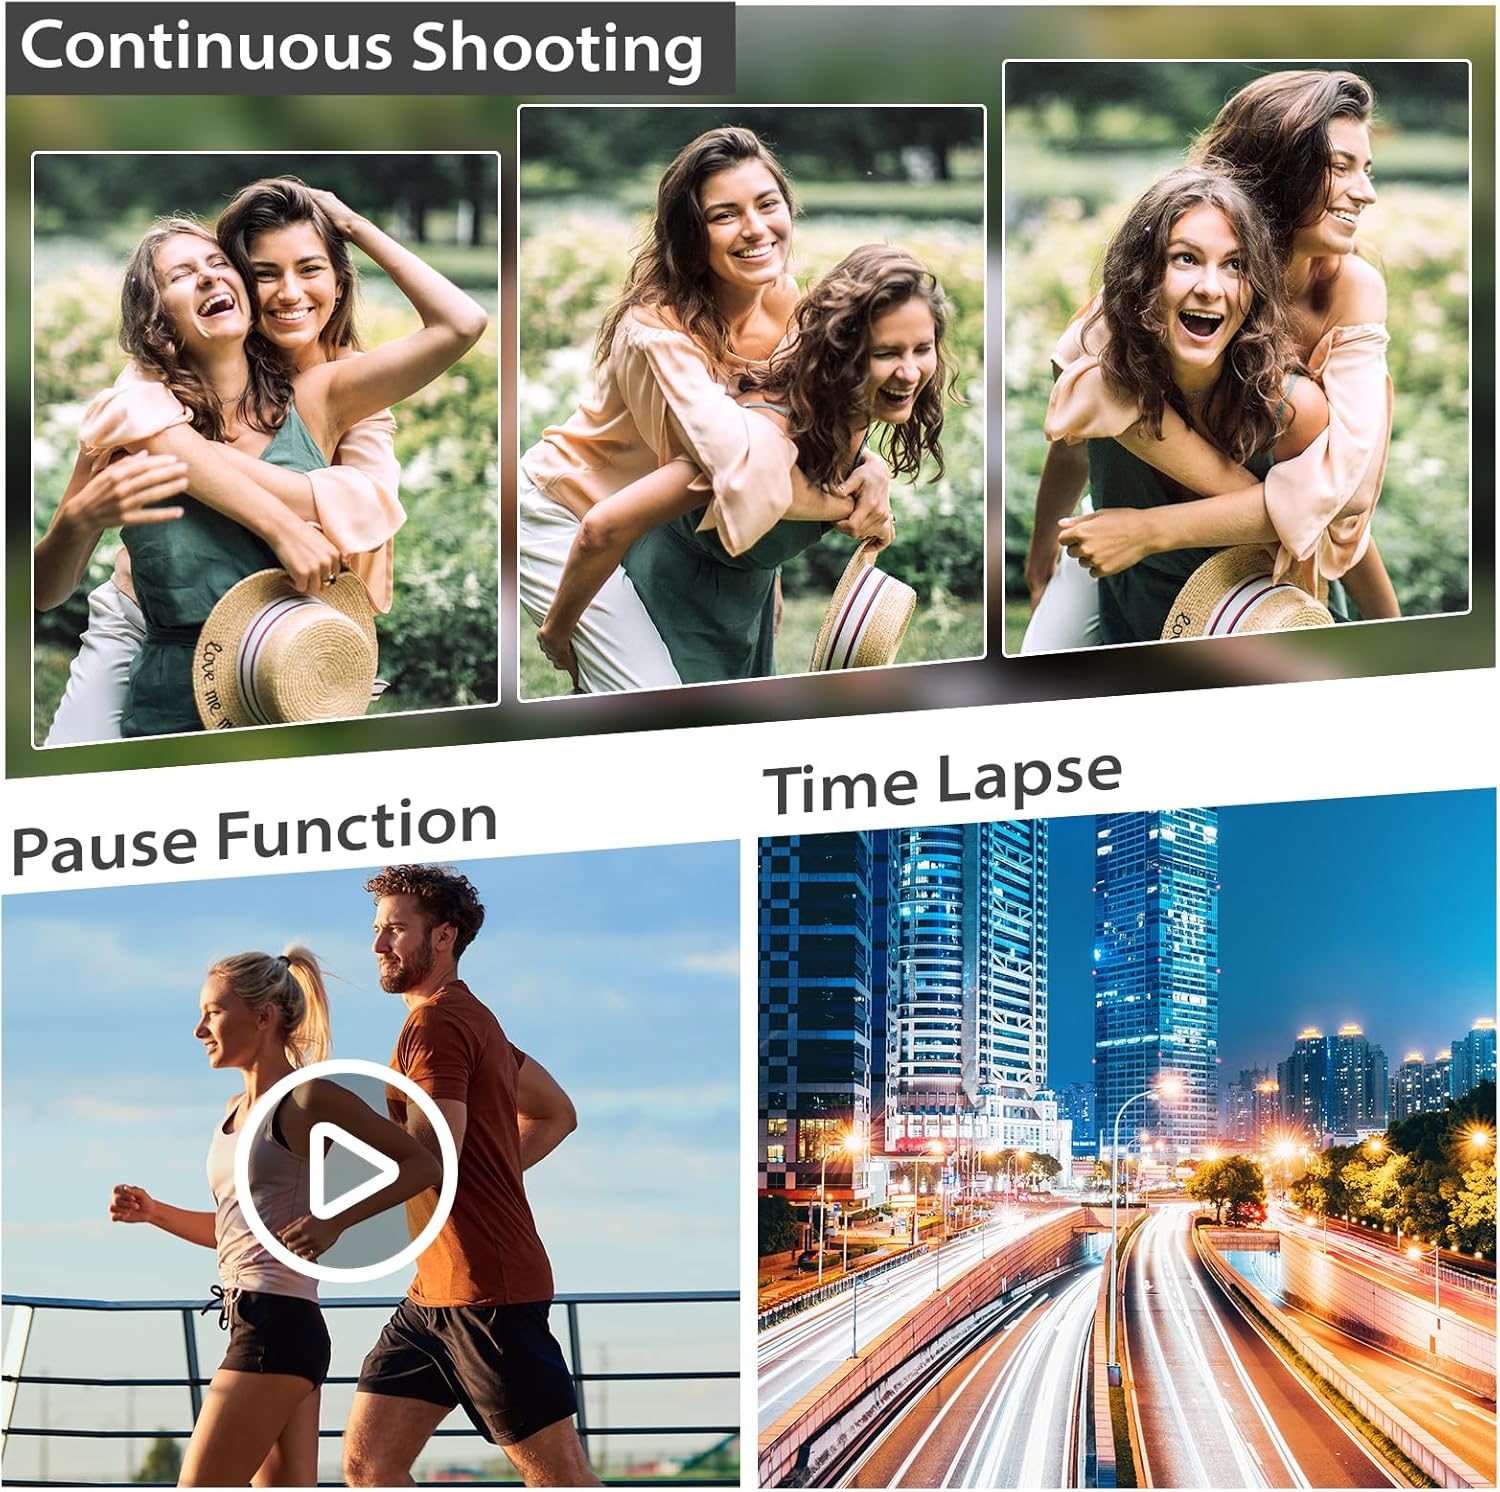
Figure 4: Advanced Shooting Modes. This image demonstrates three key shooting functionalities: Continuous Shooting, which captures multiple frames in quick succession; the Pause Function, allowing temporary suspension of video recording; and Time Lapse, which condenses long periods into short, sped-up videos, as shown by the light trails in the city scene.
- Continuous Shooting: In photo mode, select continuous shooting from the menu to capture a series of photos rapidly.
- Pause Function: During video recording, press the Pause Button (if available, or refer to menu) to temporarily stop recording. Press again to resume.
- Time Lapse: Access the Time Lapse setting in the menu to set intervals for capturing frames over an extended period, which are then compiled into a sped-up video.
5. WiFi Connectivity and App (Easy Sharing)

Figure 5: WiFi Sharing Interface. This image illustrates the camcorder's seamless WiFi sharing capability. It shows the camcorder displaying a captured image, alongside a smartphone screen indicating the "Hello Cam" app interface for connecting and sharing photos and videos directly to social media platforms.
- Download the "Hello Cam" app from your smartphone's app store.
- On the camcorder, enable Wi-Fi from the menu settings. The camcorder will broadcast a Wi-Fi network.
- On your smartphone, connect to the camcorder's Wi-Fi network.
- Open the "Hello Cam" app to browse, download, and share your photos and videos directly from the camcorder.
6. Webcam Function & Remote Control

Figure 6: Webcam and Remote Operation. This image demonstrates the camcorder's versatility as a webcam when connected to a laptop via USB, suitable for video calls or streaming. It also highlights the convenience of the included remote control for operating the camcorder from a distance of up to 30 feet, enhancing user flexibility.
- Webcam: Connect the camcorder to your computer using the USB cable. Select "PC Camera" or "Webcam" mode on the camcorder's screen (if prompted). Your computer should recognize it as a webcam for video conferencing or streaming.
- Remote Control: Use the provided remote control to operate the camcorder from a distance (up to 30 feet). Ensure the remote is pointed towards the camcorder's IR receiver. The remote allows for starting/stopping recording, taking photos, zooming, and navigating menus without touching the camcorder.
7. Menu Navigation
Press the Menu Button to access the camcorder's settings. Use the directional buttons to navigate through options and the OK/Set Button to confirm selections. Common settings include:
- Video Resolution (8K, 4K, 1080P, etc.)
- Photo Resolution (64MP, 48MP, etc.)
- Exposure Compensation
- White Balance
- Scene Modes
- Date/Time Settings
- Language
- Format SD Card

Figure 7: Resolution Comparison. This image visually demonstrates the superior clarity of 8K video compared to 4K, and the enhanced detail of 64MP still images over lower megapixel counts (24MP, 36MP, 48MP). It highlights the high-resolution capabilities of the MURAUX camcorder for both video and photography.
Maintenance
1. Cleaning
- Use the provided cleaning cloth or a soft, lint-free cloth to gently wipe the camcorder body and LCD screen.
- For the lens, use a specialized lens cleaning solution and a lens cleaning cloth. Do not apply excessive pressure.
- Avoid using abrasive cleaners, solvents, or chemical sprays.
2. Storage
- When not in use for extended periods, remove the battery from the camcorder.
- Store the camcorder in a cool, dry place, away from direct sunlight and extreme temperatures.
- Use the dust bag to protect the camcorder from dust and scratches.
3. Battery Care
- Fully charge the battery before first use.
- Avoid completely draining the battery frequently, as this can reduce its lifespan.
- If storing the battery for a long time, charge it to about 50% capacity.
Troubleshooting
| Problem | Possible Cause | Solution |
|---|---|---|
| Camcorder does not power on. | Battery is low or not inserted correctly. | Charge the battery. Reinsert the battery correctly. |
| Cannot record video/take photos. | SD card is full, not inserted, or corrupted. | Insert an SD card. Delete unnecessary files. Format the SD card (this will erase all data). Try a different SD card. |
| Poor image/video quality. | Lens is dirty. Insufficient lighting. Incorrect settings. | Clean the lens. Ensure adequate lighting or use IR Night Vision. Adjust resolution settings. |
| Wi-Fi connection issues. | Wi-Fi not enabled on camcorder. App not installed. | Enable Wi-Fi on the camcorder. Ensure "Hello Cam" app is installed and updated. Reconnect Wi-Fi on your phone. |
| Remote control not working. | Battery low in remote. Obstruction. | Replace remote battery. Ensure clear line of sight to camcorder's IR receiver. |
Specifications
| Feature | Detail |
|---|---|
| Brand | MURAUX |
| Model Number | HDV01-8K |
| Video Capture Resolution | 8K |
| Photo Sensor Technology | CMOS |
| Maximum Aperture | 1.75 millimeters |
| Maximum Focal Length | 4.77 millimeters |
| Flash Memory Type | SD (Supports up to 256GB, Class 10 recommended) |
| Video Capture Format | MP4 |
| Screen Size | 3 Inches (Rotatable LCD) |
| Connectivity Technology | USB, WiFi |
| Color | Black |
| Batteries | 1 Lithium Polymer battery (4500mAh, included) |
| Parcel Dimensions | 19.61 x 16.1 x 10.01 cm |
| Item Weight | 500 g |
Warranty and Support
MURAUX products are designed for reliability and performance. For specific warranty details, please refer to the warranty card included in your package or visit the official MURAUX website. If you encounter any issues or require technical assistance, please contact MURAUX customer support through the channels listed on our website or in your product packaging.
Please retain your proof of purchase for warranty claims.