Introduction
This manual provides detailed instructions for the assembly, operation, and maintenance of the Tilta Full Camera Cage Base Kit (Model TA-T80-A-B). This kit is designed to enhance the functionality and protection of your Panasonic S1R II, S1 II, S1 IIE, S5 II, S5 IIX, and G9 II camera bodies, offering expanded mounting options for various accessories.
The Full Camera Cage serves as a protective frame and a versatile platform for attaching additional equipment, ensuring a secure and stable setup for professional video production.
What's in the Box
Verify that all components listed below are present in your package:
- 1x Full Camera Cage for Panasonic S1R II - Black (TA-T80-FCC-B): The primary cage unit for camera protection and accessory mounting.
- 1x Tilta Xeno Top Handle (1/4"-20 with Locating Pins) - Black (TA-XTH1-B): Provides a comfortable grip and additional mounting points.
- 1x Tilta Arca Height Adjustable 15mm LWS Baseplate - Black (TA-HABP-B): Allows for height adjustment and 15mm rod support.
- 2x 15x200mm Aluminum Rod - Black (R15-200-B): For mounting follow focus, matte boxes, and other rod-based accessories.

Figure 1: Base Kit Components. This image displays all the individual parts included in the Tilta Full Camera Cage Base Kit, including the full camera cage, top handle, ARCA height adjustable 15mm LWS baseplate, and two 15x200mm aluminum rods.
Setup Instructions
- Attach the Camera to the Cage:
Carefully align your Panasonic S1R II, S1 II, S1 IIE, S5 II, S5 IIX, or G9 II camera with the Tilta Full Camera Cage. Secure the camera to the cage using the main mounting screw located at the bottom of the cage. Ensure a snug fit to prevent any movement.

Figure 2: Camera Mounted in Cage. This image shows a Panasonic camera securely mounted within the Tilta Full Camera Cage, demonstrating the integrated design.
- Install the Top Handle:
Mount the Tilta Xeno Top Handle onto the cold shoe receiver or 1/4"-20 threads with locating points on the top of the camera cage. Tighten the securing screw to ensure the handle is firmly attached.
- Attach the ARCA Height Adjustable 15mm LWS Baseplate:
Connect the ARCA Height Adjustable 15mm LWS Baseplate to the ARCA bottom plate of the camera cage. This allows for quick transitions to tripods or DJI Ronin gimbals. Insert the two 15x200mm aluminum rods into the baseplate's rod clamps and secure them.
- Secure HDMI/USB-C Cables:
Utilize the included HDMI and USB-C Cable Clamp to secure your cables when connected to the camera. This prevents accidental disconnection and protects the ports from damage.

Figure 3: Cable Management. This image illustrates the advanced cable management system, highlighting the individual locking mechanisms for HDMI and USB-C cables to prevent disconnection or damage.
Operating Instructions
Mounting Accessories
The Tilta Full Camera Cage offers multiple mounting points for various accessories:
- 1/4"-20 Threads with Locating Points: Use these threads for attaching articulating arms, external monitors, microphones, or other small accessories.
- 3/8"-16 Threads: For larger accessories that require a more robust connection.
- Cold Shoe Receiver: Located on the top handle, ideal for mounting external lights, microphones, or wireless receivers.
- 15mm Rods: The included 15mm rods support rod-based accessories such as follow focus systems, matte boxes, and lens supports.

Figure 4: Multiple Mounting Points. This diagram highlights various mounting points on the camera cage, including 3/8" to 1/4" thread adapters, strap attachment points, 1/4"-20 threads with locating points, M3 threads, and the ARCA bottom plate.
Configuring for Different Setups
The base kit is versatile and can be adapted for various shooting configurations:
- Shoulder Rig Configuration: Attach additional shoulder rig components to the 15mm rods for comfortable handheld operation.
- Gimbal Configuration: The ARCA bottom plate allows for quick mounting onto DJI Ronin gimbals.
- Tripod Configuration: Easily mount the system onto standard tripods using the ARCA plate.

Figure 5: Versatile Configurations. This image displays the camera cage configured for a shoulder rig, a gimbal, and a tripod, demonstrating its adaptability for different shooting scenarios.
Maintenance
- Cleaning: Use a soft, dry cloth to wipe down the cage and accessories. Avoid abrasive cleaners or solvents that could damage the finish.
- Inspection: Regularly check all screws and connections to ensure they are tight. Re-tighten as necessary to maintain stability.
- Storage: Store the cage and its components in a dry, dust-free environment when not in use.
The cage includes a multi-functional magnetic screwdriver located at the bottom for convenient adjustments and maintenance.

Figure 6: Integrated Screwdriver and Adapter Support. This image shows the multi-functional magnetic screwdriver conveniently located at the bottom of the cage and the dedicated adapter support system with M3 threads.
Troubleshooting
- Issue: Camera does not fit securely or controls are obstructed.
Solution: Ensure your camera model is listed as compatible (Panasonic S1R II, S1 II, S1 IIE, S5 II, S5 IIX, G9 II). While the cage is designed for these models, slight variations or specific camera accessories might cause fit issues. Double-check the camera's positioning within the cage and ensure all mounting screws are properly aligned and tightened. If issues persist, verify that no camera controls (e.g., power switch) are inadvertently blocked by the cage structure.
- Issue: Accessories are loose on mounting points.
Solution: Confirm that the accessory's mounting screw or clamp is fully tightened. For 1/4"-20 threads with locating points, ensure the locating pins are properly engaged with the accessory to prevent twisting.
- Issue: Cables disconnect easily.
Solution: Ensure the HDMI and USB-C Cable Clamp is correctly installed and tightened around the cables. The clamp is designed to provide individual locking mechanisms for secure connection.
Specifications
| Feature | Detail |
|---|---|
| Product Name | Full Camera Cage for Panasonic S1R II - Black |
| SKU | TA-T80-FCC-B |
| Dimensions (Cage Only) | 6.48 × 2.81 × 4.74 in / 164.7 × 71.4 × 120.4 mm |
| Materials | 6061-T6 Aluminum Alloy / SUS304 / Silicone |
| Net Weight (Cage Only) | 0.45 lb / 205.5g |
| Color | Black |
| Compatible Devices | Panasonic S1R II, S1 II, S1 IIE, S5 II, S5 IIX, G9 II Cameras |
| Model Number (Base Kit) | TA-T80-A-B |
| UPC | 810153177128 |
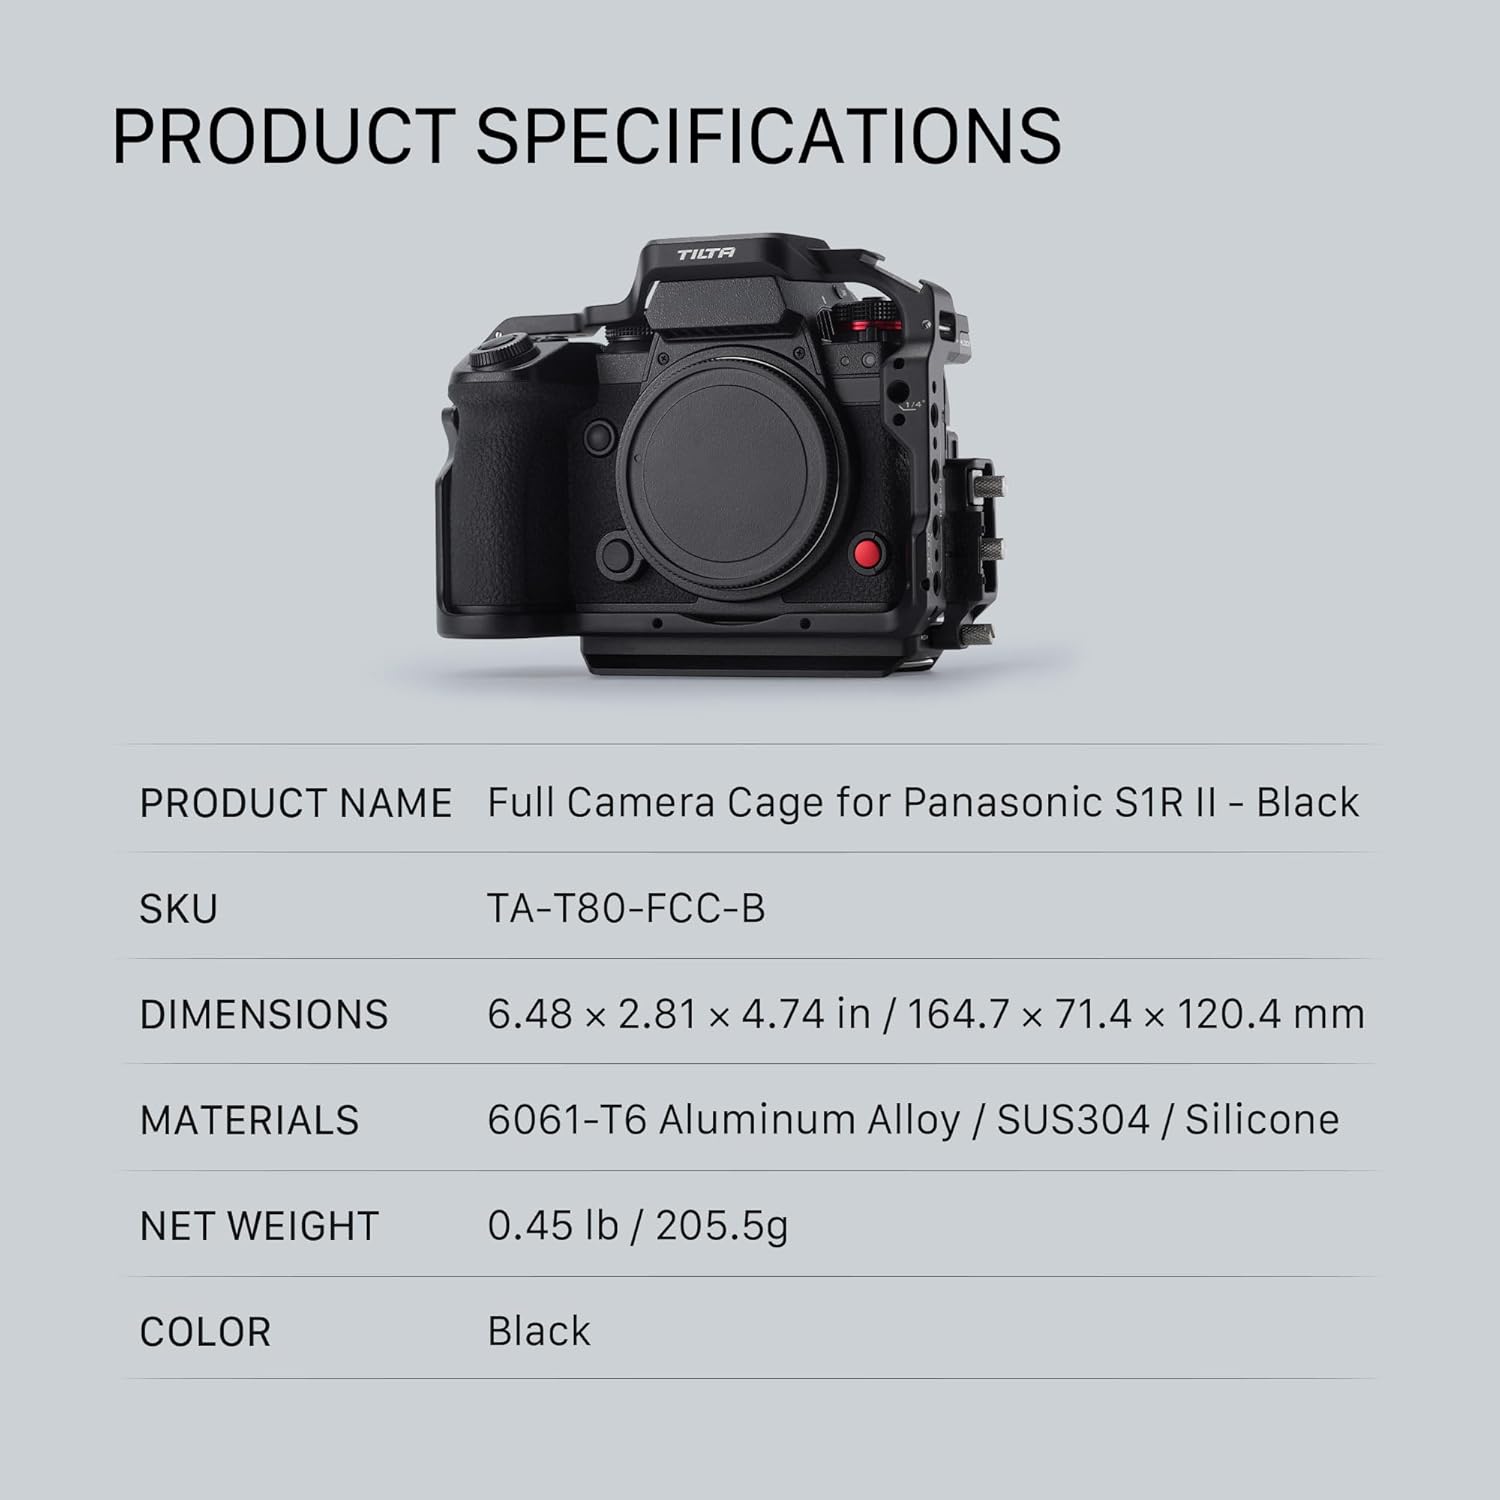
Figure 7: Product Specifications. This image provides a detailed table of the Tilta Full Camera Cage's specifications, including dimensions, materials, and weight.
Warranty and Support
For warranty information and technical support, please refer to the official Tilta website or contact your authorized Tilta dealer. Keep your purchase receipt as proof of purchase for any warranty claims.
For further assistance, you may visit the Tilta Store on Amazon.