Introduction
This manual provides comprehensive instructions for the setup, operation, and maintenance of your Wildgame Innovations 24MP Terra XD Trail Camera. Please read this manual thoroughly before using the device to ensure optimal performance and longevity.

Image: Front view of the Wildgame Innovations 24MP Terra XD Trail Camera, showcasing its camouflage pattern and lens.
Package Contents
Verify that all items are present in your package:
- Wildgame Innovations 24MP Terra XD Trail Camera
- Mounting Strap
- Power Adapter (for 12V DC auxiliary jack)
- User Manual (this document)
Note: Batteries and SD card are typically sold separately.
Setup Guide
1. Battery Installation
The Terra XD camera requires 8 AA batteries (not included). For best performance, use high-quality alkaline or lithium batteries.
- Open the camera housing by unlatching the side clips.
- Locate the battery compartment.
- Insert 8 AA batteries, ensuring correct polarity (+/-) as indicated inside the compartment.
- Close the battery compartment securely.
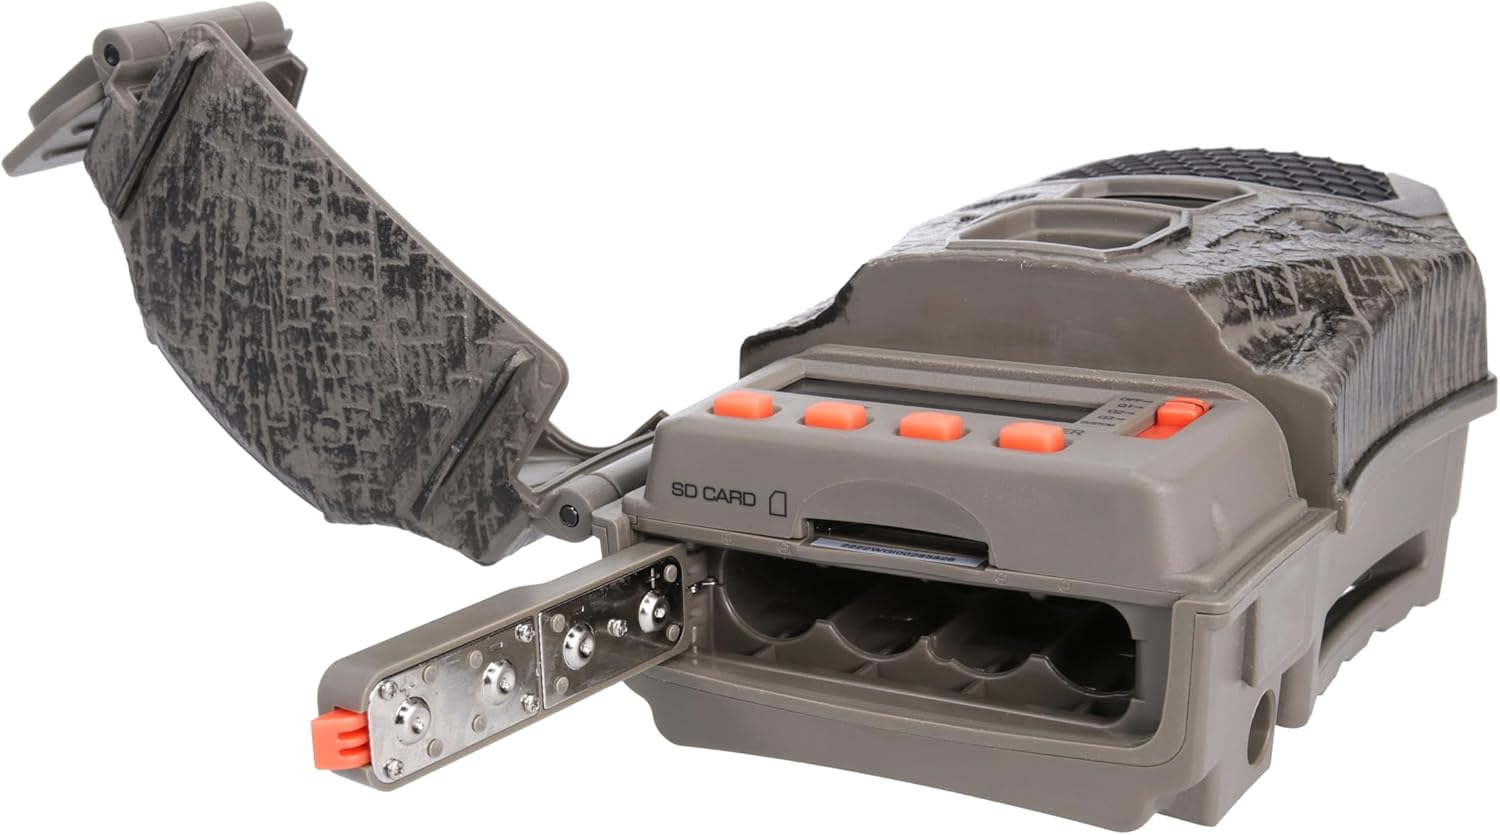
Image: The Wildgame Innovations Terra XD camera with its back panel open, revealing the battery tray and control panel.
2. SD Card Insertion
A Class 10 SD card (up to 32GB recommended, not included) is required to store photos and videos.
- With the camera housing open, locate the SD card slot.
- Insert the SD card with the metal contacts facing down until it clicks into place.
- To remove, push the card in until it clicks, then release, and it will eject.

Image: Side view of the Wildgame Innovations Terra XD camera with the main housing open, showing the internal display, control buttons, and the SD card slot.
3. Initial Power On and Basic Settings
After inserting batteries and an SD card:
- Locate the power switch/button (refer to the control panel image).
- Turn the camera ON. The internal display will activate.
- Setting Date and Time: Navigate through the menu using the arrow buttons. Locate the "Date/Time" setting. Use the arrow buttons to adjust values and the "ENTER" button to confirm. Ensure this is set correctly for accurate timestamps on your recordings.
- Formatting SD Card: It is recommended to format the SD card upon first use and periodically thereafter. Navigate to the "Format SD" option in the menu and confirm. This will erase all data on the card.
4. Mounting the Camera
The Terra XD offers versatile mounting options:
- Integrated Multi-Position Mount: Use the included strap to secure the camera to a tree or post. Thread the strap through the designated slots on the camera body and tighten.
- 1/4-20 Threaded Insert: For more precise positioning, the camera features a standard 1/4-20 threaded insert, compatible with various camera mounts and tripods.
- Python Cable Provision: For enhanced security, a python cable (sold separately) can be used to lock the camera to its mounting location.
Operating Instructions
1. Camera Modes and Settings
The camera offers various settings to customize its operation:
- Photo Resolution: Captures still images at 24 Megapixels.
- Video Resolution: Records video at 1080p.
- Burst Mode: Set the camera to capture 1 to 3 photos per trigger event.
- Trigger Speed: The camera has a rapid 0.5-second trigger speed to capture fast-moving subjects.
- Detection & Flash Range: The camera detects motion and illuminates subjects up to 80 feet away.
- Time-Out Delays: Customize the delay between trigger events from 2-59 seconds or 1-59 minutes. This prevents the camera from taking too many photos of the same subject.
- Operating Modes: Select between Photo, Video, or Photo+Video modes via the internal menu.
2. Huntsmart App Integration
The Terra XD 2.0 is compatible with the Huntsmart App, allowing for remote control and on-demand access to photos and videos. Refer to the Huntsmart App's documentation for detailed setup and usage instructions. The camera utilizes Bluetooth connectivity for smartphone pairing.
3. External Power Options
For extended operation, the camera includes a 12V DC auxiliary jack, allowing connection to external power packs (sold separately).
4. Sample Images

Image: A nighttime black and white image captured by the camera, showing a deer with prominent antlers in a forest setting.
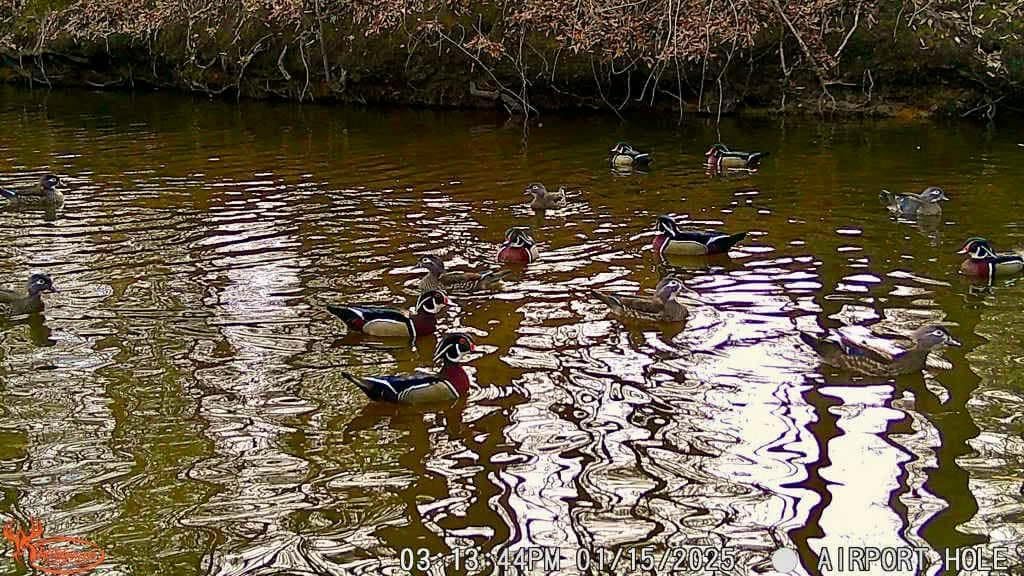
Image: A daytime color image showing several ducks swimming in a pond, demonstrating the camera's clarity in natural light.

Image: A daytime color image of a deer walking through a lightly snow-covered forest, captured by the trail camera.
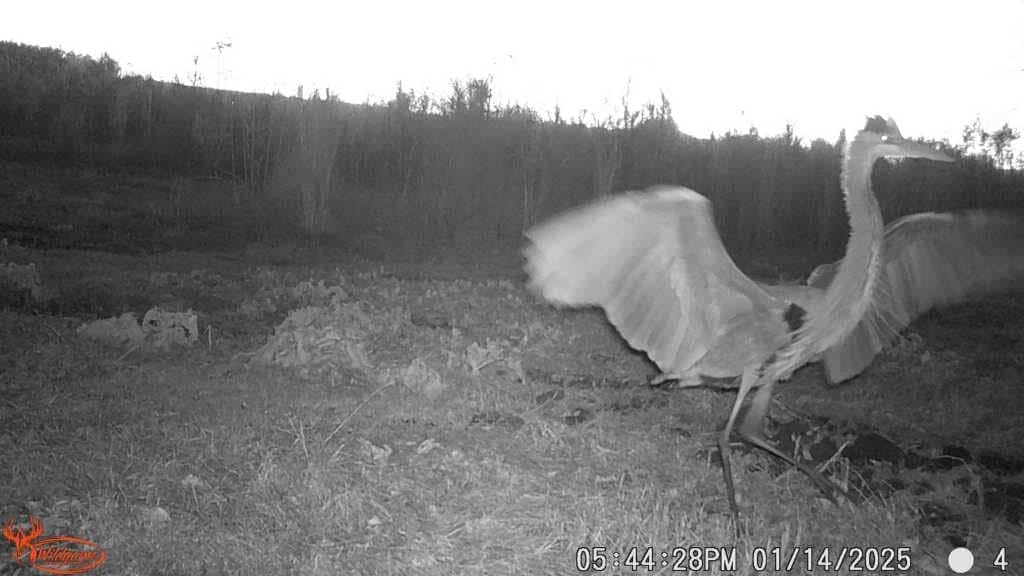
Image: A nighttime black and white image showing a large bird, possibly a heron, with wings spread, captured in motion.
Maintenance
- Battery Replacement: Replace all 8 AA batteries when the low battery indicator appears on the display or in the app. Do not mix old and new batteries or different battery types.
- SD Card Management: Regularly check the SD card capacity. Format the SD card periodically to maintain optimal performance and prevent data corruption. Back up important files before formatting.
- Cleaning: Use a soft, dry cloth to clean the camera lens and PIR sensor window. Avoid abrasive materials or harsh chemicals. Ensure the camera housing is free of dirt and debris, especially around seals, to maintain weather resistance.
- Storage: When not in use for extended periods, remove batteries and the SD card. Store the camera in a cool, dry place.
Troubleshooting
| Problem | Possible Cause | Solution |
|---|---|---|
| Camera does not power on. |
|
|
| Cannot set date/time or access menu. |
|
|
| Images are black and white during the day. |
|
|
| Camera not detecting motion. |
|
|
| Poor image/video quality. |
|
|
Specifications
| Feature | Detail |
|---|---|
| Model Number | WGI-TERA24XD |
| Image Resolution | 24 Megapixels |
| Video Resolution | 1080p (720p also mentioned in product description) |
| Trigger Speed | 0.5 seconds |
| Detection Range | 80 feet |
| Flash Range | 80 feet |
| Power Source | 8 AA Batteries (not included), 12V DC Auxiliary Jack |
| Storage | SD Card (up to 32GB, not included) |
| Connectivity | Bluetooth (for Huntsmart App) |
| Mounting Type | Tree Mount, 1/4-20 Threaded Insert |
| Dimensions (L x W x H) | 16 x 10 x 6 inches |
| Weight | 12.7 ounces |
| Special Features | HD Resolution, Motion Sensor, Weather Proof |
| UPC | 888151099117 |
Warranty and Support
For product support, troubleshooting assistance, or warranty inquiries, please contact Wildgame Innovations Customer Service. While specific warranty details are not provided in this manual, retaining your proof of purchase is recommended for any warranty claims.
You can find more information and contact details on the official Wildgame Innovations website or through their Amazon store: Wildgame Innovations Amazon Store.


