
Ruwaqart 078BK01A
Ruwaqart 4K 64MP UHD Digital Camera User Manual
Model: 078BK01A
1. Introduction
Thank you for choosing the Ruwaqart 4K 64MP UHD Digital Camera. This compact and versatile camera is designed to capture stunning 4K Ultra HD videos and high-resolution 64MP photos, making it ideal for photography enthusiasts of all ages. With its user-friendly interface and advanced features, you can easily preserve your precious moments in exceptional clarity.
Key Features:
- UHD 4K 64MP Digital Camera: Capture stunning 4K ultra HD video and 64MP professional photos with an upgraded CMOS sensor.
- Auto Focus & 16X Digital Zoom: Ensures sharp images and allows for detailed close-ups from 10cm away, with 16X digital zoom for distant subjects.
- 2.8" HD Screen & Built-in Flash: Features a 2.8-inch HD IPS display for vivid colors and a built-in flash for low-light conditions.
- Versatile Camera: Functions as a webcam and includes creative features like beauty effects, smile detection, time-lapse, slow motion, and built-in filters.
- Compact & Portable: Weighs just 0.26 lbs, making it easy to carry for travel and everyday use.
- Easy to Operate: Intuitive buttons and a straightforward menu for effortless use by all ages.
2. Package Contents
Please verify that all items are present in your package:
- Ruwaqart 4K 64MP UHD Digital Camera
- 1200mAh Rechargeable Battery (x2)
- Type-C USB Cable
- 32GB Micro SD Card (pre-installed)
- Lanyard
- Protective Bag
- User Manual

Figure 2.1: Included Accessories
3. Product Overview
Familiarize yourself with the camera's components and controls.

Figure 3.1: Camera Buttons and Interface
Component Descriptions:
- Power Button: Turns the camera on or off.
- Photo Button: Press halfway to autofocus, fully press to take a photo.
- Digital Zoom In/Out: Adjusts the digital zoom level (up to 16X).
- Up Button / Fill Light Shortcut: Navigates menus or activates the fill light.
- Right Button / Shortcut for Timed Photo: Navigates menus or sets a timed photo.
- Down Button / Delete: Navigates menus or deletes selected items.
- Menu Button / Menu Return: Accesses the camera menu or returns to the previous screen.
- M Button: Mode button for switching between photo, video, and playback modes.
- Playback Button: Enters playback mode to view photos and videos.
- Left Button / Shortcut for Continuous Photo Taking: Navigates menus or enables continuous shooting.
- Type-C USB Interface: For charging and data transfer.
- Display Screen: 2.8-inch HD IPS screen for viewing and navigating.
4. Setup
4.1 Installing the Battery and Micro SD Card
The camera requires a battery and a Micro SD card (32GB included) for operation. Ensure the battery is inserted correctly; it cannot be charged if reversed.
- Open the battery compartment cover located at the bottom of the camera.
- Insert the rechargeable battery into the compartment, ensuring the correct orientation as indicated inside the compartment.
- Insert the Micro SD card into the designated slot until it clicks into place.
- Close the battery compartment cover securely.

4.2 Charging the Battery
Before first use, fully charge the battery. Connect the camera to a power source using the provided Type-C USB cable. The charging indicator light will illuminate during charging and turn off when fully charged.
5. Operating Instructions
5.1 Powering On/Off
Press and hold the Power Button for a few seconds to turn the camera on or off.
5.2 Taking Photos
- Ensure the camera is in photo mode (indicated on the display). If not, press the M Button to switch modes.
- Frame your shot using the 2.8-inch HD display.
- Gently press the Photo Button halfway down to activate autofocus. Green focus boxes will appear on the screen.
- Once focus is achieved, press the Photo Button fully down to capture the image.

Figure 5.1: Autofocus in action on the 2.8-inch HD screen.
5.3 Recording Videos
- Press the M Button to switch to video recording mode (indicated by a video icon on the display).
- Press the Photo Button to start recording. A red recording indicator will appear.
- Press the Photo Button again to stop recording.

Figure 5.2: 4K UHD Video Recording.
5.4 Using Digital Zoom
Use the Digital Zoom In/Out buttons to adjust the magnification of your subject. The camera supports up to 16X digital zoom.
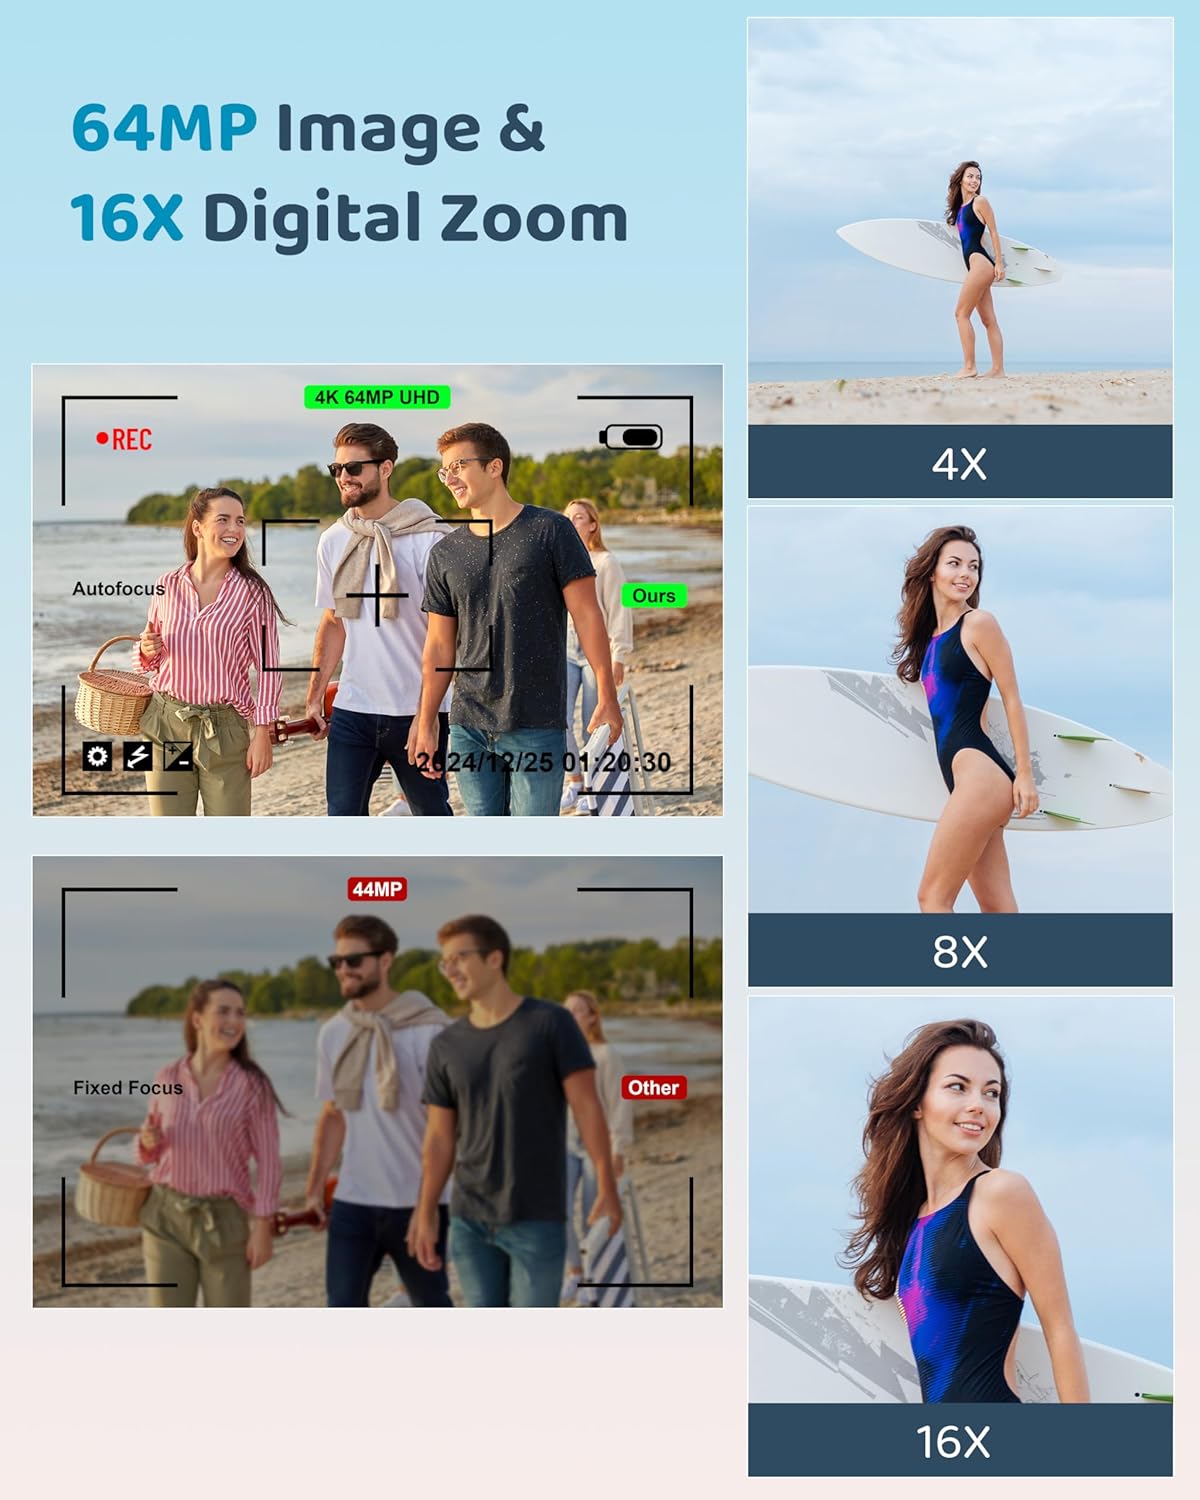
Figure 5.3: 16X Digital Zoom Capability.
5.5 Built-in Flash
The built-in flash helps illuminate subjects in low-light conditions. Press the Up Button / Fill Light Shortcut to cycle through flash modes (Auto, On, Off).

Figure 5.4: Built-in Flash for Low Light.
5.6 Playback
Press the Playback Button to review your captured photos and videos. Use the navigation buttons (Up, Down, Left, Right) to browse through your media. Press the Delete Button to remove unwanted files.
6. Advanced Features
6.1 Webcam Functionality
The camera can be used as a webcam for video calls, online learning, or live streaming. Connect the camera to your computer using the Type-C USB cable. Select 'Webcam Mode' on the camera's display when prompted.

Figure 6.1: Camera as a Webcam.
6.2 Creative Filters and Effects
Explore various built-in features to enhance your photos and videos:
- Beauty Effects: Enhances facial features for portraits.
- Smile Detection: Automatically captures a photo when a smile is detected.
- Time-Lapse: Records a series of images over time to create a sped-up video.
- Slow Motion: Records video at a higher frame rate for slow-motion playback.
- Built-in Filters: Apply various color and artistic filters to your images.
- Continuous Shooting: Hold down the Left Button / Shortcut for Continuous Photo Taking to capture multiple photos in quick succession.

Figure 6.2: Creative Features and Filters.
7. Maintenance
Proper care will extend the life of your camera.
7.1 Cleaning the Camera
- Lens: Use a soft, lint-free microfiber cloth specifically designed for optical lenses. Gently wipe in a circular motion. Avoid using harsh chemicals or abrasive materials.
- Screen: Wipe the display screen with a clean, soft cloth. For stubborn smudges, a screen cleaner spray designed for electronics can be used sparingly on the cloth, not directly on the screen.
- Body: Use a soft, dry cloth to wipe the camera body. For dirt, slightly dampen the cloth with water and wipe, then dry immediately.
7.2 Battery Care
- Store batteries in a cool, dry place when not in use.
- Avoid exposing batteries to extreme temperatures.
- If storing for an extended period, charge the battery to about 50% capacity.
7.3 Storage
When not in use, store the camera in its protective bag in a dry, dust-free environment away from direct sunlight and extreme temperatures.
8. Troubleshooting
If you encounter issues, refer to the following common problems and solutions:
| Problem | Possible Cause | Solution |
|---|---|---|
| Camera does not turn on. | Battery is dead or incorrectly inserted. | Charge the battery. Ensure the battery is inserted with correct polarity. |
| Cannot take photos/videos. | Micro SD card is full, not inserted, or corrupted. | Check Micro SD card. Delete unnecessary files or format the card (backup data first). Reinsert the card. |
| Images are blurry. | Lens is dirty, autofocus failed, or camera shake. | Clean the lens. Ensure autofocus locks before shooting (half-press shutter). Hold the camera steady. |
| Flash not working. | Flash mode is off or battery is low. | Check flash settings (Up button). Charge the battery. |
| Camera freezes. | Software glitch. | Remove and reinsert the battery to reset the camera. |
If the problem persists after trying these solutions, please contact customer support.
9. Specifications
Detailed technical specifications for the Ruwaqart 4K 64MP UHD Digital Camera.
| Feature | Specification |
|---|---|
| Brand | Ruwaqart |
| Model Name | 078BK01A |
| Effective Still Resolution | 64 MP |
| Maximum Webcam Image Resolution | 64 MP |
| Photo Sensor Size | 1/2.5-inch |
| Photo Sensor Technology | CMOS |
| Supported File Format | JPEG |
| Image Stabilization | Digital |
| Colour | Black |
| Batteries | 2 Nonstandard Battery batteries required (included) |
| Parcel Dimensions | 11.5 x 8.4 x 7.4 cm; 10 g |
10. Warranty and Support
This product comes with a standard manufacturer's warranty. For specific warranty terms and conditions, please refer to the documentation included with your purchase or visit the official Ruwaqart website. If you require technical assistance, troubleshooting beyond this manual, or have questions regarding your product, please contact Ruwaqart customer support through their official channels.
Ask a question about this manual
Ask about setup, troubleshooting, compatibility, parts, safety, or missing instructions. Manuals+ will review the question and use this page’s manual context to help answer it.