
1. Introduction
This instruction manual provides essential information for the safe and efficient use of your TRIUMPHKEY 3x9 Outdoor Canopy Tent. Please read this manual thoroughly before assembly and operation to ensure proper setup and to maximize the lifespan of your product. Keep this manual for future reference.
The TRIUMPHKEY 3x9 Outdoor Canopy Tent is designed for various outdoor activities, including garden gatherings, parties, weddings, and beach use. It features a spacious 3x9 meter area and includes removable side walls for versatility.
2. Safety Information
- Weather Conditions: Do not use the canopy tent in severe weather conditions such as strong winds, heavy rain, or snow. Disassemble and store the tent to prevent damage and ensure safety.
- Assembly: Always assemble the tent with at least two people. Ensure all connections are secure before use.
- Anchoring: Securely anchor the tent to the ground using stakes and ropes (if included) to prevent it from being lifted by wind.
- Fire Safety: Keep all heat sources and open flames away from the tent fabric. The fabric is not fireproof.
- Ventilation: Ensure adequate ventilation, especially if using the tent with all side walls attached.
- Children: Keep children away from the assembly area. Do not allow children to play unsupervised inside or around the tent.
3. Package Contents
Verify that all components are present before beginning assembly. If any parts are missing or damaged, contact customer support.
- Steel Frame Tubes (various lengths and types for legs, roof, and connectors)
- Connectors (plastic or metal joints)
- Canopy Fabric (roof cover)
- Side Walls (7 pieces, 6 with transparent windows)
- Ropes and Stakes (for anchoring)
- Instruction Manual

Image: Key components of the canopy tent, showing the support frame, connectors, fixed rope, and connecting buckle.
4. Setup Instructions
Assembly typically takes approximately 15 minutes with two people and requires no additional tools.
- Unpack Components: Lay out all frame tubes, connectors, canopy fabric, and side walls on a clear, flat surface.
- Assemble the Roof Frame: Connect the roof frame tubes using the appropriate connectors. Ensure all connections are secure.
- Attach Canopy Fabric: Drape the canopy fabric over the assembled roof frame. Ensure it is centered and aligned correctly.
- Extend Legs: Attach the leg tubes to the roof frame. With assistance, carefully lift the frame and extend the legs to the desired height. Press in the center to adjust height freely.
- Secure Side Walls: Attach the 7 removable side walls as needed. Six of these walls feature transparent windows. The side walls can be attached using zippers or connecting buckles.
- Anchor the Tent: Use the provided ropes and stakes to securely anchor the tent to the ground. This is crucial for stability, especially in light winds.

Image: Visual guide to the assembly process, illustrating how the frame components connect and the fabric is draped.
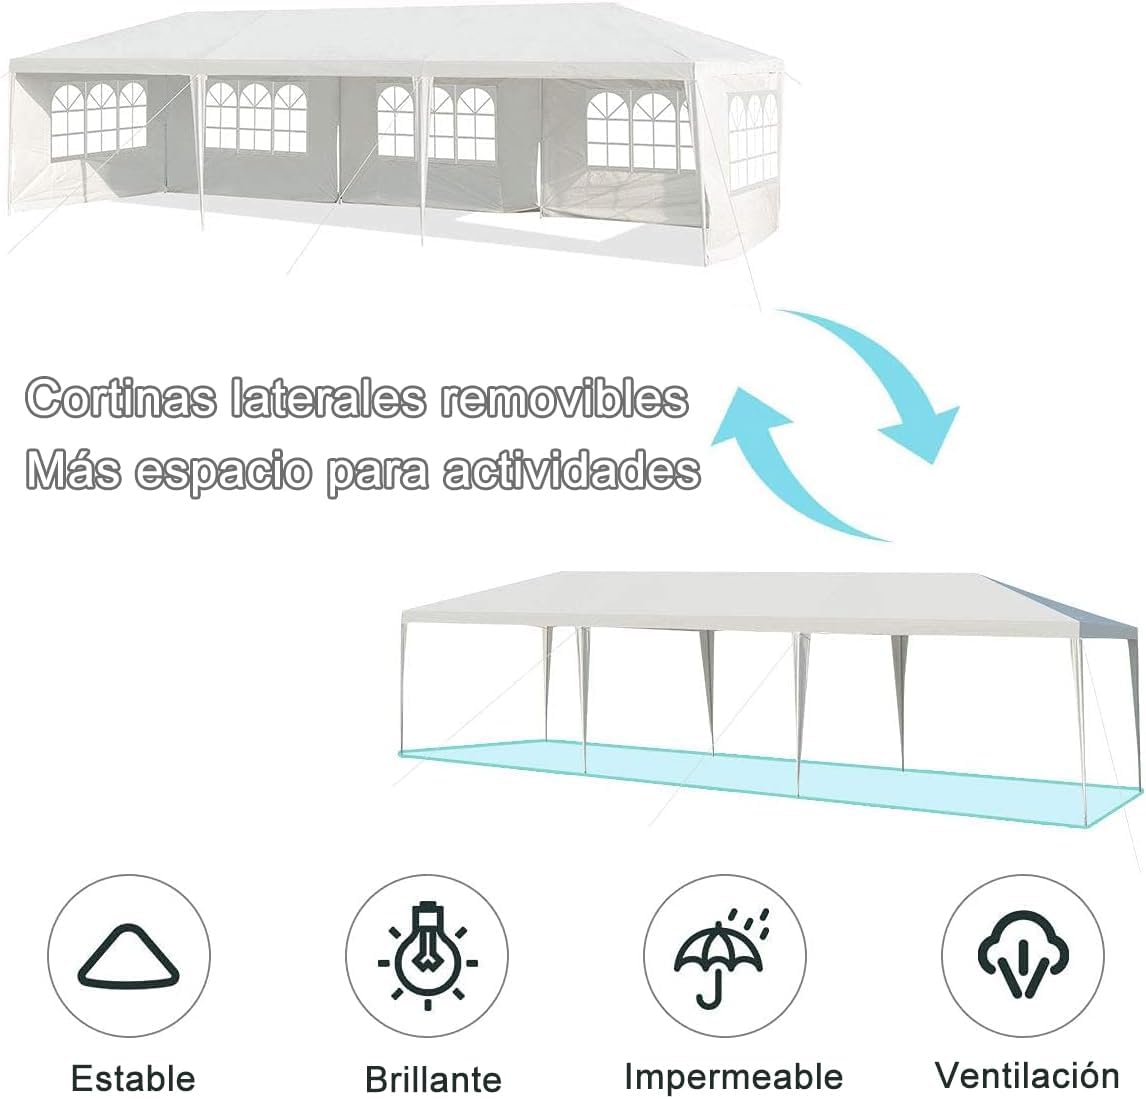
Image: Illustration of the removable side curtains and key features such as stability, light transmission, waterproofing, and ventilation.
5. Operating Instructions
- Side Wall Configuration: The 7 removable side walls offer flexibility. Attach them to block cold air, sunlight, or rain. Remove them for increased ventilation or an open-air setup. Six walls include transparent windows.
- Height Adjustment: The tent's height can be adjusted freely during setup by pressing the central mechanism. Ensure all legs are adjusted to the same height for stability.
- UV Protection: The canopy fabric features a thick silver coating to block UV rays, providing shade and protection from the sun.
- Water Resistance: The fabric is designed with heat-sealed technology to prevent water infiltration. The canopy design also helps prevent rainwater from pooling on top.

Image: The canopy tent configured for an outdoor event, demonstrating its capacity and the use of side walls.

Image: The canopy tent used for an evening event, highlighting its suitability for various times of day.
6. Maintenance
- Cleaning: Clean the canopy fabric and side walls with mild soap and water. Do not use harsh chemicals or abrasive cleaners. Rinse thoroughly and allow to air dry completely before storage.
- Frame Care: Wipe down the steel frame tubes with a damp cloth to remove dirt and debris. Ensure the frame is dry before storage to prevent rust.
- Storage: Disassemble the tent and store all components in a dry, cool place, away from direct sunlight and extreme temperatures. Ensure the fabric is completely dry to prevent mold and mildew.
- Inspection: Regularly inspect the frame, fabric, and connectors for any signs of wear, damage, or corrosion. Replace damaged parts immediately.
7. Troubleshooting
| Problem | Possible Cause | Solution |
|---|---|---|
| Tent is unstable or wobbly. | Not properly anchored; uneven ground; loose frame connections. | Ensure all ropes and stakes are securely fastened. Move to level ground if possible. Check and tighten all frame connections. |
| Water pooling on the roof. | Improper setup; heavy rainfall exceeding design capacity. | Ensure the canopy fabric is taut and properly stretched over the frame. Adjust height if necessary to create proper tension. Disassemble in very heavy rain. |
| Difficulty attaching side walls. | Misalignment; zippers stuck. | Ensure the side walls are correctly oriented. Gently align zippers before pulling. Do not force connections. |
| Frame parts do not fit together. | Incorrect part usage; debris in connection points. | Refer to the assembly diagram to ensure correct parts are being used. Clear any debris from the connection points. |
8. Specifications
- Brand: TRIUMPHKEY
- Model: 300X900CM
- Dimensions (L x W x H): 900 x 300 x 258 cm (9 x 3 x 2.58 meters)
- Weight: 21.54 kg
- Material: Steel Tube Frame, PE Fabric (Canopy and Side Walls)
- Color: White
- UPC: 769003447266
- Side Walls: 7 removable walls (6 with transparent windows)
- Features: UV protection, water-resistant fabric, easy assembly, adjustable height.

Image: Product dimensions diagram, indicating the length, width, and height of the canopy tent.
9. Warranty and Support
For warranty information or technical support, please contact TRIUMPHKEY customer service. Keep your purchase receipt as proof of purchase.
Customer Service: Refer to your purchase documentation or the TRIUMPHKEY official website for contact details.