
1. Introduction
Thank you for choosing the HJPLPXH Retro Pendulum Clock Building Block Set. This set allows you to construct a detailed model of a vintage pendulum clock that is also a fully functional timepiece. It features a linked mechanical pendulum and a real clock function, offering both an engaging building experience and a decorative item.
This manual provides essential information for the assembly, setup, operation, and maintenance of your new clock. Please read it thoroughly before beginning assembly.
2. Safety Information
WARNING: CHOKING HAZARD
This product contains small parts and is not suitable for children under 3 years of age. Adult supervision is recommended during assembly, especially for younger users.
3. Package Contents
Before starting, please verify that all components are present. The package should contain:
- 751+ Building Block Pieces
- 1 x Instruction Manual (this document)
- Clock mechanism components
If any parts are missing or damaged, please refer to the 'Warranty and Support' section for assistance.

Image 3.1: The Retro Pendulum Clock Building Block Set, including the product box and the fully assembled clock.
4. Assembly Instructions
The assembly process is detailed in the included step-by-step instruction manual. Please follow the diagrams and instructions carefully.
- Unpack and Sort: Carefully unpack all building blocks. It is recommended to sort the pieces by color and type to facilitate assembly.
- Follow the Manual: Refer to the dedicated assembly manual provided in the box for detailed, step-by-step instructions. Each step will guide you through connecting the blocks to form the clock structure and internal mechanisms.
- Assemble the Clock Mechanism: Pay close attention when assembling the internal clock mechanism and the pendulum components. Ensure all gears and linkages are correctly aligned for proper function.
- Integrate Functional Elements: Install the clock face, dial hands, and the pendulum system as instructed.

Image 4.1: Detailed views of the clock's components, showing the intricate clock face, the golden pendulum, and the visible gear mechanisms.
5. Setup
Once the clock is fully assembled, follow these steps to prepare it for operation:
- Install Batteries: Open the top cover of the clock to access the battery compartment. Insert the required batteries (not included) according to the polarity indicators. Close the cover securely.
- Set the Time: Gently rotate the minute hand clockwise to set the correct time. Avoid forcing the hands.
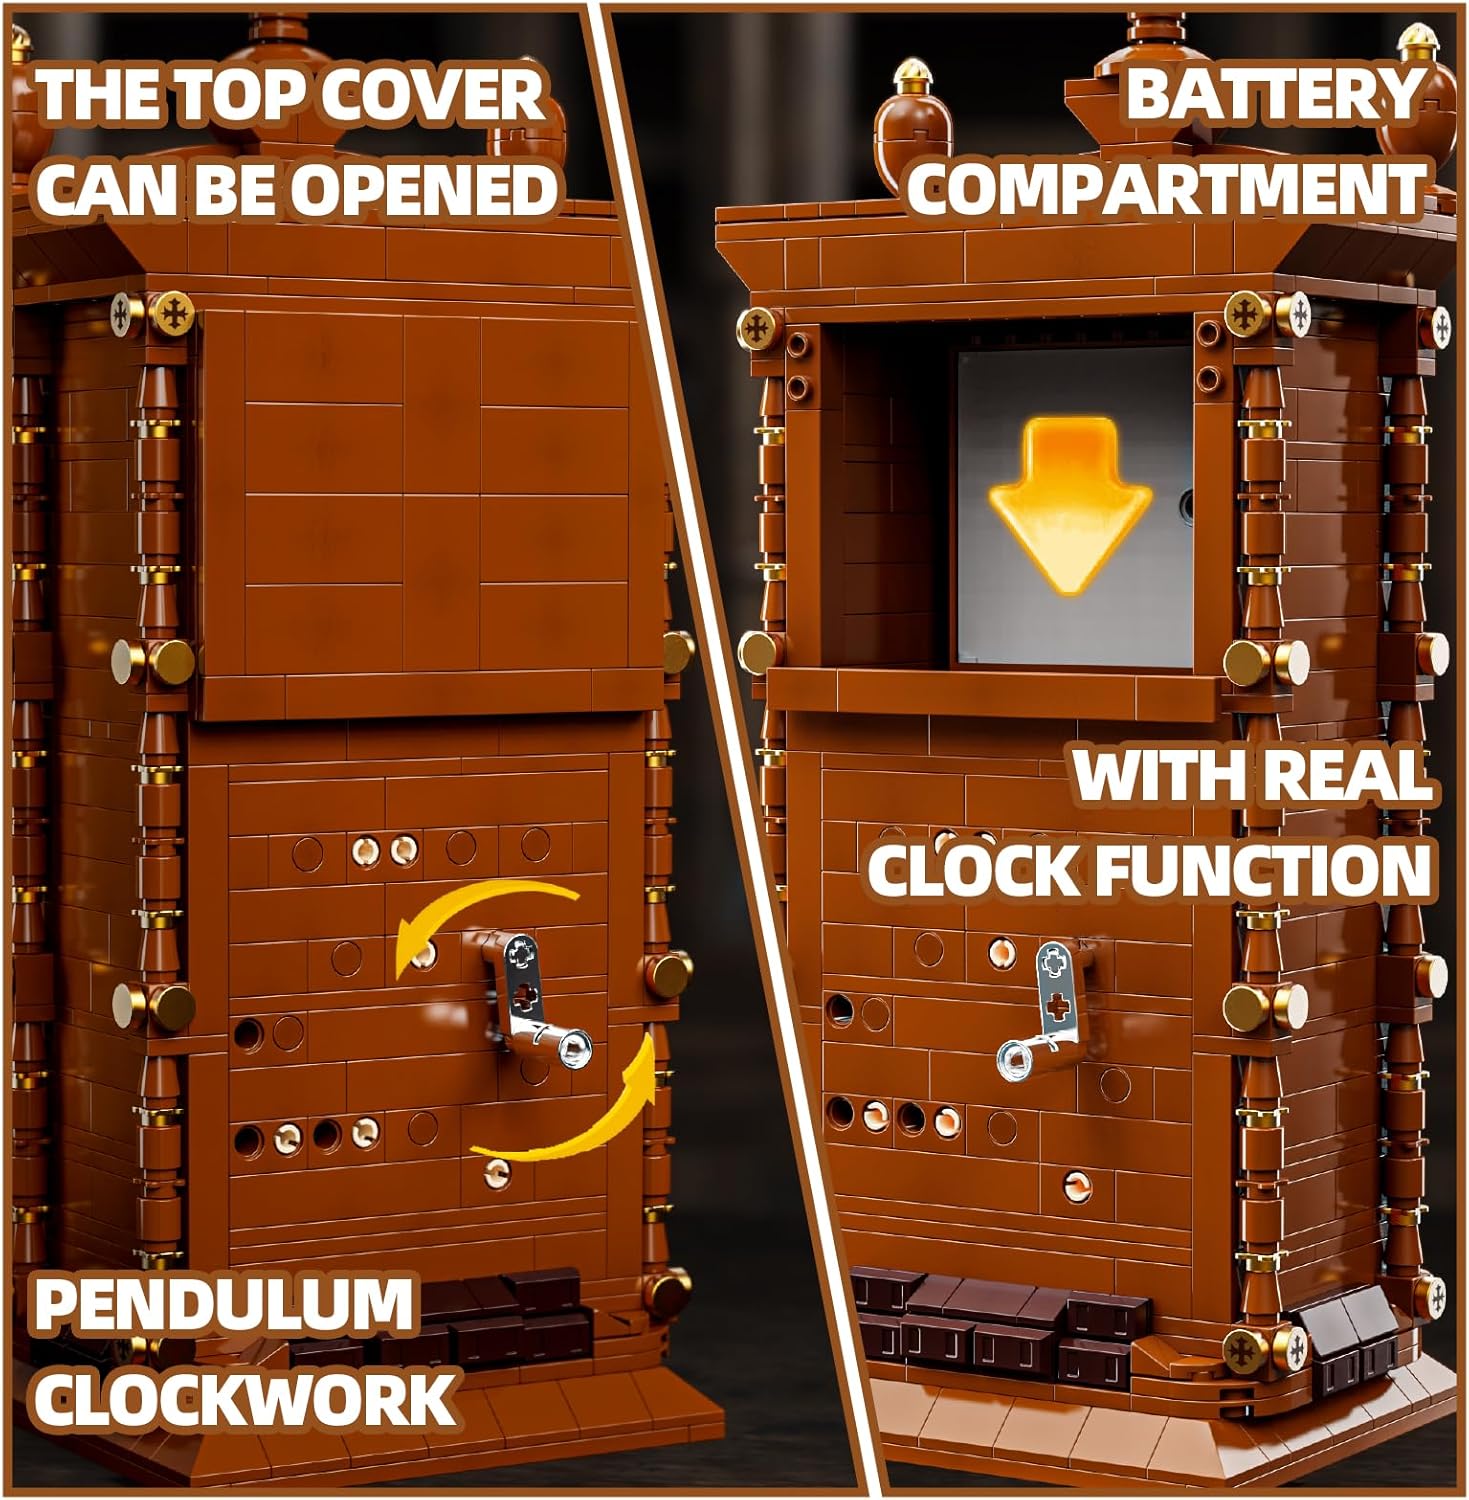
Image 5.1: The top cover can be opened to access the battery compartment. The image also shows the pendulum clockwork lever located on the back of the unit.
6. Operating Instructions
Your Retro Pendulum Clock is designed for both timekeeping and interactive display.
- Timekeeping: The clock will display the time continuously once batteries are installed and the time is set.
- Pendulum Swing: To activate the mechanical pendulum swing, locate the lever on the back of the clock. Turn this lever to initiate the pendulum's graceful movement. The pendulum is linked mechanically and operates independently of the timekeeping function.
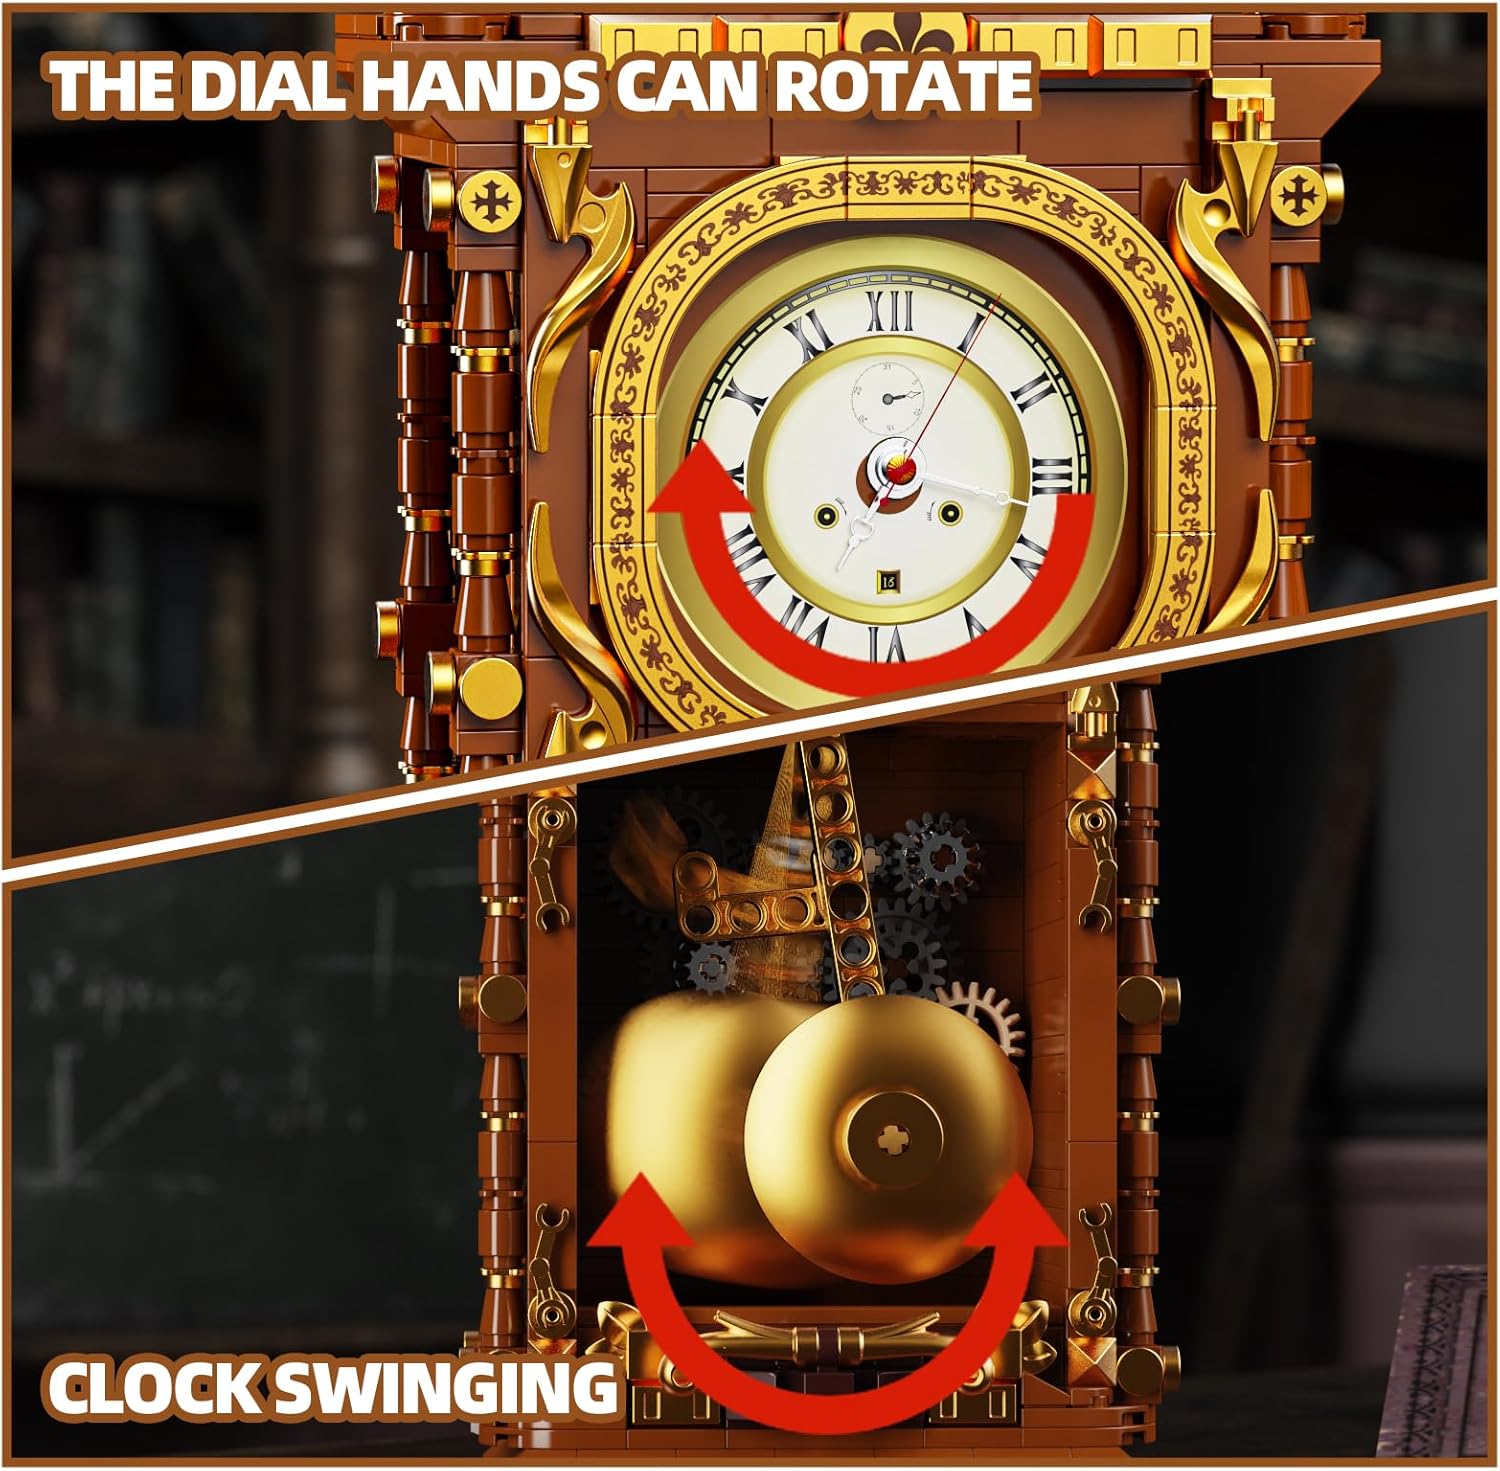
Image 6.1: The clock features rotating dial hands and a swinging pendulum, activated by the mechanism.
7. Maintenance
To ensure the longevity and proper function of your clock:
- Cleaning: Dust the clock regularly with a soft, dry cloth. Avoid using abrasive cleaners or solvents, as these may damage the plastic blocks or printed details.
- Battery Replacement: When the clock hands stop moving or the time becomes inaccurate, it is time to replace the batteries. Follow the steps in the 'Setup' section for battery installation.
- Storage: If storing the clock for an extended period, remove the batteries to prevent leakage.
8. Troubleshooting
If you encounter any issues with your Retro Pendulum Clock, please refer to the following common problems and solutions:
- Clock Not Keeping Time:
- Check if the batteries are correctly installed and have sufficient power. Replace if necessary.
- Ensure the clock mechanism was assembled correctly according to the manual.
- Pendulum Not Swinging:
- Verify that the back-mounted lever is being turned to activate the pendulum.
- Inspect the mechanical linkages of the pendulum for any obstructions or incorrect assembly.
- Missing Parts During Assembly:
- Double-check all packaging materials. If parts are genuinely missing, contact customer support as detailed in the 'Warranty and Support' section.
9. Specifications
| Model Number | T2019 |
| Product Dimensions | 5 x 1.5 x 11.5 inches (12.8 x 4.2 x 29.3 cm) |
| Item Weight | 1.68 pounds |
| Number of Pieces | 751+ |
| Recommended Age | 8 years and up |
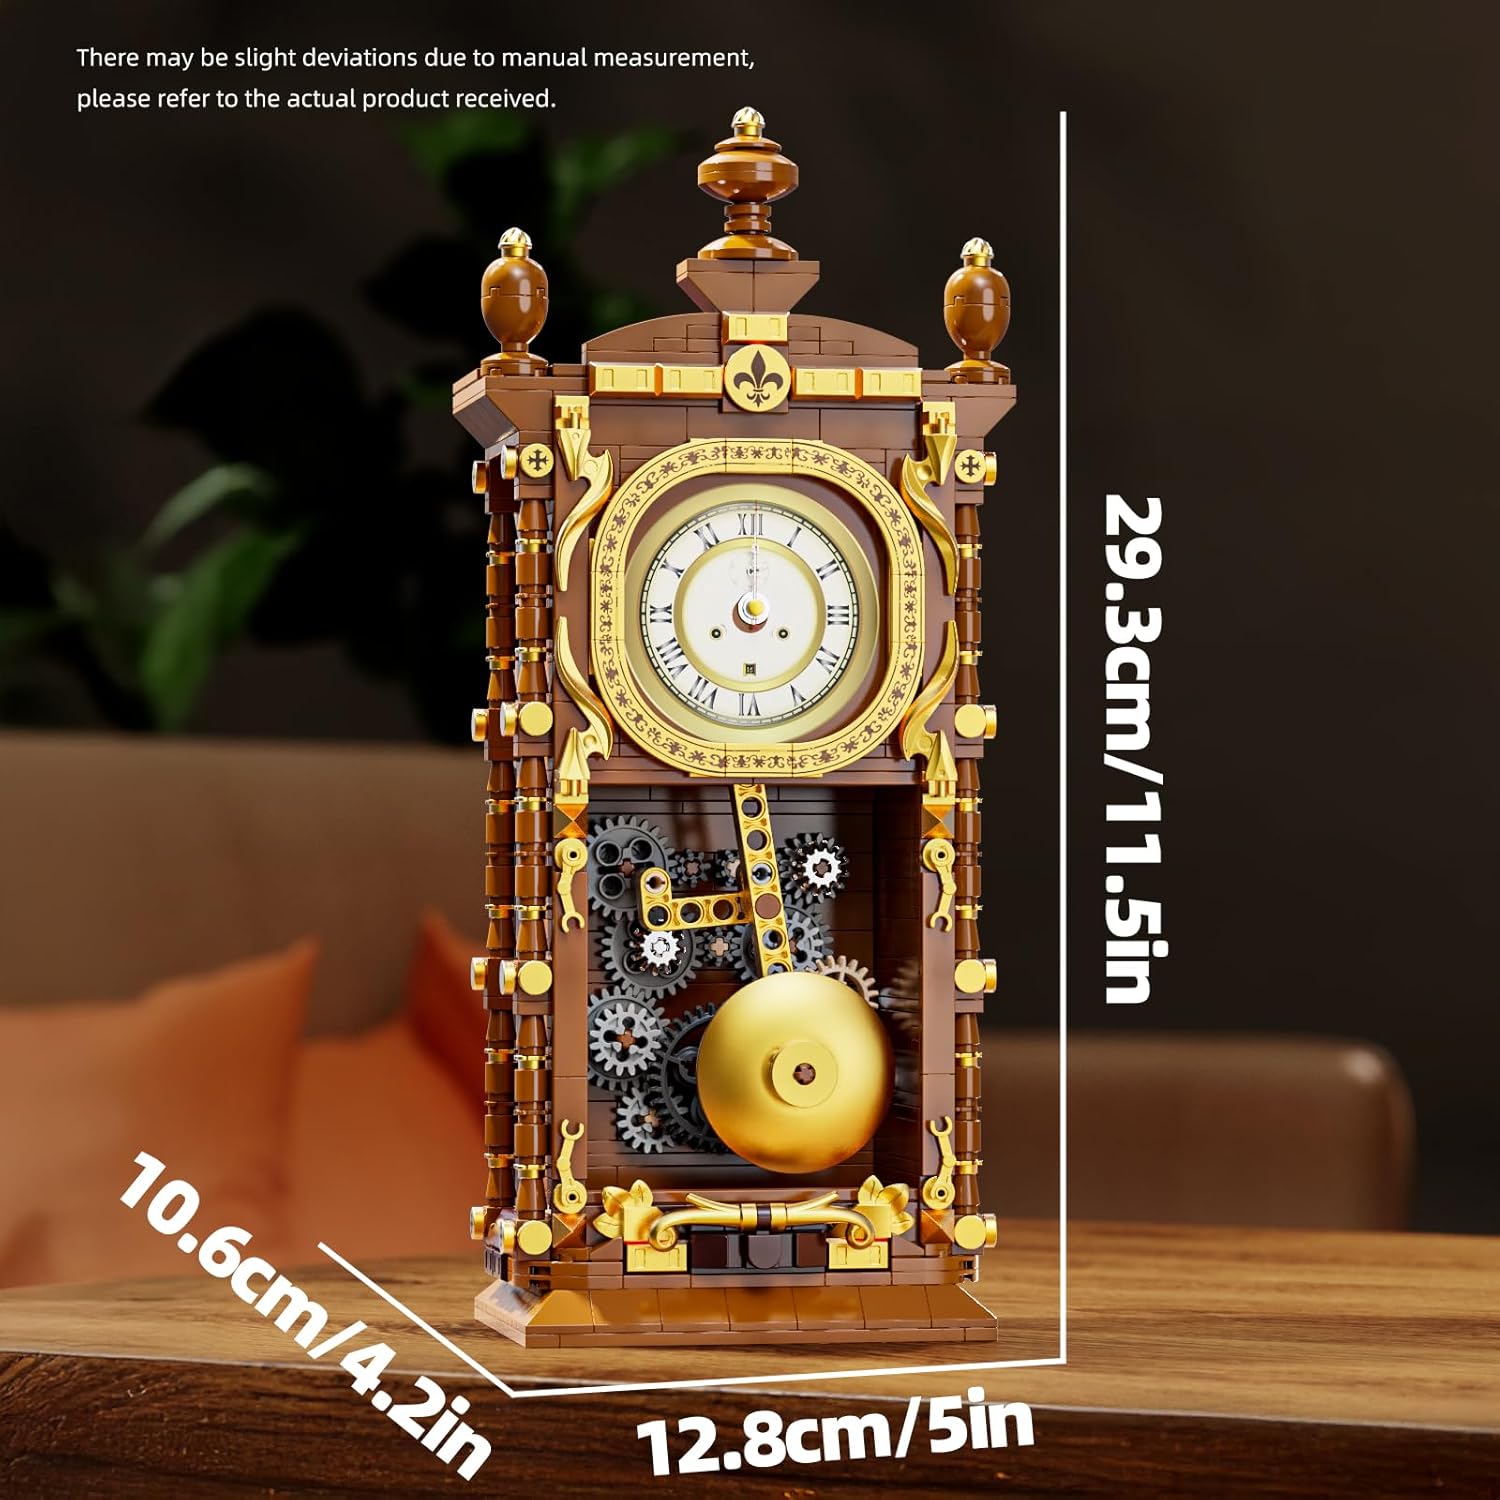
Image 9.1: Dimensions of the assembled clock, measuring approximately 5 inches wide, 4.2 inches deep, and 11.5 inches tall.
10. Warranty and Support
For any questions, concerns, missing parts, or problems encountered during the assembly or operation of your HJPLPXH Retro Pendulum Clock Building Block Set, please contact the manufacturer or seller directly. We are committed to providing a satisfactory solution for you.
Please retain your proof of purchase for any support inquiries.