
DD Audio PLE-112.1
DD Audio PLE-112.1 12" Subwoofer System User Manual
Model: PLE-112.1 | Brand: DD Audio
1. Introduction
Thank you for choosing the DD Audio PLE-112.1 powered subwoofer system. This unit is designed to provide powerful and controlled bass response for your audio system. It features a 12-inch subwoofer integrated into a precision-tuned, ported MDF enclosure, powered by a compact 400-watt RMS amplifier. This manual provides essential information for proper installation, operation, and maintenance of your PLE-112.1 subwoofer system.
2. Safety Information
Please read all instructions carefully before operating this product. Failure to do so may result in personal injury or damage to the unit or other equipment.
- Always disconnect the vehicle's battery negative terminal before making any electrical connections.
- Ensure all wiring is properly routed and secured to prevent damage or short circuits.
- Do not expose the unit to moisture or extreme temperatures.
- Avoid placing the unit in locations where it could obstruct vehicle operation or safety devices.
- Consult a professional installer if you are unsure about any installation procedures.
- Use appropriate gauge wiring for power and ground connections to prevent overheating.
3. Package Contents
Verify that all items are present in the package:
- DD Audio PLE-112.1 Powered Subwoofer Enclosure
- Remote Gain Control Unit
- Wiring Harness (for power, ground, remote, and RCA inputs)
- User Manual (this document)
4. Product Overview
The PLE-112.1 combines a high-performance subwoofer, a dedicated amplifier, and a tuned enclosure into a single, easy-to-install unit.

Figure 4.1: Front-right view of the DD Audio PLE-112.1 powered subwoofer system. This image shows the 12-inch subwoofer cone and the flared port on the left side of the enclosure, which is covered in black carpet with red DD Audio branding.

Figure 4.2: Rear view of the DD Audio PLE-112.1, highlighting the integrated amplifier panel. The panel includes terminals for power, ground, and remote turn-on, as well as controls for phase, low-pass filter (LPF), and gain. RCA input jacks are also visible.
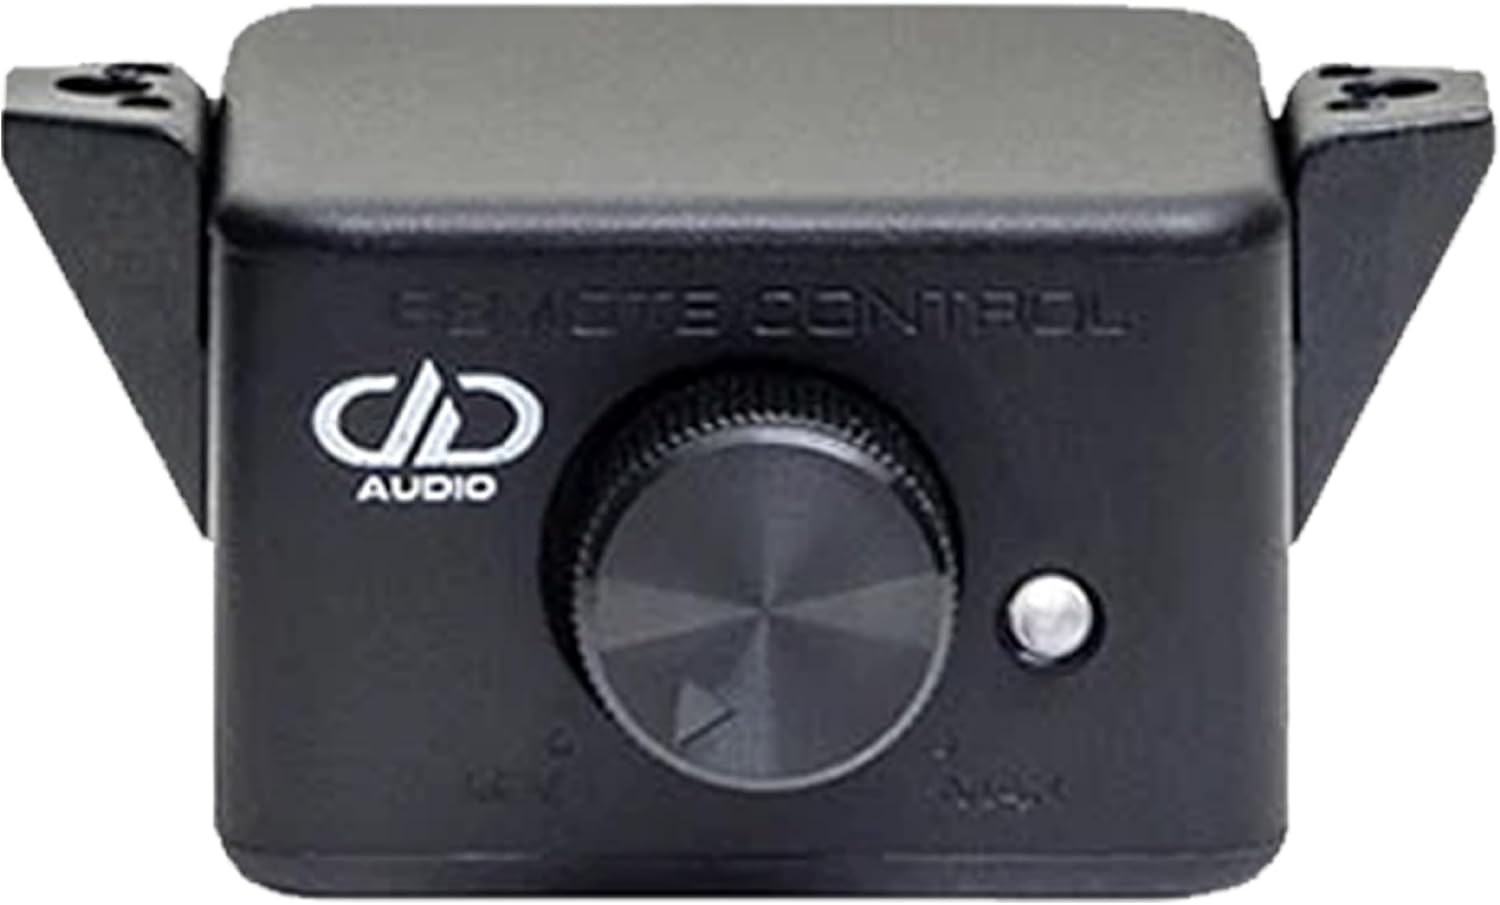
Figure 4.3: The remote gain control unit for the PLE-112.1. This compact device features a rotary knob for adjusting the subwoofer's output level and a small LED indicator.
Key Components:
- 12-inch Subwoofer: Features a high-strength, high-excursion motor and a rigid, non-pressed pulp cone for accurate bass reproduction.
- Integrated Amplifier: A 400-watt RMS monoblock amplifier with discrete outputs and a heat sink for reliable performance.
- Ported Enclosure: Constructed from 18mm MDF with a flared port, optimized for deep bass.
- Remote Gain Control: Allows convenient adjustment of the subwoofer's output level from the driver's seat.
5. Setup and Installation
Proper installation is crucial for optimal performance and safety. If you are not comfortable with electrical wiring, please seek professional installation.
5.1 Placement
The PLE-112.1 is designed for vehicle applications. Consider the following for placement:
- Secure Mounting: Ensure the enclosure is securely mounted to prevent movement during driving, which could cause damage or injury.
- Trunk/Cargo Area: Typically, the trunk or cargo area of a vehicle provides the best acoustic environment for a subwoofer.
- Airflow: Ensure adequate airflow around the amplifier's heat sink to prevent overheating.
5.2 Wiring Connections
Refer to Figure 4.2 for the amplifier panel layout. Make the following connections:
- Ground (GND): Connect the ground terminal to a clean, unpainted metal surface of the vehicle chassis. Ensure a solid, low-resistance connection. Use a wire of the same gauge as the power wire.
- Power (+12V): Connect the +12V terminal directly to the positive terminal of the vehicle's battery. Install an appropriate fuse (not included, typically 40-60A) within 18 inches (45 cm) of the battery.
- Remote (REM): Connect the REM terminal to the remote turn-on output of your head unit. This wire signals the amplifier to turn on and off with your stereo.
- RCA Input: Connect the RCA input jacks (L and R) from your head unit's subwoofer or full-range pre-out. If your head unit only has one subwoofer output, use a Y-adapter.
- Remote Gain Control: Connect the remote gain control unit (Figure 4.3) to the dedicated port on the amplifier panel using the provided cable. Mount the remote in an accessible location for easy adjustment.
Important: Double-check all connections before reconnecting the vehicle's battery. Incorrect wiring can cause severe damage to the amplifier or vehicle electrical system.
6. Operating Instructions
Once installed, adjust the amplifier settings for optimal sound performance.
6.1 Amplifier Controls (Refer to Figure 4.2)
- GAIN: This control matches the input sensitivity of the amplifier to the output level of your head unit. Start with the gain set to minimum (fully counter-clockwise). Play a familiar track with strong bass at about 75% of your head unit's maximum volume. Slowly increase the gain until you hear distortion, then back it off slightly.
- LPF (Low-Pass Filter): This control sets the upper frequency limit for the subwoofer. Frequencies above this setting will be filtered out. Adjust the LPF to blend smoothly with your main speakers. A common starting point is between 80Hz and 100Hz. Experiment to find the best integration.
- PHASE: This switch (0°/180°) helps to align the subwoofer's output with your main speakers. Listen to a bass-heavy track and switch between 0° and 180°. Choose the setting that provides the most impactful and cohesive bass.
6.2 Remote Gain Control
The remote gain control allows you to adjust the subwoofer's output level conveniently from your listening position without affecting the amplifier's main gain setting. This is useful for making quick adjustments based on music genre or personal preference.
7. Maintenance
The DD Audio PLE-112.1 requires minimal maintenance to ensure long-term performance.
- Cleaning: Use a soft, dry cloth to wipe down the enclosure and amplifier. Do not use harsh chemicals or abrasive cleaners.
- Avoid Moisture: Keep the unit dry. Exposure to water or excessive humidity can damage internal components.
- Inspect Wiring: Periodically check all wiring connections for tightness and signs of wear or corrosion.
8. Troubleshooting
If you experience issues with your PLE-112.1, refer to the following common problems and solutions:
| Problem | Possible Cause | Solution |
|---|---|---|
| No Power / Amplifier LED Off |
|
|
| No Sound Output |
|
|
| Distorted Sound |
|
|
| Weak Bass Output |
|
|
9. Specifications
Technical specifications for the DD Audio PLE-112.1 powered subwoofer system:
| Feature | Specification |
|---|---|
| Speaker Size | 12 inches |
| RMS Power Output | 400 Watts |
| Impedance | 4 ohm |
| Operating Voltage | 9 - 16 Volts DC |
| Max Current Draw | 35 Amps |
| RCA Input Voltage Sensitivity | 100mV - 6V |
| Signal-to-Noise Ratio (S/N) | ≥ 86 dB |
| Damping Factor | ≥ 200 |
| Total Harmonic Distortion (THD) | <1% |
| Frequency Response | 20 - 150 Hz |
| Low-Pass Filter Range | 30 - 150 Hz |
| Enclosure Construction | 18mm MDF, Ported |
| Product Dimensions (D x W x H) | 15"D x 15"W x 24"H |
| Item Weight | 24 Pounds |
10. Warranty and Support
DD Audio products are designed for durability and performance. For specific warranty information, please refer to the warranty card included with your product or visit the official DD Audio website. For technical support or service inquiries, please contact your authorized DD Audio dealer or DD Audio customer service.
Keep your purchase receipt as proof of purchase for warranty claims.
Ask a question about this manual
Ask about setup, troubleshooting, compatibility, parts, safety, or missing instructions. Manuals+ will review the question and use this page’s manual context to help answer it.