
1. Introduction
This manual provides comprehensive instructions for the safe and efficient operation of your OPOQO Mini Projector BL158. Please read this manual thoroughly before using the projector and retain it for future reference.
The OPOQO Mini Projector BL158 is designed to deliver a high-quality viewing experience with features such as electric focus, auto keystone correction, dual-band WiFi, Bluetooth 5.2 connectivity, and Full HD 1080P support.
2. Safety Information
- Do not look directly into the projector lens when the lamp is on.
- Ensure proper ventilation around the projector to prevent overheating.
- Keep the projector away from water or other liquids.
- Use only the power adapter supplied with the projector.
- Avoid placing the projector on unstable surfaces.
- Do not attempt to disassemble or repair the projector yourself. Contact customer support for assistance.
- Keep out of reach of children.
3. Package Contents
Verify that all items are present in the package:
- Projector
- Remote Control (AAA batteries not included)
- HDMI Cable
- Power Cord
- User Manual
4. Product Overview
The OPOQO Mini Projector BL158 is a compact and portable device designed for various entertainment and presentation needs. It features a robust design with integrated controls and multiple connectivity options.
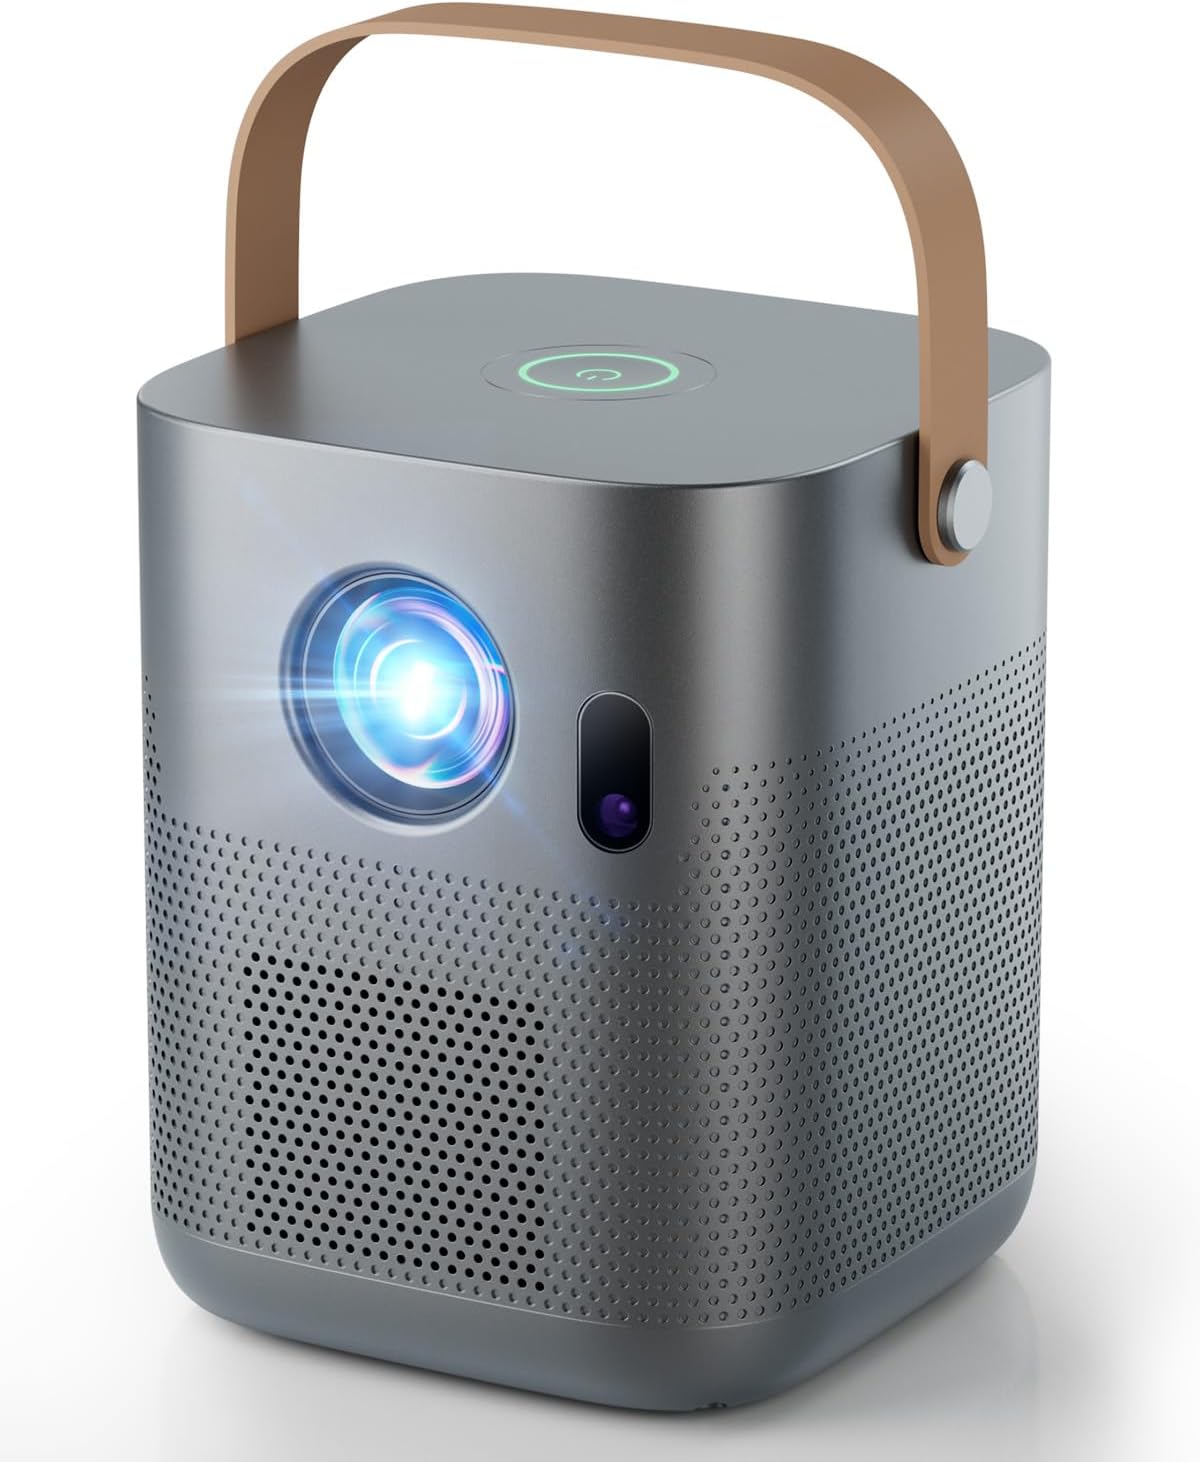
Image: Front view of the OPOQO Mini Projector BL158, showing the lens and speaker grilles.
Key Features:
- Electric Focus: Adjust focus with a single button press for sharp images.
- Auto Keystone Correction: Automatically corrects distorted images for a perfectly aligned display.
- Dual-Band WiFi (2.4GHz + 5GHz): Provides stable and fast wireless connectivity.
- Bluetooth 5.2: For connecting external audio devices.
- Full HD 1080P Support: Delivers clear and vibrant visuals with 600 ANSI Lumens and a 15000:1 contrast ratio.
- Integrated HIFI Speaker: Offers immersive sound quality.
- Compact and Portable: Lightweight design (2.99 pounds) for easy transport.
- Large Display: Supports a maximum display size of 200 inches.

Image: A split image comparing the clarity of the OPOQO projector's 600 ANSI lumens, 1080P support, and 15000:1 contrast ratio against another projector, showing a sharp tiger versus a pixelated one.

Image: The compact OPOQO projector with dimensions 5.04 inches (width), 5.44 inches (depth), and 6.22 inches (height), weighing 1.43 lbs, placed next to a backpack, illustrating its portability.

Image: A living room setup showing the OPOQO projector projecting a large, vibrant image of a landscape onto a wall, demonstrating a home theater experience with a maximum 200-inch screen.
5. Setup
5.1 Placement
Place the projector on a stable, flat surface. Ensure there is adequate space around the projector for ventilation. The projector can be placed on a table, mounted on a tripod, or ceiling-mounted depending on your setup requirements.

Image: Illustration showing various installation methods: tripod mount, table placement, and ceiling mount, with the projector automatically correcting the image for each setup.
5.2 Power Connection
- Connect the power cord to the projector's power input port.
- Plug the other end of the power cord into a power outlet.
- Press the power button on the projector or remote control to turn it on.
5.3 Focus and Keystone Adjustment
The projector features electric focus and automatic keystone correction for optimal image clarity and alignment.
- Electric Focus: Press and hold the focus button on the remote control until the image appears sharp and clear.
- Auto Keystone Correction: The projector will automatically adjust the image to correct for trapezoidal distortion. No manual adjustment is typically required.

Image: A comparison illustrating the convenience of electric focus adjustment via remote control versus the traditional method of manual focus adjustment.

Image: A projected image of a hummingbird, demonstrating how auto keystone correction automatically adjusts the image boundaries to form a perfect rectangular display.
6. Operating Instructions
6.1 Connecting Devices
The projector supports multiple connectivity options for various multimedia devices:
- HDMI: Connect laptops, PCs, TV sticks, TV boxes, or gaming consoles (e.g., PS5) using an HDMI cable.
- USB: Connect USB drives for media playback or compatible mobile devices.
- AV: Use the AV port for older devices.
- 3.5mm Jack: Connect external headphones or speakers.

Image: A diagram illustrating the various input ports (HDMI, USB, Audio) and compatible devices such as laptops, PCs, TV sticks, gaming consoles, phones, DVD players, headsets, and earphones.
6.2 Wireless Connectivity (WiFi)
The projector supports 2.4GHz and 5GHz WiFi frequencies for stable and fast wireless connectivity, enabling seamless streaming and screen mirroring.
- Navigate to the WiFi settings on the projector's main menu.
- Select your desired WiFi network (2.4GHz or 5GHz).
- Enter the password if prompted.
- Once connected, you can proceed with screen mirroring features.

Image: A projector displaying a car on a screen, with indicators for 2.4G and 5G WiFi signal strength and compatibility icons for Windows, iOS, and Android devices, demonstrating dual-band WiFi connectivity.
6.3 Screen Mirroring (iOS/Android)
To mirror your smartphone or tablet screen to the projector:
- Ensure both your mobile device and the projector are connected to the same WiFi network.
- On the projector, select the appropriate screen mirroring option (e.g., "iOS Cast" or "Android Cast") from the input menu.
- On your mobile device, enable screen mirroring/casting (often found in quick settings or display settings) and select the projector from the list of available devices.
6.4 Bluetooth Connection
Connect external Bluetooth audio devices such as speakers or headphones for an enhanced audio experience.
- Go to the Bluetooth settings on the projector's menu.
- Enable Bluetooth on your external audio device and set it to pairing mode.
- Select your device from the list displayed on the projector screen to establish a connection.
Note: The projector's Bluetooth function is designed for audio output to external speakers or headphones and does not support pairing with mobile phones for data transfer or screen mirroring.

Image: A family watching a projected cartoon, with the projector wirelessly connected to various Bluetooth audio devices like headphones and speakers, illustrating the Bluetooth 5.2 connection for immersive sound.
6.5 Adjusting Display Settings
- Zoom Function: The projector supports a digital zoom range from 100% down to 50%. Use the dedicated zoom controls on the remote control to adjust the screen size without physically moving the projector.
- Picture Modes: Access the projector's on-screen menu to adjust various picture settings such as brightness, contrast, color saturation, and sharpness to optimize the image for your viewing environment.
7. Maintenance
- Cleaning the Lens: Use a soft, lint-free cloth specifically designed for optical lenses. Gently wipe the lens surface. Avoid using abrasive cleaners, solvents, or harsh chemicals, as these can damage the lens coating.
- Cleaning the Casing: Wipe the projector's exterior with a soft, dry cloth. For stubborn marks, a slightly damp cloth can be used, followed immediately by a dry cloth to remove any moisture.
- Ventilation: Regularly check that the ventilation openings on the projector are clear of dust and debris. Proper airflow is crucial to prevent overheating and ensure the longevity of the device. Do not block the vents during operation.
- Storage: When the projector is not in use for extended periods, store it in a cool, dry place, protected from dust, extreme temperatures, and direct sunlight. It is recommended to use the original packaging or a protective case.
8. Troubleshooting
| Problem | Possible Cause | Solution |
|---|---|---|
| No image displayed | Power not connected; Incorrect input source selected; HDMI/USB cable loose or faulty. | Verify the power cord is securely connected and the projector is powered on. Select the correct input source (HDMI, USB, etc.) from the projector's menu. Ensure all connection cables are firmly inserted and undamaged. |
| Image is blurry | Focus not adjusted correctly. | Use the electric focus button on the remote control to achieve a sharp image. Adjust until the text and images are clear. |
| Image is distorted (trapezoid shape) | Projector not aligned perpendicular to the screen. | The projector features auto keystone correction, which should automatically correct trapezoidal distortion. If distortion persists, ensure the projector is placed on a level surface and as directly in front of the screen as possible. |
| No sound or low volume | Projector volume too low or muted; External audio device not connected or improperly configured. | Increase the projector's volume using the remote control. Check if the projector is muted. If using external audio, ensure the Bluetooth device is paired correctly or the 3.5mm jack cable is fully inserted. |
| WiFi connection unstable or unable to connect | Signal interference; Projector too far from router; Incorrect password. | Ensure the projector is within effective range of your WiFi router. Try connecting to the 5GHz band if available for better stability. Double-check the WiFi password. Restart the projector and router if necessary. |
| Remote control not working | Batteries dead or incorrectly inserted; Obstruction between remote and projector. | Replace the AAA batteries in the remote control, ensuring correct polarity. Remove any objects obstructing the line of sight between the remote and the projector's IR receiver. |
| Screen mirroring not working | Devices not on the same WiFi network; Incorrect mirroring protocol selected; Device compatibility issues. | Confirm both your mobile device and the projector are connected to the same WiFi network. Ensure you have selected the correct mirroring option (iOS Cast/Android Cast) on the projector. Some streaming apps may restrict mirroring due to copyright protection. |
9. Specifications
| Feature | Detail |
|---|---|
| Brand | OPOQO |
| Model Number | BL158 |
| Display Resolution | Native 1024 x 720 (Supports Full HD 1080P) |
| Brightness | 600 ANSI Lumens |
| Contrast Ratio | 15000:1 |
| Connectivity Technology | 3.5mm Jack, Bluetooth 5.2, HDMI, USB, Dual-Band Wi-Fi (2.4G+5G) |
| Special Features | Electric Focus, Auto Keystone Correction, 100%-50% Zoom |
| Maximum Display Size | 200 inches |
| Item Weight | 2.99 pounds |
| Package Dimensions | 8.82 x 7.52 x 6.61 inches |
| Recommended Uses | Business, Education, Gaming, Home Cinema |
10. Warranty and Support
OPOQO is committed to customer satisfaction. Your projector comes with a three-year product replacement warranty and lifetime after-sales service.
For any questions, technical assistance, or warranty claims, please contact our after-sales support team via email. We aim to provide a quick reply within 24 hours, 7 days a week.
Please refer to the contact information provided on the product packaging or our official website for the support email address.
