
1. Introduction
Thank you for choosing the Staaricc Super Bright Rechargeable LED Headlamp. This manual provides essential information for the safe and efficient operation, maintenance, and troubleshooting of your new headlamp. Please read this manual thoroughly before use and retain it for future reference.

The Staaricc Super Bright Rechargeable LED Headlamp, showcasing its adjustable strap, main light unit, and included accessories.
2. Package Contents
Verify that all items listed below are included in your package:
- 1x Staaricc Rechargeable Headlamp
- 1x USB-C Charging Cable
- 4x Hard Hat Clips
3. Safety Instructions
- Do not look directly into the LED light when it is on, as this may cause temporary vision impairment.
- Keep the headlamp away from children.
- Do not attempt to disassemble or modify the headlamp. This will void the warranty and may cause damage or injury.
- Use only the provided USB-C cable for charging.
- Avoid exposing the headlamp to extreme temperatures or direct sunlight for prolonged periods.
- Although waterproof, avoid prolonged submersion in water.
4. Setup
4.1 Initial Charging
Before first use, fully charge the headlamp. Connect the included USB-C charging cable to the headlamp's charging port and plug the other end into a USB power source (e.g., wall adapter, power bank, computer USB port). The power indicator light will reflect the charging status. Charge promptly when the red light flashes.
The headlamp is rechargeable using the included USB-C cable. It can be connected to various USB power sources such as power banks, laptops, or wall adapters for efficient charging.
4.2 Adjusting the Headband
The elastic headband is adjustable to fit various head sizes. Slide the buckles on the strap to achieve a comfortable and secure fit on your head or over a hat.
4.3 Attaching Hard Hat Clips
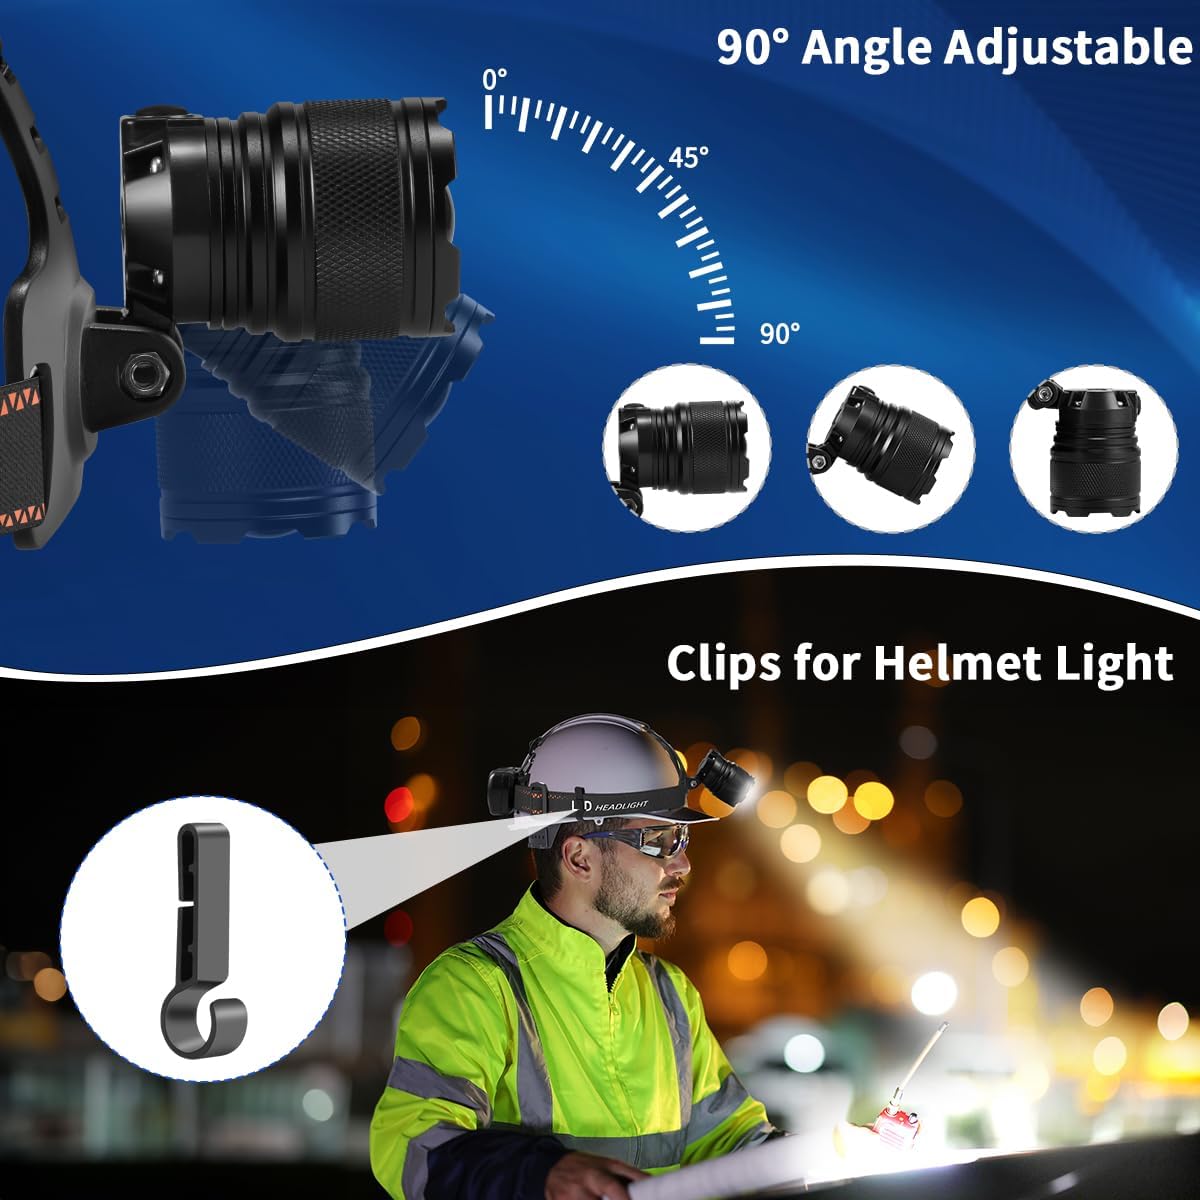
For use with a hard hat, utilize the four included clips. Securely attach the clips to the edges of your hard hat, then thread the headlamp's headband through the clips to keep it firmly in place.

The headlamp's light unit can be tilted up to 90 degrees to direct illumination precisely where needed. Also shown are the four included clips designed to securely attach the headlamp to a hard hat.
5. Operating Instructions
5.1 Power On/Off and Mode Selection
Press the power button located on the top of the headlamp to cycle through the four working modes:
- High Mode: Provides maximum brightness.
- Low Mode: Offers reduced brightness for extended battery life.
- Strobe Mode: Flashing light for signaling or attracting attention.
- SOS Mode: International Morse code signal for emergencies.
To turn off the headlamp, press the power button after the headlamp has been on for 10 seconds in any mode. This allows for direct power off without cycling through all modes.
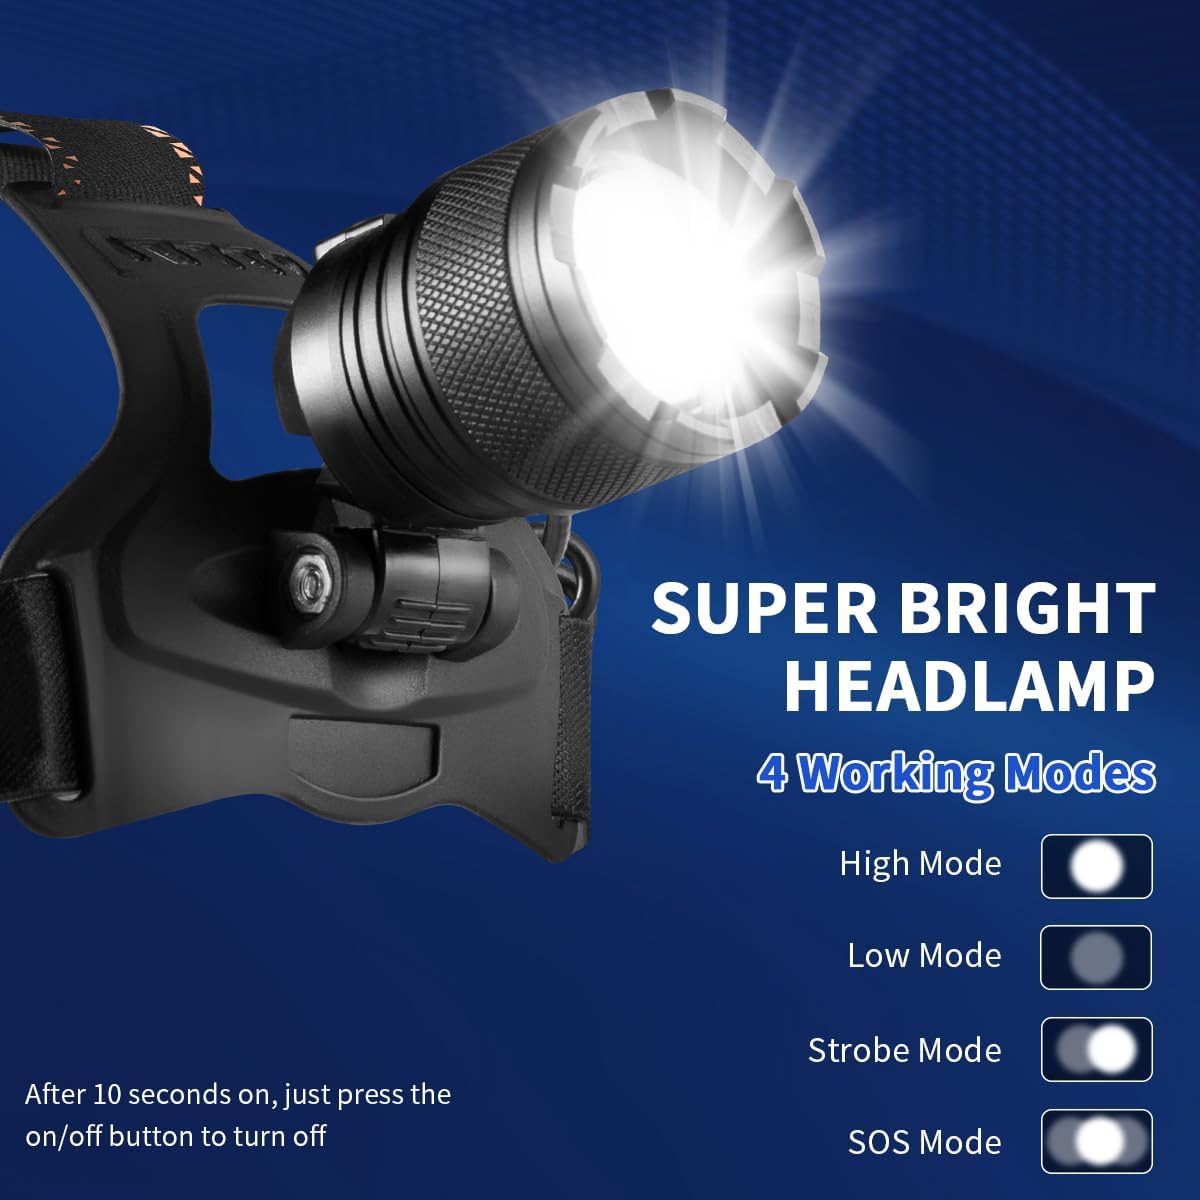
The headlamp offers four distinct lighting modes: High for maximum brightness, Low for extended battery life, Strobe for signaling, and SOS for emergency situations. The device can be turned off directly after 10 seconds in any mode by pressing the power button once.
5.2 Focus Adjustment (Floodlight/Spotlight)
The headlamp features an adjustable focus mechanism. To switch between floodlight and spotlight:
- Floodlight (Zoom In): Twist the bezel of the light unit inwards to widen the beam, illuminating a large area.
- Spotlight (Zoom Out): Twist the bezel of the light unit outwards to narrow the beam, providing concentrated light for long-distance visibility.

This image illustrates the headlamp's adjustable focus feature, demonstrating how zooming in creates a wide floodlight beam and zooming out creates a concentrated spotlight for long-distance illumination.
5.3 Angle Adjustment
The headlamp's light unit can be tilted up to 90 degrees. This allows you to direct the light beam precisely where it is needed, optimizing visibility for various tasks and environments.
6. Maintenance
- Cleaning: Wipe the headlamp with a soft, damp cloth. Do not use abrasive cleaners or solvents.
- Storage: Store the headlamp in a cool, dry place when not in use. If storing for an extended period, ensure the battery is partially charged (around 50%) and recharge every 3-6 months to maintain battery health.
- Battery Care: Avoid fully draining the battery frequently. Recharge the headlamp when the power indicator shows low battery.
7. Troubleshooting
| Problem | Possible Cause | Solution |
|---|---|---|
| Headlamp does not turn on. | Battery is depleted. | Charge the headlamp fully using the USB-C cable. |
| Light is dim or flickers. | Low battery. | Recharge the headlamp. |
| Headlamp not charging. | Faulty cable or power source. | Try a different USB-C cable or power adapter. Ensure the cable is securely connected. |
| Focus adjustment is stiff. | Dirt or debris in mechanism. | Gently clean the focus mechanism. Avoid forcing it. |
8. Specifications
| Feature | Detail |
|---|---|
| Model Number | Headlamp Rechargeable-1 |
| Light Source Type | LED |
| Brightness | Up to 1000 Lumens |
| Power Source | Battery Powered (Rechargeable Lithium Ion) |
| Special Features | Adjustable Focus, Adjustable Light Modes, High Power, Rechargeable, Weatherproof |
| Working Modes | High, Low, Strobe, SOS |
| Angle Adjustment | 90 Degrees |
| Material | Aluminum |
| Water Resistance Level | Waterproof |
| Product Dimensions | 3.9"D x 3.75"W x 4.85"H |
| Item Weight | 11.3 ounces |
| Included Components | Headlamp, USB-C Charging Cable, Hard Hat Clips |
9. Warranty and Support
Staaricc products are designed for quality and reliability. For warranty information, technical support, or any questions regarding your headlamp, please refer to the contact information provided with your purchase or visit the official Staaricc website. Please have your model number (Headlamp Rechargeable-1) available when contacting support.

