
Introduction
Thank you for choosing the LIBRATON Pneumatic Rivet Gun. This high-performance hydraulic air riveter is designed for efficient and reliable riveting in various applications, including automotive repair, HVAC, and general metalworking. This manual provides essential information for safe operation, setup, maintenance, and troubleshooting to ensure optimal performance and longevity of your tool.
Safety Information
Always observe basic safety precautions when using power tools to reduce the risk of personal injury. Read and understand all instructions before operating this tool.
- Wear Eye Protection: Always wear ANSI-approved safety goggles or safety glasses with side shields when operating this tool.
- Wear Hearing Protection: Prolonged exposure to noise from pneumatic tools can cause hearing damage.
- Wear Hand Protection: Use appropriate gloves to protect hands from injury.
- Maintain a Clean Work Area: Cluttered areas invite accidents.
- Keep Children Away: Do not let children or untrained persons operate this tool.
- Dress Properly: Do not wear loose clothing or jewelry. Contain long hair.
- Stay Alert: Watch what you are doing, use common sense. Do not operate the tool when tired.
- Check for Damaged Parts: Before use, check for any damaged parts and ensure they are replaced.
- Secure Workpiece: Always secure the workpiece to prevent movement during riveting.
- Air Pressure: Ensure the air pressure does not exceed the maximum recommended pressure (0.5-0.7 MPa / 5-7 bar).
- Disconnect Air Supply: Always disconnect the air supply before changing nozzles, performing maintenance, or when the tool is not in use.
- Use Correct Nozzle: Ensure the correct nozzle size is selected for the rivet being used.
Package Contents
Verify that all items listed below are included in your package:
- 1 x LIBRATON Pneumatic Rivet Gun
- 4 x Nozzles (2.4 mm / 3/32", 3.2 mm / 1/8", 4.0 mm / 5/32", 4.8 mm / 3/16")
- 200 x Aluminum Rivets (50 of each size)
- 4 x Air Hose Adapters
- 1 x Rod Collector
- 1 x Oil Syringe
- 2 x Wrenches
- 1 x L-Wrench
- 1 x Flat Screwdriver
- 1 x User Manual (this document)
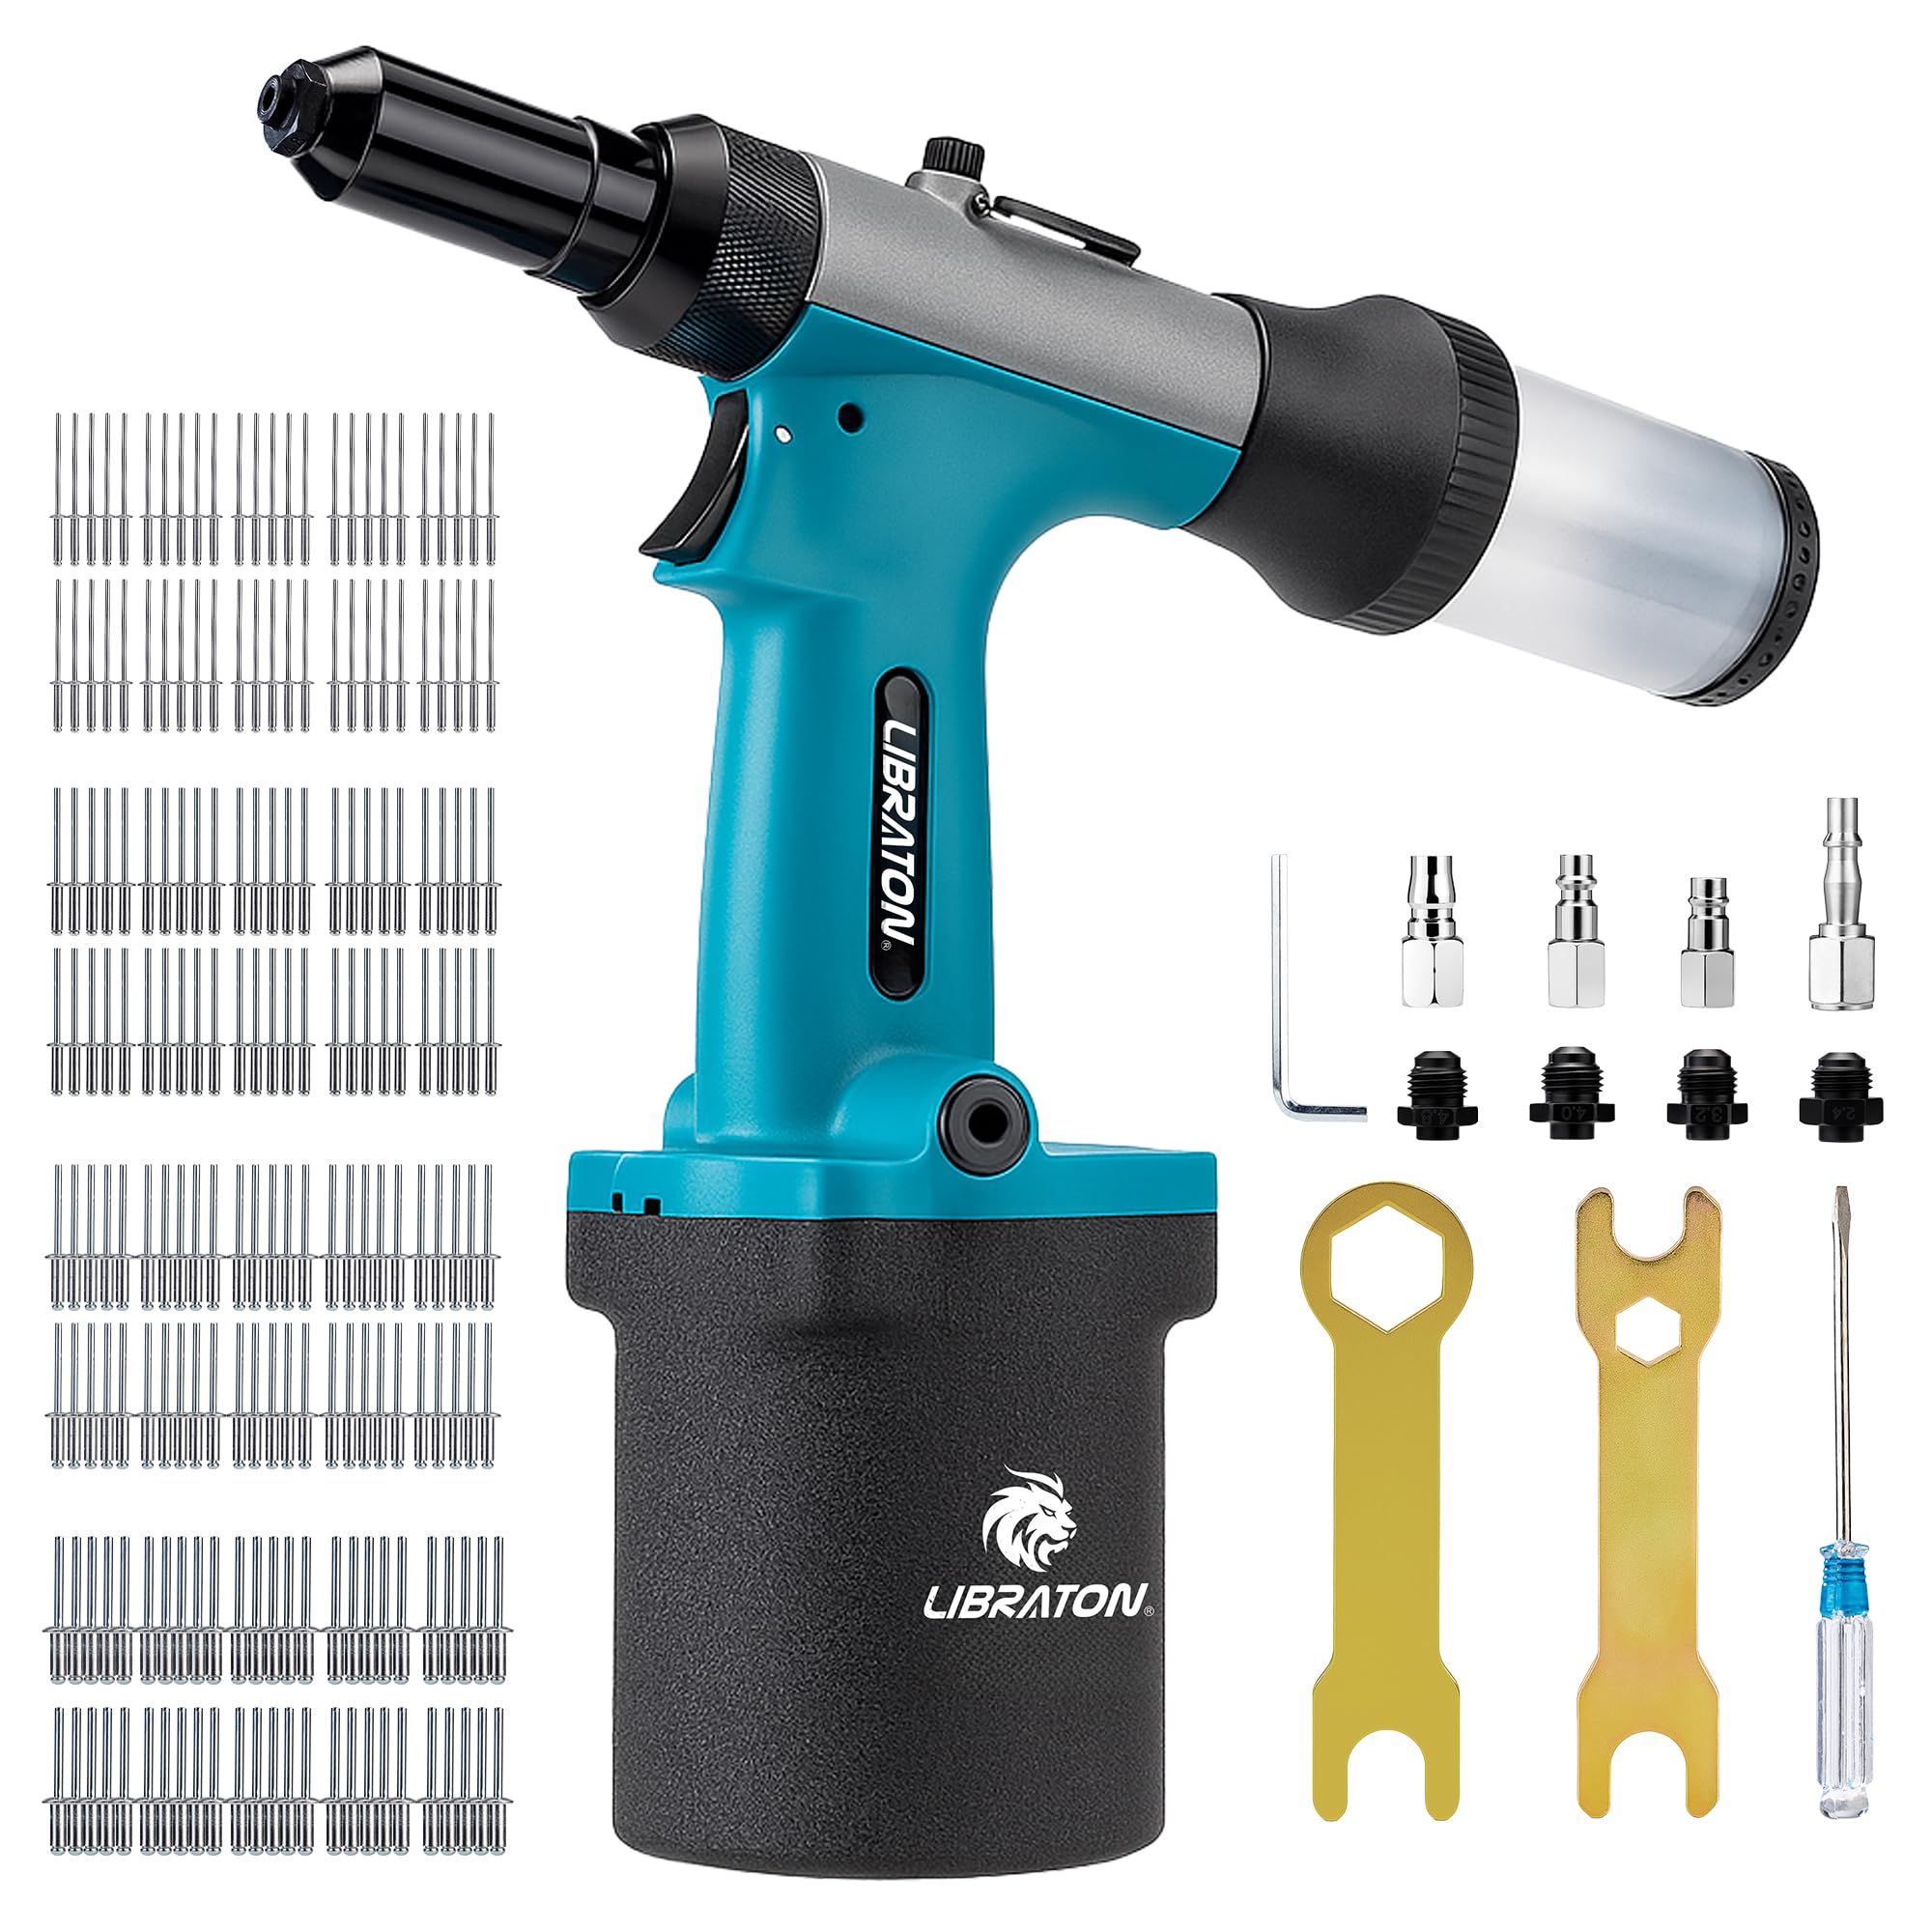
Image: The LIBRATON Pneumatic Rivet Gun shown with all its components and accessories, including various rivet sizes, nozzles, air hose fittings, wrenches, oil syringe, and the rod collection tube.
Specifications
| Model Number | 919015 |
| Weight | 1.78 kg (3.92 lb) |
| Working Pressure | 0.5 - 0.7 MPa (5 - 7 bar) |
| Air Consumption | 4 CFM |
| Tensile Force | 1000-1500 KGF (2205-3307 lbs) |
| Stroke | 19 mm |
| Noise Level | < 75 dB (A) |
| Nozzle Sizes Included | 2.4 mm (3/32"), 3.2 mm (1/8"), 4.0 mm (5/32"), 4.8 mm (3/16") |
| Compatible Rivet Materials | Aluminum, Steel |
| Dimensions (Packaging) | 32.29 x 23.8 x 9.5 cm |

Image: A visual representation of the rivet gun's key dimensions and technical specifications, including stroke, weight, air consumption, working pressure, tensile force, and noise level.

Image: A chart indicating compatibility of different nosepiece diameters (2.4mm, 3.2mm, 4.0mm, 4.8mm) with aluminum and steel rivet materials.
Setup
Before operating the pneumatic rivet gun, follow these steps for proper setup:
- Select and Install Nozzle:
Choose the appropriate nozzle size (2.4mm, 3.2mm, 4.0mm, or 4.8mm) that matches the diameter of the rivets you intend to use. Use the provided wrenches to securely attach the selected nozzle to the tool's head. Ensure it is tightened properly to prevent air leaks and ensure safe operation.

Image: Step 1 of the setup process, showing how to replace the nozzle using the provided wrenches.
- Connect Air Hose:
Select the correct air hose fitting from the four adapters provided and connect it to the air inlet of the rivet gun. Then, connect your air compressor hose to this fitting. Ensure all connections are secure to prevent air leakage. The swivel connector on the air inlet helps prevent the hose from tangling.
Image: Step 2 of the setup process, illustrating the selection of the correct air hose fitting and its connection to the air hose.
- Adjust Air Ring (Silencer):
Locate the air ring (silencer) at the base of the tool. Turn the air ring upwards to the "ON" position to activate the tool. Ensure it is properly engaged for operation.
Image: Step 3 of the setup process, showing how to turn the air ring upwards to prepare the tool for use.

Image: A detailed view of the silencer mechanism, indicating its ON and OFF positions for controlling air flow and noise.
- Prepare Rod Collector:
Ensure the rod collector is securely attached to the bottom of the tool. This collector automatically captures spent rivet mandrels, keeping your workspace clean and organized.
Image: A close-up view of the rod container (collector) attached to the base of the rivet gun.
Operating Instructions
Once the tool is set up, follow these steps to operate the pneumatic rivet gun:
- Insert Rivet:
Take a rivet of the correct size and insert its mandrel into the nozzle of the rivet gun. The tool's auto-suction feature will hold the rivet in place.
Image: Step 4 of the operating process, demonstrating how to insert a rivet into the tool's nozzle.
- Position the Rivet:
Place the rivet into the pre-drilled hole in your workpiece. Ensure the rivet head is flush against the material surface.
- Initiate Riveting:
Press the trigger firmly. The pneumatic mechanism will pull the rivet mandrel, expanding the rivet body and forming a secure joint. Continue holding the trigger until the mandrel breaks off.
Image: Step 5 of the operating process, showing the rivet gun in action, with the rivet rod being auto-sucked into the collection tube after riveting.
- Mandrel Collection:
The broken-off rivet mandrel will be automatically sucked into the rod collector at the base of the tool. This self-collecting feature helps maintain a clean work environment.

Image: A close-up view demonstrating how spent rivet mandrels are automatically collected into the transparent collection tube.
- Repeat:
Release the trigger, and the tool is ready for the next rivet. Periodically empty the rod collector when it becomes full.

Image: A collage showing the rivet gun being used in different applications, such as automotive repair and attaching items to a pegboard.

Image: A close-up shot of the rivet gun being used to secure a rivet on a metal surface, demonstrating its ergonomic handling.

Image: The rivet gun being used to attach a component to automotive upholstery, highlighting its versatility in repair tasks.
Maintenance
Regular maintenance ensures the longevity and optimal performance of your LIBRATON Pneumatic Rivet Gun.
- Lubrication: Apply a few drops of pneumatic tool oil (using the provided oil syringe) into the air inlet before each use or after every few hours of continuous operation. This lubricates internal components and prevents wear.
- Clean Nozzles: Regularly inspect and clean the nozzles to remove any debris or rivet fragments that may accumulate.
- Empty Rod Collector: Periodically empty the rod collector to prevent it from overfilling, which could impede the tool's auto-suction function.
- Inspect Air Connections: Check air hose connections and fittings for wear or damage. Replace any worn parts to prevent air leaks.
- Storage: When not in use, disconnect the air supply and store the tool in a clean, dry place away from direct sunlight and extreme temperatures.
Troubleshooting
Refer to this section for common issues and their solutions.
| Problem | Possible Cause | Solution |
|---|---|---|
| Tool does not operate or operates weakly. | Low air pressure; Air leak; Insufficient lubrication; Air ring in "OFF" position. | Ensure air compressor is set to 0.5-0.7 MPa (5-7 bar); Check all air connections for leaks and tighten; Apply pneumatic tool oil to air inlet; Turn air ring to "ON" position. |
| Rivet mandrel does not break off. | Incorrect nozzle size; Low air pressure; Worn jaws/clutch. | Ensure nozzle matches rivet diameter; Increase air pressure to recommended range; Contact support for jaw replacement if necessary. |
| Rivet mandrels are not collected. | Rod collector is full; Obstruction in collection tube; Air ring in "OFF" position (for suction). | Empty the rod collector; Clear any obstructions from the collection tube; Ensure air ring is in "ON" position. |
| Air leaks from the tool. | Loose connections; Damaged O-rings or seals. | Tighten all air hose fittings and nozzle; Inspect and replace damaged O-rings or seals. |
Warranty Information
LIBRATON products are manufactured to high-quality standards. For specific warranty details regarding your pneumatic rivet gun, please refer to the warranty card included with your purchase or visit the official LIBRATON website. Keep your purchase receipt as proof of purchase for any warranty claims.
Support
If you encounter any issues not covered in this manual or require further assistance, please contact LIBRATON customer support through the retailer where you purchased the product or visit the official LIBRATON website for contact information.
Online Resources: For additional product information, FAQs, or instructional videos, please visit the official LIBRATON website.