
1. Introduction
Thank you for choosing the Generic Rechargeable Waterproof Bicycle Headlight with Horn. This manual provides essential information for the proper installation, operation, and maintenance of your new bicycle accessory. Please read this manual thoroughly before use to ensure optimal performance and safety.
2. Safety Information
- Always ensure the headlight is securely mounted before riding.
- Do not look directly into the light beam to avoid temporary vision impairment.
- Keep the device away from extreme temperatures and direct sunlight.
- Do not attempt to disassemble or modify the device, as this may void the warranty and pose a safety risk.
- Ensure the charging port cover is properly sealed to maintain IPX5 waterproof rating.
- Use only the provided charging cable or a certified Type-C cable for charging.
3. Package Contents
Verify that all items are present in the package:
- Bicycle Headlight Unit with Integrated Horn
- Handlebar Mounting Bracket
- Remote Horn Button
- USB Type-C Charging Cable
- User Manual (this document)
4. Product Overview
Familiarize yourself with the components of your bicycle headlight:

Image: Front view of the bicycle headlight showing the 9 main LEDs, side floodlights, LCD battery display, and the remote horn button.
- Main LED Array: 9 high-brightness LEDs for primary illumination.
- Side Floodlight LEDs: 21 SMD patch lamp beads for wide-angle illumination.
- LCD Power Display: Shows current battery percentage.
- Power/Mode Button: Controls power on/off and switches lighting modes.
- Integrated Horn: Produces a 130dB warning sound.
- Remote Horn Button: External button for convenient horn activation.
- USB Type-C Charging Port: For recharging the internal battery.
- USB Output Port: Can be used to charge other devices (power bank function).
5. Setup and Installation
The headlight features a tool-free installation process.

Image: Illustration of front mounting and hanging mount options for the bicycle headlight, along with the remote horn button placement.
- Attach Mounting Bracket: Secure the handlebar mounting bracket to your bicycle's handlebar. Ensure it is tight and stable. The bracket is adjustable to fit most handlebar sizes.
- Mount Headlight: Slide the headlight unit onto the mounting bracket until it clicks securely into place. You can choose between front mounting (light above handlebar) or hanging mounting (light below handlebar) based on preference and clearance.
- Install Remote Horn Button: Attach the remote horn button to a convenient location on your handlebar, typically near your thumb for easy access. Connect its cable to the designated port on the headlight unit.
- Adjust Angle: Adjust the angle of the headlight to ensure optimal illumination of the path ahead without blinding oncoming traffic.
6. Operating Instructions

Image: Close-up of the remote control switch and an illustration of the low beam light pattern.
6.1 Power On/Off and Light Mode Selection
- Power On: Press and hold the Power/Mode button on the top of the headlight for approximately 2 seconds. The LCD display will illuminate, showing the battery level, and the light will turn on in its last used mode.
- Change Light Mode: Short press the Power/Mode button to cycle through the 7 available lighting modes. The modes typically include: High Beam, Low Beam, Near Light, Flash, etc.
- Power Off: Press and hold the Power/Mode button for approximately 2 seconds until the light turns off and the LCD display goes dark.
6.2 Horn Operation
- Activate Horn: Press the remote horn button to sound the integrated 130dB horn. Release the button to stop the sound.
6.3 Power Display
- The LCD screen on the top of the headlight displays the current battery percentage, allowing you to monitor the remaining power.
7. Charging
The headlight is equipped with a built-in rechargeable battery and supports Type-C fast charging.

Image: Illustration showing the internal lithium battery, Type-C fast charge port, and USB power output port, with a phone connected for charging.
- Charging the Headlight: Open the rubber cover of the Type-C charging port. Connect the provided USB Type-C cable to the headlight and the other end to a USB power source (e.g., wall adapter, computer USB port).
- The LCD display will show the charging status. A full charge typically takes 3-5 hours.
- Once fully charged, disconnect the cable and securely close the rubber cover to maintain waterproofing.
- Using as Power Bank: The headlight features a USB output port. You can connect your mobile phone or other USB-powered devices to this port to use the headlight's internal battery as a power bank.
8. Maintenance
- Cleaning: Wipe the headlight with a soft, damp cloth. Do not use abrasive cleaners or solvents.
- Storage: Store the headlight in a cool, dry place when not in use. If storing for an extended period, charge the battery to approximately 50% every 3 months to prolong battery life.
- Waterproofing: Always ensure the charging port cover is firmly closed to maintain the IPX5 water resistance.
9. Troubleshooting
| Problem | Possible Cause | Solution |
|---|---|---|
| Headlight does not turn on. | Battery is depleted. | Charge the headlight using the provided USB Type-C cable. |
| Light output is dim. | Low battery level. | Recharge the battery. |
| Horn does not sound. | Remote horn button not connected or faulty. | Ensure the remote horn button is securely connected to the headlight unit. Check for cable damage. |
| Headlight does not charge. | Faulty charging cable or power source. | Try a different USB Type-C cable and a different USB power adapter. |
| Water ingress after rain. | Charging port cover not properly sealed. | Ensure the rubber cover for the charging port is always securely closed when not charging. |
10. Specifications
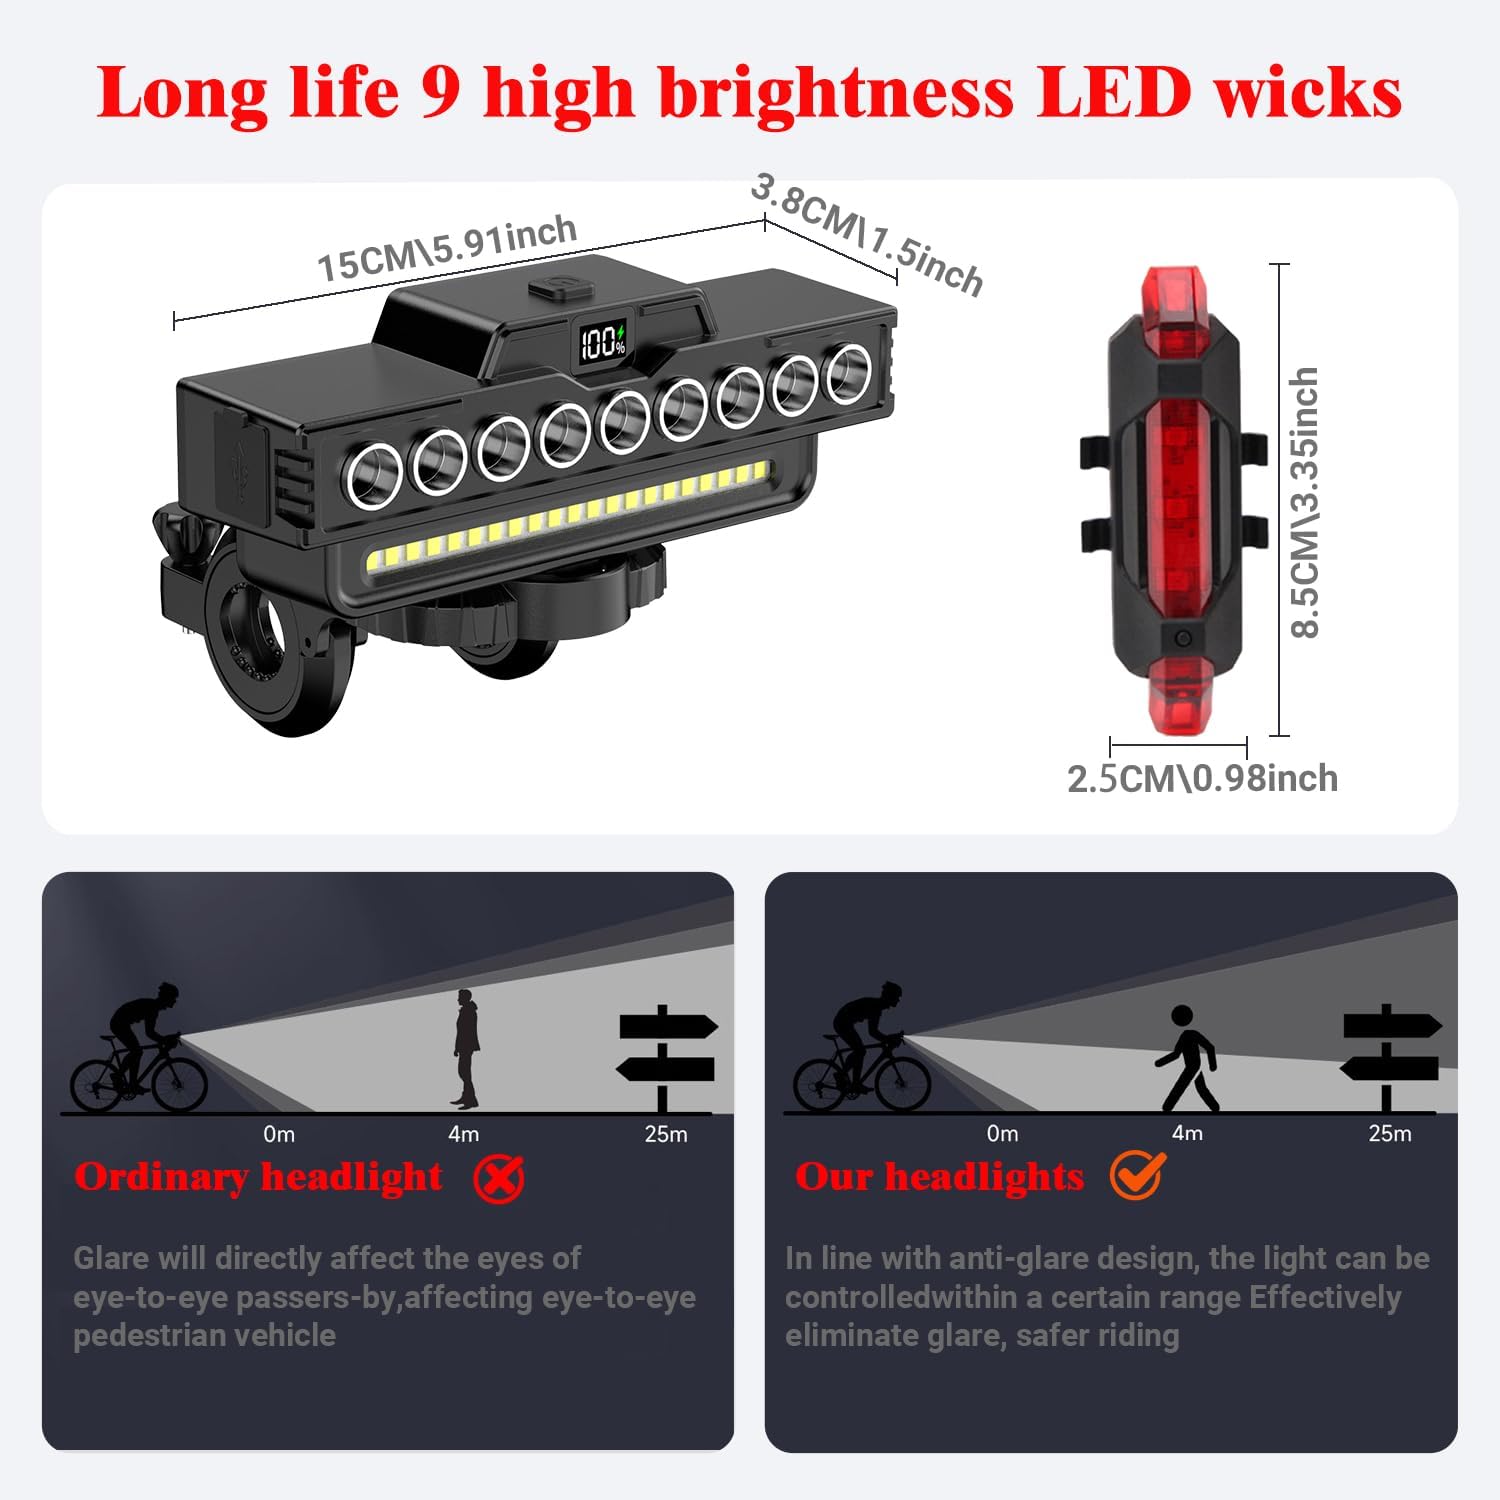
Image: Product dimensions (5.91 inches length, 1.5 inches width) and a comparison illustrating the anti-glare design.
- Model: B0F6NXCQQM
- Light Source: 9 main LEDs + 21 SMD floodlight LEDs
- Lighting Modes: 7 modes (e.g., High Beam, Low Beam, Near Light, Flash)
- Horn Volume: 130dB
- Water Resistance: IPX5
- Material: Hard ABS shell
- Power Source: Built-in Rechargeable Lithium Battery
- Charging Time: Approximately 3-5 hours
- Runtime: Up to 18 hours (in low-light mode), 5-20 hours depending on mode
- Charging Port: USB Type-C
- Output Port: USB (for power bank function)
- Dimensions (L x W x H): 5.91" x 1.5" x 1.5" (15cm x 3.8cm x 3.8cm)
- Weight: 0.2 kg
- Mounting Type: Handlebar Mount
11. Warranty and Support
Warranty: For warranty information, please refer to the product description or contact your retailer. Specific warranty details are not provided in this manual.
Customer Support: If you encounter any issues or have questions not covered in this manual, please contact the seller or retailer from whom you purchased the product for assistance.