
Introduction
This manual provides essential information for the safe and effective installation, operation, and maintenance of your LLPParts Replacement for GE GTX22EASK0WW Dryer Timer OEM. Please read these instructions thoroughly before proceeding with installation or use.
This product is a genuine OEM replacement part designed for specific GE dryer models, ensuring compatibility and reliable performance.
Safety Information
WARNING: To reduce the risk of electric shock, fire, or injury to persons, read all instructions before installing this part.
- Always disconnect power to the dryer before attempting any repairs or installations.
- Wear appropriate personal protective equipment, such as gloves and safety glasses.
- If you are unsure about any step, consult a qualified appliance repair technician.
- Ensure all connections are secure and properly insulated after installation.
- Keep children and pets away from the work area.
Setup and Installation
This section outlines the general steps for replacing the dryer timer. Specific procedures may vary slightly depending on your dryer model. Refer to your dryer's service manual for detailed instructions if available.
- Disconnect Power: Unplug the dryer from the electrical outlet or turn off the circuit breaker supplying power to the dryer. This is a critical safety step.
- Access the Control Panel: Depending on your dryer model, you may need to remove screws from the back panel or top panel to access the control panel where the timer is located.
- Locate the Timer: Identify the existing dryer timer. It is typically a round component with multiple wires connected to it.
- Document Wiring: Before disconnecting any wires, take clear photos or draw a diagram of the existing wiring connections to the timer. This will help ensure correct reassembly.
- Disconnect Wires: Carefully disconnect all wires from the old timer. Note that some wires may be held by screws, while others may be push-on terminals.
- Remove Old Timer: Unscrew or unclip the old timer from its mounting bracket.
- Install New Timer: Position the new LLPParts Replacement for GE GTX22EASK0WW Dryer Timer in the same location and secure it with the original screws or clips.
- Connect Wiring: Using your photos or diagram, carefully reconnect all wires to the new timer. Ensure each wire is securely attached to its corresponding terminal.
- Reassemble Dryer: Reattach the control panel, top panel, or back panel that was removed.
- Restore Power: Plug the dryer back into the electrical outlet or turn on the circuit breaker.
- Test Operation: Run a short cycle to ensure the dryer and the new timer are functioning correctly.
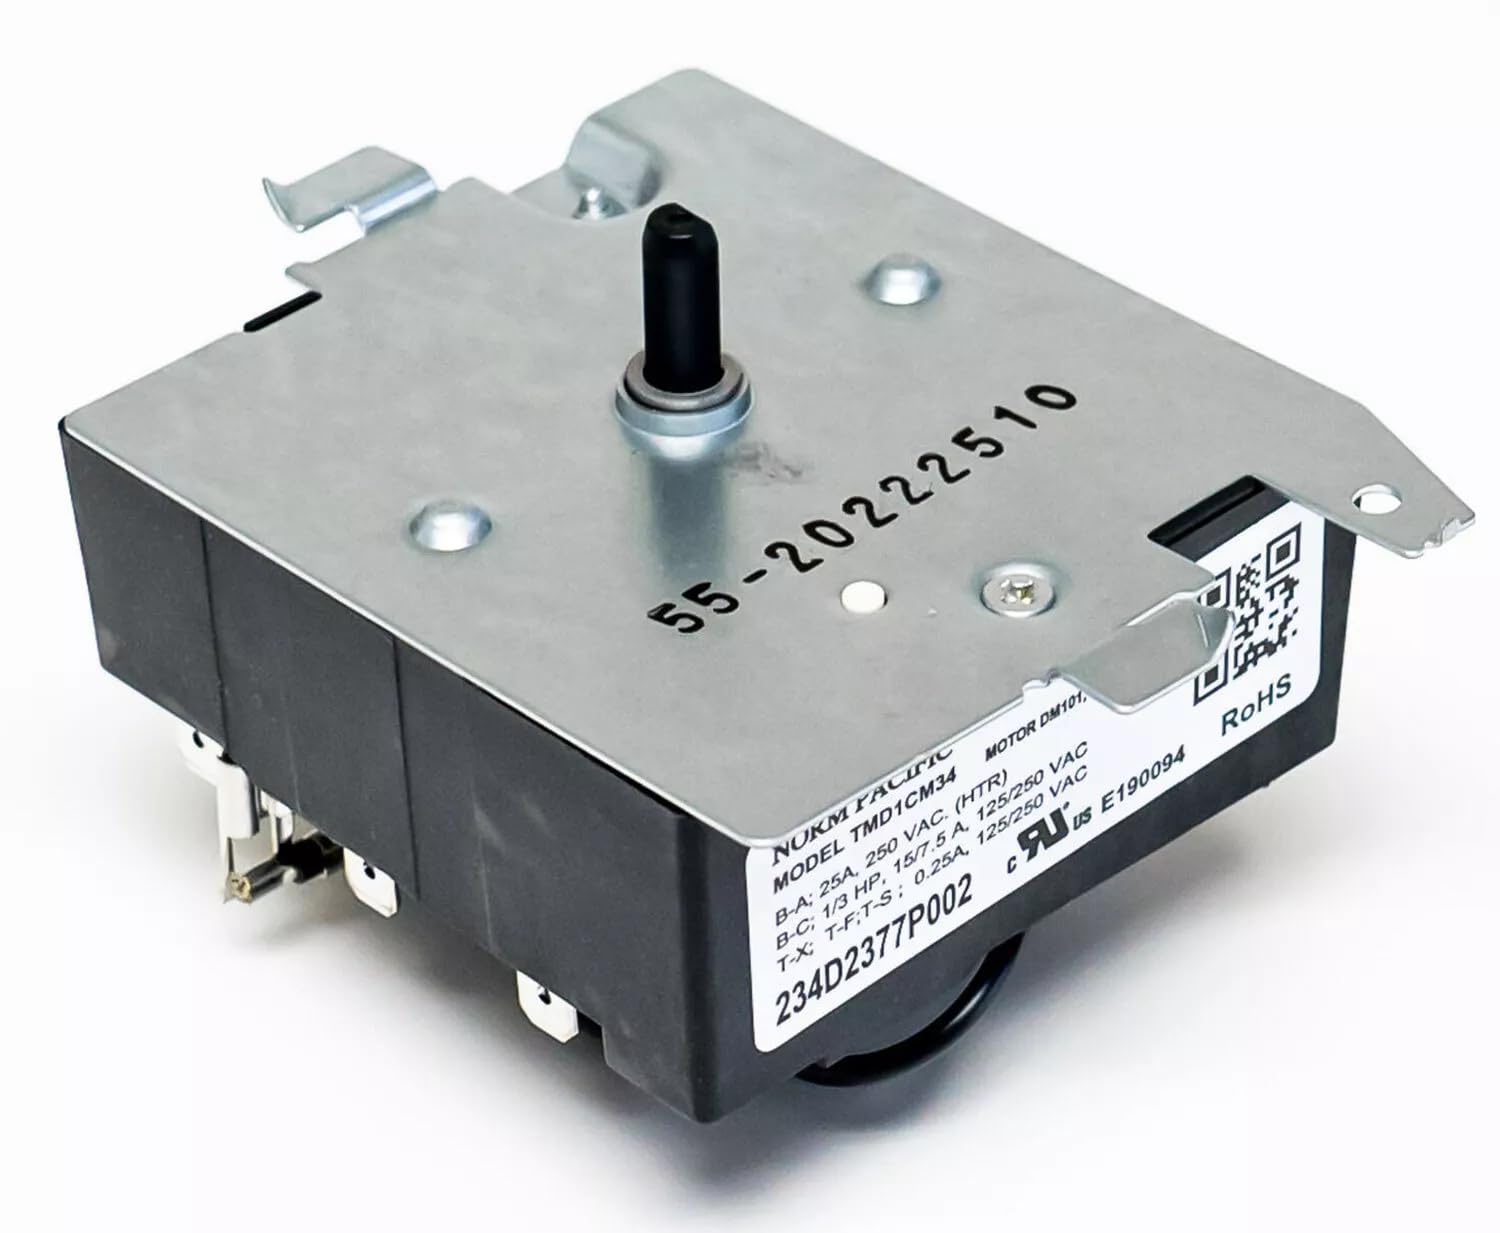
Image 1: The LLPParts Replacement for GE GTX22EASK0WW Dryer Timer. This image shows the general appearance of the replacement timer, which is crucial for identifying the correct part during installation.
Operating Instructions
The LLPParts Replacement for GE GTX22EASK0WW Dryer Timer is an internal component that controls the drying cycle. Its operation is integrated with your dryer's existing controls.
- After successful installation, operate your dryer as you normally would, following the instructions in your dryer's original user manual.
- The timer will regulate the duration and progression of the drying cycle based on the selected settings.
- If the dryer does not start, or if the cycle does not advance properly after timer replacement, refer to the Troubleshooting section.
Maintenance
The dryer timer itself typically requires no routine maintenance. However, proper general dryer maintenance can contribute to the longevity of all components, including the timer.
- Clean Lint Filter: Always clean the lint filter before or after every load to ensure proper airflow and prevent overheating.
- Inspect Venting: Periodically check the dryer's exhaust vent for blockages. A clogged vent can cause the dryer to run longer and put strain on components.
- Keep Dryer Area Clear: Ensure the area around the dryer is free from obstructions to allow for adequate ventilation.
Troubleshooting
If your dryer is not functioning as expected after replacing the timer, consider the following common issues:
| Problem | Possible Cause | Solution |
|---|---|---|
| Dryer does not start |
|
|
| Dryer runs but cycle does not advance |
|
|
| Dryer runs too long or too short |
|
|
If these steps do not resolve the issue, it is recommended to contact a qualified appliance repair technician.
Specifications
| Feature | Detail |
|---|---|
| Model Number | GTX22EASK0WW |
| Brand | LLPParts |
| Part Type | Dryer Timer (OEM Replacement) |
| UPC | 752697869186 |
| Product Dimensions | 1"D x 1"W x 1"H |
| Material | Cotton (Note: This material specification might refer to packaging or a minor component, as dryer timers are typically made of metal and plastic.) |
Warranty and Support
Warranty Period: The product warranty period is one year from the date of purchase.
For technical assistance, warranty claims, or further support, please contact LLPParts customer service. Refer to your purchase documentation for contact details.
Please have your model number (GTX22EASK0WW) and UPC (752697869186) available when contacting support.