
1. Introduction
This manual provides detailed instructions for the safe and correct installation, operation, and maintenance of your LLPParts replacement dryer timer, specifically designed for GE GTD33EASK0WW dryer models. Please read this manual thoroughly before beginning any work to ensure proper function and safety.
Product Model: GTD33EASK0WW (Replacement Part)
Manufacturer: LLPParts
2. Safety Information
WARNING: Disconnect power to the dryer before servicing. Failure to do so can result in electrical shock, fire, or personal injury.
- Always wear appropriate personal protective equipment (PPE), such as gloves and safety glasses.
- Ensure the dryer is unplugged from the electrical outlet or the circuit breaker is turned off before attempting any repair.
- If you are unsure about any step, consult a qualified appliance technician.
- Keep children and pets away from the work area.
3. Before You Begin Installation
3.1 Tools Required
- Screwdrivers (Phillips and Flathead)
- Nut drivers or socket set (various sizes, typically 1/4" and 5/16")
- Needle-nose pliers
- Work gloves
3.2 Part Verification
Before installation, compare your new LLPParts replacement timer with the original part to ensure compatibility. Verify the model number and physical connections.
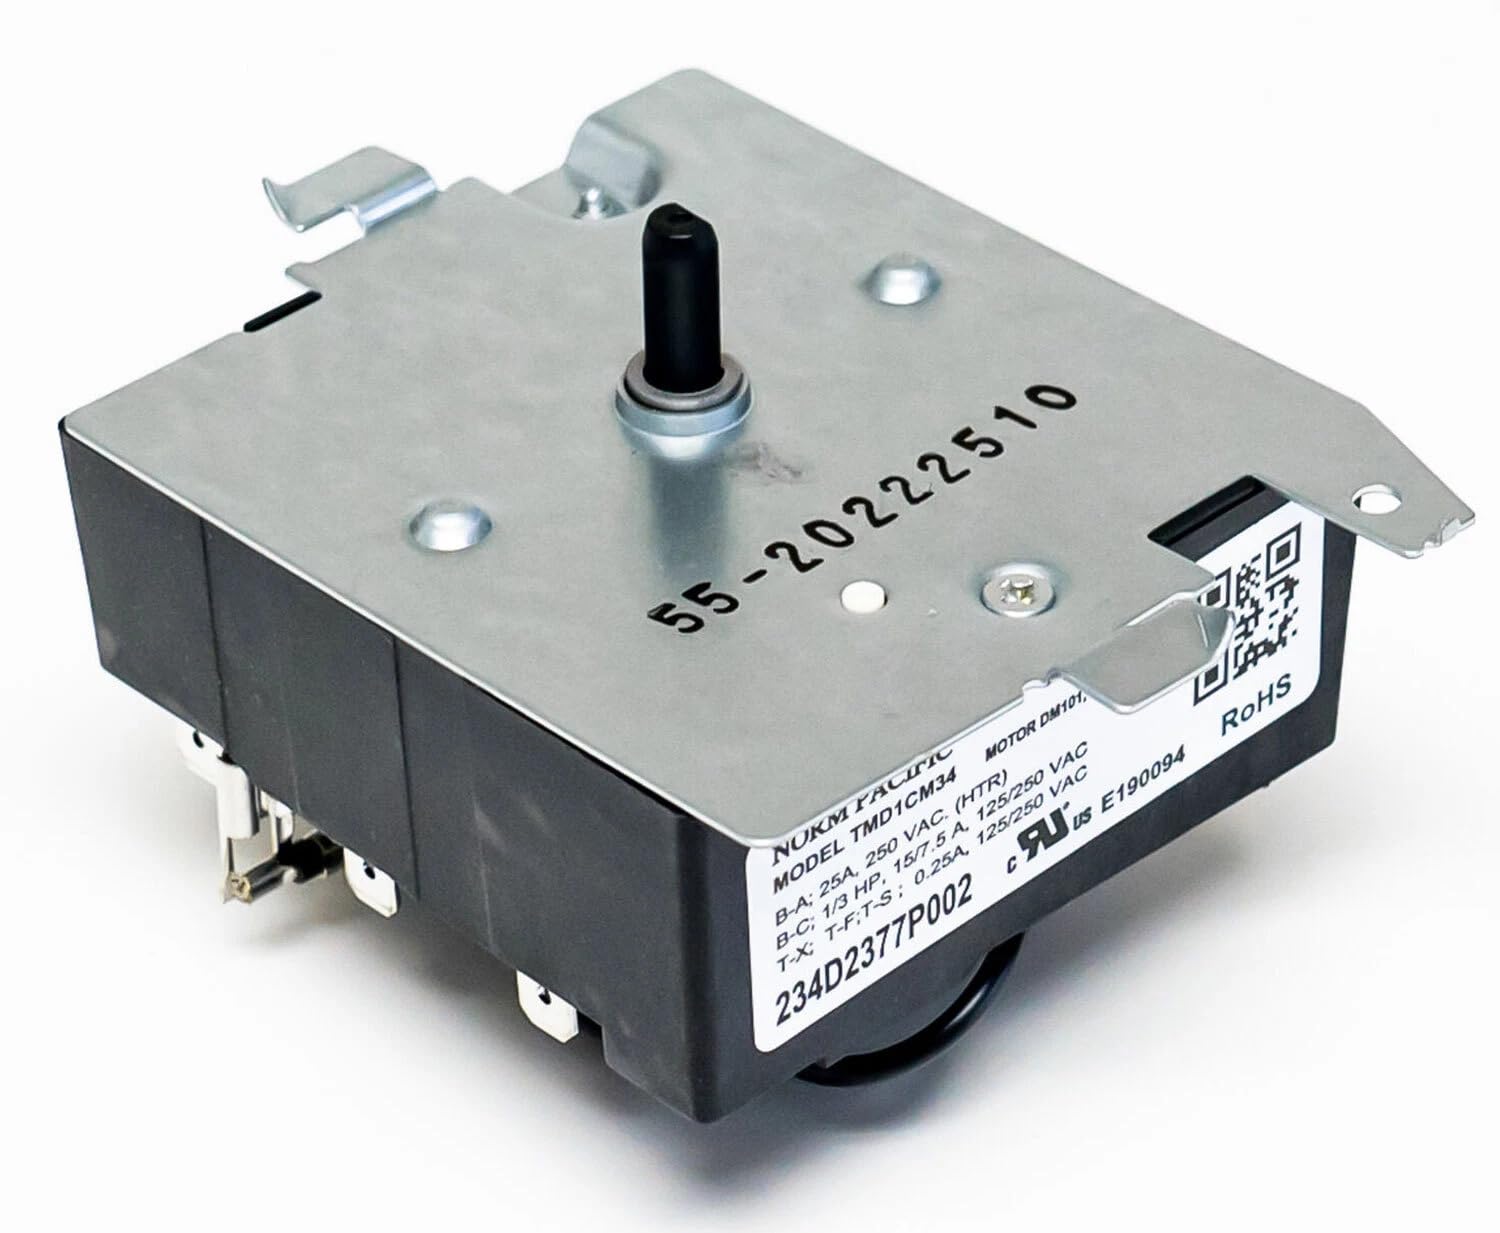
Figure 1: LLPParts Replacement Dryer Timer. This image displays the replacement dryer timer with its metal casing, central shaft, electrical terminals, and a label indicating model number TMD1CM34, electrical ratings (25A, 250 VAC; 1/3 HP, 15/7.5 A, 125/250 VAC; 0.25A, 125/250 VAC), and part number 234D2377P002.
4. Installation Instructions
Follow these steps carefully to replace the dryer timer.
- Disconnect Power: Unplug the dryer from the wall outlet or turn off the circuit breaker supplying power to the dryer.
- Access the Control Panel: Depending on your GE dryer model, you may need to remove screws from the back of the control panel or pry off end caps to access the mounting screws. Carefully lift or tilt the control panel to expose the timer.
- Document Wiring: Before disconnecting any wires, take a clear photograph or draw a diagram of the existing wiring connections to the old timer. This is crucial for correct reassembly.
- Disconnect Wires: Carefully pull each wire connector off the terminals of the old timer. Avoid pulling on the wires themselves.
- Remove Old Timer: Unscrew any mounting screws or release clips holding the old timer in place. Remove the old timer from the control panel.
- Install New Timer: Position the new LLPParts replacement timer in the control panel, aligning it with the mounting holes. Secure it with the screws or clips removed earlier.
- Connect Wires: Using your photograph or diagram, connect each wire connector to the corresponding terminal on the new timer. Ensure all connections are secure and tight.
- Reassemble Control Panel: Carefully reposition the control panel and secure it with its mounting screws.
- Restore Power: Plug the dryer back into the electrical outlet or turn on the circuit breaker.
5. Operating the Dryer with New Timer
After installation, the dryer should function as designed. The timer controls the duration and cycle of the drying process. To operate your dryer:
- Load the dryer with laundry.
- Select the desired drying cycle and temperature settings using the dryer's control knob, which connects to the timer shaft.
- Press the start button. The timer will advance through the selected cycle.
If the dryer does not start or operate correctly, refer to the Troubleshooting section.
6. Maintenance
The dryer timer is a sealed component and does not require routine maintenance. However, general dryer maintenance can prolong the life of all components:
- Regularly clean the lint filter before or after each load.
- Periodically inspect the dryer vent for blockages.
- Ensure the dryer is kept in a clean, dry environment.
7. Troubleshooting
If your dryer exhibits issues after timer replacement, consider the following:
| Symptom | Possible Cause | Solution |
|---|---|---|
| Dryer does not start | No power; loose wiring; faulty door switch | Check power supply; verify all timer connections; inspect door switch. |
| Timer does not advance | Faulty timer motor; incorrect wiring | Ensure wiring is correct per diagram; if issue persists, timer may be faulty. |
| Dryer runs continuously | Timer contacts stuck; incorrect wiring | Verify wiring; if issue persists, timer may be faulty. |
| Incorrect cycle duration | Timer malfunction | Ensure correct cycle selection; if issue persists, timer may be faulty. |
If troubleshooting steps do not resolve the issue, it is recommended to contact a qualified appliance technician.
8. Specifications
- Part Number: GTD33EASK0WW (Replacement)
- Internal Model Number (on part): TMD1CM34
- Additional Part Number (on part): 234D2377P002
- Electrical Ratings (HTR): 25A, 250 VAC
- Electrical Ratings (Motor): 1/3 HP, 15/7.5 A, 125/250 VAC
- Electrical Ratings (T-X, T-F, T-S): 0.25A, 125/250 VAC
- UPC: 752697869179
9. Warranty and Support
This LLPParts product comes with a one-year warranty from the date of purchase. For warranty claims or technical support, please contact LLPParts customer service. Keep your proof of purchase for warranty validation.