
1. Introduction
The VIHELM WT06 is an automotive brake fluid and coolant boiling point detector designed for rapid and accurate testing. This instrument helps to determine the boiling point of brake fluid (DOT3, DOT4, DOT5, DOT5.1) and coolant, which is crucial for assessing fluid quality and ensuring driving safety. It is widely used in automobile repair shops and by automotive enthusiasts.
Regular testing of brake fluid and coolant boiling points helps identify when these fluids need replacement, preventing potential system failures due to fluid degradation.
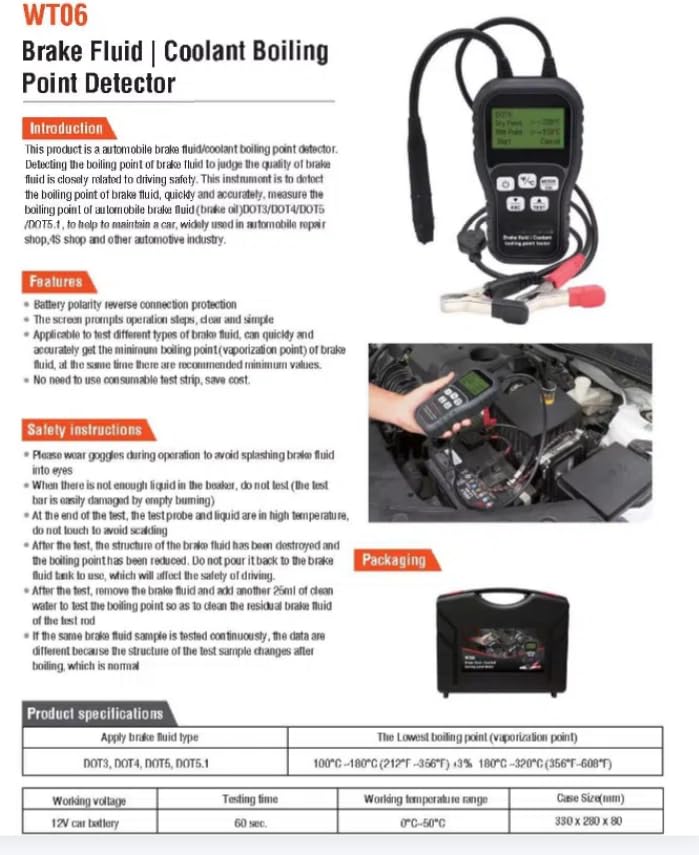
Image: Overview of the WT06 device, highlighting its introduction, key features, and safety instructions.
2. Key Features
- Battery Polarity Reverse Connection Protection: Ensures safe operation and prevents damage from incorrect battery hook-up.
- Simple Operation: The screen prompts operation steps, making the device easy to use.
- Versatile Fluid Compatibility: Applicable to different types of brake fluid (DOT3, DOT4, DOT5, DOT5.1) and coolant.
- Accurate Measurement: Quickly and accurately determines the minimum boiling (vaporization) point of brake fluid and coolant.
- Cost-Effective: No need for consumable test strips, offering long-term savings.
- Durable Design: Metal shaped tube body with IP67 waterproof grade.
- Shockproof Protection: Comes with a thick, durable, and non-slip TPU protective sleeve to prevent damage.
3. Safety Instructions
Please read and understand all safety instructions before operating the device to prevent injury or damage.
- Eye Protection: Always wear goggles during operation to avoid splashing brake fluid into eyes.
- Fluid Level: When there is not enough liquid in the beaker, do not test. The test bar must be fully submerged.
- High Temperature Warning: At the end of the test, the test probe and liquid are at high temperatures. Do not touch to avoid scalding.
- Brake Fluid Degradation: If the brake fluid has been destroyed and the boiling point has been reduced, do not pour it back into the brake fluid tank.
- Fluid Replacement: After the test, remove the brake fluid and add 25ml of clean water to test the boiling point to ensure no residual brake fluid remains.
- Consistent Sample Testing: If the same brake fluid sample is tested continuously, the data may differ due to changes in the sample structure after boiling.
4. Product Overview and Components
Familiarize yourself with the components of the WT06 Diagnostic Testing Tool.
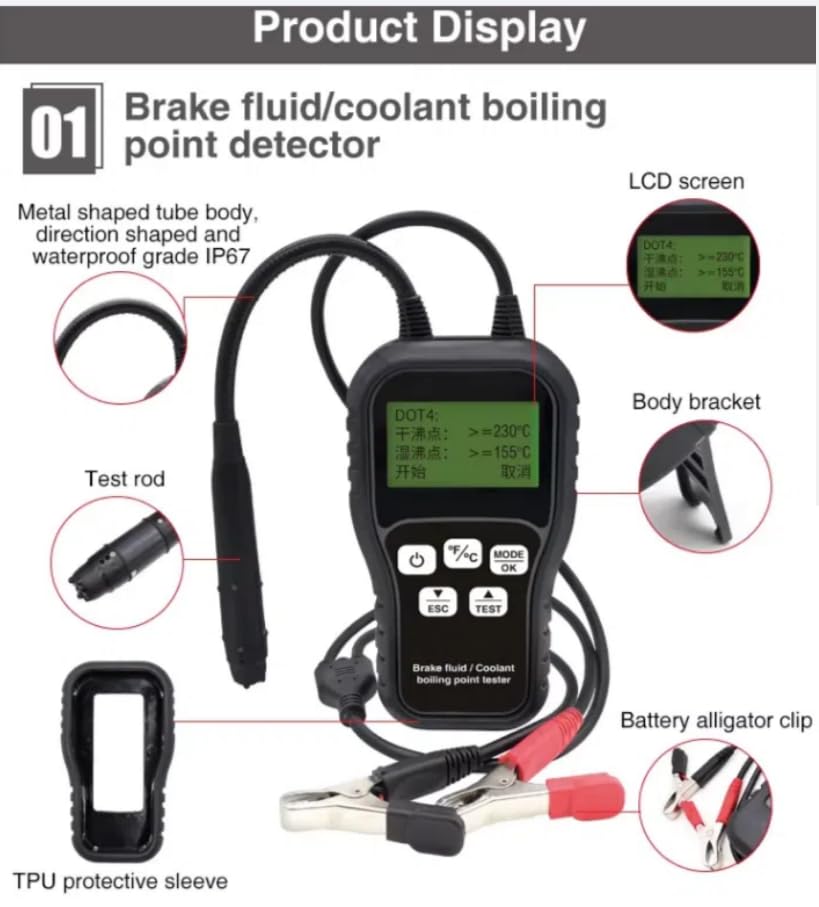
Image: Detailed view of the WT06 device, highlighting its main components such as the LCD screen, body bracket, test rod, TPU protective sleeve, and battery alligator clips.
4.1 Main Components
- Main Unit: The central processing unit with LCD display and control buttons.
- Test Rod/Probe: High-sensitivity probe for immersion into fluid.
- Battery Alligator Clips: For connecting to a 12V car battery.
- TPU Protective Sleeve: Provides shockproof protection for the main unit.
- Body Bracket: For stable positioning of the device.
4.2 Button Functions

Image: Diagram illustrating the buttons on the WT06 device and their respective functions, including power, escape, temperature unit switch, mode/OK, and test.
- Power Button: Turns the device on/off.
- ESC Button: Exits the current menu or cancels an operation.
- F/C Button: Switches between Fahrenheit and Celsius temperature units. Long press for 10 seconds to switch language.
- MODE/OK Button: Selects oil type (brake fluid/coolant) or confirms selection.
- TEST Button: Initiates the boiling point test.
- Up/Down Buttons: Used for navigation or adjusting settings.
5. Setup
Before using the WT06, ensure proper setup for accurate and safe operation.
- Unpack the Device: Carefully remove the WT06 unit and all accessories from its packaging.
- Attach Protective Sleeve: If not already installed, place the TPU protective sleeve onto the main unit for added durability.
- Connect to Power: Connect the red alligator clip to the positive (+) terminal of a 12V car battery and the black alligator clip to the negative (-) terminal. Ensure a secure connection.
- Power On: Press the Power button to turn on the device. The LCD screen should illuminate.
- Initial Check: Verify that the device powers on correctly and displays the initial menu or standby screen.
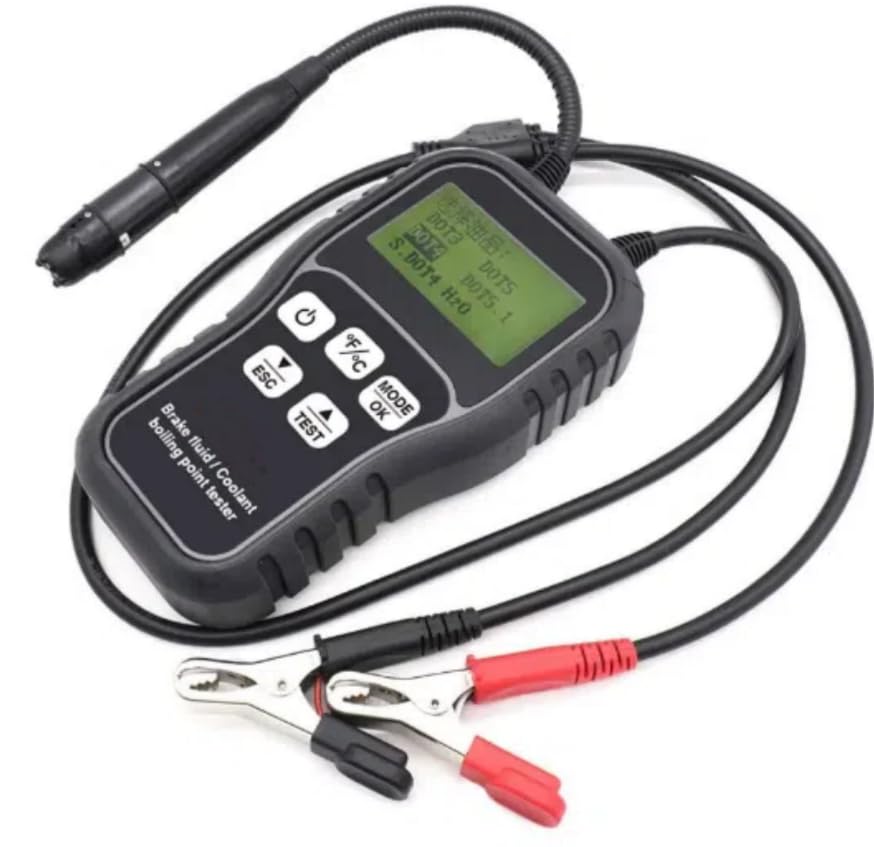
Image: The WT06 Diagnostic Testing Tool with its test probe and battery alligator clips, ready for connection.
6. Operation
Follow these steps to perform brake fluid and coolant boiling point tests.
6.1 Selecting Fluid Type
- After powering on, use the MODE/OK button to select the type of fluid you intend to test (e.g., DOT3, DOT4, DOT5, DOT5.1 for brake fluid, or Coolant).
- Confirm your selection by pressing the MODE/OK button.
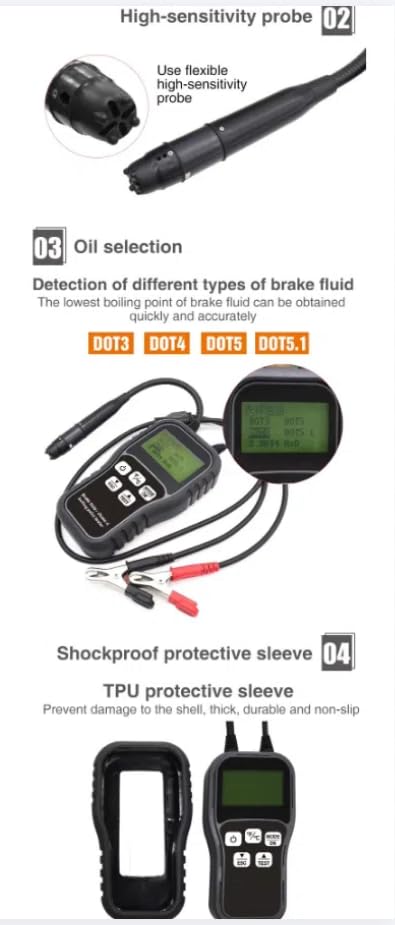
Image: The WT06 display showing options for selecting different types of brake fluid (DOT3, DOT4, DOT5, DOT5.1) for testing.
6.2 Performing a Brake Fluid Test
- Ensure the correct brake fluid type is selected on the device.
- Carefully immerse the test rod into the brake fluid sample. Ensure the test rod is fully submerged in the fluid.
- Press the TEST button to begin the boiling point measurement.
- The device will display the boiling point on the LCD screen. Compare this value with the reference values provided in Section 9.2 to assess fluid quality.
- After the test, carefully remove the test rod. Be aware that the probe and fluid may be hot.
- Clean the test rod thoroughly as described in the Maintenance section.
6.3 Performing a Coolant Test
- Select "Coolant" using the MODE/OK button.
- Immerse the test rod into the coolant sample, ensuring full submersion.
- Press the TEST button to start the measurement.
- The device will display the coolant boiling point. Refer to the reference values in Section 9.3 to interpret the results.
- Remove and clean the test rod after the test.
6.4 Switching Temperature Units and Language
- To switch between Celsius (°C) and Fahrenheit (°F), press the F/C button.
- To switch the display language, long press the F/C button for 10 seconds.
7. Maintenance
Proper maintenance ensures the longevity and accuracy of your WT06 Diagnostic Testing Tool.
- Cleaning the Test Rod: After each use, especially after testing brake fluid, thoroughly clean the test rod with clean water. It is recommended to immerse the test rod in 25ml of clean water and perform a test to ensure no residual fluid remains.
- Device Cleaning: Wipe the main unit with a soft, dry cloth. Do not use abrasive cleaners or solvents.
- Storage: Store the device in its original protective case in a cool, dry place, away from direct sunlight and extreme temperatures.
- Battery Care: Disconnect the alligator clips from the car battery when not in use for extended periods.
- Protective Sleeve: Keep the TPU protective sleeve on the device to prevent accidental damage.
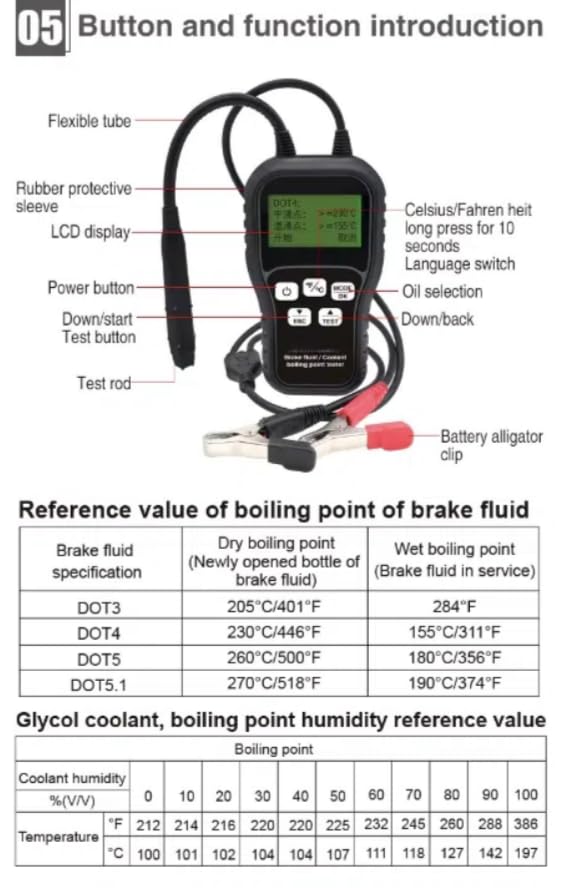
Image: The WT06 Diagnostic Testing Tool neatly stored within its custom-fitted protective hard case, alongside its accessories.
8. Troubleshooting
This section addresses common issues you might encounter with the WT06.
| Problem | Possible Cause | Solution |
|---|---|---|
| Device does not power on. | Incorrect battery connection; Low car battery voltage; Device fault. | Check alligator clip connections (red to +, black to -). Ensure car battery has sufficient charge. If problem persists, contact support. |
| Inaccurate readings. | Test rod not fully submerged; Test rod not clean; Fluid sample too small; Continuous testing of same sample. | Ensure test rod is fully submerged. Clean test rod thoroughly after each use. Use adequate fluid sample. Allow device to cool or use a fresh sample for repeated tests. |
| Display shows error message. | Internal error; Sensor issue. | Turn off the device, wait a few seconds, and turn it back on. If the error persists, contact customer support. |
9. Specifications and Reference Values
9.1 Product Specifications
| Attribute | Value |
|---|---|
| Model Number | WT06 |
| Brand | VIHELM |
| Power Source | Battery Powered (12V car battery) |
| Applicable Fluid Types | DOT3, DOT4, DOT5, DOT5.1 Brake Fluid; Coolant |
| Waterproof Grade | IP67 (for test rod/probe) |
| Working Voltage | 12V car battery |
| Testing Time | Approx. 60 seconds |
| Working Temperature Range | 0°C - 50°C (32°F - 122°F) |
| Case Size (approx.) | 330 x 280 x 90 mm |
| Color | Black |
9.2 Reference Value of Boiling Point for Brake Fluid
These values indicate the typical boiling points for new and in-service brake fluids. A lower boiling point indicates moisture contamination and reduced effectiveness.
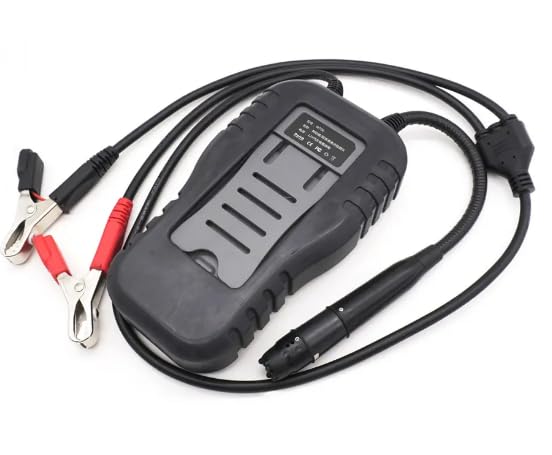
Image: Table detailing the dry boiling points (for newly opened brake fluid) and wet boiling points (for brake fluid in service) for DOT3, DOT4, DOT5, and DOT5.1 specifications.
| Brake Fluid Specification | Dry Boiling Point (Newly opened bottle of brake fluid) | Wet Boiling Point (Brake fluid in service) |
|---|---|---|
| DOT3 | 205°C / 401°F | 140°C / 284°F |
| DOT4 | 230°C / 446°F | 155°C / 311°F |
| DOT5 | 260°C / 500°F | 180°C / 356°F |
| DOT5.1 | 270°C / 518°F | 190°C / 374°F |
9.3 Glycol Coolant Boiling Point Humidity Reference Value
This table provides reference boiling points for glycol-based coolants at various humidity (water content) levels.
| Coolant Humidity %(V/V) | Boiling Point | ||||||||||
|---|---|---|---|---|---|---|---|---|---|---|---|
| 0 | 10 | 20 | 30 | 40 | 50 | 60 | 70 | 80 | 90 | 100 | |
| °F | 212 | 214 | 216 | 220 | 220 | 225 | 232 | 245 | 260 | 288 | 386 |
| °C | 100 | 101 | 102 | 104 | 104 | 107 | 111 | 118 | 127 | 142 | 197 |
10. Warranty and Support
For warranty information and technical support, please refer to the documentation provided with your purchase or contact VIHELM customer service.
Please retain your proof of purchase for any warranty claims.