
1. Introduction
The SWIFF AUDIO WX520 is a 5.8GHz wireless in-ear monitor system designed to provide musicians and performers with high-fidelity, low-latency audio monitoring. This system ensures clear, stable sound transmission, making it suitable for live performances, studio recording, band rehearsals, and streaming. Its multi-functional design and robust connectivity offer a reliable monitoring solution.

Image 1.1: Overview of the SWIFF AUDIO WX520 Wireless In-Ear Monitor System highlighting its core features.
2. What's in the Box
Please check the package contents to ensure all items are present:
- 1 x Transmitter (Charging Case)
- 1 x Receiver
- 1 x User Manual
- 1 x Type-C Charging Cable

Image 2.1: All components included in the SWIFF AUDIO WX520 package.
3. Product Overview
3.1. Transmitter (Charging Case)
The transmitter unit also functions as a charging case for the receiver. It features multiple audio input options and controls for mode selection.
- Input Ports: XLR, 1/4-inch (6.35mm), and 1/8-inch (3.5mm) connectors for versatile audio source connection.
- Mode Switch: Stereo/Mono and Auxiliary/Line mode selection.
- CUE Mic Function: Connect a dynamic microphone to the 1/4-inch mono interface to enable the CUE mic feature.
- Charging Indicators: LED lights indicate the charging status of the internal battery and the receiver.

Image 3.1: The transmitter unit with its charging function and input/output options.
3.2. Receiver
The compact receiver unit is designed for portability and ease of use, featuring an LED display and volume control.
- LED Display: Shows connection status, battery level, and selected channel.
- Volume Control: Independent volume adjustment for monitoring.
- Headphone Jack: Standard 3.5mm output for in-ear monitors or headphones.
- Clip-on Design: Allows for easy attachment to clothing or instrument straps.
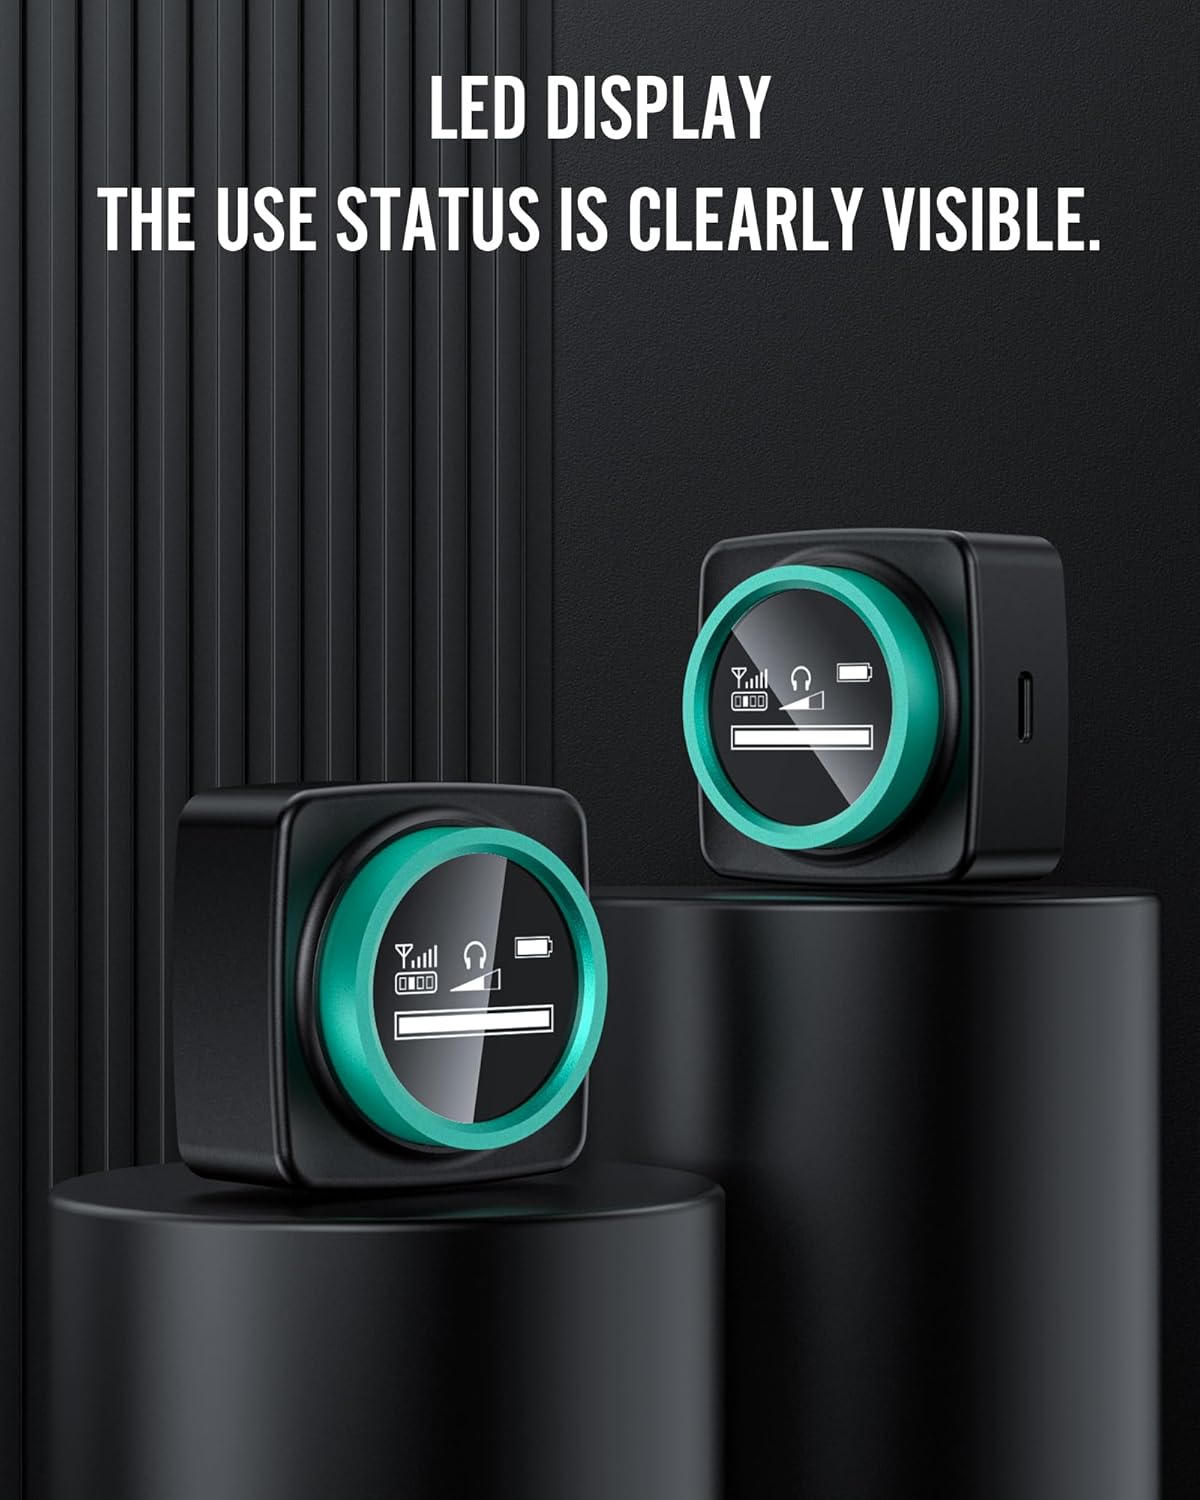
Image 3.2: The receiver unit with its LED display for real-time status monitoring.
4. Setup Guide
4.1. Initial Charging
- Connect the Type-C charging cable to the transmitter's charging port and a USB power adapter (not included).
- Place the receiver into the charging slot of the transmitter case. The LED indicators on both units will show charging status.
- Charge both units fully before first use. A full charge for the receiver takes approximately 1 hour.
4.2. Connecting the Audio Source to the Transmitter
- Identify the output from your audio mixer, interface, or instrument.
- Use an appropriate cable (XLR, 1/4-inch, or 1/8-inch) to connect the audio source to the corresponding input port on the transmitter.
- Ensure the connection is secure.
4.3. Connecting Headphones to the Receiver
- Plug your in-ear monitors or headphones into the 3.5mm headphone jack on the receiver.
- Adjust the receiver's volume knob to its lowest setting before powering on to prevent sudden loud audio.
4.4. Power On and Automatic Pairing
- Press and hold the power button on the transmitter to turn it on.
- Press and hold the power button on the receiver to turn it on.
- The transmitter and receiver will automatically pair within seconds. The LED display on the receiver will show a stable connection indicator.
4.5. Channel Selection
The system supports 4 channels. To change the channel:
- On the transmitter, locate the channel selection button.
- Press the button to cycle through the available channels (1-4). The receiver's display will update to show the selected channel.
- Ensure all connected receivers are set to the same channel as the transmitter for proper operation.
5. Operating Instructions
5.1. Volume Adjustment
- Transmitter Volume: Adjust the input gain on your audio source (mixer, interface) to send an optimal signal level to the transmitter. The transmitter itself does not have a volume knob for the main audio input.
- Receiver Volume: Use the independent volume control knob on the receiver to adjust the monitoring level to your preference.
5.2. Stereo/Mono Mode Switching
The transmitter features a switch to select between Stereo and Mono output modes. Choose the mode that best suits your audio source and monitoring needs.
- Stereo Mode: Provides a true stereo image if your audio source is stereo.
- Mono Mode: Combines left and right channels into a single mono signal, useful for ensuring all audio is heard in both ears, especially with mono sources.
5.3. Auxiliary/Line Mode Switching
The transmitter also includes a switch for Auxiliary (Aux) or Line input levels. Select the appropriate setting based on the output level of your connected audio device.
- Line Mode: For standard line-level audio sources (e.g., mixer outputs, audio interfaces).
- Aux Mode: May be used for devices with lower output levels, though Line mode is generally recommended for professional audio equipment.
5.4. CUE Mic Function
To use the CUE mic function:
- Connect a dynamic microphone to the 1/4-inch (6.35mm) mono input on the transmitter.
- This allows the microphone signal to be transmitted to the receivers, enabling communication or cueing during performances or recordings.

Image 5.1: Setting up the CUE mic function on the transmitter.
5.5. One-to-Many Connection
A single SWIFF AUDIO WX520 transmitter can support up to 10 receivers simultaneously. To achieve this:
- Ensure all receivers are powered on and set to the same channel as the transmitter.
- The system will automatically establish connections.

Image 5.2: A single transmitter can connect to multiple receivers.
5.6. Transmission Range
The system offers a maximum transmission range of 160 feet (approximately 50 meters) in open, unobstructed environments. Performance may vary depending on environmental factors such as walls, other wireless devices, and physical obstructions.

Image 5.3: Visual representation of the stable transmission range.
6. Maintenance
6.1. Cleaning
- Wipe the units with a soft, dry cloth.
- Do not use abrasive cleaners, solvents, or harsh chemicals.
- Keep the charging contacts clean and free of debris.
6.2. Battery Care
- Charge the units regularly, even if not in frequent use, to maintain battery health.
- Avoid fully discharging the batteries frequently.
- Store the system in a cool, dry place when not in use.
- Actual battery life may vary based on usage, volume levels, and ambient temperature. The receiver provides up to 5 hours of continuous use, extending to 10 hours with the fully charged transmitter case.
7. Troubleshooting
7.1. No Sound or Low Volume
- Check Connections: Ensure all audio cables are securely connected to the transmitter and headphones to the receiver.
- Volume Levels: Verify that the receiver's volume is turned up and the audio source (mixer, interface) is sending a sufficient signal.
- Battery Level: Check the battery indicators on both units. Recharge if necessary.
- Mode Selection: Confirm the Stereo/Mono and Aux/Line switches on the transmitter are set correctly for your audio source.
7.2. Interference or Signal Dropouts
- Distance and Obstacles: Reduce the distance between the transmitter and receiver. Avoid placing large metal objects or walls between them.
- Channel Selection: Try switching to a different channel (1-4) on the transmitter to avoid interference from other 5.8GHz devices. Ensure all receivers are on the same channel.
- Other Wireless Devices: Minimize the use of other 5.8GHz wireless devices in the immediate vicinity.
7.3. Receiver Not Pairing
- Power Cycle: Turn off both the transmitter and receiver, then power them back on.
- Proximity: Ensure the receiver is close to the transmitter during the pairing process.
- Channel Mismatch: Verify both units are attempting to connect on the same channel.
7.4. Short Battery Life
- Full Charge: Ensure both units are fully charged before use.
- Usage Conditions: High volume levels and extreme temperatures can reduce battery life.
- Charging Case: Remember that the transmitter case provides additional charges for the receiver, extending total usage time.
8. Specifications
| Feature | Specification |
|---|---|
| Brand | SWIFF AUDIO |
| Model Number | WX520 |
| Connectivity Technology | Wireless (5.8GHz) |
| Frequency Range | 20-20000 Hz |
| Audio Latency | 5 Milliseconds |
| Transmission Range | Up to 160 feet (50 meters) |
| Number of Channels | 4 |
| Receiver Battery Life | Up to 5 hours (continuous use) |
| Total Battery Life (with charging case) | Up to 10 hours |
| Battery Charge Time | Approximately 1 hour |
| Transmitter Inputs | XLR, 1/4-inch, 1/8-inch |
| Receiver Output | 3.5 mm Headphone Jack |
| Material | Plastic |
| Item Weight | 0.39 Kilograms |
9. Warranty and Support
9.1. Warranty Information
The SWIFF AUDIO WX520 Wireless In-Ear Monitor System comes with a 1-year warranty from the date of purchase. This warranty covers manufacturing defects and ensures the product functions as intended under normal use. Please retain your proof of purchase for warranty claims.
9.2. Customer Support
For technical assistance, troubleshooting beyond this manual, or warranty inquiries, please contact SWIFF AUDIO customer support. Refer to the contact information provided on the official SWIFF AUDIO website or your purchase documentation.
