
1. Introduction
This manual provides instructions for the Quntis 20.5-inch Monitor Light Bar. This device is designed to provide precise, eye-care illumination for your workspace, featuring radar motion sensing, auto-dimming, and remote control capabilities. Please read this manual thoroughly before use to ensure proper operation and safety.
2. Package Contents
Verify that all items listed below are included in your package:
- Monitor Light Bar (20.5 inches)
- Wireless Remote Control
- USB Type-C Power Cable
- User Manual
- AAA Batteries (3x) for Remote Control (Note: Batteries may not be included in all regions. Please check packaging.)
- Allen Key (for clamp adjustment, if applicable)
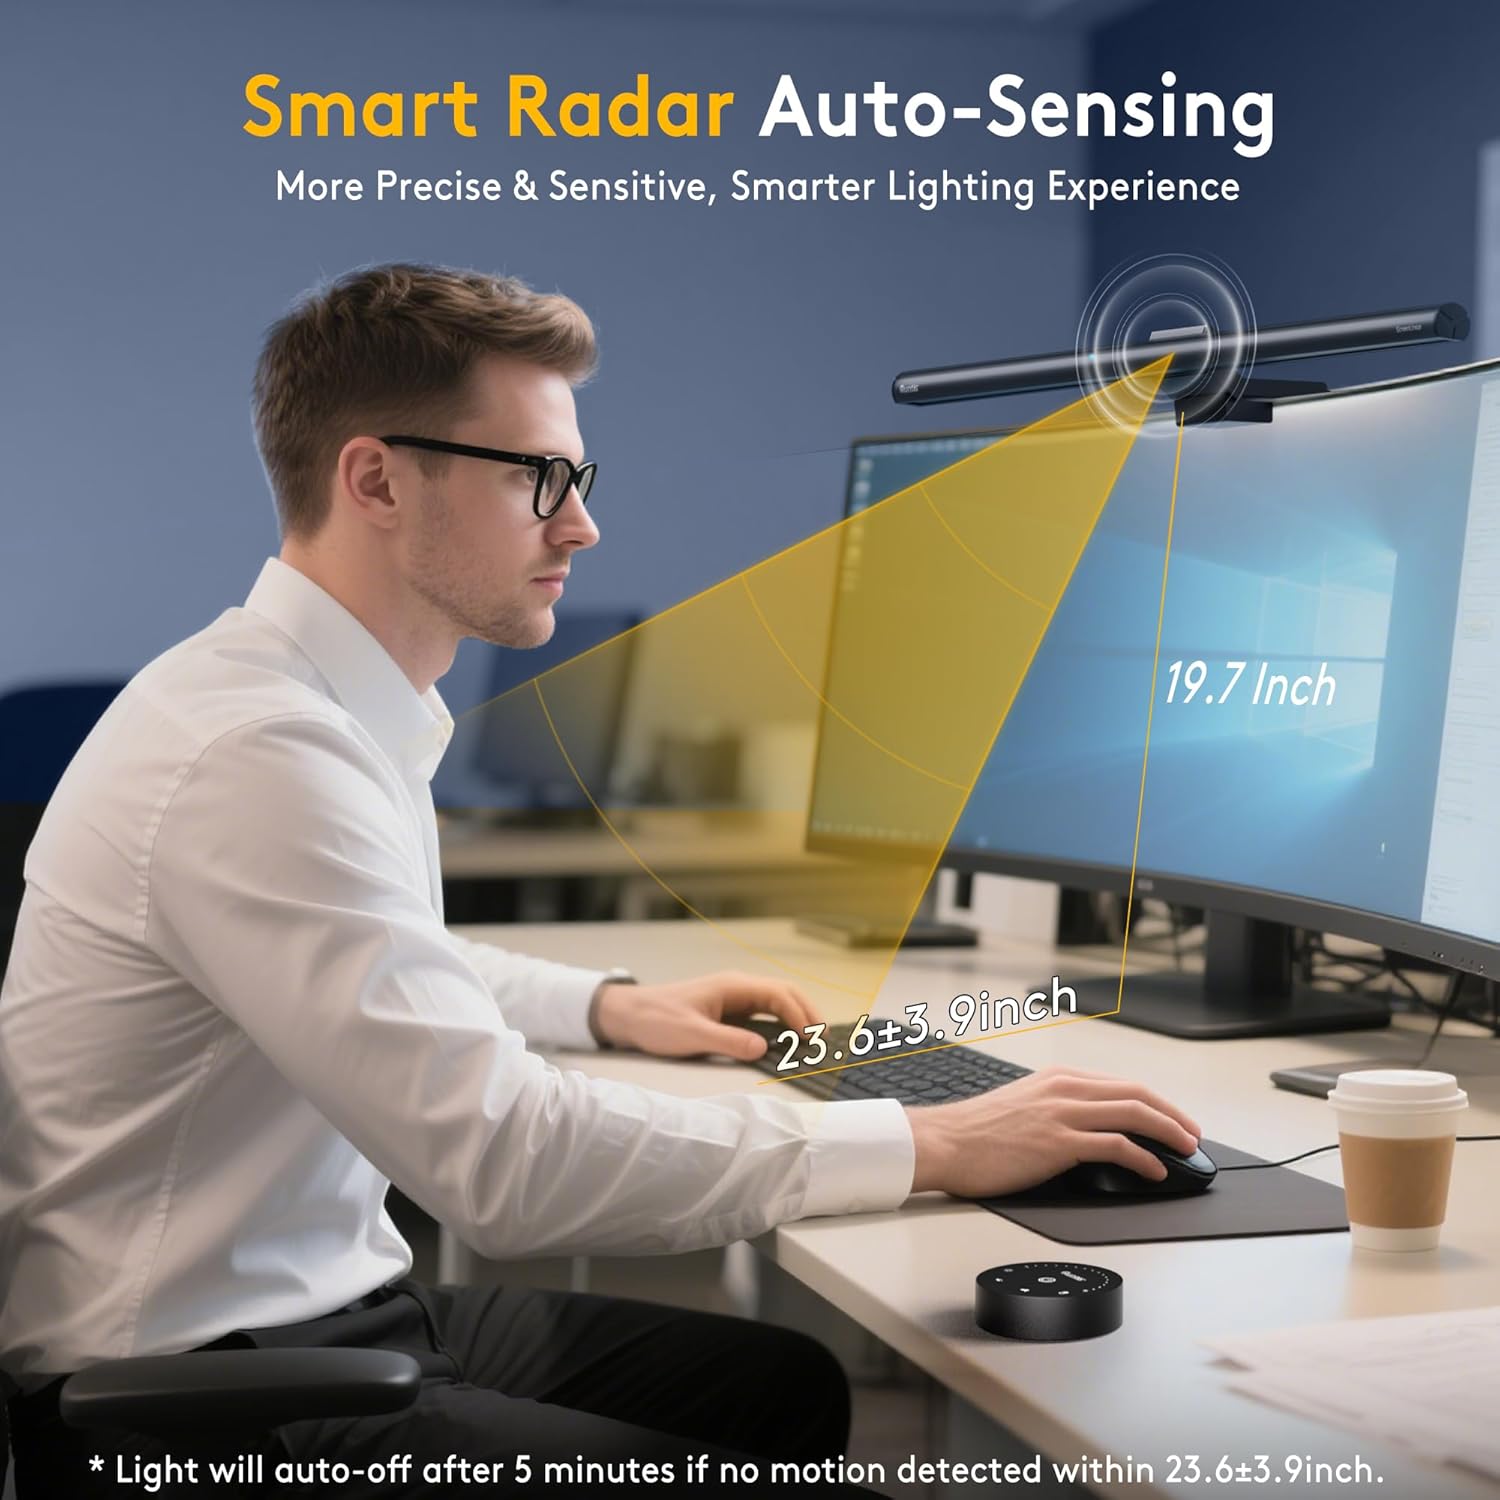
Image: All components included in the Quntis monitor light bar package.
Video: Unboxing and installation guide for the Quntis ScreenLinear Radar Monitor Light Bar.
3. Setup
3.1 Remote Control Battery Installation
- Remove the protective film from the remote control.
- Gently twist and open the bottom cover of the remote control.
- Insert three AAA batteries, ensuring correct polarity (+/-).
- Close the bottom cover securely.
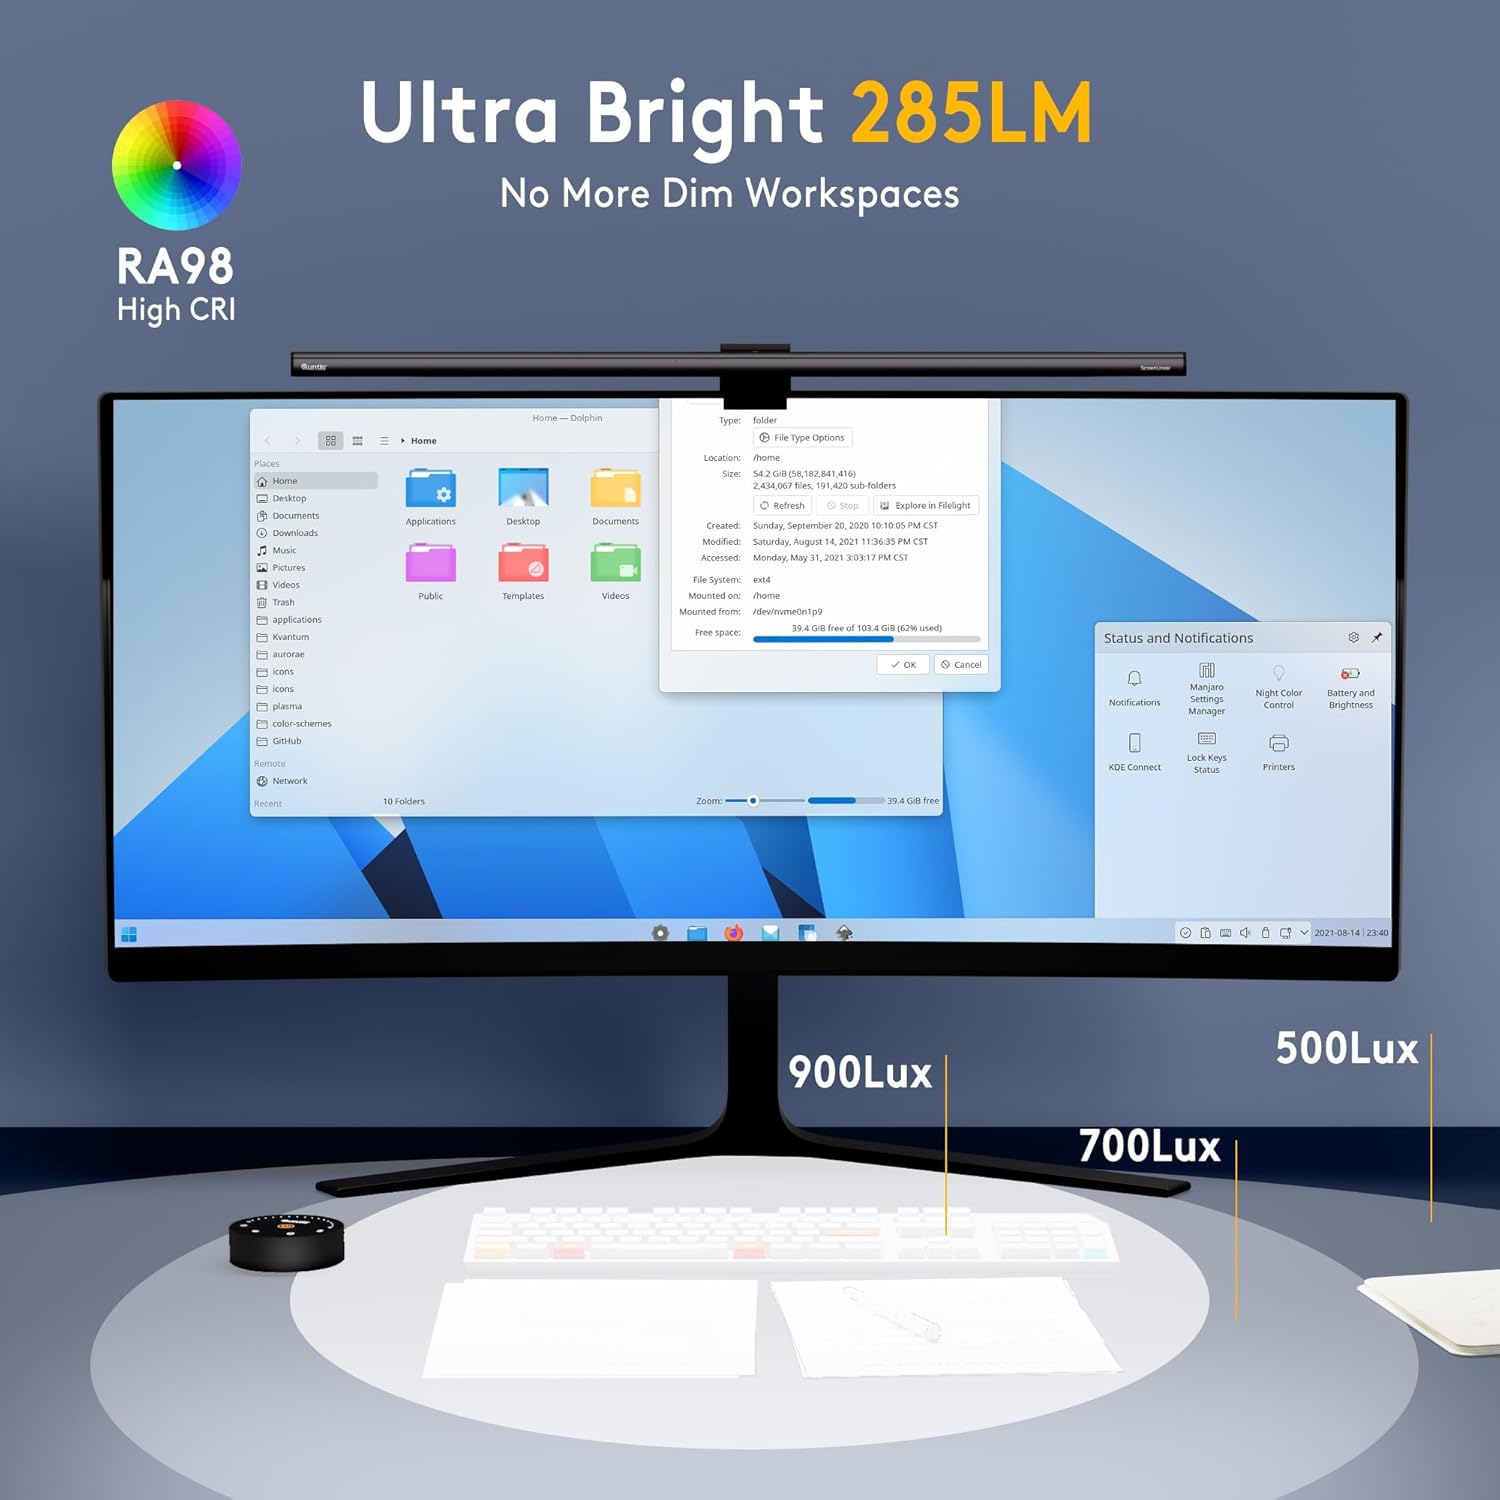
Image: Installing AAA batteries into the remote control.
3.2 Mounting the Light Bar
- Adjust the clamp to fit the thickness of your monitor. The clamp is designed for various monitor types, including curved, ordinary, and irregular screens.
- Place the light bar securely on top of your monitor. Ensure the counterweight block provides stable balance.
- Connect the USB Type-C power cable to the light bar and then to a USB power source (e.g., computer USB port, USB wall adapter).
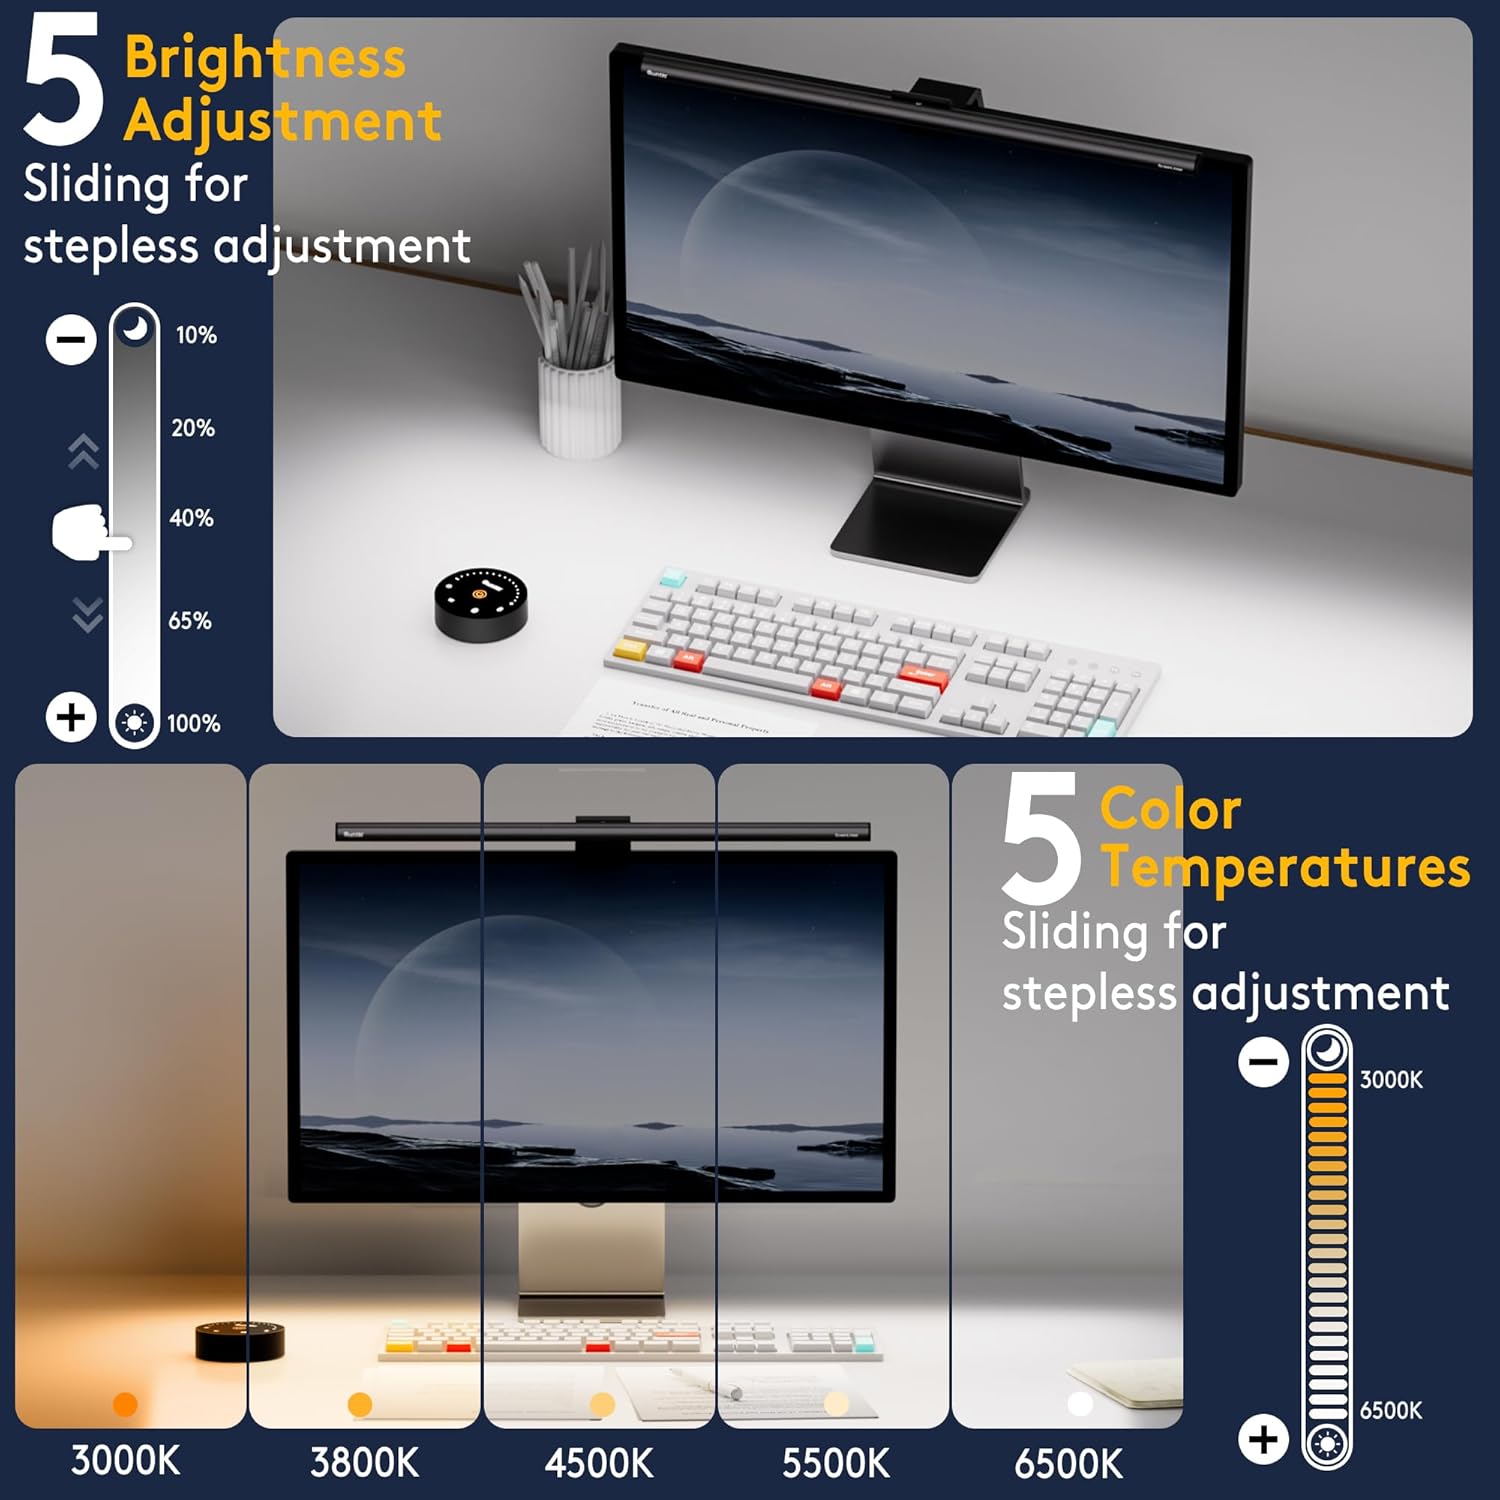
Image: Detailed view of the adjustable clamp mechanism for various monitor types.
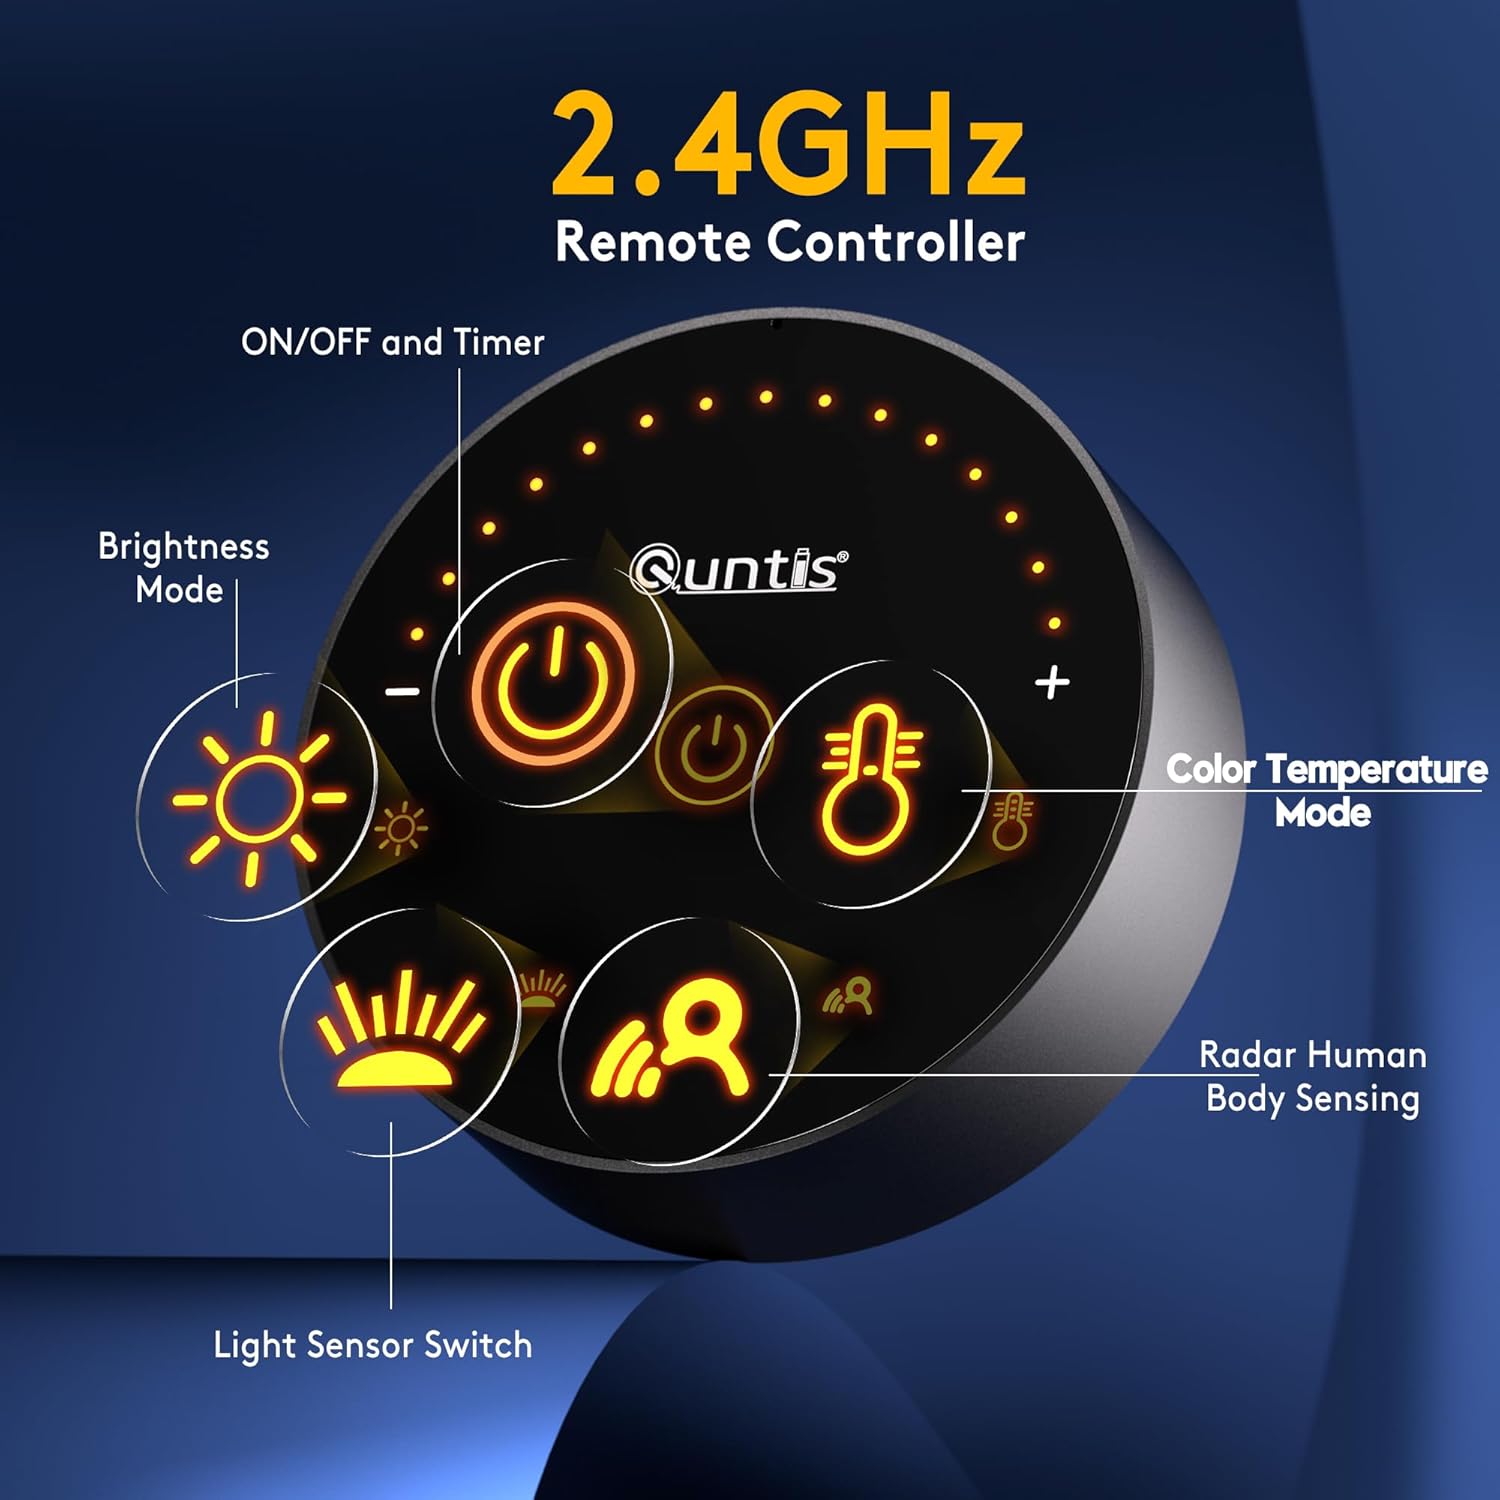
Image: The monitor light bar mounted on a screen, highlighting the reserved space for a webcam.
4. Operation
4.1 Power On/Off
- Press the power button on the remote control to turn the light bar on or off.
4.2 Brightness Adjustment
- Tap: Tap the brightness buttons (+/-) on the remote control for incremental adjustments.
- Long Press: Long press the brightness buttons (+/-) for stepless dimming, allowing fine-tuned brightness levels from 10% to 100%.

Image: The remote control interface for adjusting brightness and color temperature.
4.3 Color Temperature Adjustment
- Tap: Tap the color temperature buttons (+/-) on the remote control for incremental adjustments.
- Long Press: Long press the color temperature buttons (+/-) for stepless adjustment of color temperature, ranging from 3000K (warm white) to 6500K (cool white).
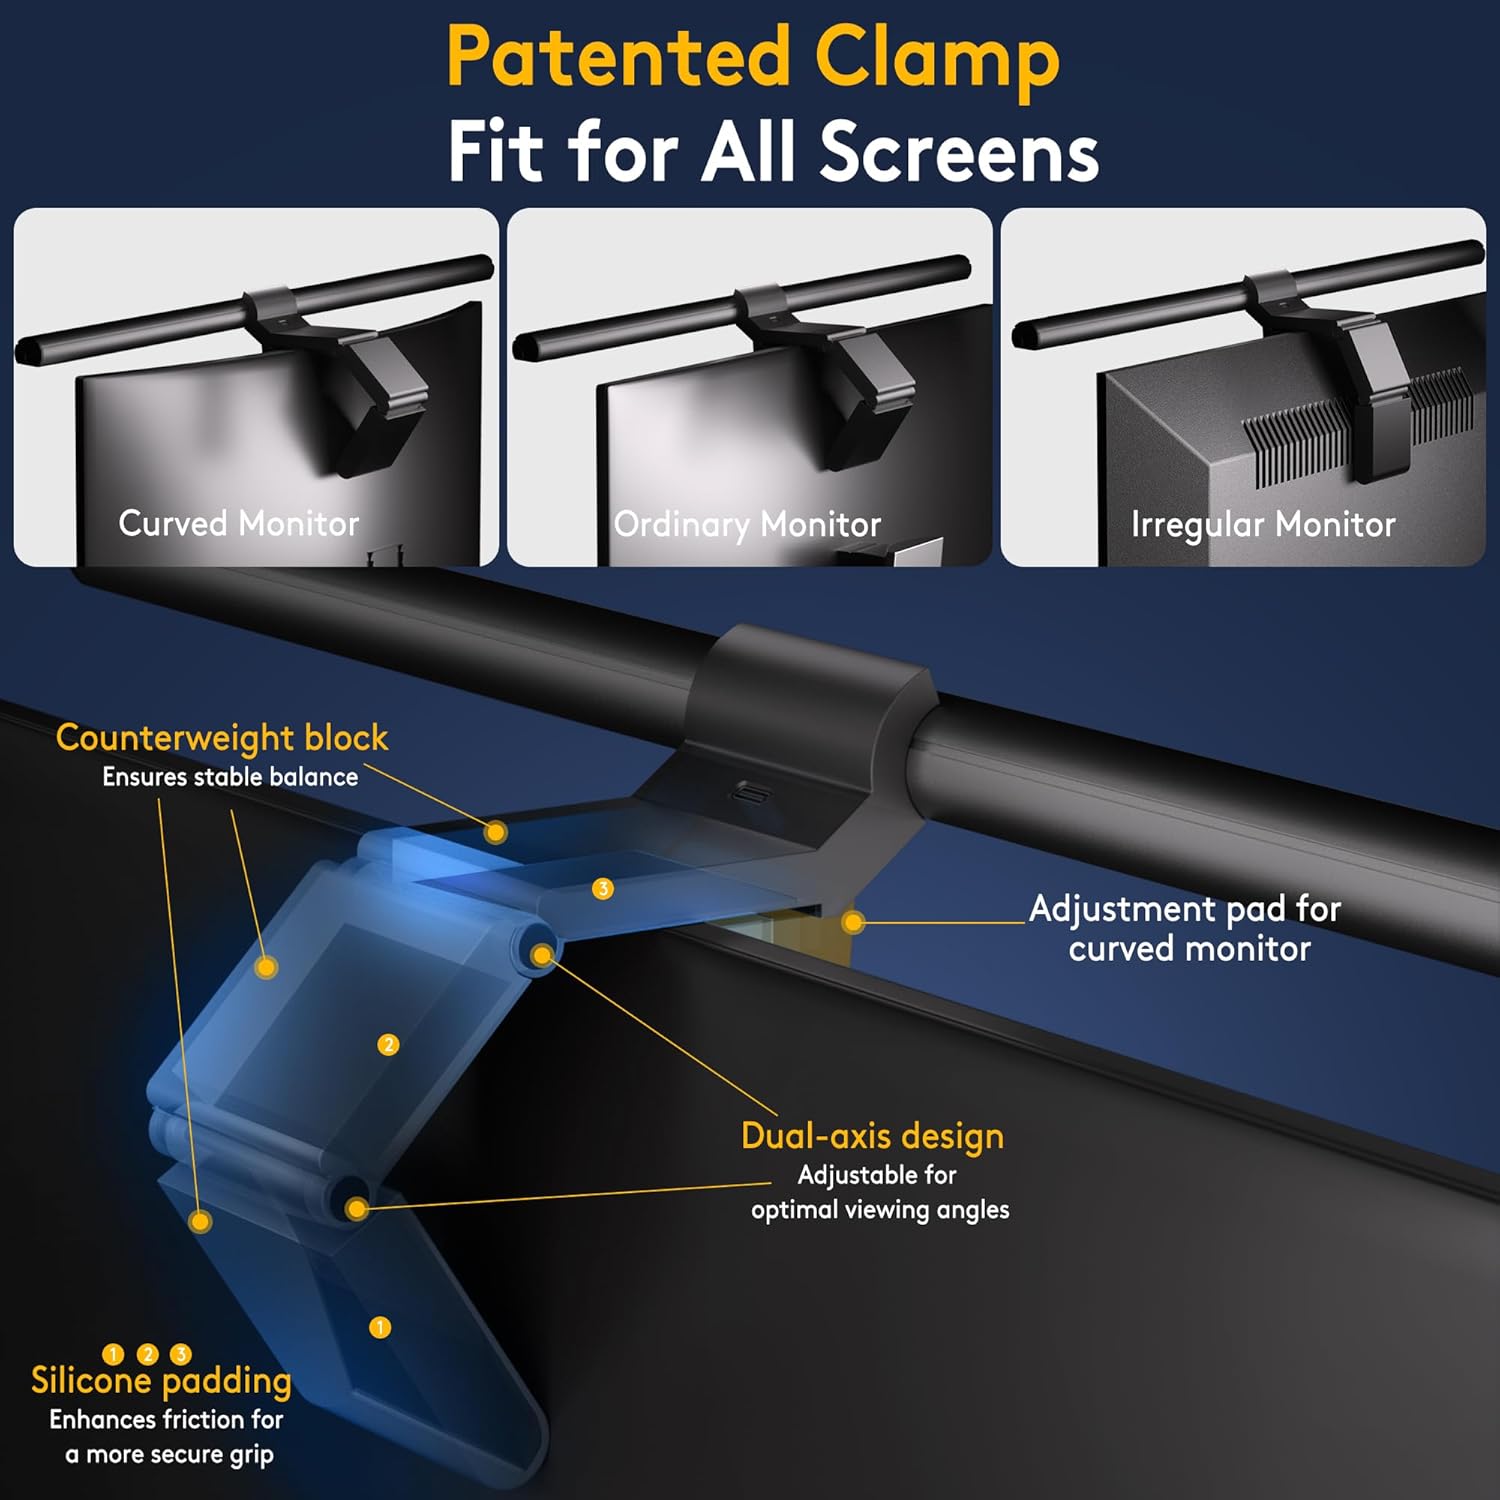
Image: Visual representation of various color temperature settings available on the light bar.
4.4 Auto-Dimming Function
- Press the auto-dimming button (sun icon) on the remote control to activate this feature. The integrated light sensor will automatically adjust the brightness based on ambient light conditions.
4.5 Radar Motion Sensor
- Press the radar motion sensor button (person icon) on the remote control to enable this function. The light bar will automatically turn on when movement is detected within a 23.6" ±3.9" range and turn off 5 minutes after no movement is detected.
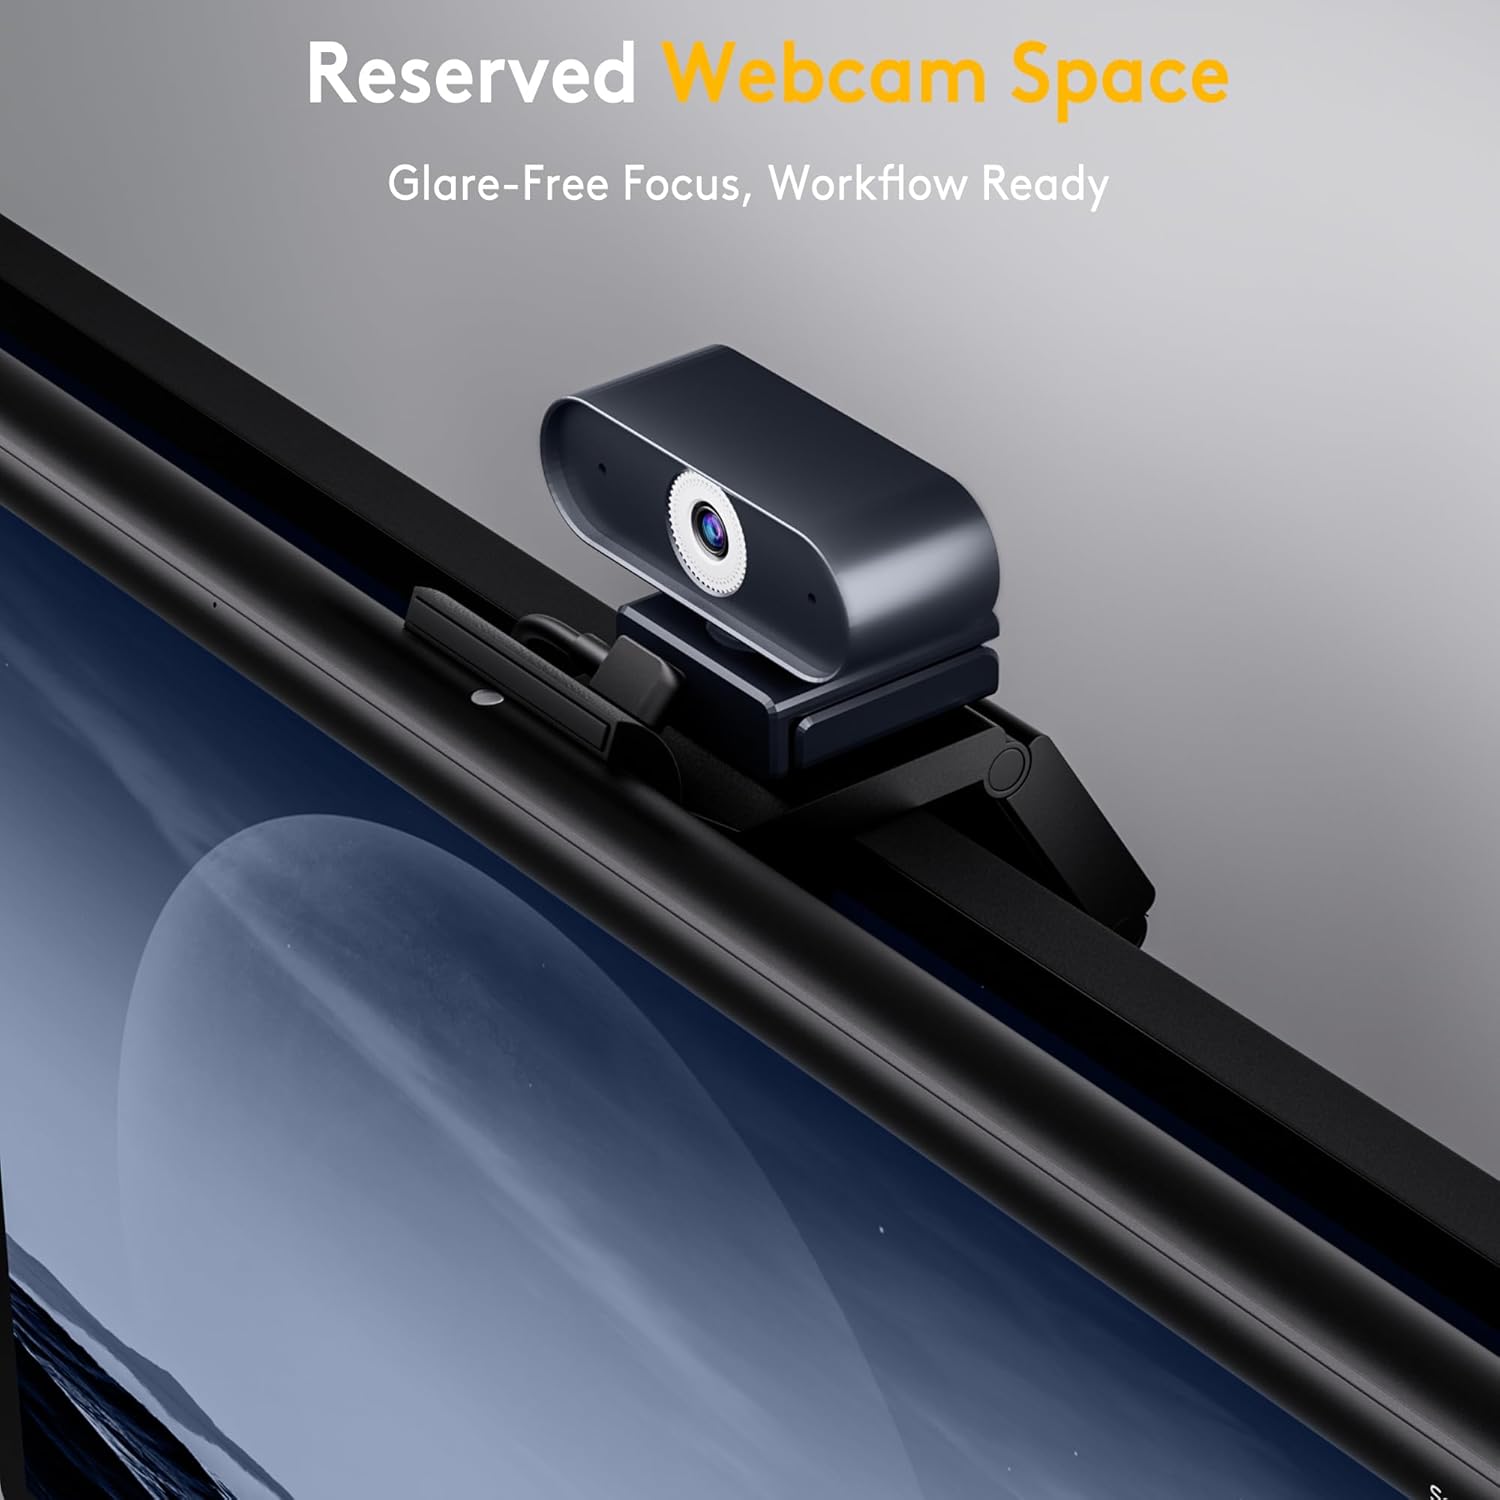
Image: The radar motion sensor detecting a user and automatically activating the light.
4.6 2-Hour Auto-Off Timer
- Press the timer button on the remote control to activate the 2-hour auto-off timer. This feature promotes healthy eye habits by reminding you to take breaks.
5. Key Features
- Precision Lighting: Provides over 900lx of center brightness for wide, precise illumination.
- Smart Motion Sensor: Automatically turns on/off based on user presence (23.6" ±3.9" range, 5-minute auto-off).
- Intelligent Auto-Dimming: Adjusts brightness to ambient surroundings.
- 2-Hour Timer: Promotes eye health by reminding users to take breaks.
- Customizable Lighting: Stepless adjustment of brightness (10%-100%) and color temperature (3000K-6500K) via remote control.
- Space-Saving Clamp: Securely mounts on most curved (1000R to 1800R) and non-flat top monitors.
- Webcam Mount Compatibility: Integrated design allows easy attachment of a webcam without blocking the lens.
- High Color Rendering Index (CRI): Ra98 for faithful reproduction of real-world colors.
- Asymmetric Light Design: Illuminates the desk without causing screen glare.
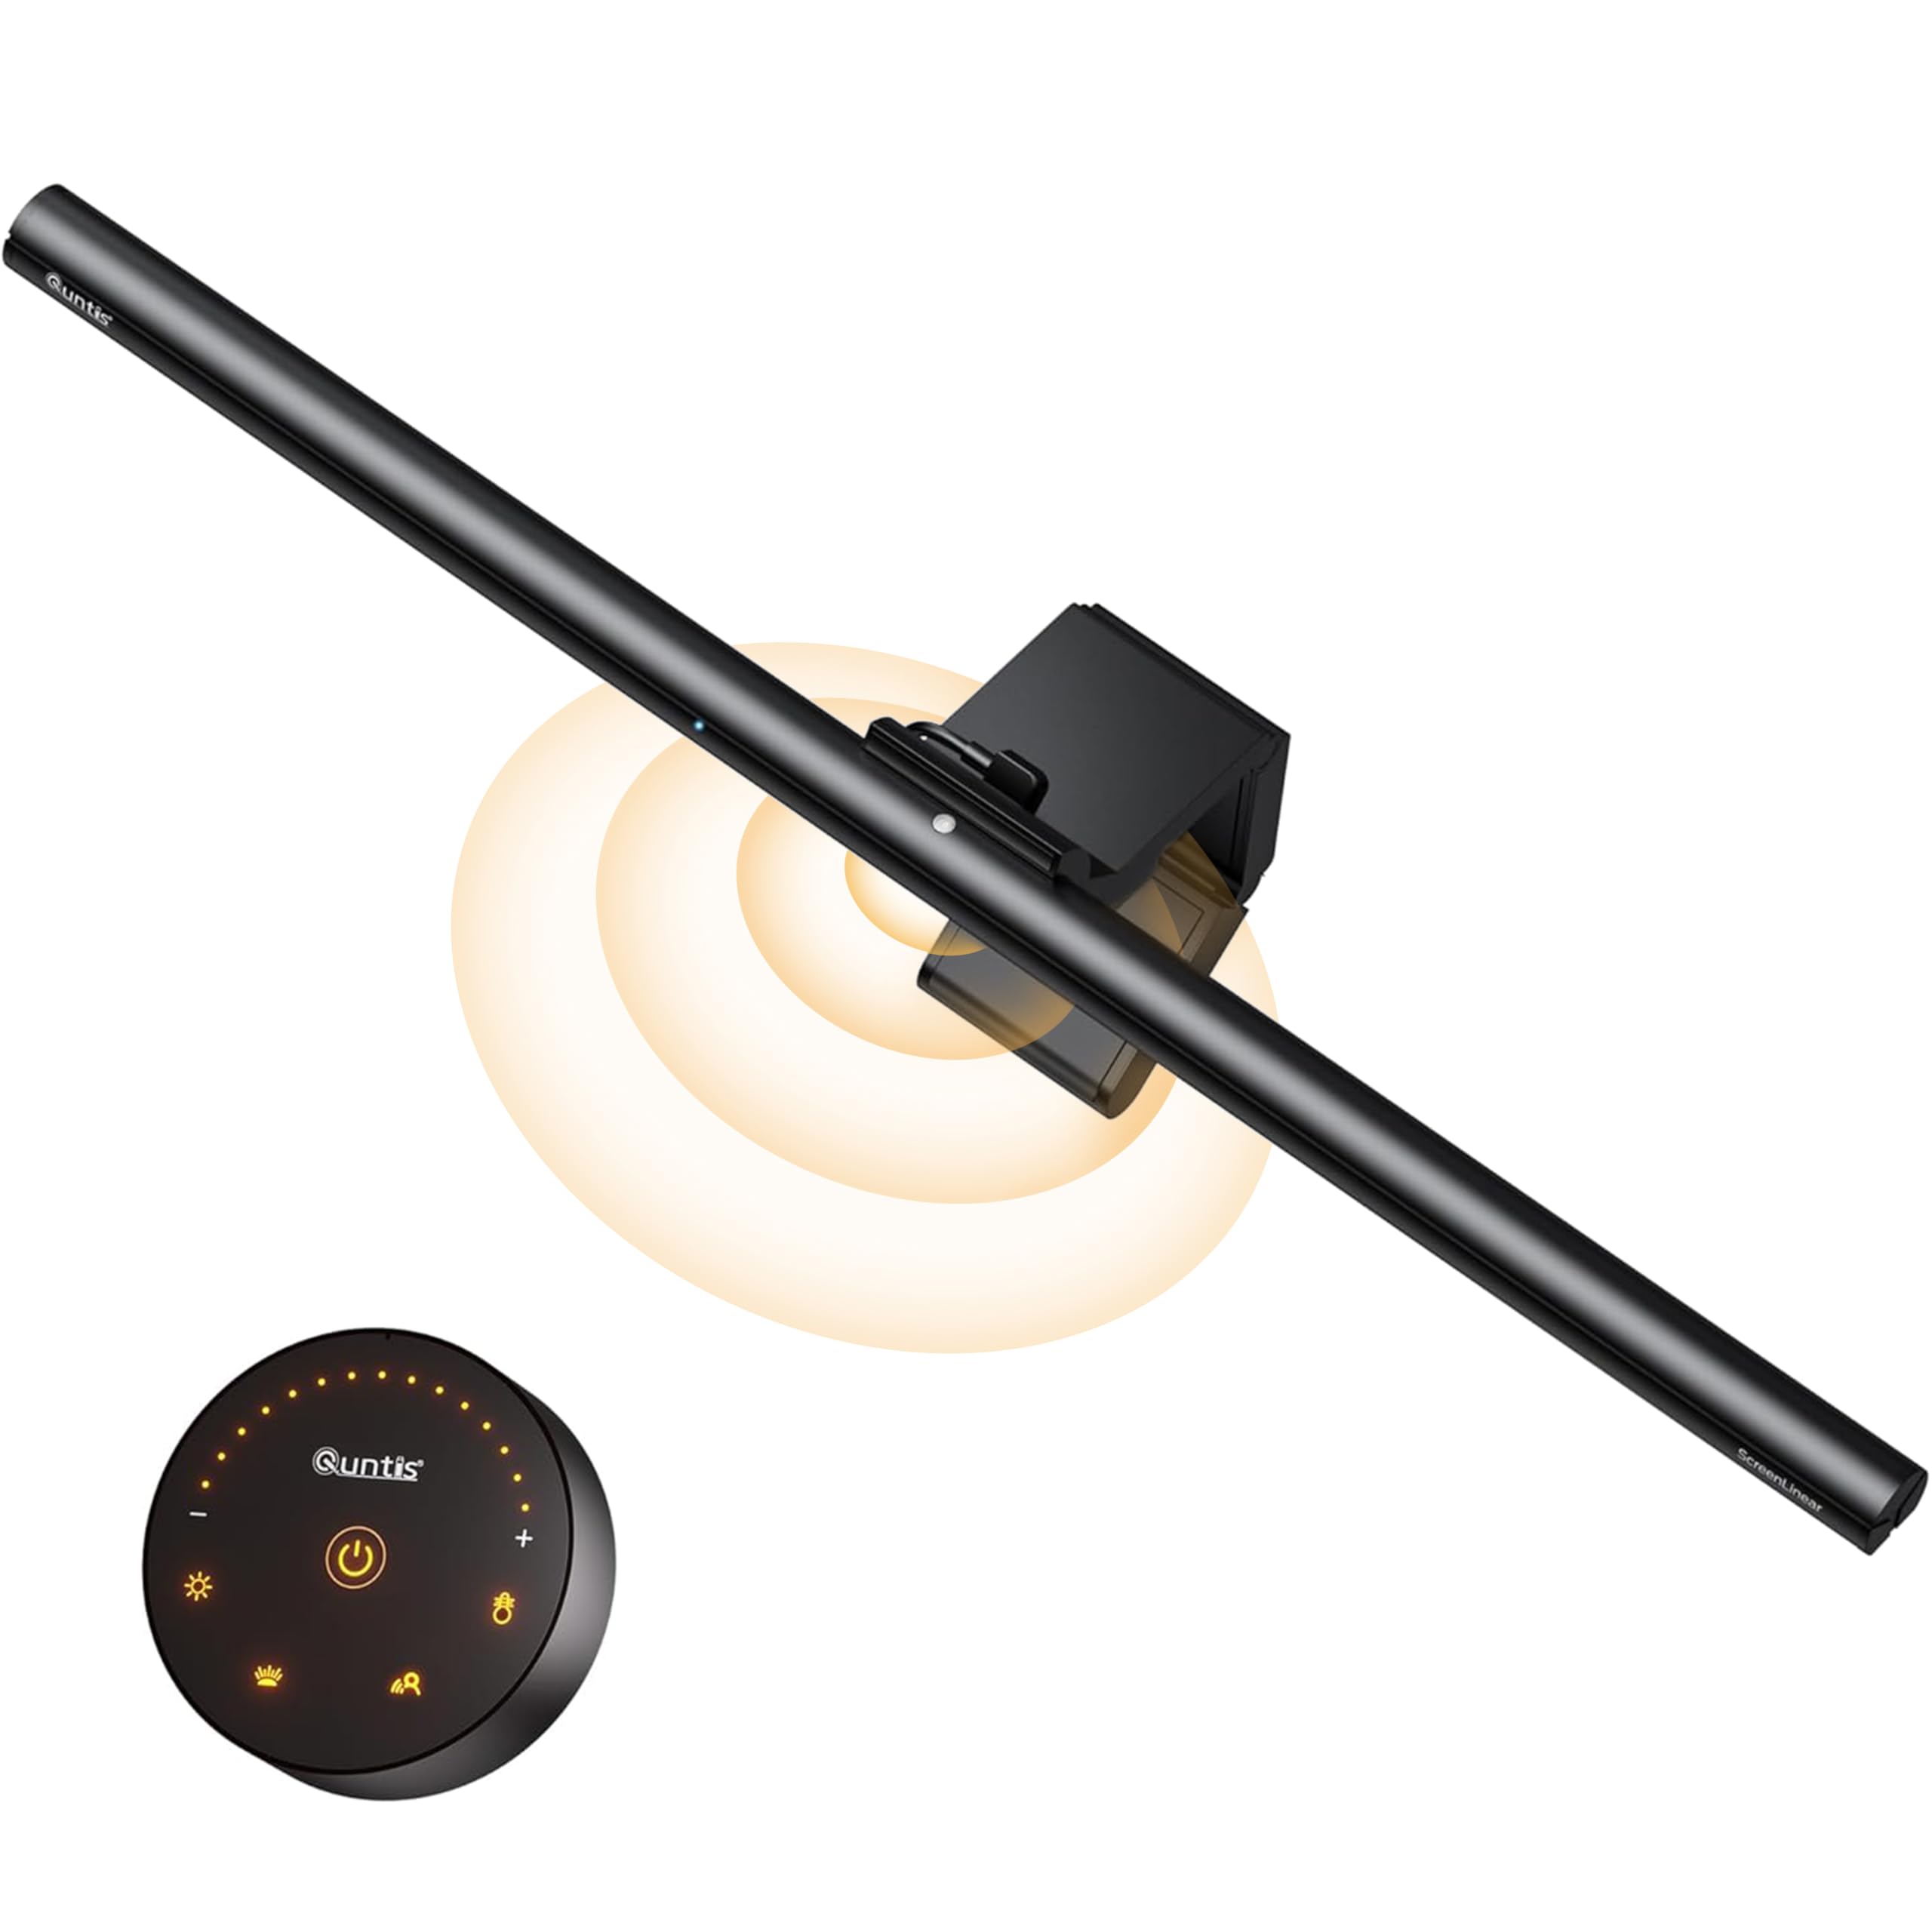
Image: The monitor light bar illuminating a workspace with ultra-wide coverage.
Video: Overview of the Quntis ScreenLinear Radar Professional Monitor Light Bar features, including eye-care technology, smart auto-sensing, and remote control.
6. Specifications
| Feature | Detail |
|---|---|
| Brand | Quntis |
| Model Number | LI-HY-0209-GY |
| Color | Gray |
| Product Dimensions | 0.78"D x 20.08"W x 0.78"H |
| Item Weight | 2.35 pounds |
| Material | Aluminum |
| Power Source | Corded Electric |
| Voltage | 5 Volts (DC) |
| Wattage | 5 watts |
| Type of Bulb | LED |
| Color Temperature Range | 3000K – 6500K |
| Brightness | Over 900lx (center brightness) |
| Motion Sensor Range | 23.6" ±3.9" |
| Special Features | Adjustable Brightness & Color Temperature, Auto-Dimming & Timer, Memory Function, Radar Motion Sensor, Ultra-wide Illumination |
| Mounting Type | Desktop (Hanging) |
7. Maintenance
- Cleaning: Disconnect the power before cleaning. Use a soft, dry cloth to wipe the light bar and remote control. Avoid using abrasive cleaners or solvents.
- Battery Replacement: Replace the AAA batteries in the remote control when the indicator light dims or the remote becomes unresponsive.
- Storage: If storing the device for an extended period, remove the batteries from the remote control and store the light bar in a cool, dry place.
8. Troubleshooting
| Problem | Possible Cause | Solution |
|---|---|---|
| Light bar does not turn on. | No power supply. Remote control batteries are dead or incorrectly installed. | Ensure the USB cable is securely connected to a working power source. Replace remote control batteries, ensuring correct polarity. |
| Remote control is unresponsive. | Low or dead batteries. Interference. | Replace batteries. Ensure no obstructions between the remote and the light bar. Try re-pairing if applicable (refer to manufacturer's specific pairing instructions if available). |
| Auto-dimming or motion sensor not working. | Feature not activated. Sensor obstructed. Ambient light too high/low for auto-dimming to register significant change. | Ensure the respective function is enabled via the remote control. Clear any obstructions from the sensor area on the light bar. Test in varying light conditions or adjust manually. |
| Light flickers or is unstable. | Unstable power supply. Loose connection. | Try a different USB power source or cable. Re-seat the USB cable connection. |
9. Warranty & Support
The Quntis 20.5-inch Monitor Light Bar comes with a 1-Year Warranty from the date of purchase. This warranty covers manufacturing defects and malfunctions under normal use. It does not cover damage caused by misuse, accidents, unauthorized modifications, or improper installation.
For warranty claims, technical support, or product inquiries, please contact Quntis customer service through their official website or the retailer where the product was purchased. Please have your proof of purchase and model number (LI-HY-0209-GY) ready.
For additional support and product information, visit the Quntis Store on Amazon.
