
1. Safety Information
Always prioritize safety when operating welding equipment. Failure to follow safety guidelines can result in serious injury or property damage.
- Personal Protective Equipment (PPE): Always wear a welding helmet, welding gloves, safety glasses, and appropriate protective clothing (long sleeves, heavy-duty pants, closed-toe shoes) to shield against sparks, UV radiation, and heat.
- Ventilation: Ensure adequate ventilation in your work area to disperse welding fumes, which can be hazardous if inhaled.
- Fire Hazards: Keep flammable materials away from the welding area. Have a fire extinguisher readily available.
- Electrical Safety: Ensure the welding machine is properly grounded. Do not operate in wet conditions. Inspect cables for damage before each use.
- Workpiece Clamping: Securely clamp your workpiece to prevent movement during welding.
2. Package Contents
Verify that all items listed below are included in your SakerPlus Portable Welding Machine kit:
- Arc Portable Welder Handheld (Compact 3.75lb IGBT inverter welder)
- Durable Carry Case
- Welding Ground Wire
- Welding Helmet
- Welding Brush
- Chipping Hammer
- 30x 3/32" Welding Rods
- Welding Gloves
- Safety Goggles

3. Product Overview
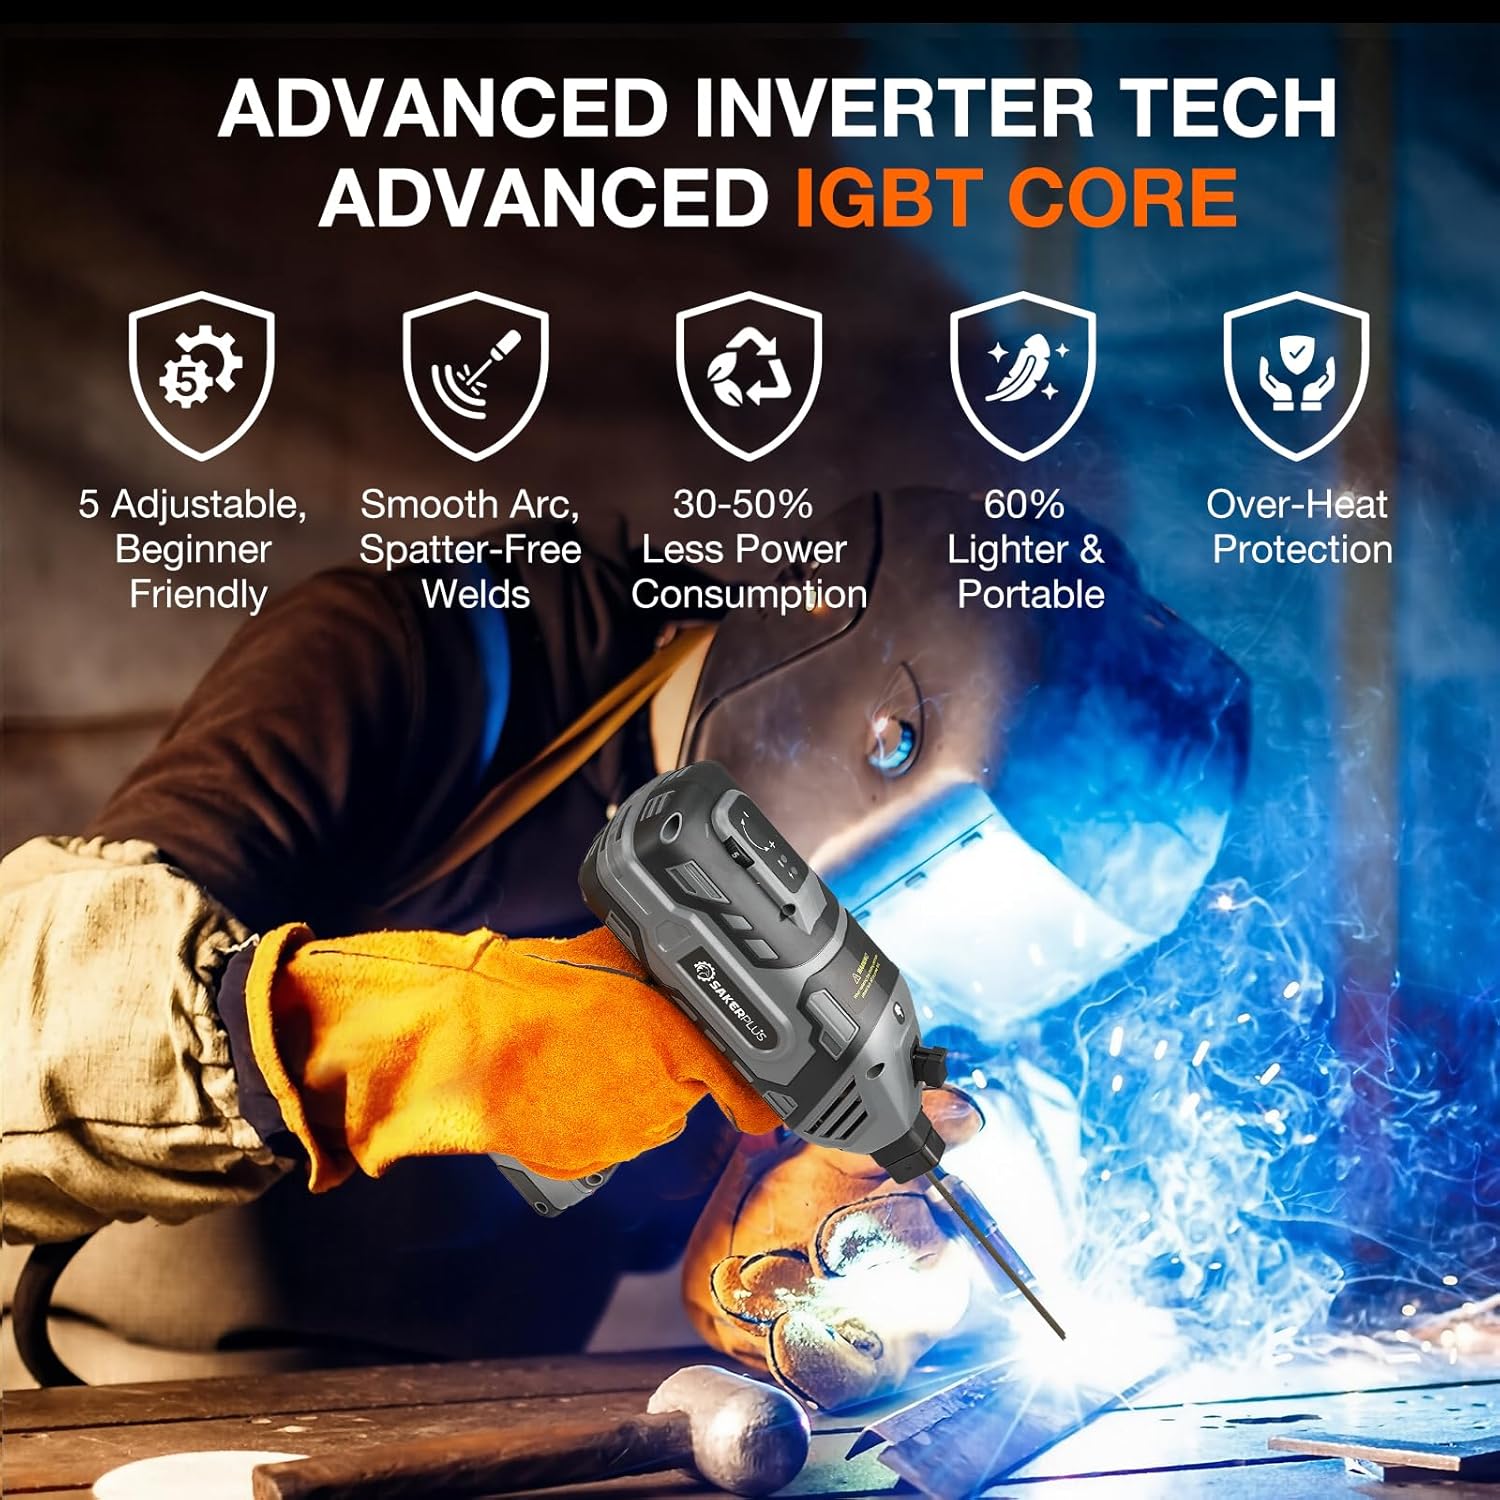
The SakerPlus Portable Welding Machine is designed for versatility and ease of use, featuring advanced IGBT and inverter technology for stable current output and minimal spatter. Its lightweight and compact design makes it suitable for various applications.

Product Features:
- Ultra-Lightweight & Portable: Weighing only 3.75 lbs (1.7 kg), it is significantly lighter than older models, ideal for overhead work, tight spaces, or mobile repairs.
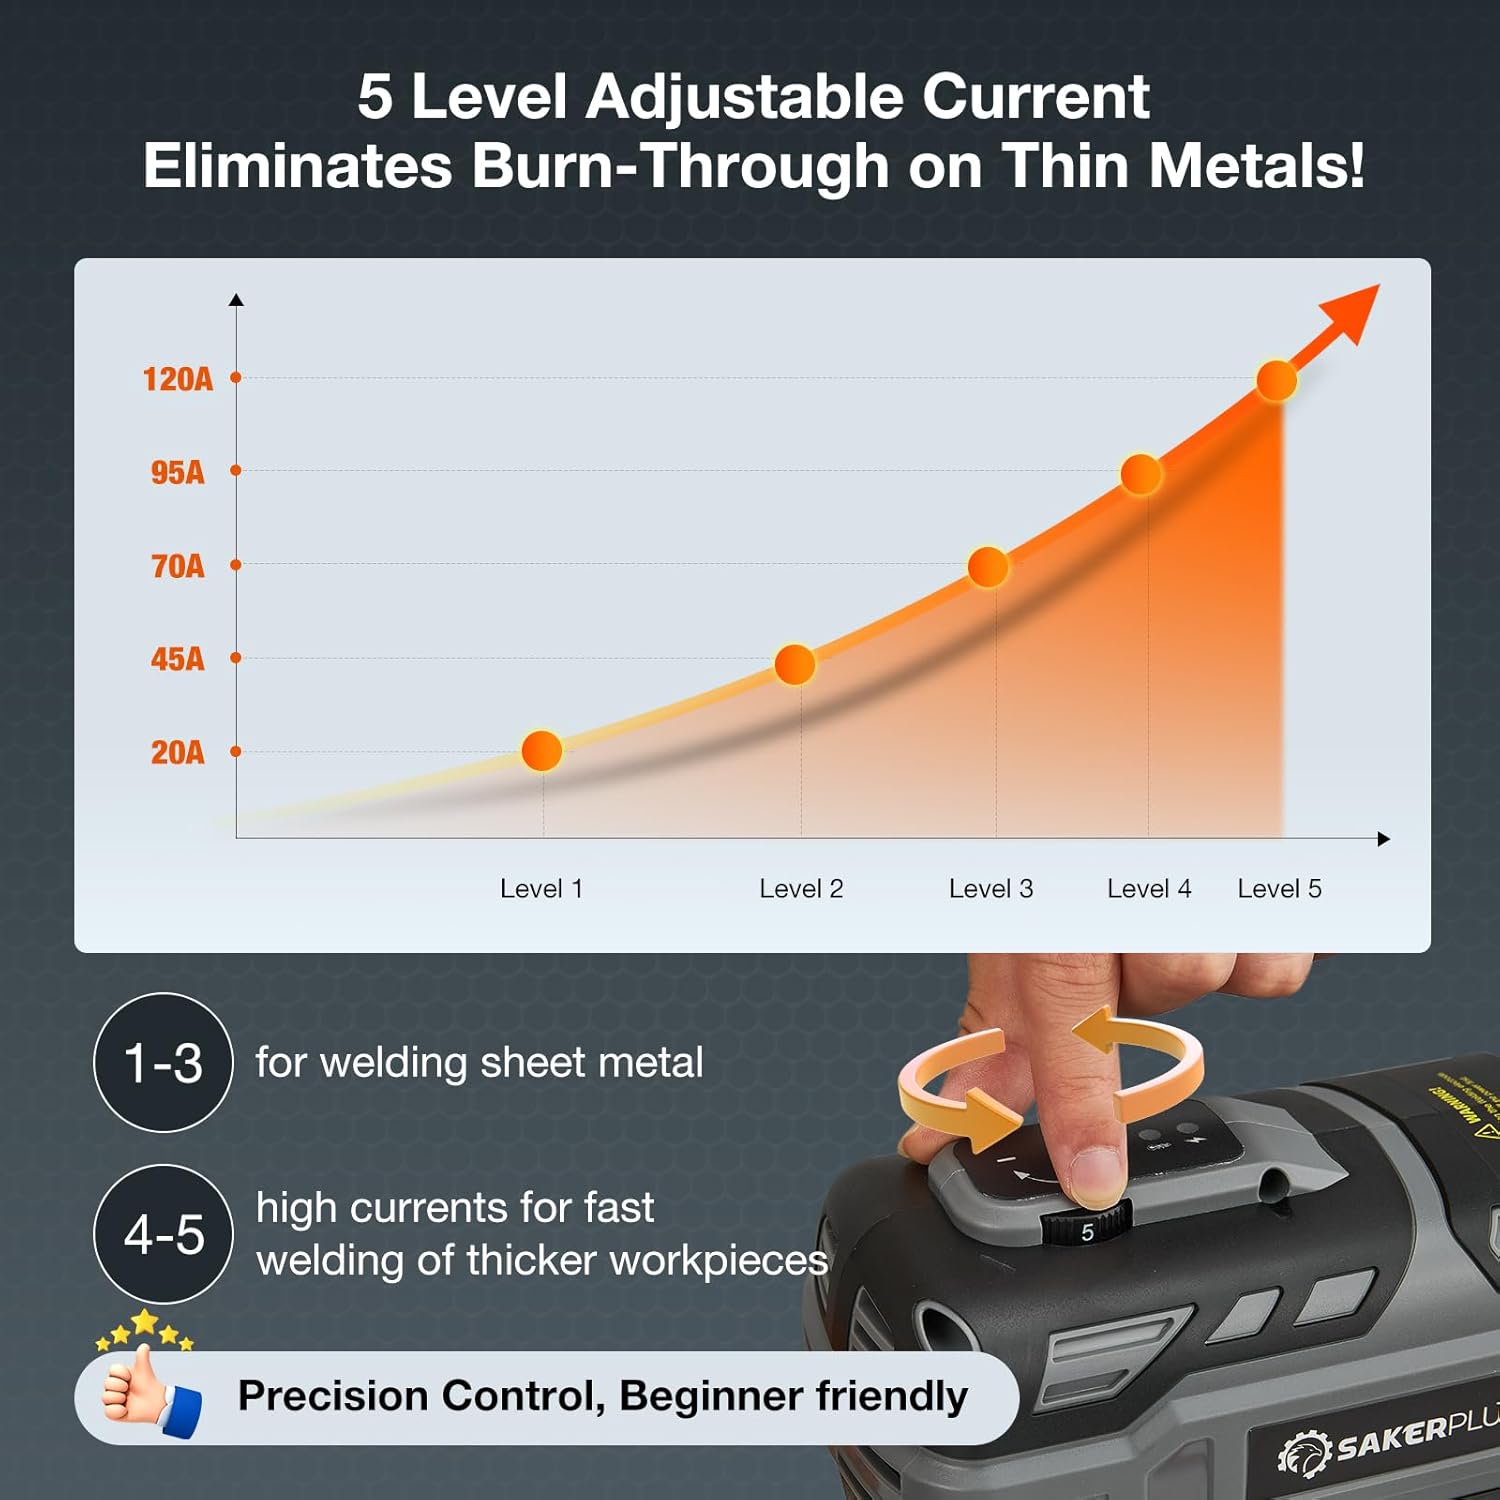
- 5 Precision Current Settings: Easy-to-select amperage levels (20A/45A/70A/95A/120A) for controlled heat on thin sheet metal and deep penetration on thick steel.
- Superior Welding Quality: Advanced IGBT and inverter technology ensure stable current output (±1% fluctuation), minimizing spatter and producing smooth welds.
- Multi-Material Welding: Capable of welding alloy steel, carbon steel, and iron.
- Built-in Safeguards: Includes overload, over-temperature, and over-current/short-circuit protection for enhanced safety.
4. Setup Instructions
Follow these steps to prepare your SakerPlus Portable Welding Machine for operation:
- Unpack the Unit: Remove all components from the carry case.
- Connect Ground Clamp: Attach the ground clamp to a clean, bare metal section of your workpiece. Ensure a secure connection for proper electrical circuit.
- Insert Welding Rod: Depress the welding rod clamp button on the front of the machine. Insert a compatible welding rod (3/32" to 1/8" or 2.5-3.2mm) into the clamp. Release the button to secure the rod.
- Power Connection: Plug the welding machine into a standard 110V household outlet.
- Power On: Flip the main power switch to the 'ON' position. The machine is now ready for current adjustment.

Setup Demonstration Video:
5. Operating Instructions
Once the machine is set up, you can begin welding. Always ensure you are wearing all necessary PPE.
- Adjust Current: Use the intuitive dial to select the appropriate amperage level for your material thickness. Refer to Section 6 for detailed current adjustment guidelines.
- Initiate Arc: Bring the tip of the welding rod into contact with the workpiece and quickly pull it away slightly to strike an arc. Maintain a consistent arc length.
- Maintain Travel Speed: Move the welding rod along the joint at a steady pace to create a uniform weld bead.
- Overheat Protection: The machine features overheat protection. If the unit becomes too hot, it will temporarily shut down to prevent damage. Allow it to cool before resuming operation.

Operation Demonstration Videos:
6. Current Adjustment
The SakerPlus welder features 5 easy-to-select amperage levels to match your project requirements:
- Levels 1-3 (20A-70A): Deliver gentle, controlled heat, ideal for welding thin sheet metal without burn-through.
- Levels 4-5 (95A-120A): Provide deep penetration for thicker materials, suitable for farm equipment or structural repairs.
The intuitive dial allows you to adjust the current quickly and precisely.
7. Maintenance
Regular maintenance ensures the longevity and optimal performance of your welding machine:
- Cleaning: After each use, clean the machine and accessories (welding brush, chipping hammer) to remove slag and debris. Use a dry cloth to wipe down the unit.
- Cable Inspection: Periodically inspect all cables and connections for cuts, fraying, or loose contacts. Replace damaged components immediately.
- Storage: Store the welding machine and its accessories in the provided carry case in a dry, dust-free environment, away from extreme temperatures.
8. Troubleshooting
If you encounter issues with your SakerPlus Portable Welding Machine, consider the following common troubleshooting steps:
- No Power: Check the power cord connection to the outlet and the machine. Ensure the power switch is in the 'ON' position. Verify the outlet is functional.
- No Arc: Ensure the ground clamp has a clean, secure connection to the workpiece. Check that the welding rod is properly inserted and secured in the clamp. The welding rod may be too short or worn out.
- Poor Weld Quality: Adjust the current setting according to the material thickness (refer to Section 6). Ensure the workpiece is clean and free of rust, paint, or oil. Practice maintaining a consistent arc length and travel speed.
- Overheat Shutdown: If the machine shuts down due to overheating, allow it to cool down for several minutes. Ensure proper ventilation around the unit.
If problems persist, contact SakerPlus customer support for assistance.
9. Specifications
| Feature | Detail |
|---|---|
| Manufacturer | SakerPlus |
| Part Number | SK-PWM110B |
| Product Dimensions | 40 x 31.8 x 12.9 cm |
| Item Model Number | SK-PWM110B |
| Power Source | AC |
| Item Weight | 4.05 kg (8.93 lbs) |
| Input Voltage | 110V |
| Current Adjustment | 5 Variable Levels (20A/45A/70A/95A/120A) |
| Electrode Compatibility | 3/32" to 1/8" (2.5-3.2mm) |
10. Warranty and Support
For warranty information and customer support, please refer to the documentation included with your product or visit the official SakerPlus website. Keep your purchase receipt as proof of purchase for any warranty claims.