Product Overview
The ALLmeter DTI Digital Dial Indicator is a precision measuring tool designed for accurate dimensional measurements in various mechanical and industrial applications. It features a large LCD display for easy readability, switchable metric and imperial units, and a zero-setting function for versatile use.

Figure 1: Front view of the ALLmeter DTI Digital Dial Indicator, showing the LCD display and control buttons.

Figure 2: Detailed diagram illustrating the key components and dimensions of the digital dial indicator, including the LCD display, on/off switch, inch/mm switch, zero-setting button, holding point for clamp, spring-loaded probe, and screw thread type M2.5.
What's Included
Upon opening the package, verify that all components are present:
- Digital Dial Indicator unit
- Rear Cover (for mounting)
- 1.5V Battery (LR44 type)
- Instruction Manual (this document)
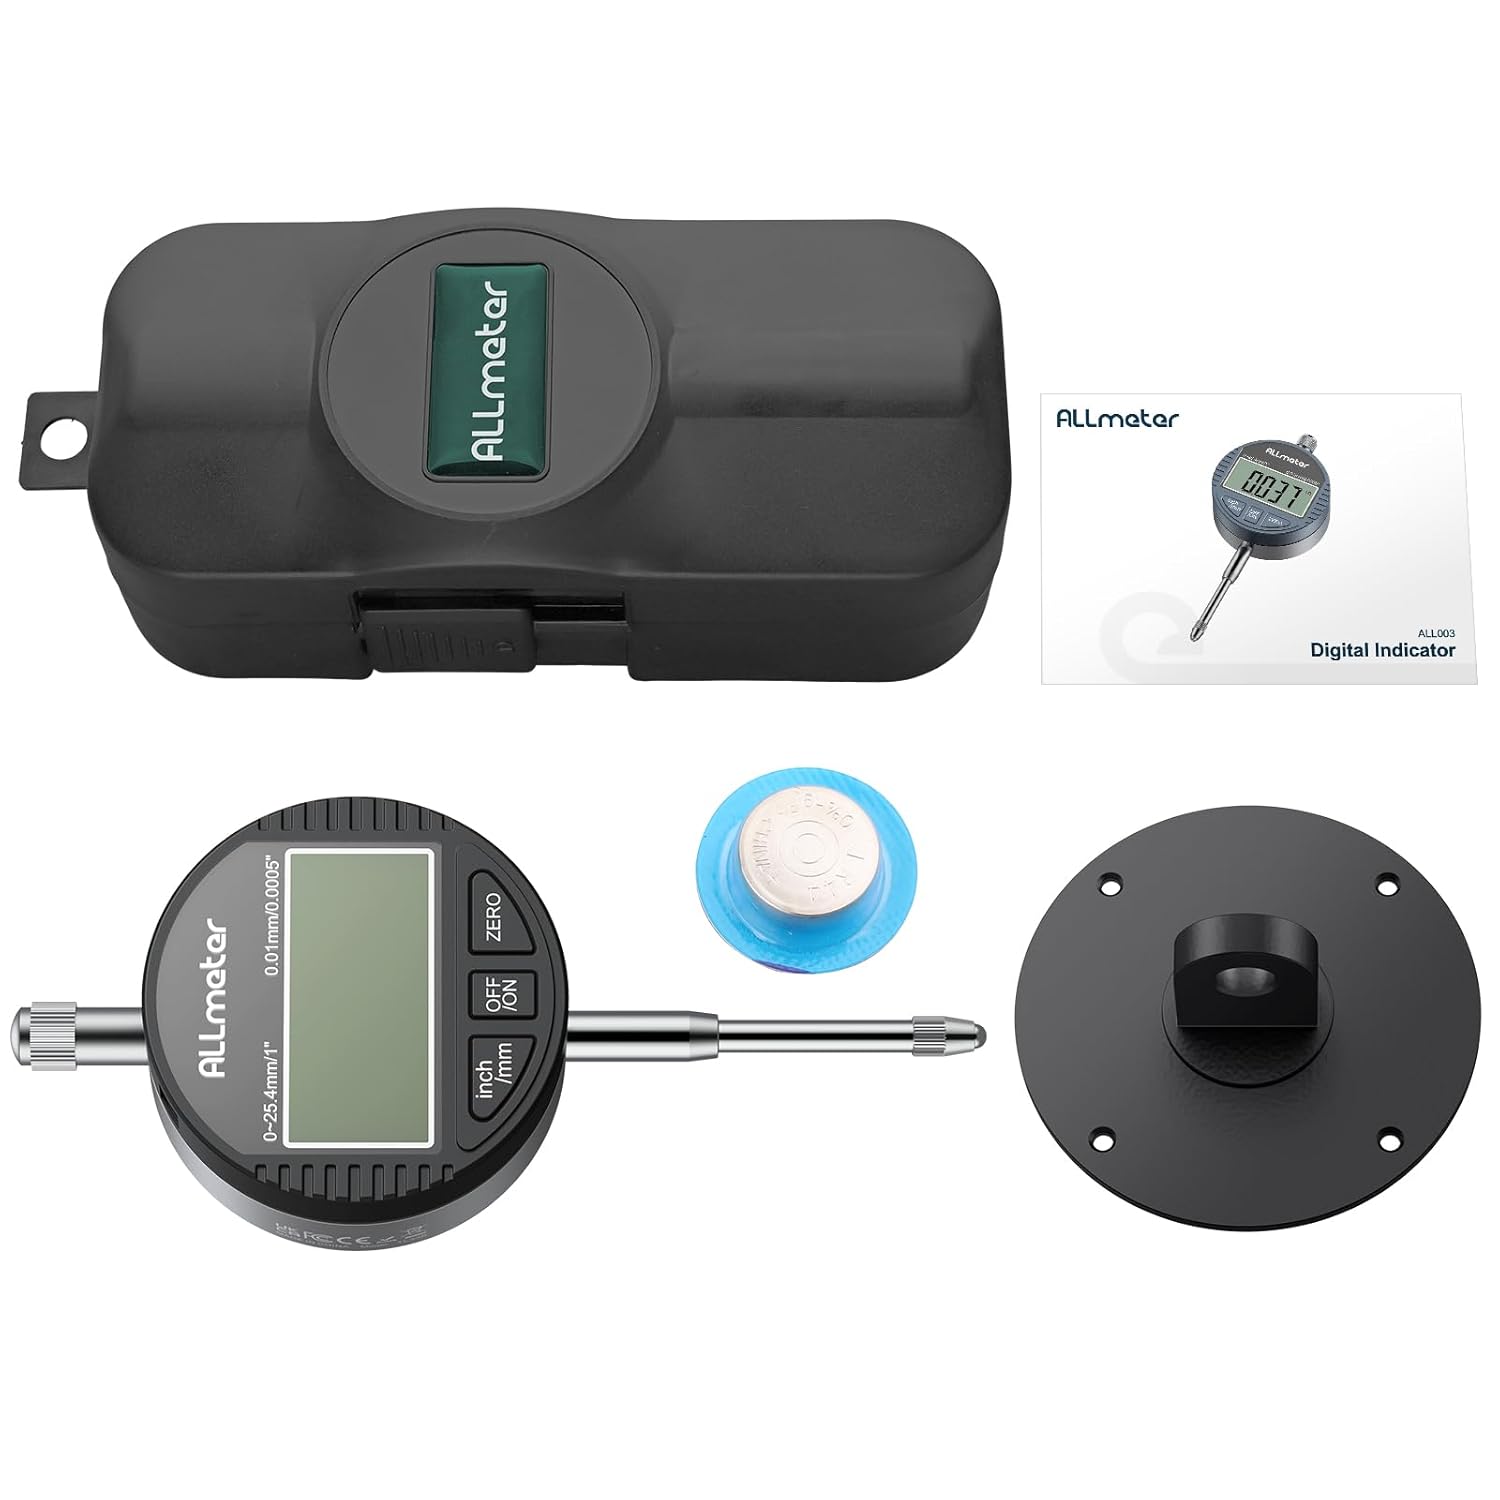
Figure 3: Image showing the complete contents of the product package, including the digital dial indicator, rear cover, battery, and instruction manual.
Setup
1. Battery Installation
The digital dial indicator requires one LR44 1.5V button cell battery. The battery compartment is located on the side of the unit.
- Locate the battery compartment cover.
- Gently slide or unclip the cover to open the compartment.
- Insert the LR44 battery with the positive (+) side facing upwards.
- Close the battery compartment cover securely.

Figure 4: Close-up view of the digital dial indicator, highlighting the convenient LR44 battery compartment for easy replacement and the zero button.
2. Attaching Rear Cover
The digital dial indicator comes with a detachable rear cover, allowing it to be used with different magnetic base holder stands or other mounting solutions. The standard rear cover can be replaced with the included metal back with a mounting lug for increased versatility.
- If a different rear cover is desired, use a small screwdriver to remove the screws securing the current rear cover.
- Carefully remove the existing cover.
- Align the desired rear cover (e.g., the metal one with mounting lug) with the screw holes.
- Secure the new cover by tightening the screws.
Video 1: Demonstration of how to detach and attach the rear cover of the digital dial indicator, showcasing its adaptability for various magnetic base holder stands.
Operating Instructions
1. Power On/Off
Press the OFF/ON button to turn the device on or off.
2. Unit Conversion (mm/inch)
Press the inch/mm button to switch between metric (millimeters) and imperial (inches) units. The selected unit will be displayed on the LCD screen.

Figure 5: Comparison of the digital dial indicator display showing measurements in both millimeters (mm) and inches (in), demonstrating the unit conversion feature.
3. Zero Setting
To set the current position as zero, press the ZERO button. This allows for relative measurements from any desired reference point.
4. Taking Measurements
Extend or retract the spring-loaded probe to make contact with the surface to be measured. The measurement will be displayed instantly on the LCD screen.
Video 2: Operational demonstration of the electronic digital dial indicator, including switching between mm/inch units, performing zero setting, and taking measurements on a surface.
5. Automatic Shutdown
The device features an automatic shutdown function to conserve battery life. If there is no operation for approximately 5 minutes, the indicator will automatically turn off.

Figure 6: Illustration of the automatic shutdown feature, indicating that the device powers off after 5 minutes of inactivity to save battery.
Maintenance
1. Cleaning
To ensure accurate readings and prolong the life of your digital dial indicator, keep it clean. Wipe the surface with a soft, dry cloth. Avoid using abrasive cleaners or solvents that could damage the display or housing.
2. Storage
When not in use, store the digital dial indicator in its protective case to prevent dust and damage. Store in a dry environment away from direct sunlight and extreme temperatures.

Figure 7: The digital dial indicator shown with its protective storage case and included batteries, emphasizing proper storage for protection and longevity.
3. Battery Replacement
If the display starts flashing consistently, it indicates a low battery. Replace the LR44 battery as described in the "Battery Installation" section to ensure continued accurate operation.
Troubleshooting
| Problem | Possible Cause | Solution |
|---|---|---|
| Display is blank or dim. | Battery is dead or incorrectly installed. | Check battery orientation. Replace battery if necessary. |
| Display is flashing. | Low battery indicator. | Replace the LR44 battery. |
| Inaccurate readings. | Dirt or debris on the probe or measuring surface; damaged probe; unit not properly zeroed. | Clean the probe and measuring surface. Re-zero the device. If problem persists, contact support. |
| Unit does not turn on. | Battery issue; internal malfunction. | Ensure battery is new and correctly installed. If still unresponsive, contact support. |
Specifications

Figure 8: Overview of the digital dial indicator's key specifications, including measuring range, resolution, and operating conditions.
- Measuring Range: 0-25.4mm (0-1 inch)
- Resolution: 0.01mm (0.0005 inch)
- Response Time: ≤ 0.5 m/s
- Operating Temperature: 0 ~ 40 °C (32 ~ 104 °F)
- Storage Temperature: -20 ~ 70 °C (-4 ~ 158 °F)
- Relative Humidity: ≤ 80% R.H
- Material: Aluminum Alloy frame
- Product Dimensions: 7.09 x 3.35 x 2.36 inches
- Weight: Approximately 129g (4.55 ounces)
- Battery Type: 1 x LR44 1.5V button cell (included)
- Automatic Shutdown: After 5 minutes of inactivity
Warranty and Support
ALLmeter products are manufactured to high quality standards. For warranty information, technical support, or service inquiries, please contact ALLmeter customer service through the retailer where the product was purchased or visit the official ALLmeter website.
For more information and product updates, visit the ALLmeter Store on Amazon.


