
1. Introduction
The XAUCY KW850 is a professional 2-in-1 diagnostic tool designed for car owners. It functions as both an OBD2 diagnostic scanner and a real-time car battery tester. This device helps users quickly read and erase Diagnostic Trouble Codes (DTCs), check engine light status, and monitor various vehicle parameters. It is compatible with most gasoline vehicles manufactured after 1996 (US-Based), 2001 (EU-Based), and 2006 (Asian cars) that are OBDII/EOBD & CAN compliant.
Key features include a high-resolution TFT colorful display, bright color-coded LEDs, and a built-in speaker for readiness verification. Its patented One-Click I/M Readiness Key simplifies emission checks. The device supports all 10 modes of OBDII tests and offers a multi-language menu option.

Image 1.1: Overview of the XAUCY KW850 diagnostic scanner interface, displaying diagnostic menu, graph data values, and battery check.
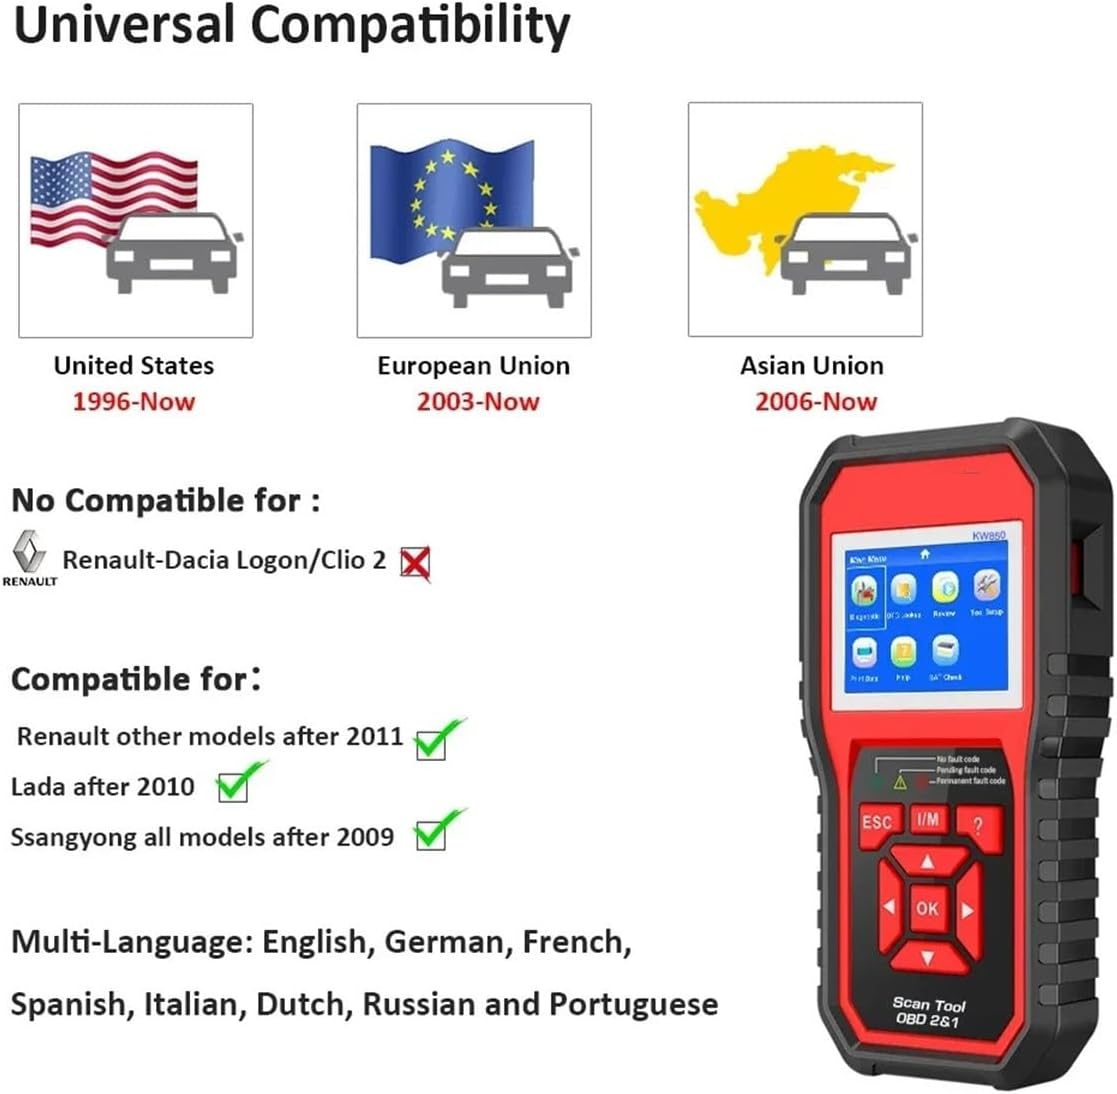
Image 1.2: The KW850 scanner's universal compatibility with vehicles from the United States (1996-Now), European Union (2003-Now), and Asian Union (2006-Now). It also lists specific compatible and incompatible Renault, Lada, and Ssangyong models.
2. Setup
2.1 Device Overview
Familiarize yourself with the device components:
- Diagnostic Cable: Connects to the vehicle's DLC (Data Link Connector).
- OBD2 16 Pin Connector: Connects to the OBD2 DLC.
- I/M Button: Quick access to I/M readiness status.
- Help Button: Provides help information and Code Breaker function.
- ESC Button: Returns to the previous screen.
- OK Button: Confirms the current operation.
- Selection Buttons: Used to move the cursor up/down/left/right for selection.

Image 2.1: Detailed overview of the KW850 scanner, highlighting its diagnostic cable, OBD2 16-pin connector, and various control buttons (I/M, Help, ESC, OK, Selection).
2.2 Initial Connection
- Locate the vehicle's OBD2 port, typically under the dashboard on the driver's side.
- Ensure the vehicle's ignition is in the OFF position.
- Connect the KW850's OBD2 16-pin connector to the vehicle's OBD2 port.
- Turn the vehicle's ignition to the ON position (engine off). The scanner will power on automatically.
2.3 Language and Unit Settings
The KW850 supports 9 languages. To change settings:
- From the Main Menu, navigate to 'Tool Setup'.
- Select 'Language' to choose your preferred language (English, German, French, Spanish, Italian, Dutch, Russian, Portuguese, Polish).
- Select 'Unit of Measure' to set preferred units for flow, speed, distance, pressure, and temperature.
- You can also toggle the 'Beep' sound on or off.

Image 2.2: The KW850 scanner's language selection screen, showing options for English, Español, Português, Français, Русский, Deutsch, Italiano, Nederlands, and Polski.
3. Operating Instructions
The KW850 offers a comprehensive suite of OBDII diagnostic functions. Navigate through the menus using the directional buttons and confirm selections with the 'OK' button.
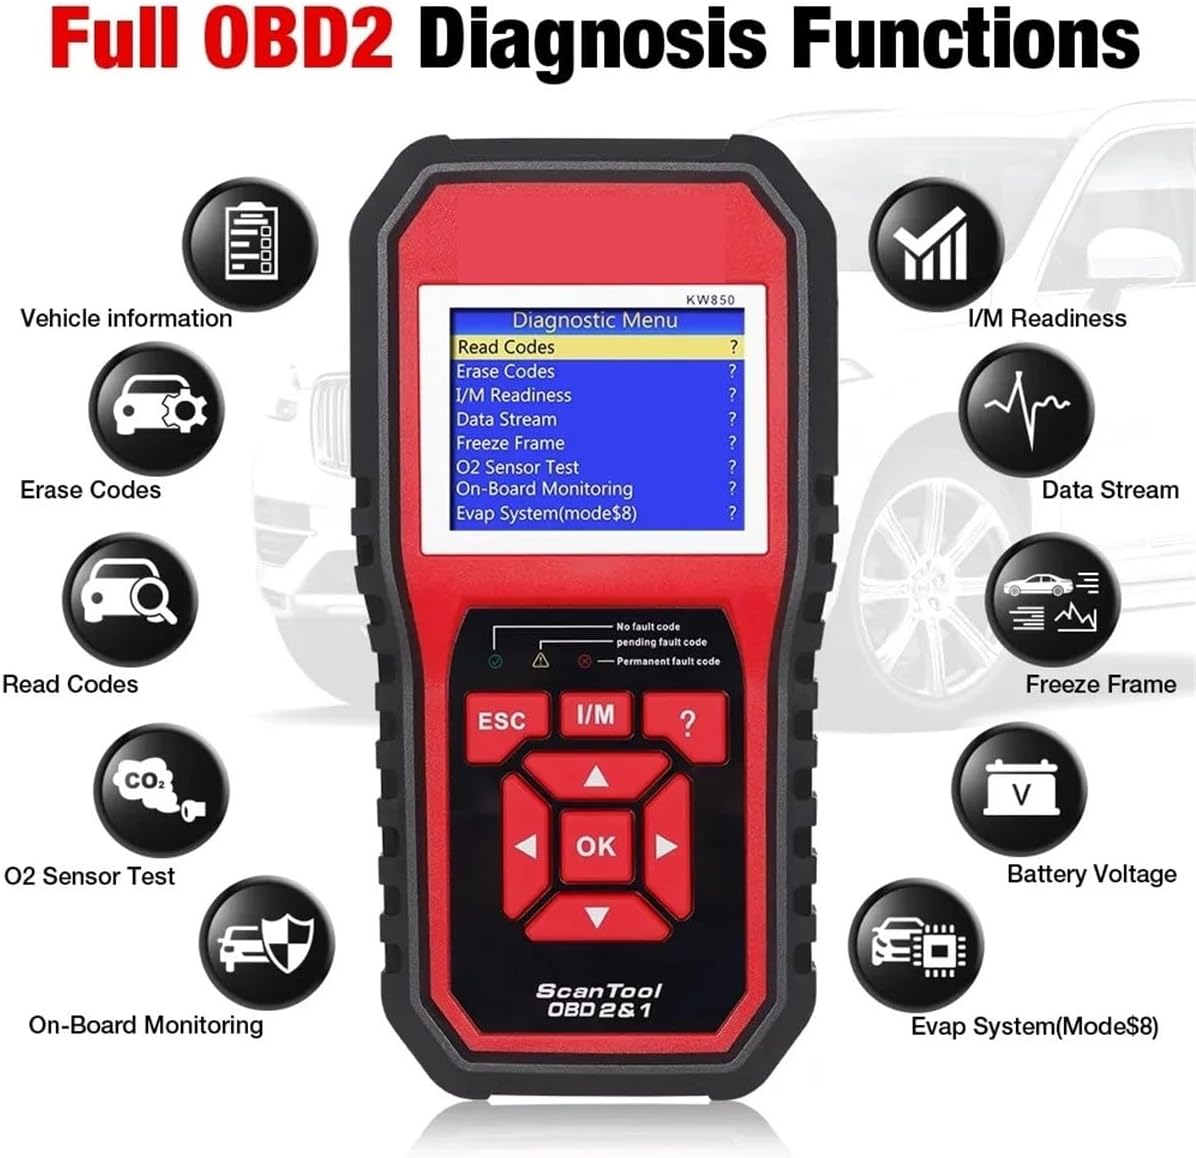
Image 3.1: The KW850 scanner's main diagnostic menu, illustrating various functions such as Vehicle Information, Erase Codes, Read Codes, O2 Sensor Test, On-Board Monitoring, EVAP System (Mode 8), I/M Readiness, Data Stream, Freeze Frame, and Battery Voltage.
3.1 Reading Codes
This function retrieves generic (P0, P2, P3, and U0) and manufacturer-specific (P1, P3, and U1) codes from the vehicle's control modules. DTCs help identify the cause of a problem.

Image 3.2: The KW850 scanner displaying the 'Read Codes' option within the diagnostic menu, with a description of its function to read DTCs and help determine problem causes.
3.2 Erasing Codes
After addressing a vehicle issue, use this function to clear Diagnostic Trouble Codes (DTCs), turn off the Check Engine Light (MIL), and reset monitors. Ensure the underlying problem is resolved before clearing codes to prevent recurrence.
3.3 Live Data Stream
View real-time PCM (Powertrain Control Module) data stream in both digital and graphical formats. The RGB color screen allows comparison of up to 4 live readings simultaneously, aiding in the identification of suspicious parameters.
3.4 Freeze Frame Data
This function displays a snapshot of engine conditions, such as fuel trim and engine coolant temperature, at the moment a Malfunction Indicator Lamp (MIL) was triggered. This data is crucial for diagnosing intermittent problems.
3.5 I/M Readiness Status
Check the status of emission-related monitors to determine if the vehicle is ready for an emissions test. The patented One-Click I/M Readiness Key provides quick access to this function.
3.6 O2 Sensor Test
Perform an advanced O2 sensor test to retrieve and view O2 sensor monitor test results for the most recently completed tests from the vehicle's on-board computer.
3.7 On-Board Monitoring (Mode 6)
This function retrieves test results for emission-related powertrain components and systems that are not continuously monitored. It can help pinpoint specific cylinder misfire issues.
3.8 EVAP System Test (Mode 8)
Initiate a leak test for the vehicle's Evaporative Emission Control (EVAP) system. This test checks for leaks in the fuel vapor recovery system.
3.9 Battery Test
Perform a real-time car battery voltage check to assess the battery's health status. This 2-in-1 design integrates battery testing capabilities.
3.10 DTC Lookup
Access the built-in DTC library to search for definitions of stored codes. This function provides detailed explanations for diagnostic trouble codes, assisting in troubleshooting.
3.11 Vehicle Information
Retrieve important vehicle information including the Vehicle Identification Number (VIN), Calibration Identification (CID), and Calibration Verification Numbers (CVN).
3.12 Printing Data
The device supports connecting to a computer to print diagnostic data. Refer to the software instructions for detailed steps on printing DTCs, datastreams, and freeze frame data.
4. Maintenance
- Keep the device clean by wiping it with a soft, dry cloth. Avoid using abrasive cleaners or solvents.
- Store the scanner in a dry, cool environment away from direct sunlight and extreme temperatures.
- Ensure the diagnostic cable and connectors are free from damage. Do not pull the cable forcefully when disconnecting.
- Regularly check for software updates on the manufacturer's website to ensure optimal performance and compatibility with newer vehicles.
5. Troubleshooting
- Device does not power on: Ensure the OBD2 connector is securely plugged into the vehicle's DLC and the vehicle's ignition is in the ON position. Check the vehicle's battery voltage.
- Communication error: Verify that the OBD2 connector is properly seated. Ensure the vehicle is OBDII compliant. Try connecting to a different OBDII compliant vehicle to rule out a vehicle-specific issue.
- Codes cannot be cleared: If the underlying fault that triggered the codes has not been repaired, the codes may not clear or may reappear immediately. Address the vehicle issue first.
- Screen display issues: If the screen is frozen or unresponsive, try disconnecting the device from the vehicle and reconnecting it.
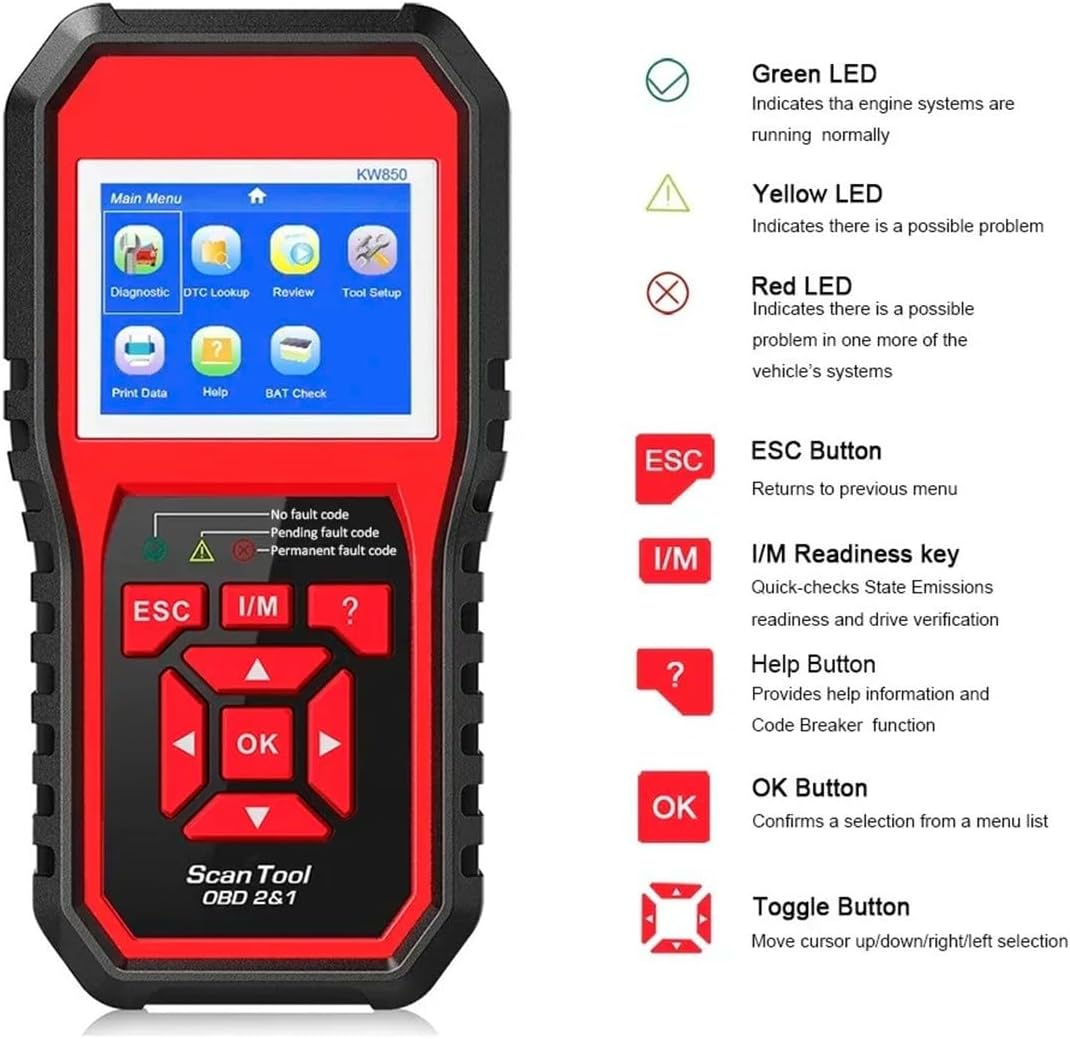
Image 5.1: The KW850 scanner's LED indicators: Green for normal engine systems, Yellow for a possible problem, and Red for a definite problem in one or more vehicle systems.
6. Specifications
| Feature | Detail |
|---|---|
| Manufacturer | XAUCY |
| Brand | XAUCY |
| Model | KW850 |
| Item Weight | 1.76 pounds |
| Package Dimensions | 1 x 1 x 1 inches |
| Item Model Number | XAUCY |
| Manufacturer Part Number | XAUCY |
| ASIN | B0F5X7B27W |
| Date First Available | April 22, 2025 |
7. Warranty and Support
For warranty information, technical support, or service inquiries, please refer to the documentation included with your product or visit the official XAUCY website. Keep your purchase receipt as proof of purchase for warranty claims.