PRUNUS J-177 Retro Vintage Alarm Clock Radio User Manual
Model: J-177 | Brand: PRUNUS
1. Introduction
Thank you for choosing the PRUNUS J-177 Retro Vintage Alarm Clock Radio. This device combines classic aesthetics with modern functionality, offering dual alarms, FM radio, fast wireless charging, and a clear LED display. This manual provides detailed instructions to help you set up and operate your new alarm clock radio effectively.
2. Safety Information
- Ensure the device is placed on a stable, flat surface.
- Keep away from water, moisture, and direct heat sources.
- Use only the provided power adapter or a compatible 15W+ fast charger and cable for optimal performance and safety.
- Do not attempt to disassemble or repair the device yourself. Contact qualified service personnel for assistance.
- For wireless charging, remove phone cases for better charging efficiency and to prevent overheating.
3. Package Contents
- PRUNUS J-177 Alarm Clock Radio
- USB-C Power Cable (Note: Wall adapter not included)
- User Manual
4. Product Overview
Familiarize yourself with the main components and controls of your PRUNUS J-177.

Figure 1: Front Panel Overview
The front panel features a large LED display showing time, date, day of the week, and temperature. Below the display are control buttons for various functions, and a central knob for dimmer control and confirmation.

Figure 2: Rear Panel Overview
The rear panel includes the USB-C power input, a USB-A output port for charging other devices, and the connection point for the telescopic FM antenna.
5. Setup
5.1 Power Connection
- Connect the provided USB-C cable to the "DC 5V" port on the back of the alarm clock.
- Plug the other end of the USB-C cable into a compatible USB wall adapter (not included). A 15W+ fast charger is recommended for optimal wireless charging performance.
- The display will illuminate, indicating the device is powered on.
5.2 FM Antenna Setup
For improved FM radio reception, extend the telescopic antenna located on the back of the unit.
Video 1: PRUNUS 177 Radio Overview
This video demonstrates various features of the PRUNUS J-177, including power connection, time setting, alarm setting, sleep timer, and FM radio functionality. It provides a visual guide to the initial setup and basic operations.
6. Operating Instructions
6.1 Time and Date Setting
- Switch 12/24H Format: Long press the <TIME/DATE> button to toggle between 12-hour and 24-hour time formats.
- Adjust Time/Date: Press the <TIME/DATE> button to enter time setting mode. Use the <-> / <+ / °F/°C> buttons or rotate the <OK> knob to adjust the hour, minute, year, month, and day. Press <OK> to confirm each setting.
6.2 Alarm Setting
The PRUNUS J-177 supports dual alarms (ALARM 1 and ALARM 2).
- Set Alarm Time: Press <ALARM 1> or <ALARM 2> to select the desired alarm. Use the <-> / <+ / °F/°C> buttons or rotate the <OK> knob to set the hour and minute. Press <OK> to confirm.
- Select Alarm Tone: After setting the time, use <-> / <+ / °F/°C> to browse 8 available alarm sounds (S01-S08) or FM radio. Press <OK> to confirm.
- Adjust Alarm Volume: Rotate the <OK> knob to adjust the alarm volume (16 levels). Press <OK> to confirm.
- Enable/Disable Alarm: Long press <ALARM 1> or <ALARM 2> to enable or disable the respective alarm. An alarm icon will appear on the display when active.
- Snooze Function: When the alarm sounds, press the <OK> knob to activate snooze for 9 minutes. The alarm icon will flash.
- Dismiss Alarm: Press any button (except <OK>) to dismiss the alarm.

Figure 3: Dual Alarms & Smart Snooze
Set two independent alarms for different schedules and utilize the smart snooze function for extra rest.
6.3 Display Brightness Control
The display offers 4 adjustable brightness modes:
- Press the <OK> knob to cycle through brightness levels: Bright > Medium > Off > Auto Dimming.
- Auto Dimming: In this mode, the display brightness intelligently adjusts to ambient light conditions.
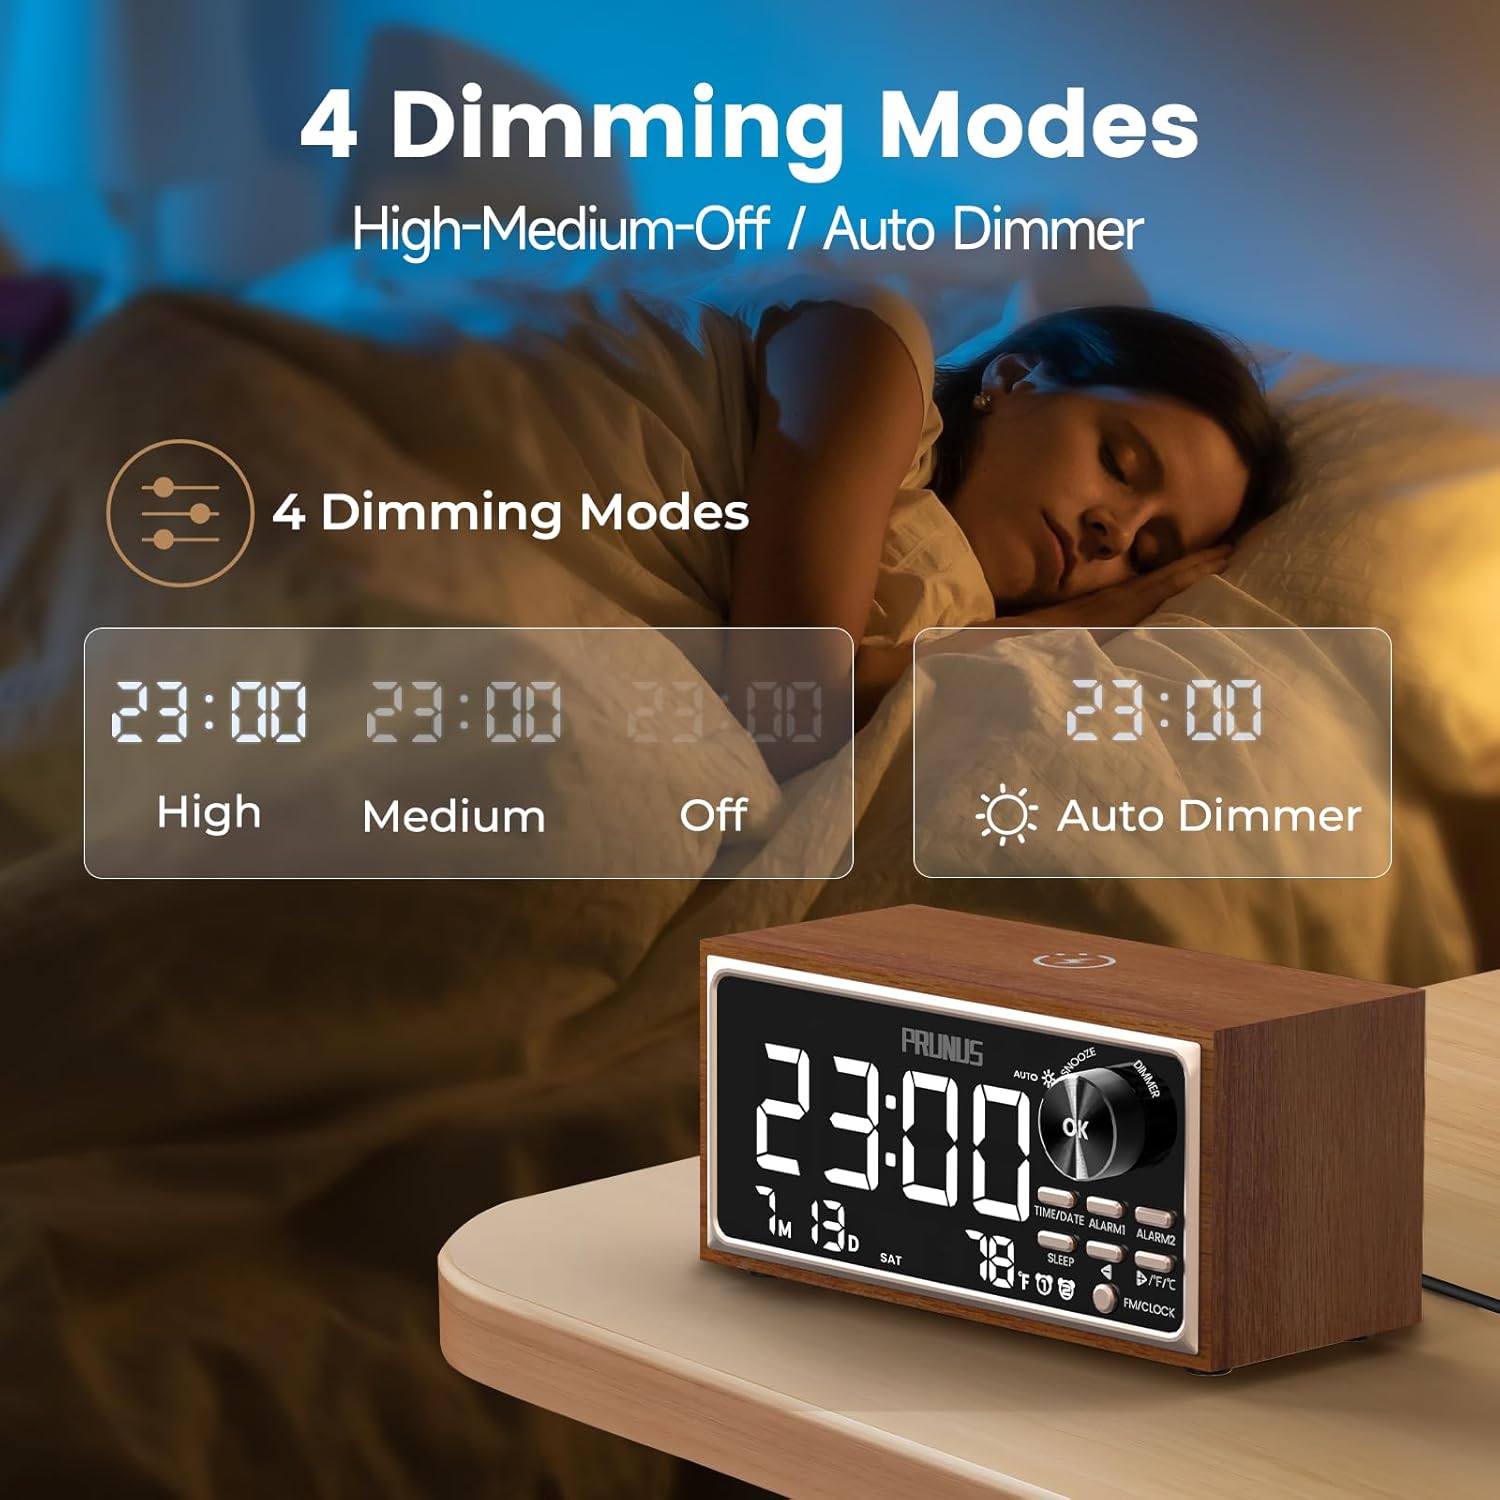
Figure 4: 4 Adjustable Brightness Modes
Customize the display brightness to suit your preference and environment, including an auto-dimming feature.
6.4 FM Radio Operation
- Switch to FM Mode: Press the <FM/CLOCK> button to switch to FM radio mode. The display will show the current FM frequency.
- Auto-Scan Stations: Long press the <-> or <+ / °F/°C> button to auto-scan for the next available FM station.
- Adjust Volume: Rotate the <OK> knob to increase or decrease the volume. Alternatively, short press <-> or <+ / °F/°C> to adjust the volume.

Figure 5: Digital Clock & FM Radio
Enjoy clear FM radio reception with the extendable antenna and easily tune to your favorite stations.
6.5 Wireless Charging
The top of the alarm clock features a 15W wireless charging pad.
- Place your Qi-compatible smartphone on the wireless charging pad.
- Ensure the phone is centered on the pad for optimal charging.
- The charging indicator on your phone will confirm that charging has begun.
- For best results, remove thick phone cases during wireless charging.

Figure 6: 15W Wireless Charging
Conveniently charge your Qi-compatible devices by simply placing them on the top surface.
6.6 USB Charging Output
A 5W USB-A port is located on the back of the device for charging other gadgets.
- Connect your device (e.g., tablet, earbuds, smartwatch) to the USB-A output port using its charging cable.
- The device will begin charging.
Figure 7: 5W USB Charging Output
Charge additional devices like earbuds or smartwatches using the convenient USB-A port.
6.7 Sleep Timer
The sleep timer allows you to fall asleep to music or white noise, which will automatically turn off after a set duration.
- Press the <SLEEP> button to activate the sleep timer.
- Use the <-> / <+ / °F/°C> buttons to select the desired duration (15 / 30 / 60 / 90 minutes).
- You can also select a sleep sound (S01-S07) or FM radio to play during the sleep timer.
- Press <OK> to confirm the setting.
- Long press <SLEEP> to disable the sleep timer.
7. Maintenance
- Clean the device with a soft, dry cloth. Do not use liquid cleaners or abrasive materials.
- Keep the wireless charging pad free from dust and debris to ensure efficient charging.
- Avoid blocking the speaker grille or ventilation openings.
8. Troubleshooting
| Issue | Possible Solution |
|---|---|
| Device does not power on. | Ensure the USB-C cable is securely connected to both the device and a working power source. Verify the power adapter is functional. |
| Wireless charging is slow or not working. | Ensure your phone is Qi-compatible and correctly centered on the charging pad. Remove any thick phone cases. Use a 15W+ fast charger and compatible cable. |
| Poor FM radio reception. | Fully extend the telescopic antenna. Try repositioning the device to find a better signal. |
| Alarm does not sound. | Verify the alarm is enabled (alarm icon visible). Check the alarm volume setting. Ensure the time is set correctly. |
| Display is too bright/dim. | Press the <OK> knob to cycle through brightness modes or select auto-dimming. |
9. Specifications
- Brand: PRUNUS
- Model: J-177
- Display Type: Digital LED
- Power Source: Corded Electric (USB-C)
- Wireless Charging Output: 15W
- USB Output: 5W
- FM Radio Frequency: 87.5-108MHz
- Alarm Features: Dual Alarms, 8 Tones (including FM), 16 Volume Levels, 9-minute Snooze
- Sleep Timer: 15-90 minutes
- Display Brightness: 4 Modes (High, Medium, Off, Auto-Dimming)
- Dimensions: 3.5"W x 3.3"H (Product Dimensions)
- Material: Wood (Frame Material)
- Item Weight: 1.28 pounds
10. Warranty and Support
For warranty information and customer support, please refer to the contact details provided with your purchase or visit the official PRUNUS website. Keep your proof of purchase for any warranty claims.


