
MINIWARE TS21
MINIWARE TS21 Digital Soldering Iron User Manual
Precise Temperature Control & Portable Design
1. Introduction
The MINIWARE TS21 Digital Soldering Iron is a compact and powerful tool designed for electronics repair, DIY projects, and hobbyist use. It features precise temperature control, rapid heating, and a portable design, making it suitable for various applications from micro-circuits to thicker wires.
This manual provides detailed instructions for the safe and effective operation, setup, and maintenance of your TS21 soldering iron.
2. What's in the Box
Upon opening the package, please verify that all the following components are included:
- TS21 Soldering Iron with KU Tip
- 65W Power Adapter
- USB Type-C Cable (for power and configuration)
- Mini Stand
- Solder Wire

Image: The MINIWARE TS21 Digital Soldering Iron, its packaging, 65W power adapter, USB-C cable, mini stand, and solder wire.
3. Setup
3.1. Attaching the Soldering Tip
The TS21 features a detachable design for easy tip replacement. Gently insert the KU tip into the heating element end of the soldering iron until it is securely seated. Ensure the tip is fully inserted to ensure proper heat transfer.

Image: The TS21 soldering iron body next to its detachable KU tip, illustrating the modular design.
3.2. Power Connection
Connect the provided USB Type-C cable to the TS21 soldering iron and then to the 65W power adapter. Plug the power adapter into a suitable electrical outlet. The TS21 can also be powered by any compatible USB-C PD source, such as a laptop, power bank, or car charger, offering flexibility for various work environments.

Image: The included 65W USB-C power adapter, used to power the soldering iron.
3.3. Initial Power On
Once connected to power, the OLED screen on the soldering iron will illuminate, indicating it is ready for operation. The screen will display real-time temperature and settings.
4. Operating Instructions
4.1. Temperature Control
The TS21 allows for precise temperature control ranging from 100°C to 400°C. Use the control buttons located on the handle to adjust the desired temperature. The OLED screen will clearly show the current temperature and target settings.
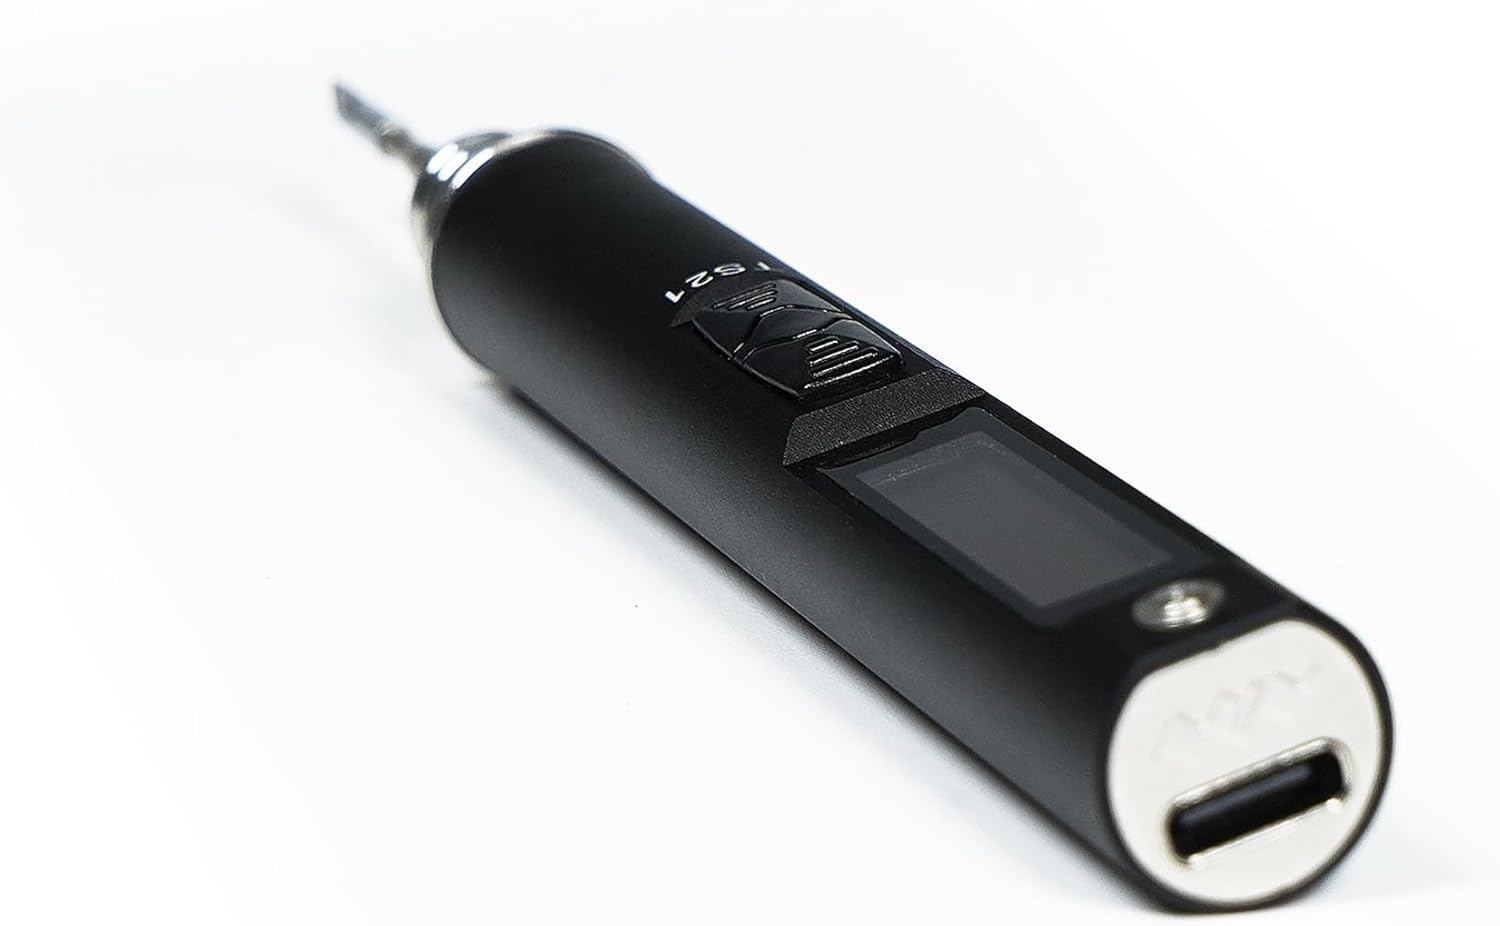
Image: A close-up view of the TS21 soldering iron, highlighting its OLED display and control buttons for temperature adjustment.
4.2. Rapid Heating
The TS21 heats up rapidly, reaching the set temperature in under 10 seconds. This quick heat-up time minimizes waiting and improves efficiency during soldering tasks.
4.3. Soldering Applications
The TS21 is versatile and can be used for a variety of soldering applications, including:
- Repairing drones and other small electronic devices.
- Working on circuit boards and small components.
- Repairing RC cars and other hobby electronics.
- General electronics repair for computers and phones.

Image: The TS21 soldering iron in use, demonstrating its precision for repairing components on a phone motherboard.

Image: A user holding the TS21 soldering iron, applying solder to a circuit board, showcasing its ergonomic design and ease of use.
4.4. Usage Scenarios Video
Watch the official product video for a demonstration of various usage scenarios for the MINIWARE TS21 Digital Soldering Iron:
Video: This video demonstrates the MINIWARE TS21 Digital Soldering Iron being used for repairing drones, circuit boards, RC cars, and computer/phone components, highlighting its versatility.
5. Maintenance
5.1. Tip Cleaning and Care
Regularly clean the soldering tip using the provided mini stand with sponge or a brass wire cleaner. This helps maintain optimal heat transfer and extends the life of the tip. Always tin the tip with a small amount of solder after cleaning and before storing to prevent oxidation.
5.2. General Cleaning
Ensure the soldering iron is unplugged and cooled down before cleaning. Wipe the body of the iron with a soft, dry cloth. Avoid using abrasive cleaners or solvents that could damage the aluminum alloy body or OLED screen.

Image: A close-up of the soldering iron's grip area, showing the textured surface for comfortable handling.

Image: The soldering iron tip illuminated by an integrated LED light, providing visibility during detailed work.
6. Troubleshooting
6.1. Iron Not Heating Up
- Ensure the USB-C cable is securely connected to both the iron and the power adapter/source.
- Verify that the power adapter is plugged into a working electrical outlet.
- Check if the power source (e.g., power bank) is providing sufficient power (65W recommended).
- Confirm the soldering tip is correctly and fully inserted into the iron.
6.2. Inconsistent Temperature Readings
- Ensure the soldering tip is clean and properly tinned. Oxidation on the tip can affect temperature accuracy.
- Check for any loose connections between the tip and the iron.
6.3. OLED Screen Not Displaying
- Confirm the iron is receiving power from a compatible source.
- If the issue persists, contact customer support.
7. Specifications
| Feature | Detail |
|---|---|
| Model | TS21 Precision Soldering Iron |
| Interface | USB Type-C |
| Working Voltage | 9-24V |
| Heating Power | 100W Max |
| Temperature Range | 100-450°C |
| Protocol | PD (Power Delivery) |
| Screen | 0.91 inches OLED |
| Weight | 32g (iron only) |
| Item Weight (Package) | 5.3 ounces (approx. 150 grams) |
| Package Dimensions | 6.42 x 6.42 x 1.65 inches |
| Color | Grey |
| Material | Aluminum Alloy Body |

Image: Visual representation of the TS21 soldering iron's dimensions and key technical specifications.
8. Warranty and Support
The MINIWARE TS21 Digital Soldering Iron comes with a standard manufacturer's warranty. For specific warranty terms and conditions, please refer to the warranty card included in your product packaging or visit the official MINIWARE website. For technical support, troubleshooting assistance, or replacement parts, please contact MINIWARE customer service through their official channels.
You can visit the official MINIWARE store on Amazon for more information: MINIWARE Store
Related documentsTS21


Ask a question about this manual
Ask about setup, troubleshooting, compatibility, parts, safety, or missing instructions. Manuals+ will review the question and use this page’s manual context to help answer it.