
1. Important Safety Information
Please read all instructions carefully before using this treadmill. Retain this manual for future reference.
- Always place the treadmill on a flat, stable surface.
- Ensure adequate clear space around the treadmill (at least 2 meters behind and 0.6 meters on each side).
- Keep children and pets away from the treadmill during operation.
- Do not operate the treadmill if it has a damaged cord or plug, or if it is not working properly.
- Always attach the safety key clip to your clothing before starting the treadmill. The safety key will stop the machine if you fall or move too far back.
- Do not use the treadmill in a damp or wet environment.
- Maximum user weight capacity: 300 lbs.
- Unplug the treadmill from the power outlet when not in use, before cleaning, or before performing maintenance.
2. Package Contents
Verify that all components are present before assembly and setup.
- YPOO Foldable Treadmill Unit
- Remote Control (x1)
- Hex Tool (x1)
- Power Cord (x1)
- Safety Key (x1)
- Knobs for Incline Adjustment (x2)
- User Manual (this document)

Figure 2.1: Illustration of the treadmill's robust 5-layer running belt and powerful 2.5HP motor, designed for durability and user comfort.
3. Setup Instructions
The YPOO Foldable Treadmill is designed for minimal assembly. Follow these steps to prepare your treadmill for use.
- Unpacking: Carefully remove the treadmill from its packaging. Place it on a flat, stable surface in your desired workout area.
- Unfolding the Handlebar:
- Gently lift the handlebar until it locks into the upright position. Ensure it is securely fastened.
- If the handlebar needs to be secured with screws or knobs, use the provided tools to tighten them firmly.
- Power Connection: Connect the power cord to the treadmill's power input and then plug it into a grounded electrical outlet.
- Safety Key Placement: Attach the safety key to the designated slot on the console. The treadmill will not operate without the safety key in place.

Figure 3.1: The treadmill's foldable design allows for easy storage and space-saving, with dimensions shown for reference.
Video 3.1: Official YPOO video demonstrating the setup and folding of the treadmill, showcasing its compact design and ease of use.
4. Operating Instructions
The YPOO treadmill offers two primary modes of operation: Walking Pad Mode and Treadmill Mode with Handlebar.
4.1. Control Methods
The treadmill can be controlled via the console, remote control, or the Ypoofit APP.
- Console: Features buttons for Start/Stop, Speed adjustment (+/-), and Mode selection.
- Remote Control: Allows for convenient adjustment of speed and starting/stopping the treadmill.
- Ypoofit APP: Provides comprehensive control, workout tracking, and access to interactive features.

Figure 4.1: Overview of the treadmill's control options, including the console, remote, and mobile application.
4.2. Walking Pad Mode (Handlebar Folded)
In this mode, the handlebar is folded down, allowing the treadmill to be used as a walking pad, ideal for under-desk use.
- Speed Range: 0.8 KM/H to 6.0 KM/H (0.5 MPH to 3.7 MPH).
- Activation: Ensure the handlebar is fully folded and secured.
- Operation: Use the remote control or Ypoofit APP to start, stop, and adjust speed.
4.3. Treadmill Mode (Handlebar Upright)
With the handlebar in the upright position, the treadmill functions as a traditional treadmill, supporting higher speeds.
- Speed Range: Up to 8.0 KM/H (5.0 MPH).
- Activation: Ensure the handlebar is fully extended and locked into the upright position.
- Operation: Control speed and start/stop via the console, remote control, or Ypoofit APP.

Figure 4.2: Visual representation of the treadmill's versatility, showing both the walking pad and full treadmill configurations.
5. Incline Adjustment
The YPOO treadmill features a 3-level manual incline system to enhance your workout intensity.
- Locate Incline Adjusters: Identify the yellow knobs/adjusters near the rear base of the treadmill.
- Adjust Incline:
- To increase the incline, lift the rear of the treadmill slightly and insert the knobs into the higher slots.
- To decrease the incline, lift the rear and move the knobs to lower slots or remove them for a flat surface.
- Ensure both sides are adjusted to the same level for stability.
- Incline Levels: The treadmill offers a unique 8% manual incline, significantly increasing calorie burn compared to flat walking.
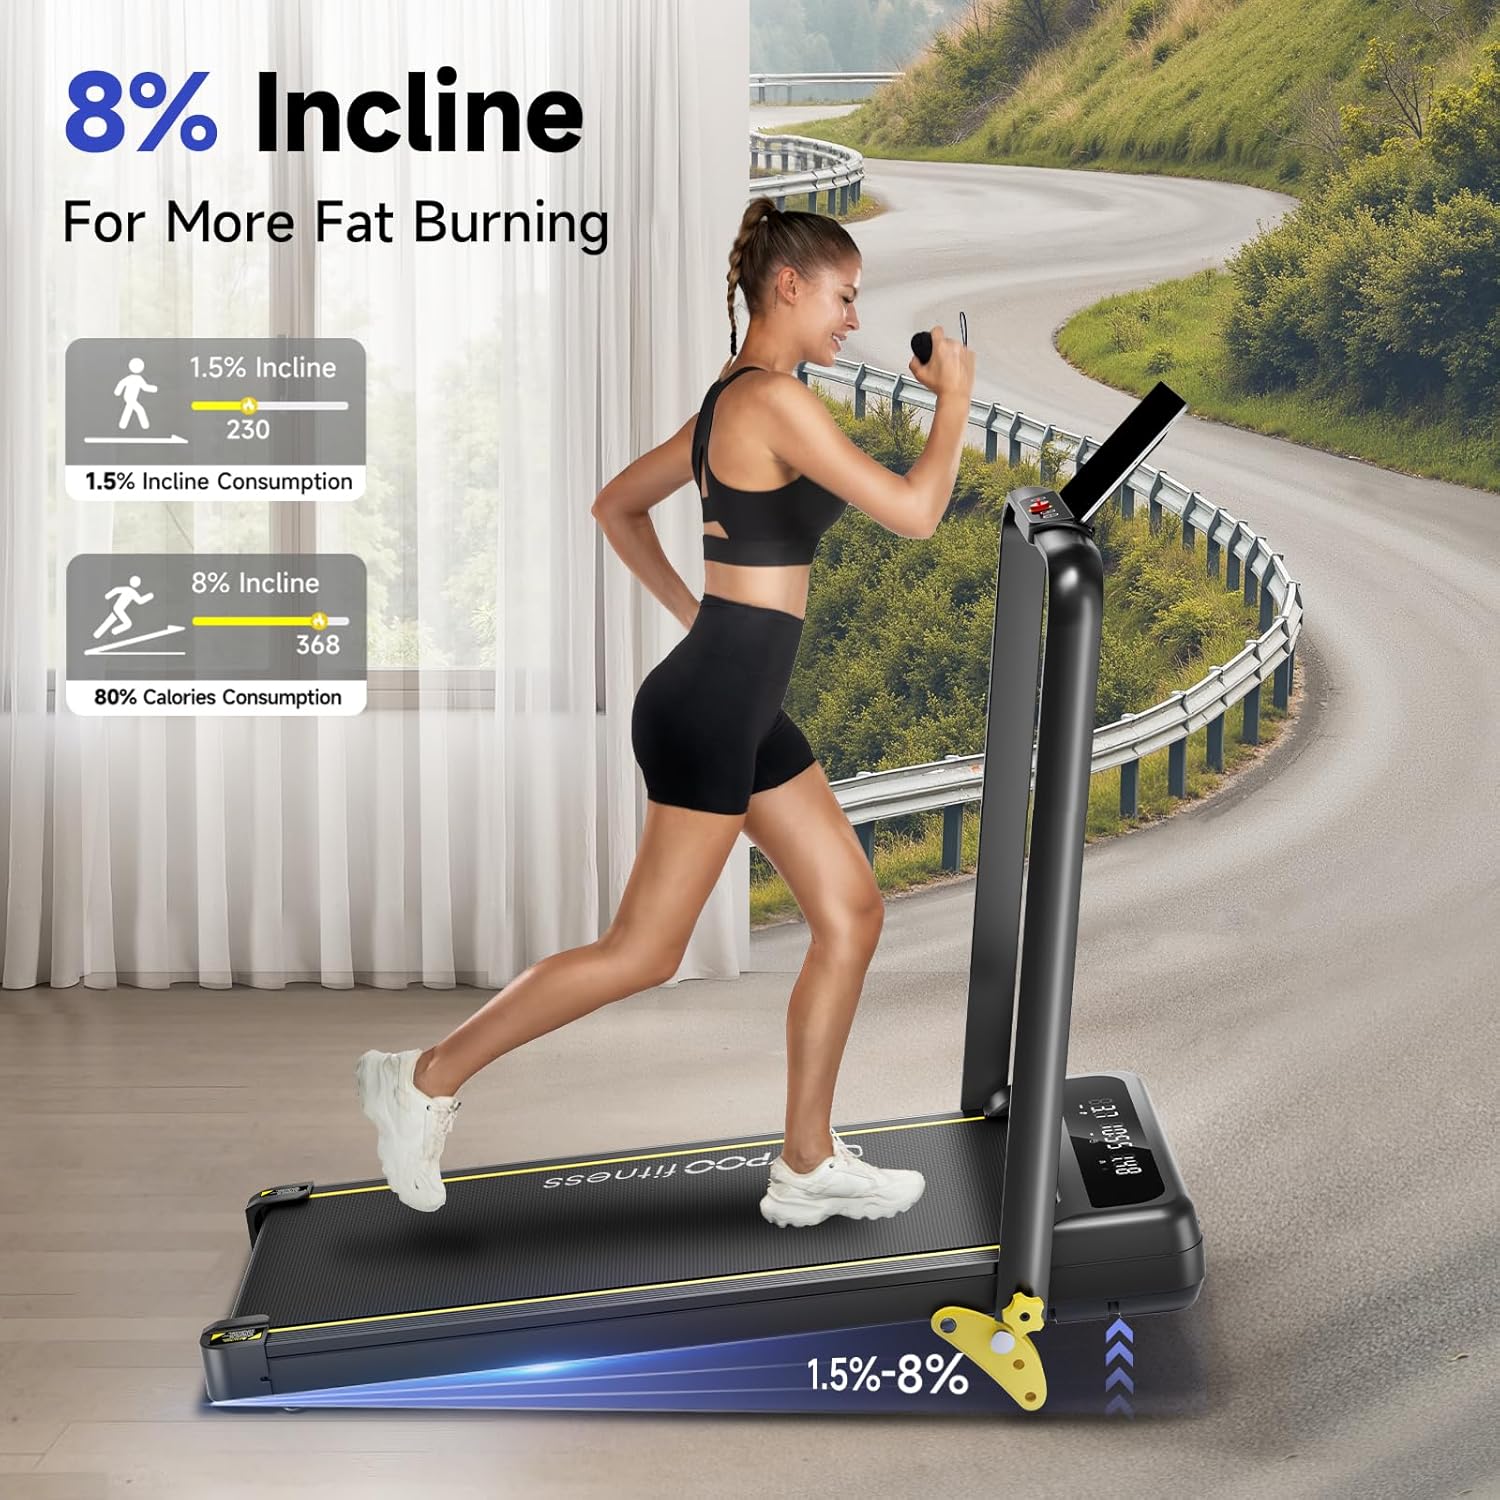
Figure 5.1: Detailed view of the manual incline adjustment, illustrating how to set different incline levels for varied workout intensity.
6. Ypoofit APP Connectivity
Enhance your workout experience by connecting your treadmill to the Ypoofit APP.
- Download APP: Search for "Ypoofit" in your device's app store (available on App Store and Google Play).
- Pairing:
- Ensure Bluetooth is enabled on your smartphone or tablet.
- Open the Ypoofit APP and follow the on-screen instructions to search for and connect to your treadmill.
- Features: The APP allows you to:
- Control treadmill speed and mode.
- Track workout progress (distance, calories burned, time, speed).
- Access interactive workout programs and connect with other users.

Figure 6.1: The Ypoofit APP provides an interactive platform for tracking workouts and accessing fitness content.
7. Maintenance
Regular maintenance ensures the longevity and optimal performance of your treadmill.
- Cleaning: Wipe down the treadmill with a damp cloth after each use to remove sweat and dust. Do not use abrasive cleaners.
- Belt Lubrication: The running belt requires periodic lubrication to reduce friction and extend its lifespan.
- Apply silicone lubricant (included or purchased separately) under the running belt every 3-6 months, depending on usage.
- Refer to the specific instructions provided with your lubricant for application details.
- Belt Tension and Alignment:
- If the belt feels loose or slips, use the hex tool to adjust the tension bolts at the rear of the treadmill. Turn both bolts equally in small increments (quarter turns) until tension is restored.
- If the belt drifts to one side, adjust the corresponding bolt (tighten the side it drifts towards, loosen the opposite side) until it is centered.
- Storage: When not in use, fold the treadmill to save space. It features built-in wheels for easy portability. Store in a dry, cool place away from direct sunlight.
8. Troubleshooting
This section addresses common issues you might encounter with your treadmill.
| Problem | Possible Cause | Solution |
|---|---|---|
| Treadmill does not start. | Power cord unplugged, safety key not in place, power switch off. | Ensure power cord is securely plugged in. Insert safety key fully. Turn on the power switch. |
| Running belt slips or hesitates. | Belt too loose, insufficient lubrication. | Adjust belt tension (refer to Maintenance section). Lubricate the running belt. |
| Unusual noise during operation. | Loose components, belt misalignment, motor issue. | Check for and tighten any loose screws. Adjust belt alignment. If noise persists, contact customer support. |
| Remote control not working. | Dead battery, remote not paired. | Replace remote control battery. Refer to pairing instructions in the Operating section or APP manual. |
| APP not connecting to treadmill. | Bluetooth off, APP not updated, treadmill not discoverable. | Ensure Bluetooth is on. Update Ypoofit APP. Restart treadmill and try pairing again. |
9. Specifications
Key technical specifications for the YPOO Foldable Treadmill with Incline.
- Brand: YPOO
- Model Name: ZP01
- Color: Black
- Product Dimensions (LxWxH): 45.5"D x 24"W x 42.1"H
- Folded Size: 44.9" x 4.9" x 21.5"
- Item Weight: 49 Pounds
- Material: Alloy Steel
- Maximum Speed: 5.0 Miles per Hour (8.0 KM/H)
- Minimum Speed: 0.5 Miles per Hour (0.8 KM/H)
- Maximum Horsepower: 2.5 HP
- Maximum Incline Percentage: 8% (3 manual levels)
- Maximum Weight Recommendation: 300 Pounds
- Running Belt Dimensions: 36.6" x 15" (Length x Width)
- Display Type: LED
- Power Source: Corded Electric
- Metrics Measured: Speed, Calories Burned, Time, Distance
- Special Features: Portable, Manual Incline, Heavy Duty, Foldable, Wheeled, APP Connectivity

Figure 9.1: The YPOO Foldable Treadmill with Incline, showcasing its compact design and integrated features.
10. Warranty and Support
YPOO is committed to providing high-quality products and excellent customer service.
- Warranty: This product comes with a 1-Year Warranty. Please retain your proof of purchase for warranty claims.
- Customer Service: For any questions, concerns, or technical support, please contact YPOO customer service. Contact information can typically be found on the product packaging or the official YPOO website.
- Online Resources: Visit the official YPOO store on Amazon for additional product information and support: YPOO Amazon Store.