
1. Introduction
Thank you for choosing the YITAHOME 26x10x7ft Greenhouse. This manual provides essential information for the safe assembly, operation, and maintenance of your new greenhouse. Please read these instructions thoroughly before beginning assembly and retain them for future reference.

Image 1.1: The YITAHOME 26x10x7ft Greenhouse installed in a garden setting.
2. Safety Information
Important: Safety measures and professional installation are highly recommended. Always ensure the greenhouse is securely fixed using ground pegs and additional weights to prevent it from being blown over or collapsing. Failure to properly secure the greenhouse can result in property damage or personal injury.
- Ensure all components are present and undamaged before assembly.
- Assemble on a level, stable surface.
- It is recommended that at least two to three people assist with the assembly process for safety and ease.
- Wear appropriate safety gear, such as gloves, during assembly.
- Securely anchor the greenhouse to the ground using all provided anchoring hardware.
- In areas prone to high winds or heavy snow, consider additional anchoring methods and regularly clear snow from the roof.

Image 2.1: Illustration of recommended anchoring methods using ground pegs, ropes, and heavy stones placed on the extended fabric base for stability.
3. Components List
Before starting assembly, verify that all parts are included and undamaged. Refer to the packing list provided with your product for specific quantities. Key components include:
- Frame Components: Galvanized steel pipes (22mm/1" diameter, 0.5mm/0.02" wall thickness), connectors, crossbars, and diagonal bars.
- Cover: 140gPE fabric cover, designed to be UV-blocking and waterproof.
- Doors: Two swing doors with hinges and latches.
- Windows: Fourteen double screen windows for ventilation.
- Anchoring Hardware: Ground pegs (U-shape ground nails), ropes, and drawstrings.

Image 3.1: Diagram illustrating the galvanized pipe frame structure and detailed pipe dimensions.

Image 3.2: Visual representation of the greenhouse dimensions (6.6ft H, 9.7ft W, 23.3ft L) and included anchoring components (ropes, spiral anchors, U-shaped ground nails).
4. Setup Instructions
Follow these steps carefully for proper assembly. Refer to the detailed assembly diagram included in your packaging for specific part identification.
4.1 Site Selection
- Choose a level, well-drained area for installation.
- Consider sun exposure: a south-facing location is generally ideal for maximum sunlight.
- Ensure adequate space around the greenhouse for access and maintenance.
4.2 Frame Assembly
- Unpack all galvanized steel pipes and connectors.
- Assemble the base frame first, ensuring all connections are secure.
- Gradually build the arched frame structure by connecting the pipes according to the provided diagram. Ensure all crossbars and diagonal bars are correctly installed for structural integrity.
4.3 Cover Installation
- Carefully drape the 140gPE fabric cover over the assembled frame.
- Align the cover so that the door openings and window sections match the frame.
- Secure the cover to the frame using any integrated ties or fasteners.
4.4 Door and Window Installation
- Attach the two swing doors to the designated frame openings using the provided hinges. Ensure they open and close smoothly.
- Verify that the 14 double screen windows are functional and can be rolled up or down as needed for ventilation.
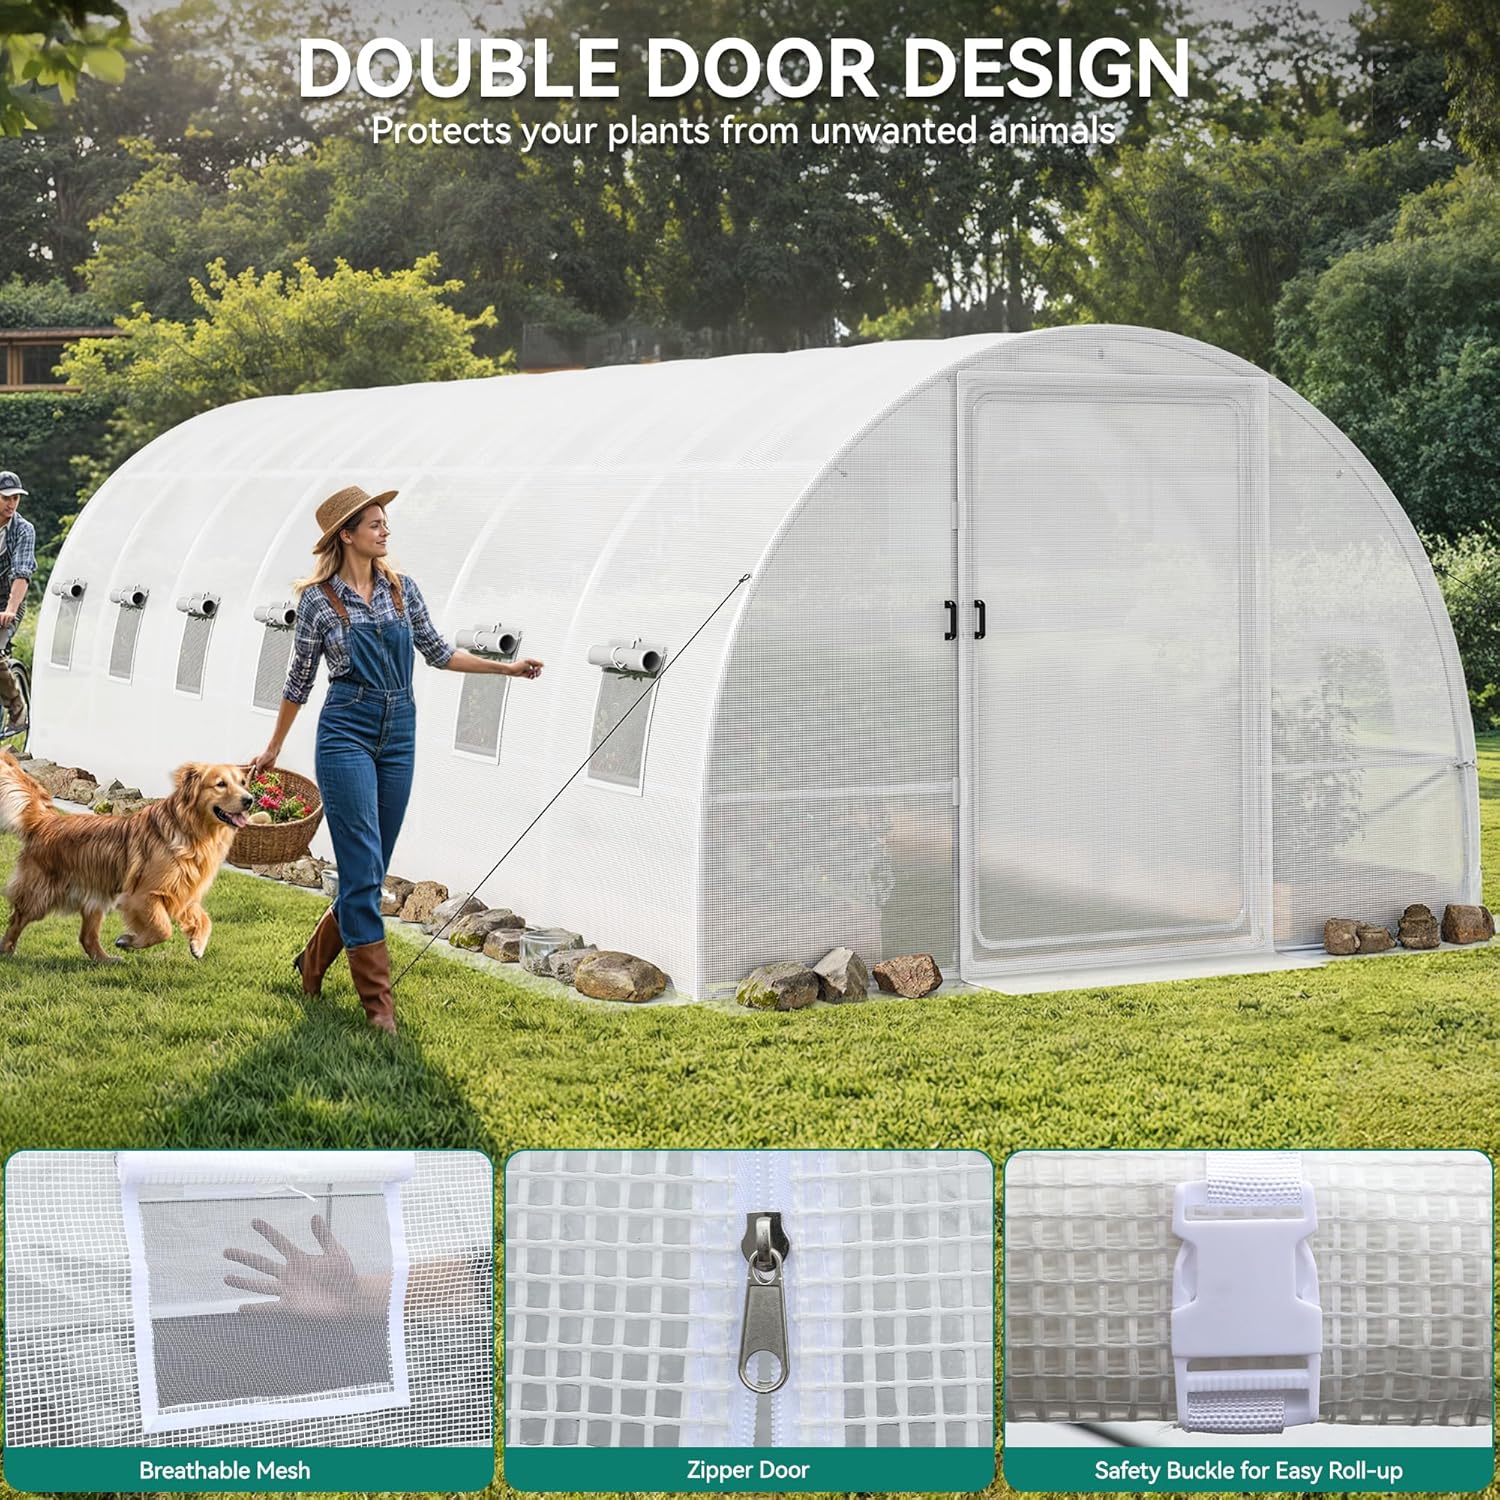
Image 4.1: The greenhouse featuring its double door design, with close-up views of the breathable mesh window, zipper mechanism, and safety buckle for securing rolled-up elements.
4.5 Anchoring
- Utilize the U-shape ground nails to secure the base frame to the ground.
- Attach the ropes to the designated points on the greenhouse frame and secure them to the ground using the spiral anchors or additional ground pegs.
- The bottom edge of the greenhouse cover has an extension. Place heavy stones, sandbags, or soil onto this extension to provide additional stability and prevent wind uplift.
5. Operating Instructions
5.1 Ventilation
The greenhouse is equipped with 14 double screen windows. These windows are crucial for maintaining optimal air circulation and temperature control, especially during warmer periods. Open them to allow fresh air in and release excess heat and humidity.

Image 5.1: Close-up view of the screen window design, highlighting its mesh structure for enhanced ventilation.
5.2 Door Usage
The two swing doors provide convenient access to the greenhouse. They can also be used to further enhance ventilation when needed. Ensure doors are securely latched when closed to protect plants from external elements and animals.

Image 5.2: A woman tending to plants inside the spacious greenhouse, emphasizing its UV-blocking, waterproof, and long-life features.
5.3 Climate Control
The 140gPE fabric cover is designed to protect plants by blocking UV rays and providing warmth. In cold weather, keeping the doors and windows closed will help retain heat. In hot weather, maximize ventilation by opening windows and doors to prevent overheating.
6. Maintenance
- Cleaning: Periodically clean the PE cover with mild soap and water to remove dirt and debris, ensuring maximum light penetration. Avoid abrasive cleaners.
- Inspection: Regularly inspect the frame for any signs of rust or damage. Check the cover for tears or holes and repair them promptly to maintain its protective properties.
- Anchoring: Periodically check all anchoring points (ground pegs, ropes, weights) to ensure they remain secure, especially after strong winds or heavy precipitation. Re-tighten or re-secure as necessary.
- Snow Removal: In areas with heavy snowfall, gently remove accumulated snow from the roof to prevent structural strain and potential collapse.
7. Troubleshooting
- Greenhouse Instability: If the greenhouse feels unstable, immediately re-check all anchoring points. Ensure ground pegs are fully inserted, ropes are taut, and sufficient weight (stones, sandbags) is placed on the extended fabric base.
- Cover Not Fitting Correctly: Ensure the frame is assembled squarely and the cover is aligned properly before fully securing it. Slight adjustments may be needed during initial installation.
- Water Accumulation on Roof: Verify that the cover is taut and properly stretched over the frame to allow water to run off. Clear any debris that might be obstructing drainage.
- Difficulty with Assembly: Refer to the detailed assembly diagrams. If parts seem misaligned, double-check part numbers and orientation. Contact customer support if you suspect missing or defective parts.
8. Specifications
| Feature | Specification |
|---|---|
| Brand | YITAHOME |
| Model Number | MAYIHfuHrE |
| UPC | 197839553880 |
| Product Dimensions (L x W x H) | 312" x 120" x 84" (26ft x 10ft x 7ft) |
| Item Weight | 127.87 Pounds |
| Frame Material | Alloy Steel (Galvanized) |
| Cover Material | Polyethylene (PE) 140g |
| Number of Doors | 2 (Swing Doors) |
| Number of Windows | 14 (Double Screen Windows) |
9. Warranty and Support
For warranty information or technical support, please refer to the documentation included with your purchase or contact YITAHOME customer service directly. Keep your purchase receipt and model number handy when contacting support.


