
1. Introduction
This manual provides instructions for the SEAOURA Aquarium Digital Thermometer and Adjustable Air Pump. This combined system is designed to monitor aquarium water temperature and provide oxygenation. The air pump features adjustable airflow and quiet operation, while the digital thermometer offers precise temperature readings with an alarm function.
2. Safety Information
- Always disconnect power before performing any maintenance or setup procedures.
- Ensure all electrical connections are dry and away from water to prevent electric shock.
- Do not operate the air pump or thermometer if any part is damaged.
- Keep out of reach of children.
- The thermometer is designed for use in glass aquariums only.
- Ensure the air pump is placed in a well-ventilated area.
3. Package Contents
Verify that all items are present in the package:
- Digital Aquarium Thermometer
- Adjustable Aquarium Air Pump
- Air Stone(s)
- Air Tubing
- User Manual
4. Setup Instructions
4.1. Air Pump Setup
- Connect the air tubing to the air pump outlet.
- Attach the air stone(s) to the other end of the air tubing.
- Place the air stone(s) inside the aquarium.
- Position the air pump according to the following guidelines:

Image 4.1: Air Pump Positioning. This image illustrates two scenarios for air pump placement. The top diagram shows the air pump placed above the water level, which is suitable when no check valve is used. The bottom diagram shows the air pump placed below the water level, requiring a check valve to prevent water backflow into the pump.
- Without Check Valve: The air pump should be placed above the aquarium water level to prevent water backflow in case of a power outage.
- With Check Valve: If the air pump must be placed below the water level, a check valve must be installed in the air tubing to prevent water from flowing back into the pump.
4.2. Digital Thermometer Setup
- Clean the exterior surface of the aquarium glass where the thermometer will be placed.
- Attach the thermometer to the outside of the aquarium glass using its magnetic or adhesive mounting system. Ensure it is securely fastened and positioned for easy viewing.
- The thermometer is pre-calibrated. Refer to the 'Temperature Calibration' section if further adjustment is needed.
5. Operating Instructions
5.1. Air Pump Operation
- Plug the air pump into a power outlet.
- The air pump will begin to operate, providing oxygenation to the aquarium.
- Adjust the airflow using the control knob on the pump. Turn the knob to increase or decrease the air bubble output.

Image 5.1: Airflow Adjustment. This image demonstrates the adjustable airflow feature of the air pump. The left side shows a 'LOW' setting with fewer bubbles, while the right side shows a 'HIGH' setting with a greater volume of bubbles, controlled by a central knob.
The air pump is designed for ultra-quiet operation, typically below 25dB, to minimize disturbance.

Image 5.2: Quiet Operation. This image illustrates the low noise level of the air pump, indicating it operates at less than 25dB, comparable to the sound of falling leaves and significantly quieter than a library or refrigerator.
5.2. Digital Thermometer Operation
5.2.1. Display and Motion Sensor
The thermometer features an LCD display that shows the current water temperature. It includes a human body motion sensor. When a person approaches, the screen will automatically light up to display the temperature, conserving battery life when not in use.

Image 5.3: Motion Sensor and Screen Brightness. This image demonstrates the thermometer's motion sensor, which activates the display when a person is nearby. It also shows different screen brightness levels (Darkest, Dark, Bright, Brightest) that can be adjusted.
5.2.2. Temperature Calibration
The thermometer is pre-calibrated. If you need to adjust the temperature reading to match an external reference thermometer, follow these steps:
- Compare the thermometer's reading with a known accurate external thermometer.
- If a discrepancy exists, press and hold the '▼' (down) key on the thermometer.
- When the temperature on the main screen starts flashing, use the '▲' (up) key to raise the temperature or the '▼' (down) key to lower it in 0.1°F increments.
- Release the button once the desired temperature is set. The thermometer will save the new calibration.

Image 5.4: Temperature Calibration Process. This image provides a visual guide for calibrating the thermometer. It shows how to enter calibration mode by holding the down arrow, adjust the temperature using the up/down arrows, and confirm the new setting.
5.2.3. High/Low Temperature Alarm
The thermometer allows you to set high and low-temperature alarm thresholds. If the water temperature exceeds the high limit or drops below the low limit, an alarm will activate to alert you to potential issues.

Image 5.5: Thermometer Features. This image highlights key features of the SEAOURA thermometer, including temperature calibration, a human body sensor, and high/low temperature alarms, contrasting them with limitations of traditional thermometers.
5.2.4. Real-time Temperature Monitoring
The thermometer continuously tracks water temperature changes and displays historical high and low temperatures, allowing for easy maintenance of stable conditions.
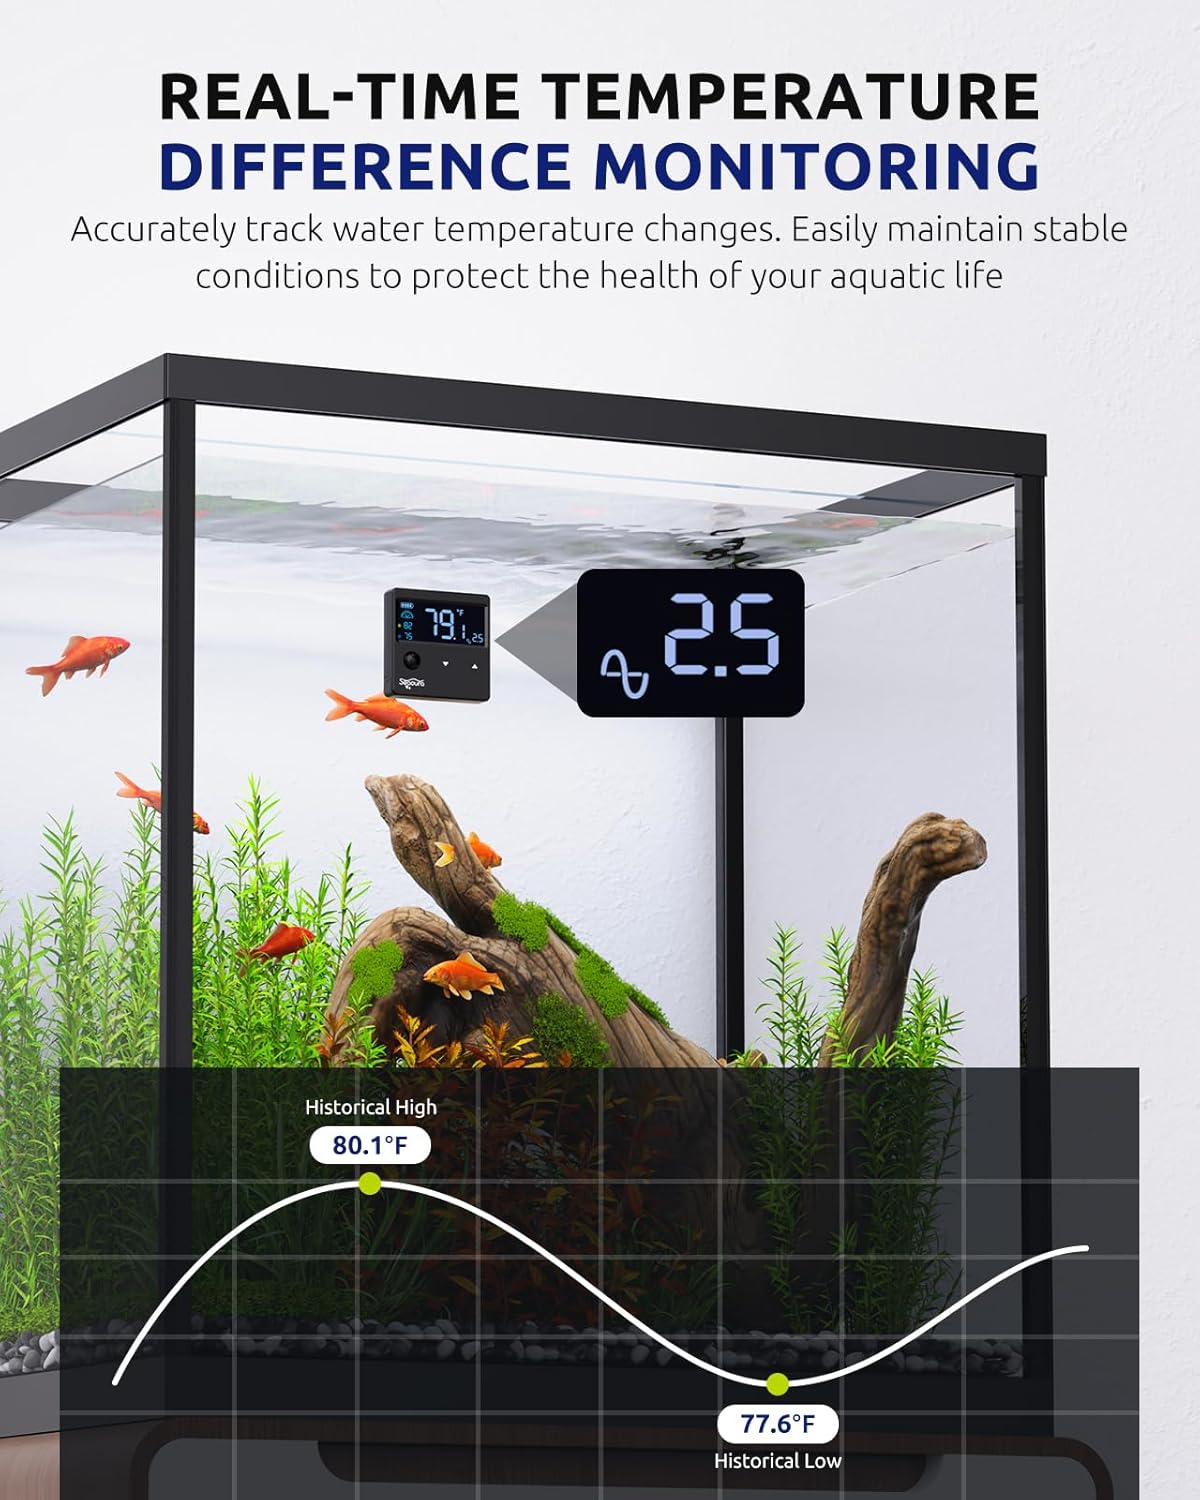
Image 5.6: Real-time Temperature Monitoring. This image displays the thermometer's ability to track and show real-time temperature fluctuations, along with historical high and low temperature records, aiding in maintaining stable aquarium conditions.
5.2.5. Official Product Video: Digital Aquarium Thermometer with Motion Sensor
Video 5.1: Digital Aquarium Thermometer Features. This video demonstrates the functionality of the digital aquarium thermometer, including its motion sensor activation and temperature display. It provides a visual overview of how to interact with the device.
6. Maintenance
6.1. Air Pump Maintenance
- Regularly check air tubing for kinks or blockages.
- Clean or replace air stones periodically to ensure optimal airflow and prevent clogging.
- Keep the air pump's air intake free from dust and debris.
6.2. Thermometer Maintenance
- Wipe the thermometer's display and casing with a soft, dry cloth. Do not use abrasive cleaners.
- The thermometer uses a replaceable battery for long service life. Refer to the product packaging or manufacturer's website for specific battery type and replacement instructions.
7. Troubleshooting
| Problem | Possible Cause | Solution |
|---|---|---|
| Air pump not producing air | Power not connected; tubing kinked or blocked; air stone clogged. | Check power connection; inspect and clear tubing; clean or replace air stone. |
| Thermometer display is blank | Battery depleted; motion sensor not triggered. | Replace battery; wave hand near sensor to activate display. |
| Inaccurate temperature reading | Needs calibration. | Perform temperature calibration as described in Section 5.2.2. |
| Alarm sounds frequently | Temperature fluctuations; alarm thresholds set too narrowly. | Check aquarium heater/cooler; adjust high/low alarm settings to a wider range. |
8. Specifications
8.1. General Features
- Thermometer Accuracy: ±1°F
- Air Pump Noise Level: As low as 20dB (typically below 25dB)
- Air Pump Tank Capacity: Supports 5-300 gallons
- Thermometer Compatibility: All glass aquariums
- Thermometer Features: Motion sensor, high/low temperature alarm, adjustable screen brightness, replaceable battery.
8.2. Internal Structure Overview
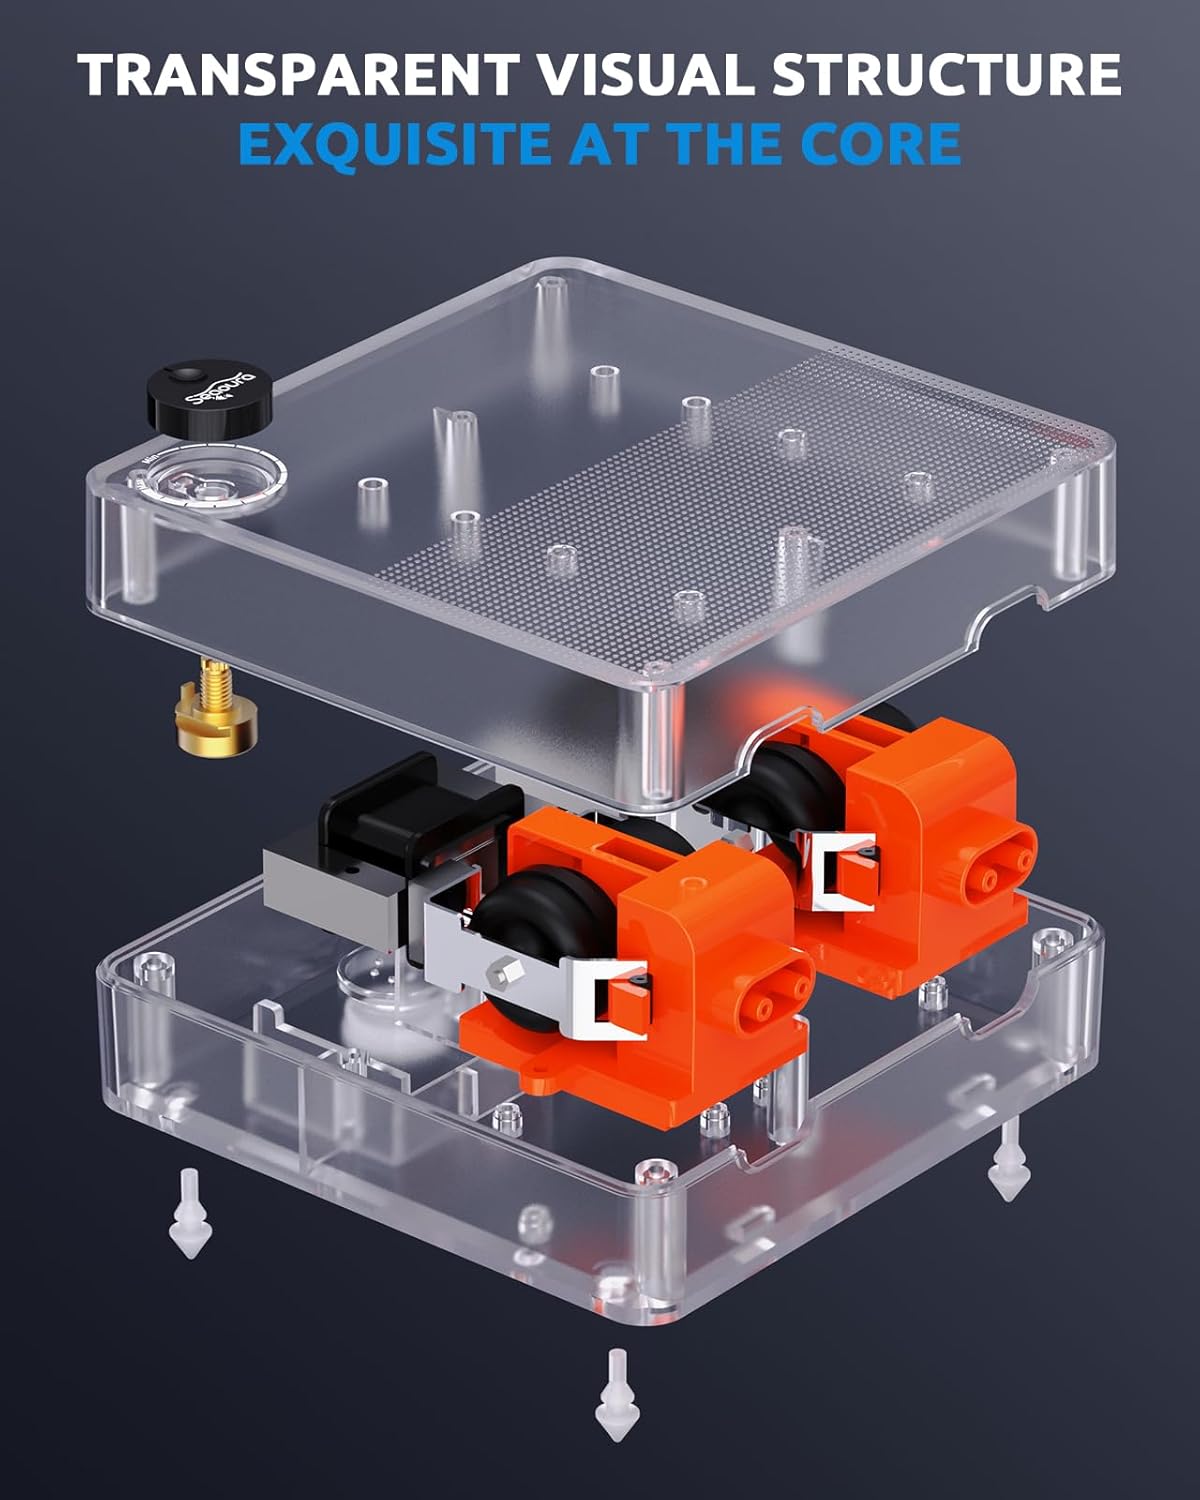
Image 8.1: Transparent Visual Structure. This image provides an exploded view of the air pump, showcasing its internal components and transparent casing design.
9. Warranty and Support
For warranty information, technical support, or customer service inquiries, please refer to the product packaging or contact SEAOURA customer support directly through their official website or the retailer where the product was purchased.