
1. Introduction
This manual provides essential information for the proper setup, operation, and maintenance of your Pixio PX160 Wave Portable Monitor. Please read this manual thoroughly before using the product to ensure optimal performance and longevity. Keep this manual for future reference.
The Pixio PX160 Wave is a 15.6-inch Full HD (1080p) IPS portable monitor designed for enhanced productivity and entertainment. It features HDR support, a 60Hz refresh rate, and versatile connectivity options including USB-C and HDMI, making it compatible with various devices such as laptops, PCs, gaming consoles, and smartphones.
2. Package Contents
Verify that all items listed below are included in your package. If any items are missing or damaged, please contact Pixio customer support.
- Pixio PX160 Wave Portable Monitor
- Smart Cover/Stand
- USB-C to USB-C Cable
- Mini HDMI to HDMI Cable
- USB-A to USB-C Power Cable
- Power Adapter
- User Manual (this document)
3. Product Overview
3.1 Monitor Features
- Display: 15.6-inch Full HD (1920x1080) IPS Panel
- Refresh Rate: 60Hz
- High Dynamic Range (HDR): Supported for enhanced contrast and color.
- Connectivity: 2x USB-C ports (full-featured), 1x Mini HDMI port.
- Audio: Integrated dual speakers and 3.5mm audio jack.
- Design: Ultra-thin, lightweight, and portable with a magnetic smart cover that doubles as a stand.
3.2 Port and Button Layout
Familiarize yourself with the monitor's ports and control buttons for proper usage.

Image: Side view of the Pixio PX160 Wave Portable Monitor, highlighting the Audio jack, Menu & Main OSD button, Input Selection button, Type C1, Type C2, and Mini HDMI ports.
- USB-C Ports (Type C1, Type C2): Used for power, video, and audio transmission.
- Mini HDMI Port: Used for video and audio transmission.
- 3.5mm Audio Jack: For connecting external headphones or speakers.
- OSD Menu/Power Button: Controls the On-Screen Display menu and powers the monitor on/off.
- Input Selection Button: Switches between input sources.
4. Setup
4.1 Using the Smart Cover/Stand
The included magnetic smart cover can be folded to create a stable stand for the monitor, allowing for various viewing angles.
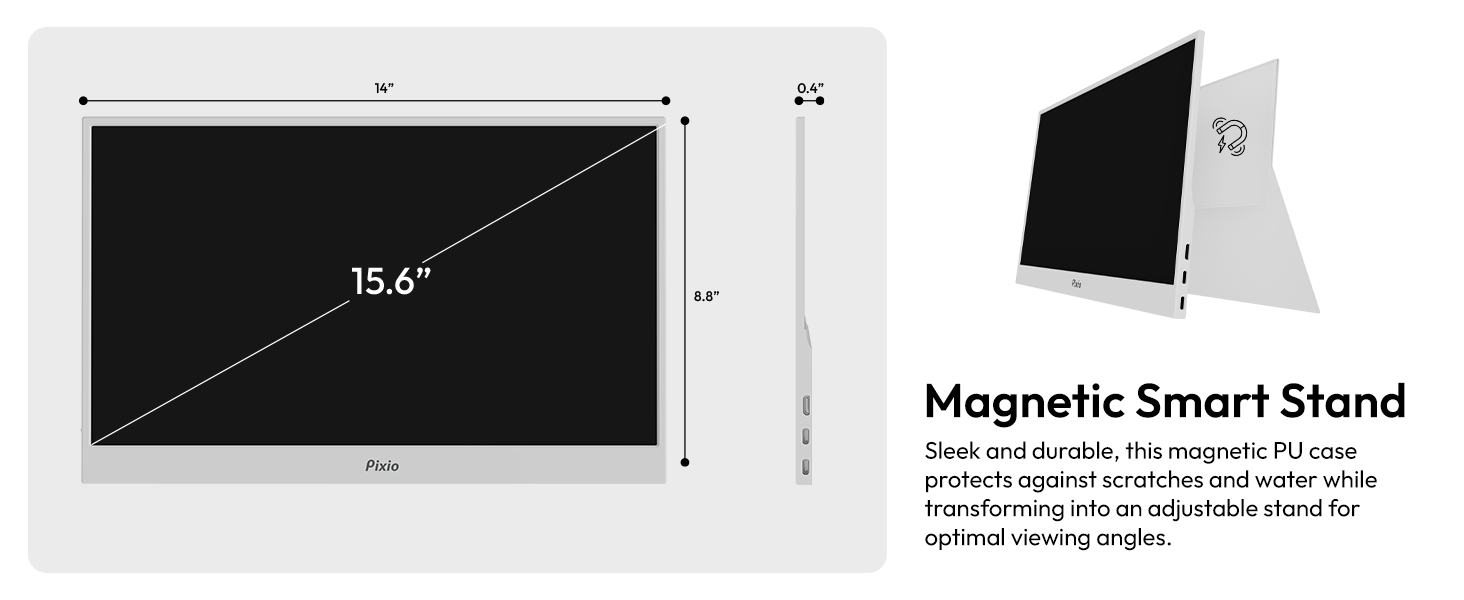
Image: The Pixio PX160 Wave Portable Monitor shown with its magnetic smart cover folded into a stand, illustrating its compact design and adjustable viewing angles.
4.2 Connecting to Devices
The Pixio PX160 Wave supports plug-and-play functionality. Ensure your device supports video output via USB-C or HDMI.
Connecting via USB-C (Single Cable Solution)
- Connect one end of the USB-C to USB-C cable to a full-featured USB-C port on your device (e.g., laptop, smartphone).
- Connect the other end of the USB-C to USB-C cable to either Type C1 or Type C2 port on the monitor.
- The monitor should automatically detect the signal and power on. If not, press the power button.
Connecting via HDMI (Requires External Power)
- Connect one end of the Mini HDMI to HDMI cable to the Mini HDMI port on the monitor.
- Connect the other end of the Mini HDMI to HDMI cable to the HDMI port on your device (e.g., PC, gaming console).
- Connect the USB-A to USB-C power cable to the monitor's remaining USB-C port (Type C1 or Type C2) and the power adapter. Plug the power adapter into a wall outlet.
- The monitor should power on and display the signal. If not, press the power button and select the correct input source using the Input Selection button.
Video: A user demonstrates the setup and connectivity options of a portable monitor, including connecting to a laptop via USB-C and HDMI, and navigating the OSD menu.
Video: A demonstration of connecting a 15.6-inch 1080p portable monitor to a laptop using USB-C and HDMI, showcasing its ease of use for dual-screen setups.
5. Operating Instructions
5.1 Power On/Off
To power on the monitor, press the OSD Menu/Power button. To power off, press and hold the OSD Menu/Power button for a few seconds until the screen turns off.
5.2 OSD Menu Navigation
The On-Screen Display (OSD) menu allows you to adjust various monitor settings.
- Press the OSD Menu/Power button to open the OSD menu.
- Use the OSD Menu/Power button (scroll up/down) to navigate through menu options.
- Press the OSD Menu/Power button (push in) to select an option or confirm a setting.
- Use the Input Selection button to exit the OSD menu.
5.3 Display Settings
Within the OSD menu, you can adjust the following settings:
- Brightness/Contrast: Adjust the display's luminance and contrast levels.
- Color Settings: Modify color temperature (Warm, Cool, User-defined RGB), hue, and saturation.
- Aspect Ratio: Select between 16:9 or other available aspect ratios.
- HDR Mode: Enable or disable HDR for compatible content.
- Input Source: Manually select the input source (USB-C1, USB-C2, HDMI).
- Volume: Adjust the volume of the integrated speakers or connected headphones.
- Language: Change the OSD menu language.
6. Maintenance
To maintain the performance and appearance of your Pixio PX160 Wave monitor, follow these guidelines:
- Cleaning the Screen: Gently wipe the screen with a soft, lint-free cloth. For stubborn marks, use a screen-specific cleaning solution applied to the cloth, not directly to the screen.
- Cleaning the Casing: Use a soft, dry cloth to clean the monitor's casing. Avoid abrasive cleaners or solvents.
- Storage: When not in use, store the monitor in a cool, dry place, preferably in its original packaging or with the smart cover attached to protect the screen.
- Avoid Extreme Conditions: Do not expose the monitor to extreme temperatures, humidity, or direct sunlight.
7. Troubleshooting
If you encounter issues with your monitor, refer to the following common solutions:
- No Display/Signal:
- Ensure all cables are securely connected.
- Verify the monitor is powered on.
- Check if your device's display output is enabled (e.g., extend display, duplicate display).
- Manually select the correct input source via the OSD menu.
- If using HDMI, ensure external power is supplied to the monitor.
- Flickering Screen:
- Check cable connections.
- Try a different cable or port.
- Ensure your device's graphics driver is up to date.
- No Sound:
- Adjust the monitor's volume via the OSD menu.
- Check your device's audio output settings to ensure sound is directed to the monitor.
- Ensure external speakers/headphones are properly connected to the 3.5mm audio jack.
- Buttons Not Responding:
- Power cycle the monitor (turn off, then on again).
If the issue persists, please contact Pixio customer support for further assistance.
8. Specifications
| Feature | Detail |
|---|---|
| Model Number | PX160WAVEW |
| Screen Size | 15.6 Inches |
| Panel Type | IPS |
| Resolution | 1920 x 1080 Pixels (FHD 1080p) |
| Refresh Rate | 60Hz |
| Aspect Ratio | 16:9 |
| Image Brightness | 250 Candela |
| Screen Surface | Matte |
| Product Dimensions | 0.5 x 14 x 9 inches |
| Item Weight | 4.47 pounds |
| Connectivity | 2x USB-C, 1x Mini HDMI, 1x 3.5mm Audio Jack |
9. Warranty and Support
For warranty information and customer support, please refer to the warranty card included in your package or visit the official Pixio website. Keep your proof of purchase for any warranty claims.
For technical assistance or further inquiries, please contact Pixio customer service.

