
1. Introduction
This manual provides detailed instructions for the operation and maintenance of your Acuvar 5K75MP Digital Camera. Please read this manual thoroughly before using the camera to ensure proper function and to maximize your experience. This camera is designed for capturing high-resolution photos and videos, offering features such as autofocus, digital zoom, and WiFi connectivity.

Image 1.1: Acuvar 5K75MP Digital Camera (Pink Pro Kit)
2. Product Overview
2.1. What's Included (Pro Kit)
The Acuvar 5K75MP Digital Camera Pro Kit includes the following components:
- Acuvar 75MP 4K/5K Digital Camera
- Wide-Angle / Macro Lens
- UV / Filter Kit
- USB Memory Card Reader
- Rechargeable Batteries (2)
- 64GB Micro SD Card + Adapter

Image 2.1: Kit Comparison Table (Pro Kit components are marked with a checkmark)
2.2. Camera Components and Controls
Familiarize yourself with the camera's physical components and controls:

Image 2.2: Camera Controls Diagram
- Mode Dial: Selects shooting modes (Photo, Video, Continuous Shooting, Timer, Automatic Shooting, Loop Recording, Time Lapse, Slow Motion).
- Photo Button: Captures still images.
- POWER Button: Turns the camera on or off.
- Digital Zoom In/Out (T/W): Adjusts the digital zoom level.
- Charging/Working Indicator Light: Indicates camera status.
- Playback Button: Enters playback mode to view photos and videos.
- Delete Button: Deletes selected files.
- Up Button/Shortcut for Fill Light: Navigates menus or activates fill light.
- Right/Left/Down Buttons: Navigates menus and settings.
- OK Button: Confirms selections.
- Menu Button: Accesses camera settings.
- DISP Button: Changes display information.
3. Setup
3.1. Battery Installation and Charging
- Open the battery compartment cover located on the bottom of the camera.
- Insert the rechargeable battery, ensuring correct polarity.
- Close the battery compartment cover.
- Connect the camera to a power source using the provided USB cable to charge the battery. The charging indicator light will show charging status.
3.2. SD Card Installation
The camera supports SD cards up to 64GB. A 64GB Micro SD card and adapter are included in the Pro Kit.
- Locate the SD card slot on the side of the camera.
- Insert the Micro SD card into the adapter, then insert the adapter into the camera's SD card slot until it clicks into place.
- To remove, press the card gently to release it.
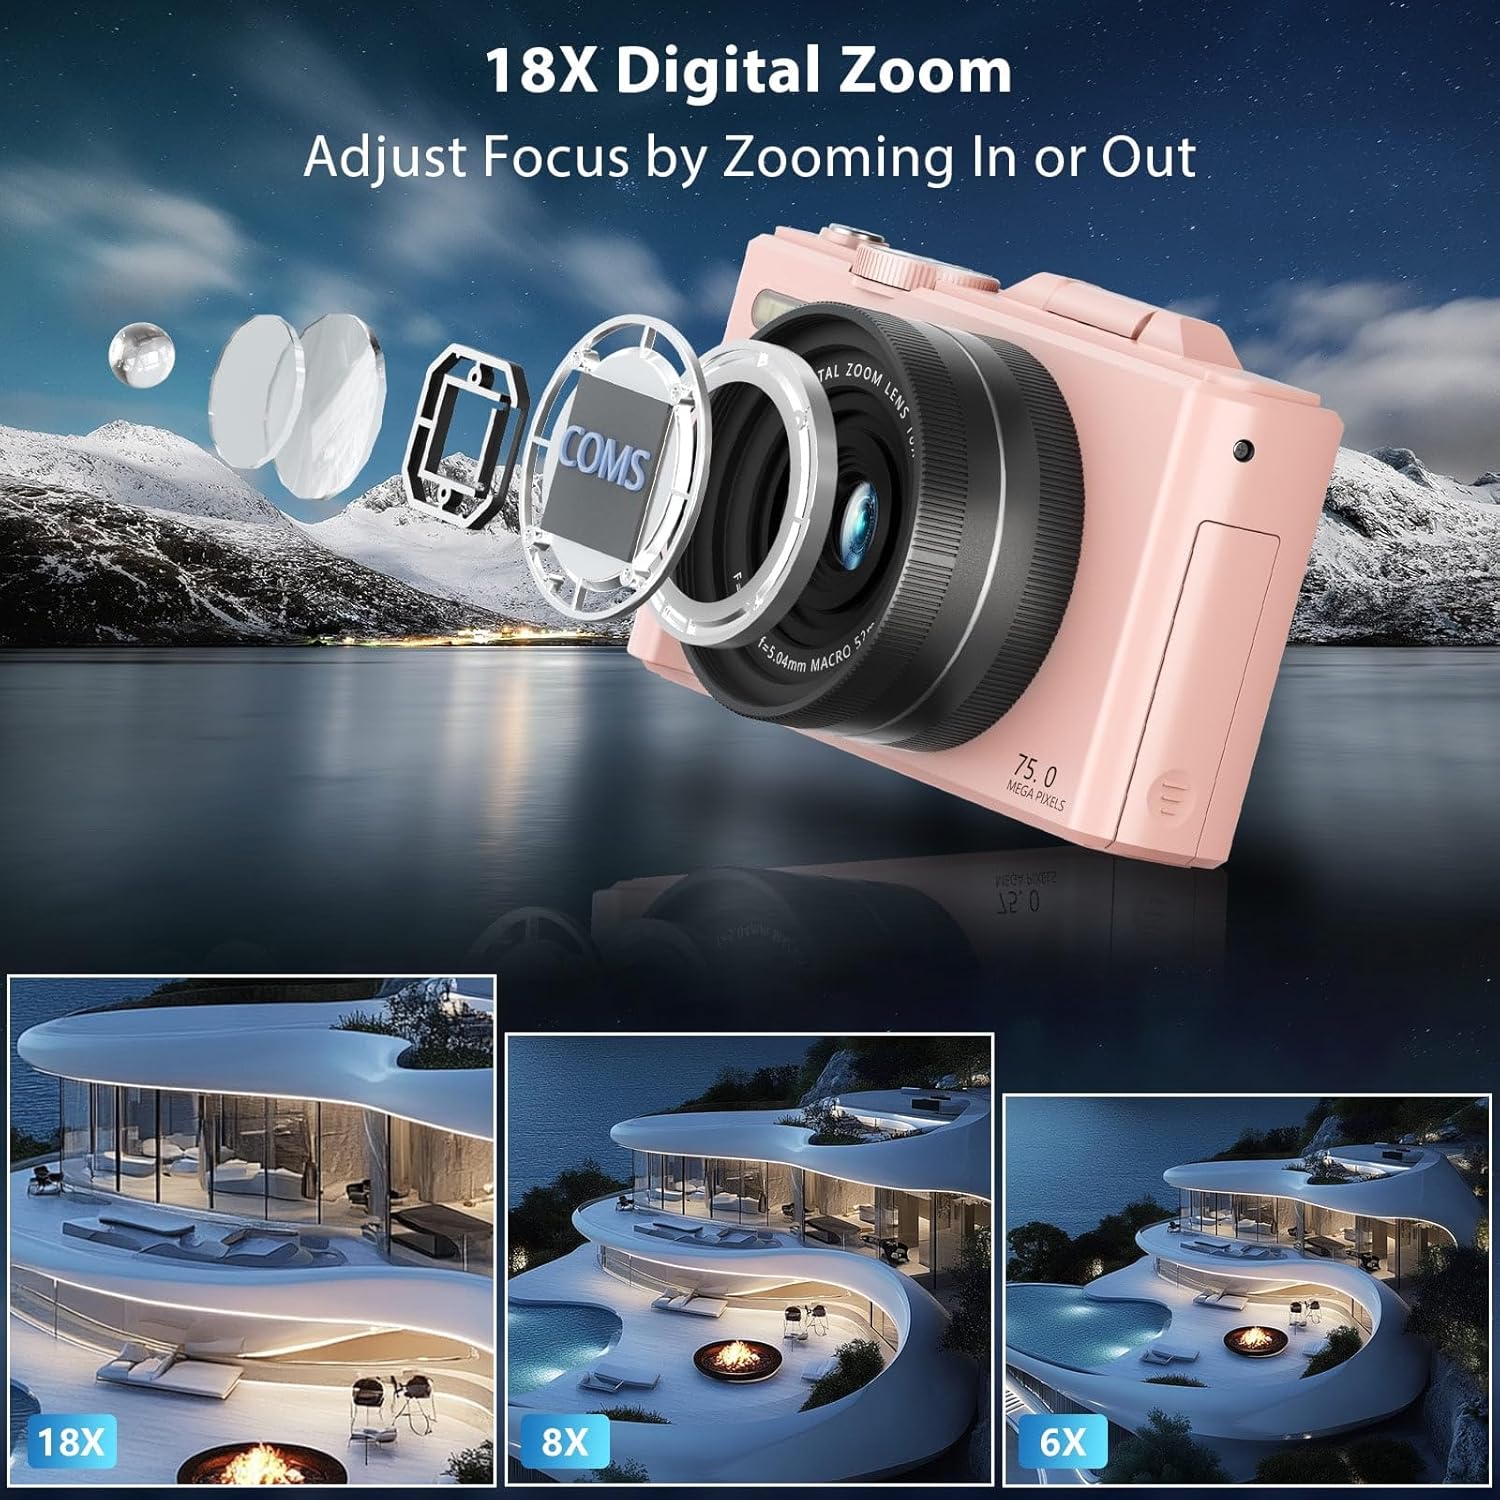
Image 3.1: SD Card for the Acuvar 5K75MP Digital Camera
4. Operating Instructions
4.1. Power On/Off
Press and hold the POWER button to turn the camera on or off.
4.2. Selecting Shooting Modes
Rotate the Mode Dial on the top of the camera to select your desired shooting mode. Available modes include Photo, Video, Continuous Shooting, Timer, Automatic Shooting, Loop Recording, Time Lapse, and Slow Motion.
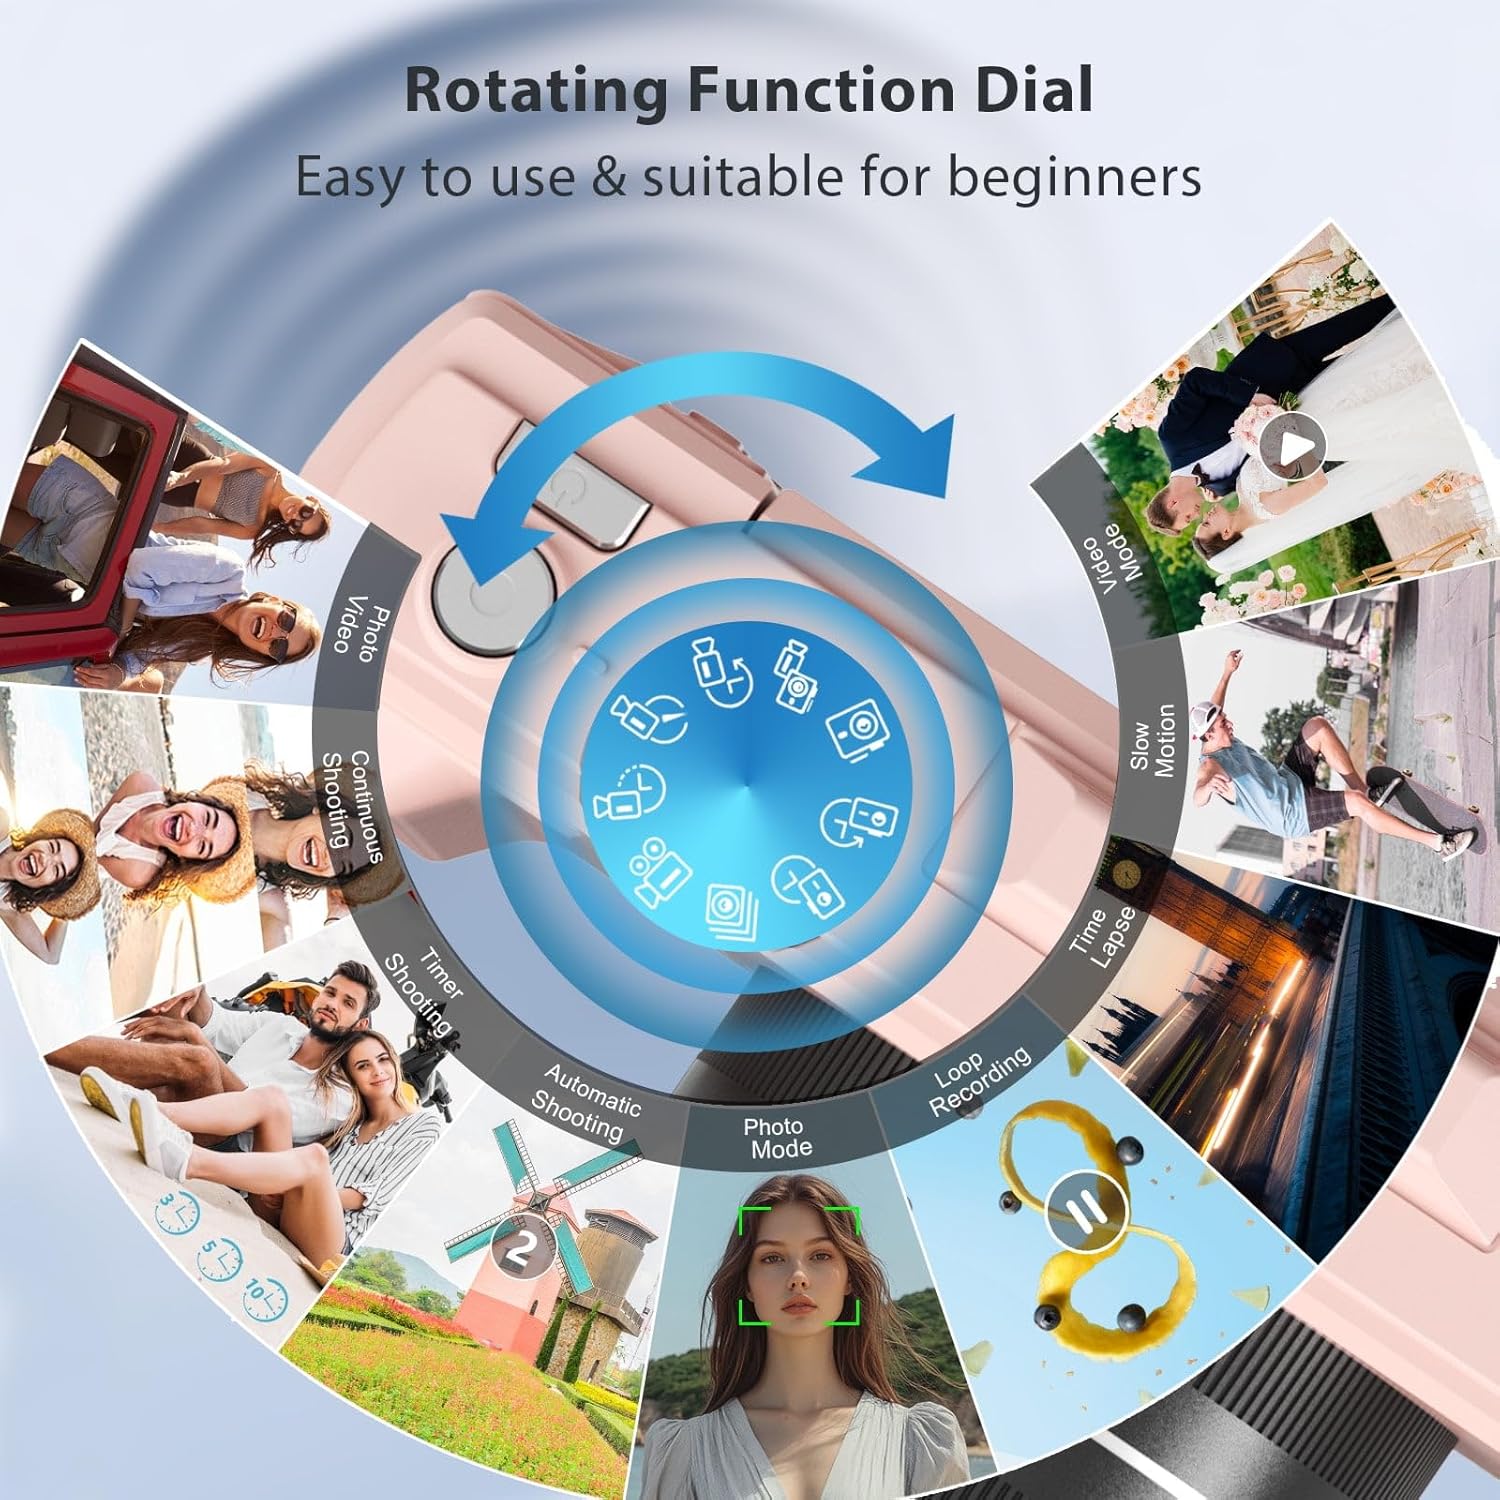
Image 4.1: Rotating Function Dial for Mode Selection
4.3. Photography (75MP)
In Photo Mode, the camera captures still images at 75MP resolution. The autofocus feature helps ensure subjects are sharp. Press the Photo Button to take a picture.
4.4. Video Recording (5K Ultra HD)
In Video Mode, the camera records footage in 5K Ultra HD. Press the Photo Button to start and stop video recording.
4.5. Digital Zoom (18X)
Use the T (Telephoto) and W (Wide) buttons to adjust the 18X digital zoom. This allows you to magnify distant subjects.

Image 4.2: 18X Digital Zoom Demonstration
4.6. Using the 3.0-inch Flip Screen
The camera features a 3.0-inch 180° flip screen, allowing for flexible viewing angles, especially useful for self-recording or vlogging.
4.7. WiFi Connectivity and Webcam Function
The camera includes built-in WiFi for instant sharing and webcam functionality.
- Scan the QR code displayed on the camera screen or provided in the manual to download the corresponding APP (APP-HDV CAM).
- Turn on your smartphone's WiFi and connect to the camera's WiFi network (e.g., WD08_5K_WiFi). The default password is 12345678.
- Press and hold the UP/Flash button for approximately 3 seconds to activate the camera's WiFi function.
- Once connected, you can use the app to control the camera, view photos/videos, and transfer files.
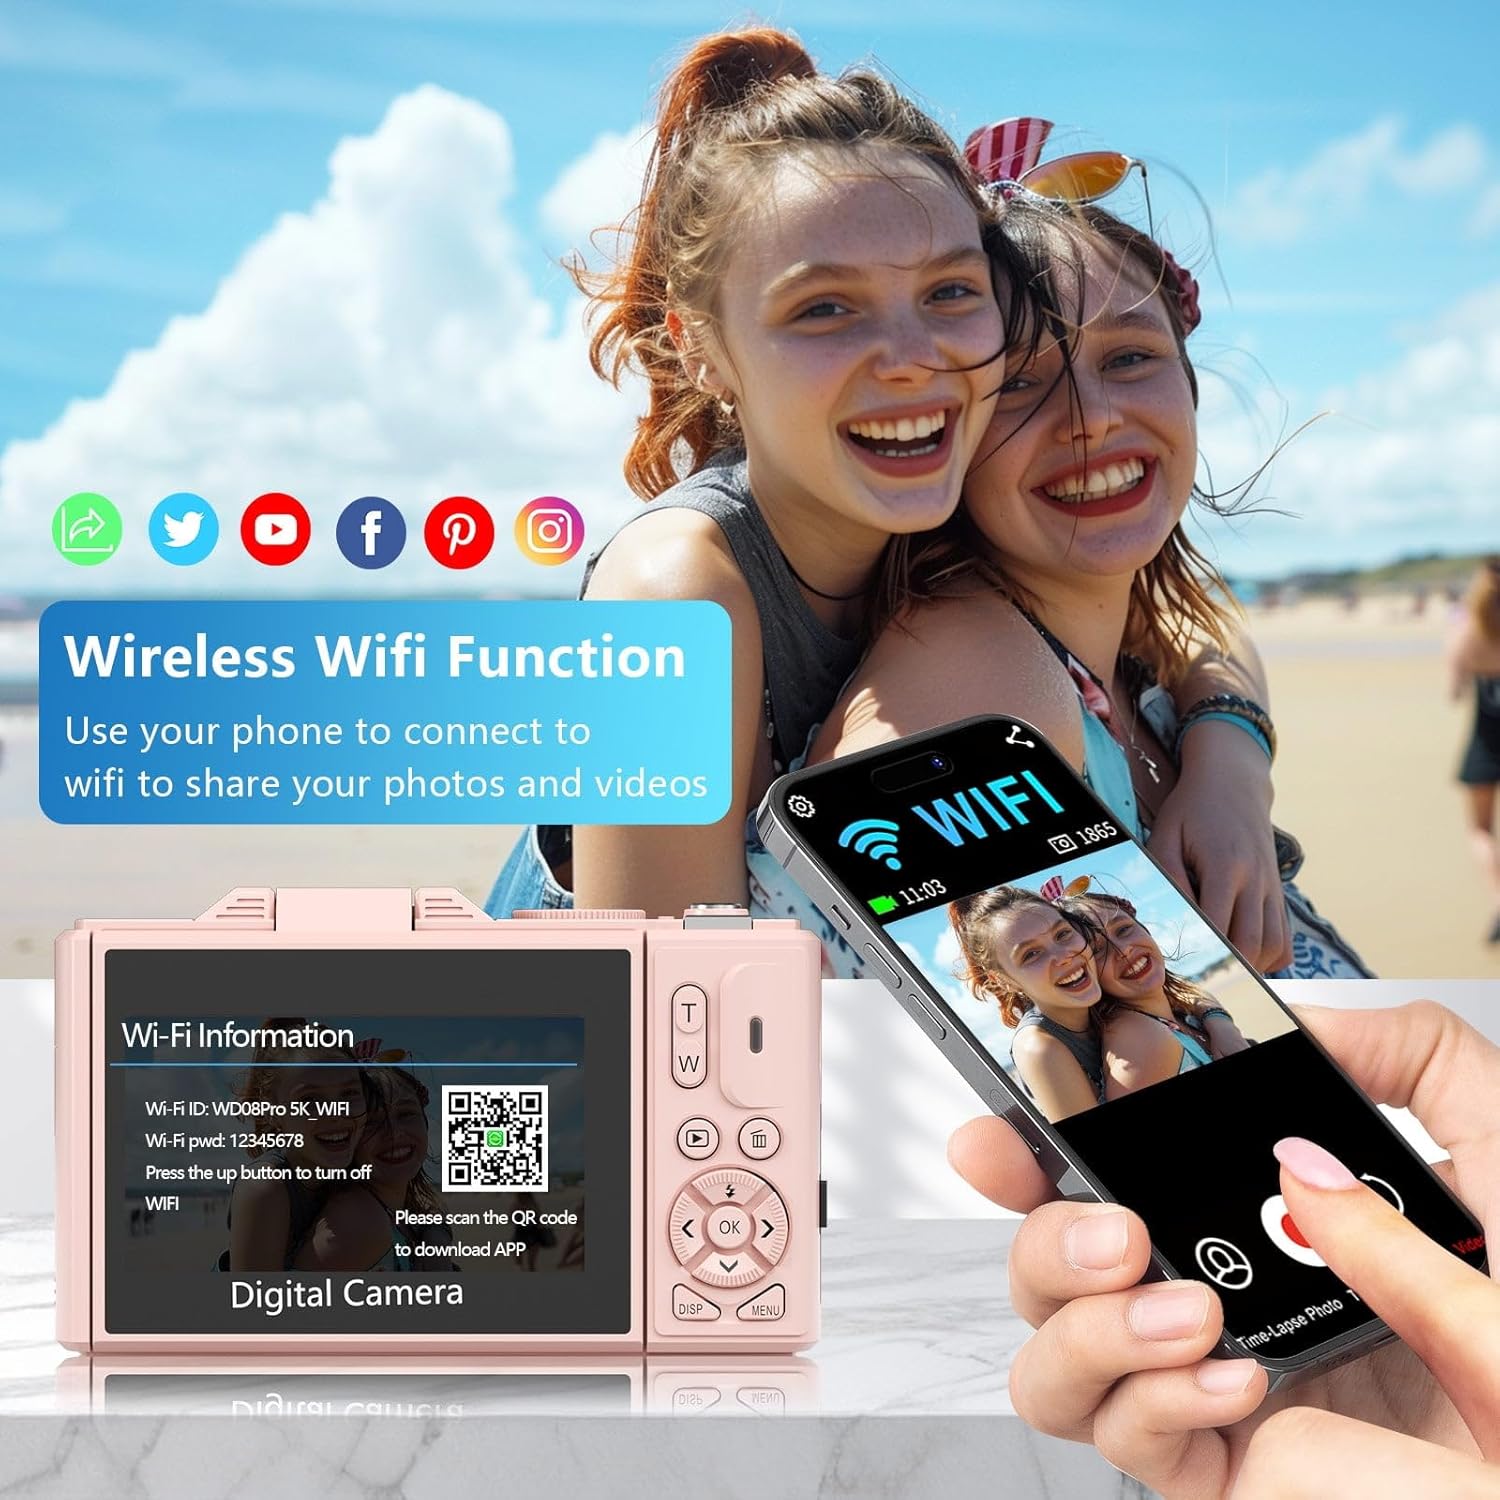
Image 4.3: Wireless WiFi Function for Instant Sharing
For app download, scan this QR code: https://qr03.cn/BA45q0
To use as a webcam, connect the camera to your computer via USB and select the webcam option on the camera's screen.
4.8. Using Photo Filters
The camera supports various photo filters to enhance your images. The Pro Kit includes a UV/Filter Kit. Attach the desired filter to the front of the lens.
- UV Filter: Reduces ultraviolet light, improving clarity and protecting the lens.
- CPL Filter (Circular Polarizer): Reduces glare and reflections, enhances color saturation.
- FLD Filter (Fluorescent Light Correction): Corrects color casts under fluorescent lighting.
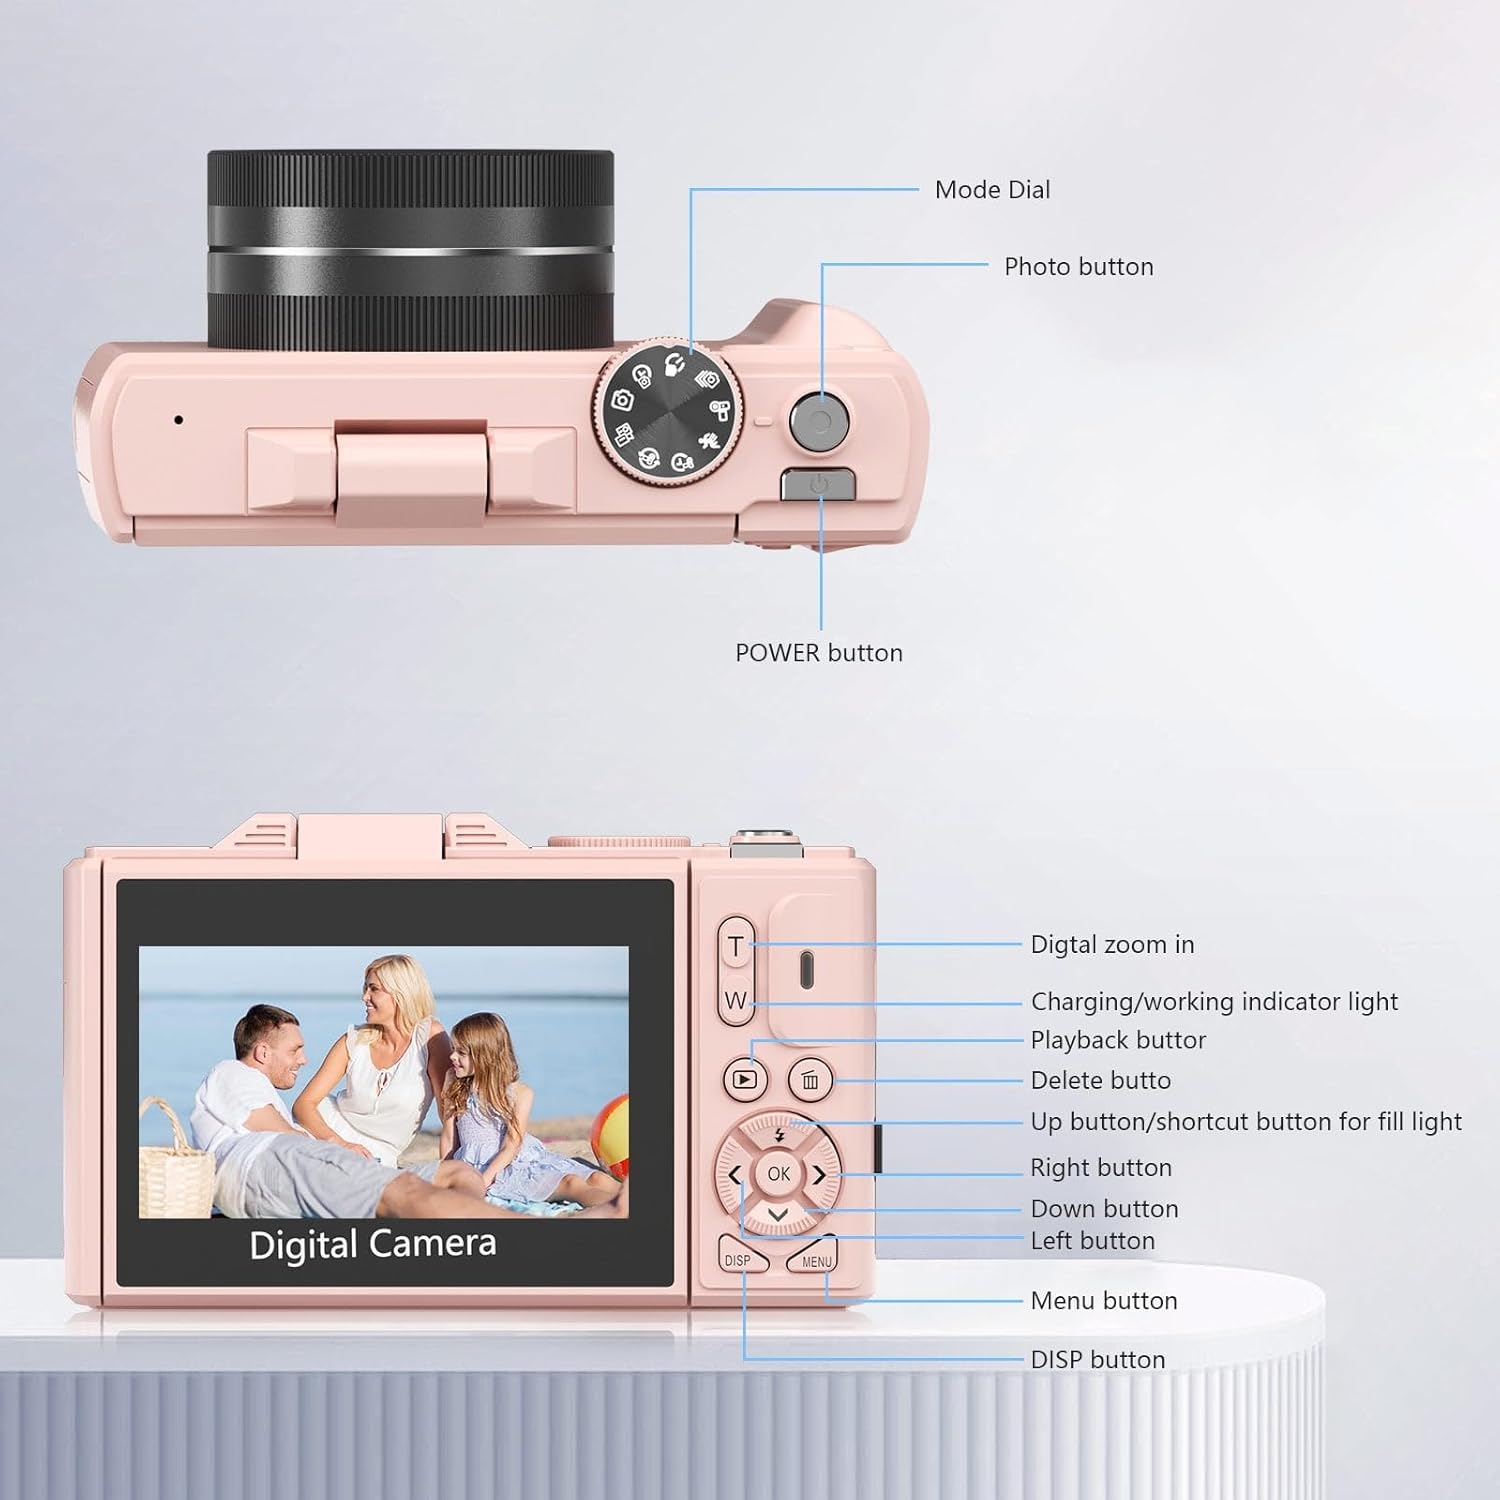
Image 4.4: Filter Effects Comparison
5. Maintenance
5.1. Cleaning the Camera
- Use a soft, dry cloth to clean the camera body.
- For the lens and screen, use a specialized lens cleaning cloth and solution. Avoid abrasive materials.
- Do not use organic solvents (e.g., alcohol, thinner) to clean the camera.
5.2. Storage
- Store the camera in a cool, dry place away from direct sunlight and high humidity.
- Remove the battery if the camera will not be used for an extended period.
6. Troubleshooting
If you encounter issues with your camera, refer to the following common solutions:
| Problem | Possible Cause | Solution |
|---|---|---|
| Camera does not power on. | Low or depleted battery. | Charge the battery fully. |
| Camera does not power on. | Battery incorrectly inserted. | Reinsert the battery with correct polarity. |
| Cannot take photos/videos. | SD card full or not inserted. | Insert an SD card or delete unnecessary files. |
| Images are blurry. | Autofocus issue or dirty lens. | Ensure autofocus is active. Clean the lens. |
| WiFi connection fails. | Incorrect password or WiFi not activated. | Verify password. Activate camera WiFi (hold UP/Flash button). |
7. Specifications
Key technical specifications for the Acuvar 5K75MP Digital Camera:
| Feature | Specification |
|---|---|
| Model Name | ACUVAR5K |
| Model Number | 5K75MP |
| Photo Sensor Resolution | 75 MP |
| Video Resolution | 5K Ultra HD (1080p listed, but product title indicates 5K) |
| Digital Zoom | 18 x |
| Screen Size | 3 Inches (180° Flip Screen) |
| Connectivity | Wi-Fi, USB |
| Storage | Supports up to 64 GB SD Card |
| Autofocus | Yes |
| Image Stabilization | Digital |
| Battery Type | Rechargeable |
| Material | Plastic |
| Item Weight | 3 Ounces |
8. Official Product Video
Watch the official product video for a visual guide to the Acuvar 5K75MP Digital Camera's features and operation.
Video 8.1: Acuvar 75MP 5K Digital Camera Overview
9. Warranty and Support
9.1. Warranty Information
The Acuvar 5K75MP Digital Camera comes with a 90-day warranty from the date of purchase. This warranty covers manufacturing defects. Please retain your proof of purchase for warranty claims.
9.2. Customer Support
For further assistance, technical support, or warranty inquiries, please contact Acuvar customer service. Refer to the product packaging or the official Acuvar website for contact details.