
1. Introduction
Thank you for choosing the GGGUOJINN Waterproof Irrigation Timer with Rain Sensor. This smart controller is designed to automate your garden watering, ensuring efficient and precise irrigation while conserving water. Its integrated rain sensor intelligently detects rainfall, preventing unnecessary watering on rainy days. This manual provides detailed instructions for installation, operation, and maintenance to help you get the most out of your device.
2. Product Features
- Rainwater Induction: Automatically stops watering on rainy days and resumes on sunny days, optimizing water usage.
- Programmable Schedules: Supports up to 6 independent watering programs, allowing for flexible and regular automatic irrigation.
- Precise Irrigation: Watering duration can be set from 1 second to 99 minutes and 59 seconds, offering fine-tuned control.
- Integrated Water Inlet Filter: Effectively blocks sand, gravel, and other debris to prevent clogging and ensure smooth operation.
- Easy Installation: Features a twistable active water inlet connector for convenient attachment, even to faucets close to walls.
3. Package Contents
Please verify that all items are present in your package:
- 1 x GGGUOJINN Waterproof Irrigation Timer
- Note: AA alkaline batteries are not included and must be purchased separately.
4. Setup Instructions
4.1. Battery Installation
The timer requires two (2) AA alkaline batteries for operation. Ensure correct polarity when inserting the batteries.
- Locate the battery compartment on the back of the timer.
- Open the battery compartment cover.
- Insert two new AA alkaline batteries, observing the correct positive (+) and negative (-) terminals.
- Securely close the battery compartment cover to maintain water resistance.
4.2. Connecting the Timer to a Faucet
The timer is designed for easy attachment to standard outdoor faucets.

This image illustrates the four steps for installing the irrigation timer: 1) Screw the timer onto the faucet, 2) Tighten the connection, 3) Attach the garden hose to the timer's outlet, and 4) Ensure all connections are secure.
- Ensure the faucet is turned off.
- Screw the timer's inlet connector onto your outdoor faucet. Hand-tighten until secure. Do not overtighten.
- Attach your garden hose to the outlet connector at the bottom of the timer. Hand-tighten until secure.
- Slowly turn on the faucet to check for leaks. If leaks occur, tighten connections slightly.
4.3. Rain Sensor Placement
The integrated rain sensor is located on the top surface of the timer. Ensure it is exposed to rainfall for accurate detection.

This image displays the irrigation timer installed on a faucet, with a clear view of its digital display. An inset shows a magnified view of the rain sensor grid located on the top of the device, highlighting its position for optimal rain detection.
5. Operating Instructions
The timer features a clear digital display and intuitive buttons for programming.

This image provides a detailed view of the timer's interface, showing the digital screen with 'NOW 6:30', 'P1 ON', 'Su Mo Tu We Th Fr Sa', 'START TIME 6:35', and 'HOW LONG 1min 00s'. The control buttons, including 'OK', '+', and '-', are clearly visible for programming.
5.1. Setting Current Time
- Press the 'NOW' button (or similar button to access time setting).
- Use the '+' and '-' buttons to adjust the current hour.
- Press 'OK' to confirm the hour and move to minutes.
- Use the '+' and '-' buttons to adjust the current minutes.
- Press 'OK' to save the current time.
5.2. Programming Watering Schedules (P1-P6)
The timer allows for up to 6 independent watering programs (P1 to P6).
- Press the 'P' button (or similar) to cycle through programs P1 to P6. Select the program you wish to set.
- Once a program (e.g., P1) is selected, use the '+' or '-' buttons to toggle it 'ON' or 'OFF'.
- Press 'OK' to set the watering days. Use '+' or '-' to select specific days (e.g., Su Mo Tu We Th Fr Sa). Press 'OK' to confirm each day.
- Press 'OK' again to set the 'START TIME'. Use '+' and '-' to adjust the hour and minutes. Press 'OK' to confirm.
- Press 'OK' again to set 'HOW LONG' (duration). Use '+' and '-' to adjust minutes and seconds. The duration can be set from 1 second to 99 minutes and 59 seconds. Press 'OK' to confirm.
- Repeat steps for other programs (P2-P6) as needed.
5.3. Manual Watering
To initiate manual watering outside of programmed schedules:
- Press the manual watering button (often indicated by a water droplet icon).
- Use '+' and '-' to set the desired manual watering duration.
- Press 'OK' to start manual watering.
- To stop manual watering prematurely, press the manual watering button again.
5.4. Rain Sensor Functionality
The integrated rain sensor detects rainfall and automatically pauses scheduled watering to prevent overwatering.
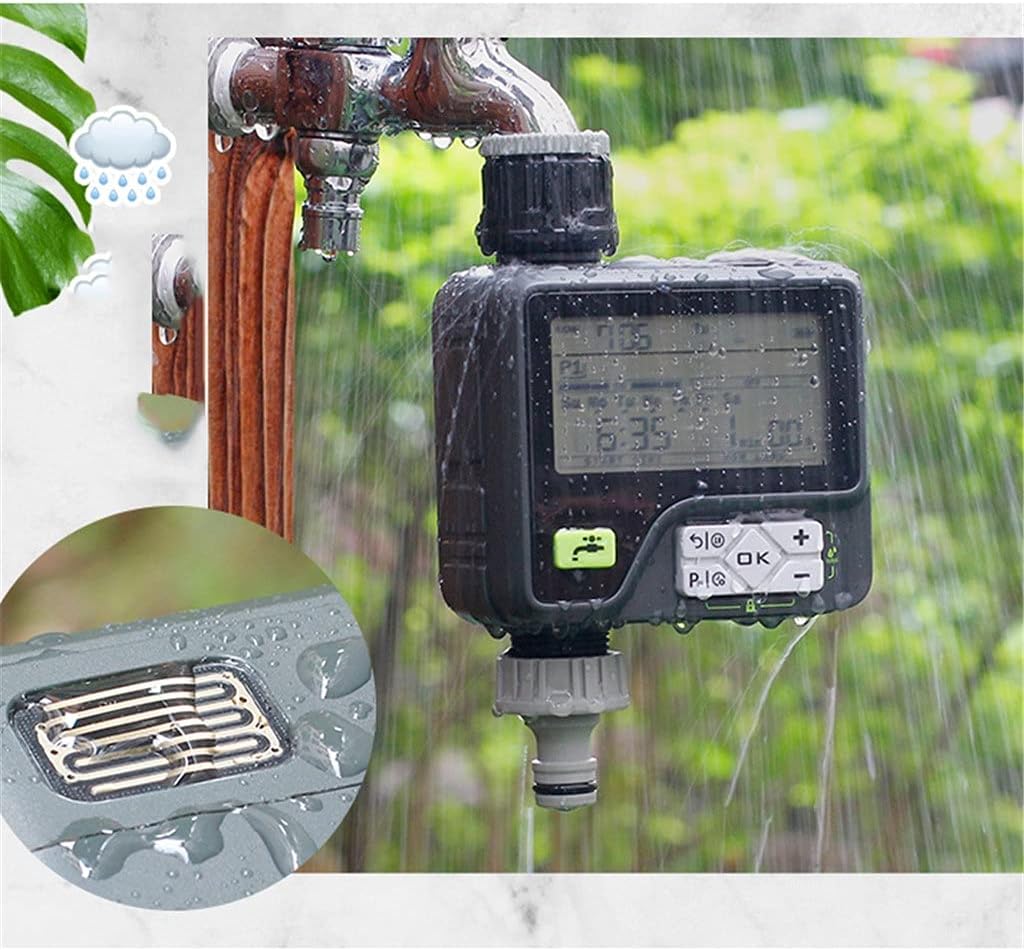
This image shows the irrigation timer in a rainy environment, with water visibly accumulating on its surface. An inset highlights the rain sensor grid, demonstrating its function in detecting precipitation and pausing watering cycles.
Once the rain sensor detects sufficient moisture, the timer will display an indicator (e.g., a rain cloud icon) and suspend watering. Watering will resume automatically once the sensor dries, indicating the need for irrigation.
6. Maintenance
6.1. Cleaning the Water Inlet Filter
Regularly inspect and clean the water inlet filter to prevent clogging and ensure optimal water flow.
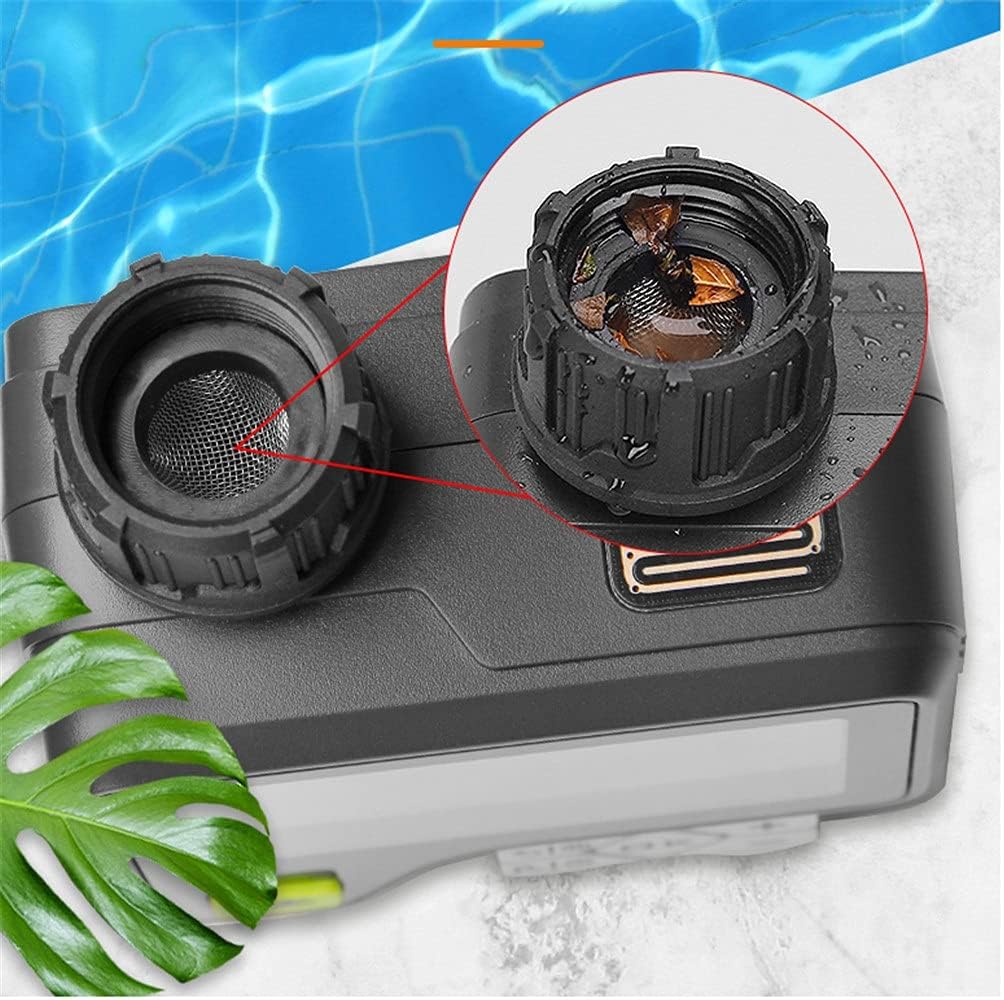
This image focuses on the water inlet of the irrigation timer, clearly showing the fine mesh filter designed to trap debris. An accompanying inset provides a magnified view of the filter, illustrating how it can collect leaves and other particles, emphasizing the need for periodic cleaning.
- Turn off the faucet and disconnect the timer.
- Unscrew the inlet connector to access the filter screen.
- Remove the filter screen and rinse it under running water to remove any debris.
- If necessary, use a soft brush to gently clean stubborn particles.
- Reinsert the clean filter screen and reattach the timer to the faucet.
6.2. Battery Replacement
Replace batteries when the low battery indicator appears on the display to ensure continuous operation.
- Follow the battery installation steps outlined in Section 4.1.
- Dispose of old batteries responsibly according to local regulations.
6.3. Winterization
Before freezing temperatures occur, disconnect the timer from the faucet and store it indoors in a dry, frost-free location. Remove batteries if storing for extended periods.
7. Troubleshooting
| Problem | Possible Cause | Solution |
|---|---|---|
| Timer not watering | Low batteries; Faucet off; Program off; Rain sensor active; Clogged filter | Replace batteries; Turn on faucet; Check program settings; Wait for sensor to dry; Clean filter |
| Water leaks from connections | Loose connections; Worn washer | Tighten connections; Replace washer |
| Display is blank or dim | Dead or low batteries | Replace batteries |
| Timer waters during rain | Rain sensor obstructed or faulty | Ensure sensor is clear; Contact support if issue persists |
8. Specifications
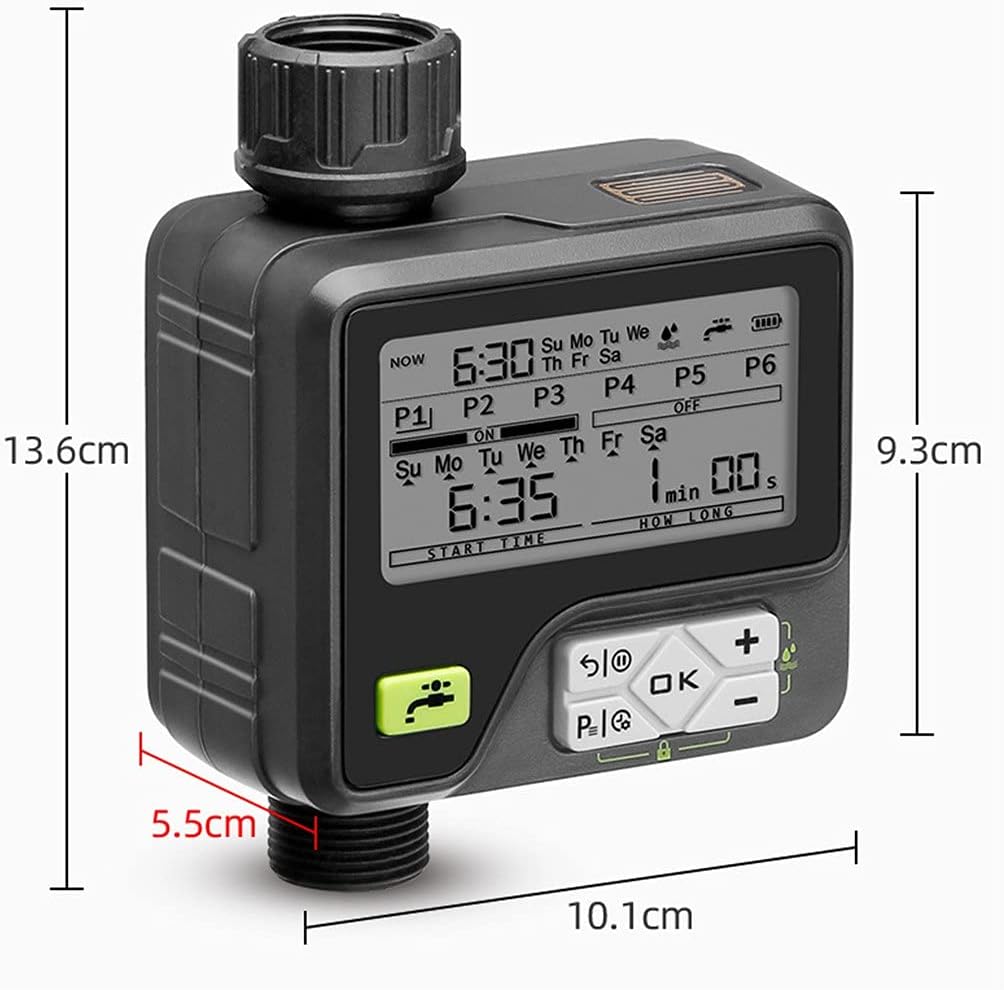
This image provides the key dimensions of the irrigation timer: 13.6 cm in height, 10.1 cm in width, and 5.5 cm in depth, offering a clear understanding of its physical size.
- Working Voltage: 2 x AA Alkaline Batteries (not included)
- Suitable Water Pressure: 0.05 - 0.8 MPa
- Irrigation Duration: 1 second to 99 minutes 59 seconds
- Programmable Schedules: Up to 6 sets
- Dimensions (Approx.): 13.6 cm (Height) x 10.1 cm (Width) x 5.5 cm (Depth)
- Brand: GGGUOJINN
- ASIN: B0F4X8VSPY
- UPC: 793877478187
9. Warranty & Support
For warranty information or technical support, please refer to the retailer's return policy or contact the manufacturer directly. Keep your purchase receipt as proof of purchase.