1. Introduction
Thank you for choosing the Benbodes Men's Hair Clippers & Beard Trimmer Grooming Kit. This manual provides essential information for the safe and effective use, maintenance, and care of your new grooming device. Please read these instructions thoroughly before first use and retain them for future reference.
2. Safety Instructions
- This appliance is intended for household use only. Do not use it for commercial purposes.
- Keep the appliance dry. Do not immerse the main unit in water or use it in wet environments such as showers or bathtubs.
- Do not attempt to repair or disassemble the appliance yourself. Contact qualified service personnel for repairs.
- Keep out of reach of children. This appliance is not a toy.
- Use only the provided charging cable. Ensure the charging voltage is compatible with your power source.
- Unplug the appliance before cleaning and when not in use for extended periods.
- Avoid pressing the blades against the skin too hard, as this may cause irritation or injury.
- Do not use the appliance if the blades are damaged or broken, as this may cause injury.
- Always ensure the appliance is fully charged before use to maintain optimal performance.
3. Package Contents
Your Benbodes Grooming Kit includes the following items:
- Electric Hair Clipper (Main Unit)
- Shawl (Hair Cutting Cape)
- Cleaning Brush
- Cleaning Sponge
- 2 Scissors (Hair Cutting and Thinning)
- Comb
- 4 Trimming Combs (3mm, 6mm, 9mm, 12mm)
- 6 Trim Patterns (Stencils for designs)
- USB Data Cable
- Instruction Manual
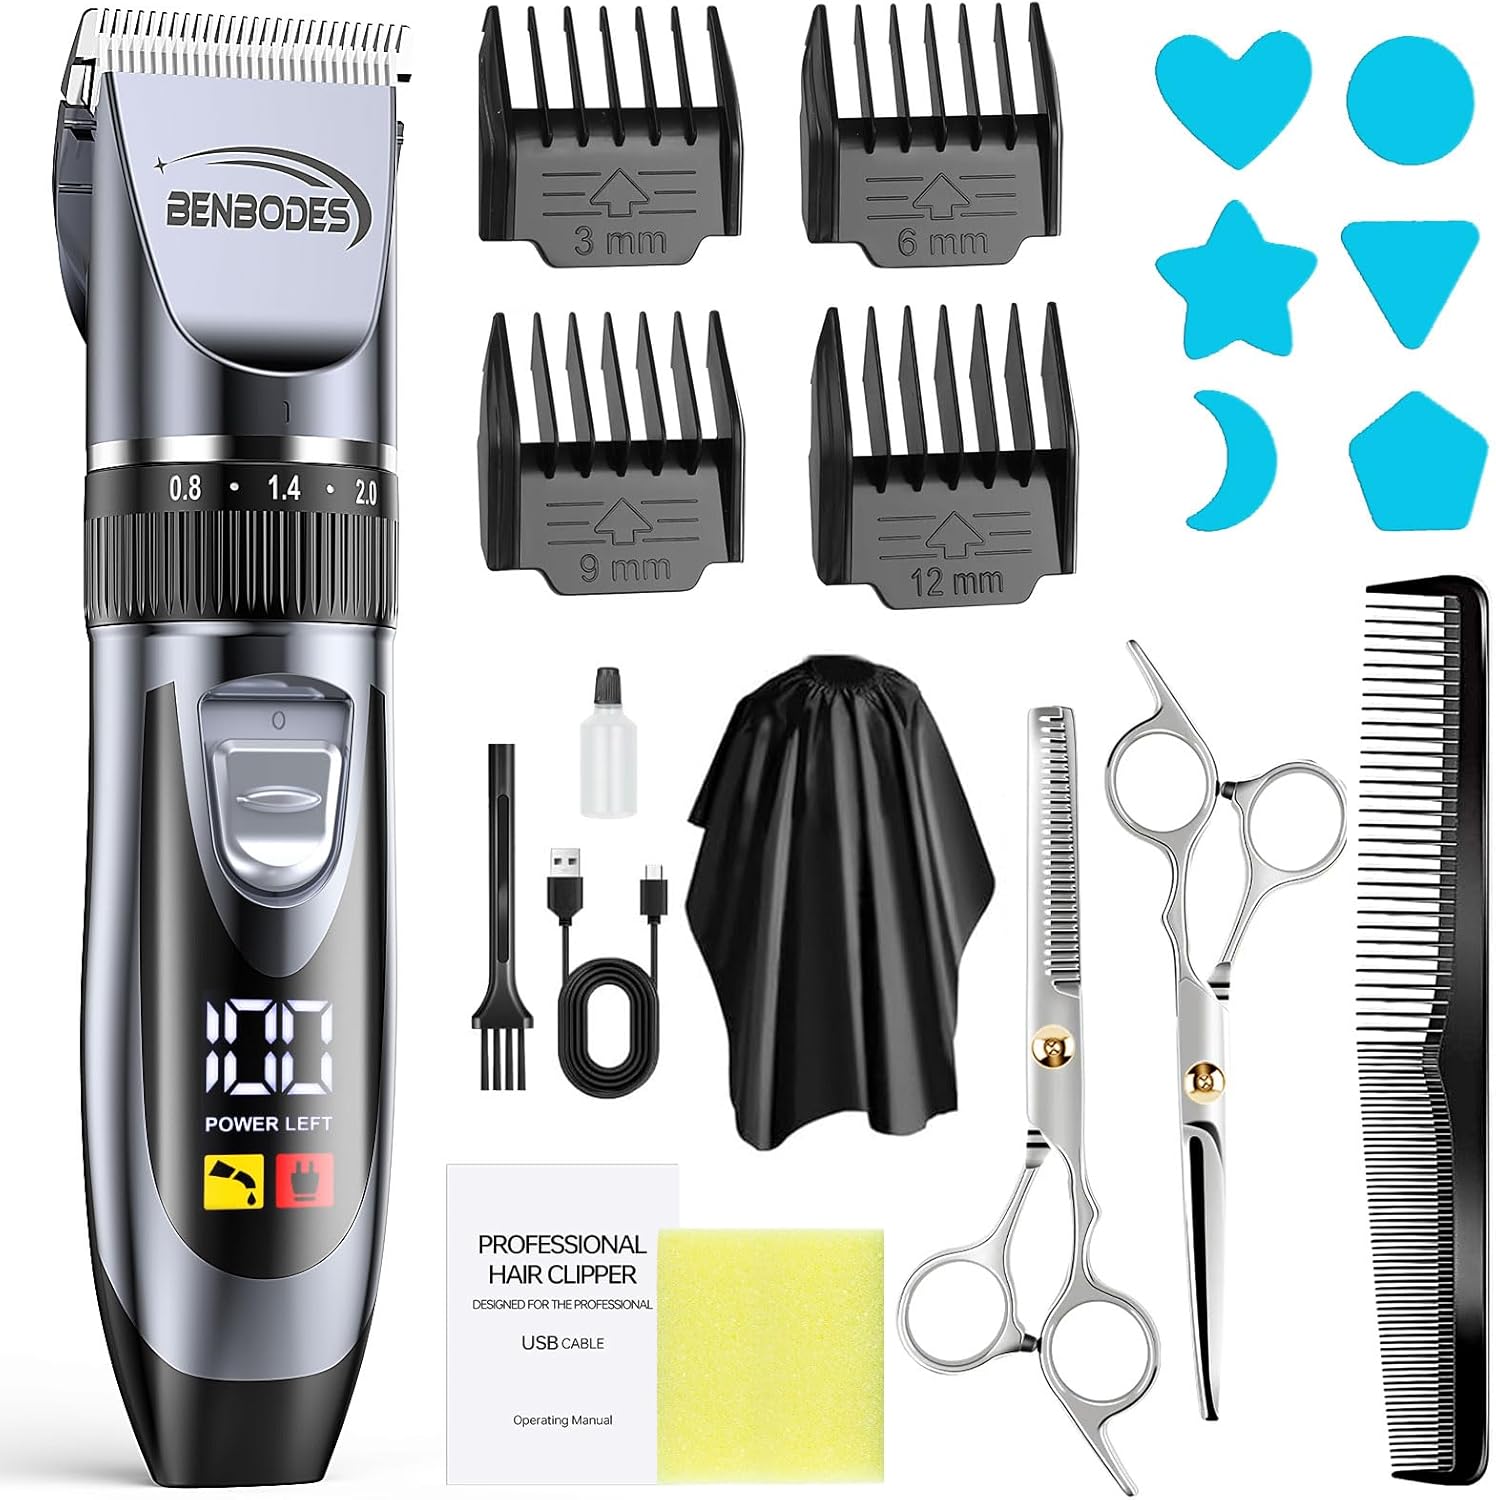
Image: All components included in the Benbodes Men's Hair Clippers & Beard Trimmer Grooming Kit.
4. Product Overview
The Benbodes hair clipper features a durable design with a titanium fixed blade and ceramic movable blade for precise cutting. It is equipped with an adjustable blade lever and an intelligent LED display.
Adjustable Blade Lever
The integrated adjustable lever allows for fine-tuning of the cutting length from 0.8mm to 2.0mm without an attachment comb. This provides versatility for various hair lengths and styles.
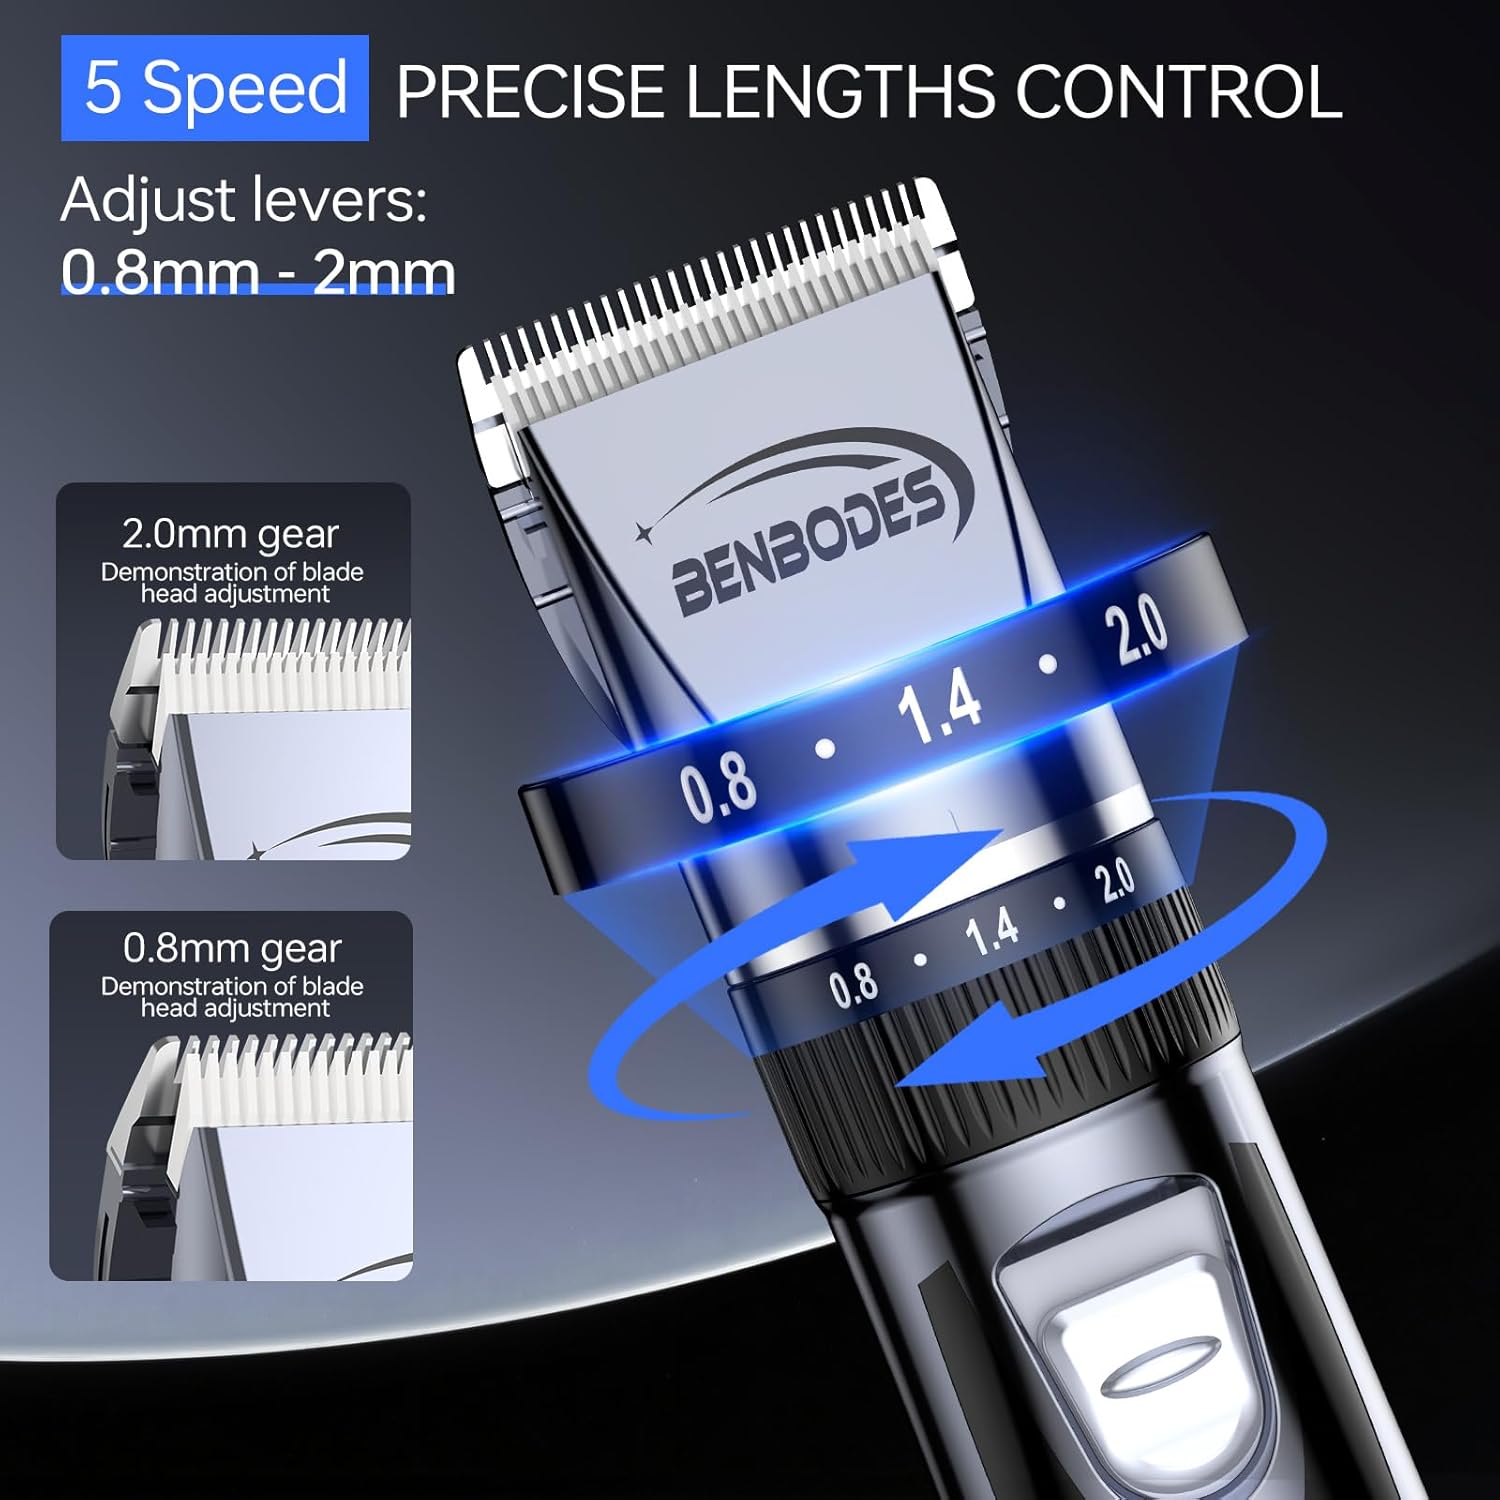
Image: Detail of the adjustable blade lever for precise length control.
Versatile Grooming
This grooming kit is designed for multiple applications, including hair cutting, beard trimming, and body hair maintenance.

Image: Demonstrates the clipper's use for hair, mustache, and body grooming.
Smart LED Display
The built-in LED display provides real-time information on the clipper's status, including remaining power, an oil reminder, and charging status.

Image: The LED display indicating power level, oil reminder, and charging status.
5. Setup
Before using your Benbodes hair clipper for the first time, ensure it is fully charged. Refer to the 'Charging' section for detailed instructions.
Initial Blade Preparation
It is recommended to apply a small amount of lubricating oil to the blades before the first use to ensure smooth operation and longevity. See the 'Maintenance and Cleaning' section for details on oiling.
6. Charging
The Benbodes hair clipper is equipped with a rechargeable battery and can be charged via the included USB cable.
- Connect the USB cable to the charging port on the bottom of the clipper.
- Plug the other end of the USB cable into a compatible USB power source (e.g., power bank, wall charger adapter, computer USB port).
- The LED display will indicate the charging status. A full charge typically takes approximately 2 hours.
- Once fully charged, the clipper provides up to 180 minutes of cordless operation.
- Unplug the clipper once charging is complete to preserve battery life.

Image: The hair clipper connected via USB for charging, illustrating compatibility with various USB power sources.
7. Operation
Basic Operation
- Ensure the clipper is charged and the blades are clean and oiled.
- Press the power button to turn the clipper on. The LED display will illuminate.
- Adjust the blade length using the integrated lever or attach a guide comb as desired (see 'Blade Adjustment and Attachment Combs' section).
- Hold the clipper firmly and move it against the direction of hair growth for an even cut.
- After use, press the power button to turn the clipper off.
Hair Cutting Tips
- For best results, use the clipper on clean, dry hair.
- Start with a longer guide comb setting and gradually reduce the length if needed.
- Use smooth, overlapping strokes to ensure an even cut.
- Regularly clear hair from the blades during use to maintain cutting efficiency.
8. Blade Adjustment and Attachment Combs
Adjusting the Blade Length
The clipper features an adjustable blade lever on the side, allowing you to change the cutting length from 0.8mm to 2.0mm without needing an attachment comb. Simply slide the lever up or down to select your desired length.
Image: The adjustable blade lever for precise length control from 0.8mm to 2.0mm.
Attaching and Removing Guide Combs
For longer hair lengths, use the included trimming combs (3mm, 6mm, 9mm, 12mm).
- Ensure the clipper is turned off before attaching or removing combs.
- Select the desired guide comb.
- Align the comb with the clipper blade and slide it on until it clicks securely into place.
- To remove, gently pull the comb away from the blade.

Image: The detachable blade being cleaned, also illustrating the different sizes of guide combs.
9. Maintenance and Cleaning
Regular cleaning and maintenance will ensure the longevity and optimal performance of your clipper.
Cleaning the Blades
- Turn off the clipper and unplug it from any power source.
- Gently push down on the blade assembly to detach it from the main unit.
- Use the included cleaning brush to remove any loose hair from the blades and the clipper head.
- The detachable blade can be rinsed under running water. Ensure the blade is completely dry before reattaching. Do not rinse the main clipper body.
- To reattach the blade, align it with the slot on the clipper head and press firmly until it clicks into place.

Image: Visual instructions for detaching and reattaching the clipper blade for thorough cleaning.
Oiling the Blades
After cleaning and drying the blades, apply 1-2 drops of lubricating oil (included) to the blades. Turn the clipper on for a few seconds to distribute the oil evenly. This helps maintain cutting performance and prevents rust.
10. Troubleshooting
If you encounter any issues with your Benbodes hair clipper, refer to the table below for common problems and solutions.
| Problem | Possible Cause | Solution |
|---|---|---|
| Clipper does not turn on. | Battery is depleted. | Charge the clipper fully. |
| Poor cutting performance or pulling hair. | Blades are dull, dirty, or not oiled. | Clean and oil the blades. If blades are dull, consider replacement. |
| Clipper stops during use. | Battery is low. | Recharge the clipper. |
| Excessive noise or vibration. | Blades are not properly aligned or oiled. | Ensure blades are correctly attached and oiled. |
11. Specifications
| Feature | Detail |
|---|---|
| Model Number | IMR18650-600mAh |
| Blade Material | Titanium fixed blade, Ceramic movable blade |
| Adjustable Blade Length | 0.8mm - 2.0mm |
| Guide Comb Sizes | 3mm, 6mm, 9mm, 12mm |
| Battery Type | Rechargeable Nonstandard Battery (included) |
| Charging Time | Approximately 2 hours |
| Operating Time | Up to 180 minutes (fully charged) |
| Display | Smart LED Display (Power, Oil Reminder, Charging Status) |
| Power Source | Cordless/Corded (USB charging) |
| Manufacturer | Xinxiang Hongli Supply Source Technology Co.,Ltd. |
12. Warranty and Support
This product is covered by a standard manufacturer's warranty against defects in materials and workmanship. Please refer to the product packaging or contact your retailer for specific warranty terms and conditions.
For technical support, troubleshooting assistance, or inquiries regarding replacement parts, please contact Benbodes customer service through the retailer's platform or the contact information provided with your purchase.