
Introduction
Thank you for choosing the Atopskins 5-in-1 Hot Air Styler. This versatile hair styling tool is designed to provide professional-quality results at home, combining the functions of a hair dryer, automatic curler, straightening brush, and volumizing brush. Please read this manual carefully before use to ensure safe and optimal performance.
Product Overview
The Atopskins 5-in-1 Hot Air Styler features a main handle and five interchangeable attachments, allowing for a variety of styling options. It incorporates advanced ionic and ceramic technologies to protect hair while styling.
Components:
- Main Styler Handle
- 30mm Automatic Curling Barrels (Left and Right)
- Fast Dryer Nozzle
- Hair Straightener Brush
- Large Oval Volumizing Brush
- Heat Resistant Glove

Image: The Atopskins 5-in-1 Hot Air Styler main unit with all five interchangeable attachments and a heat resistant glove.
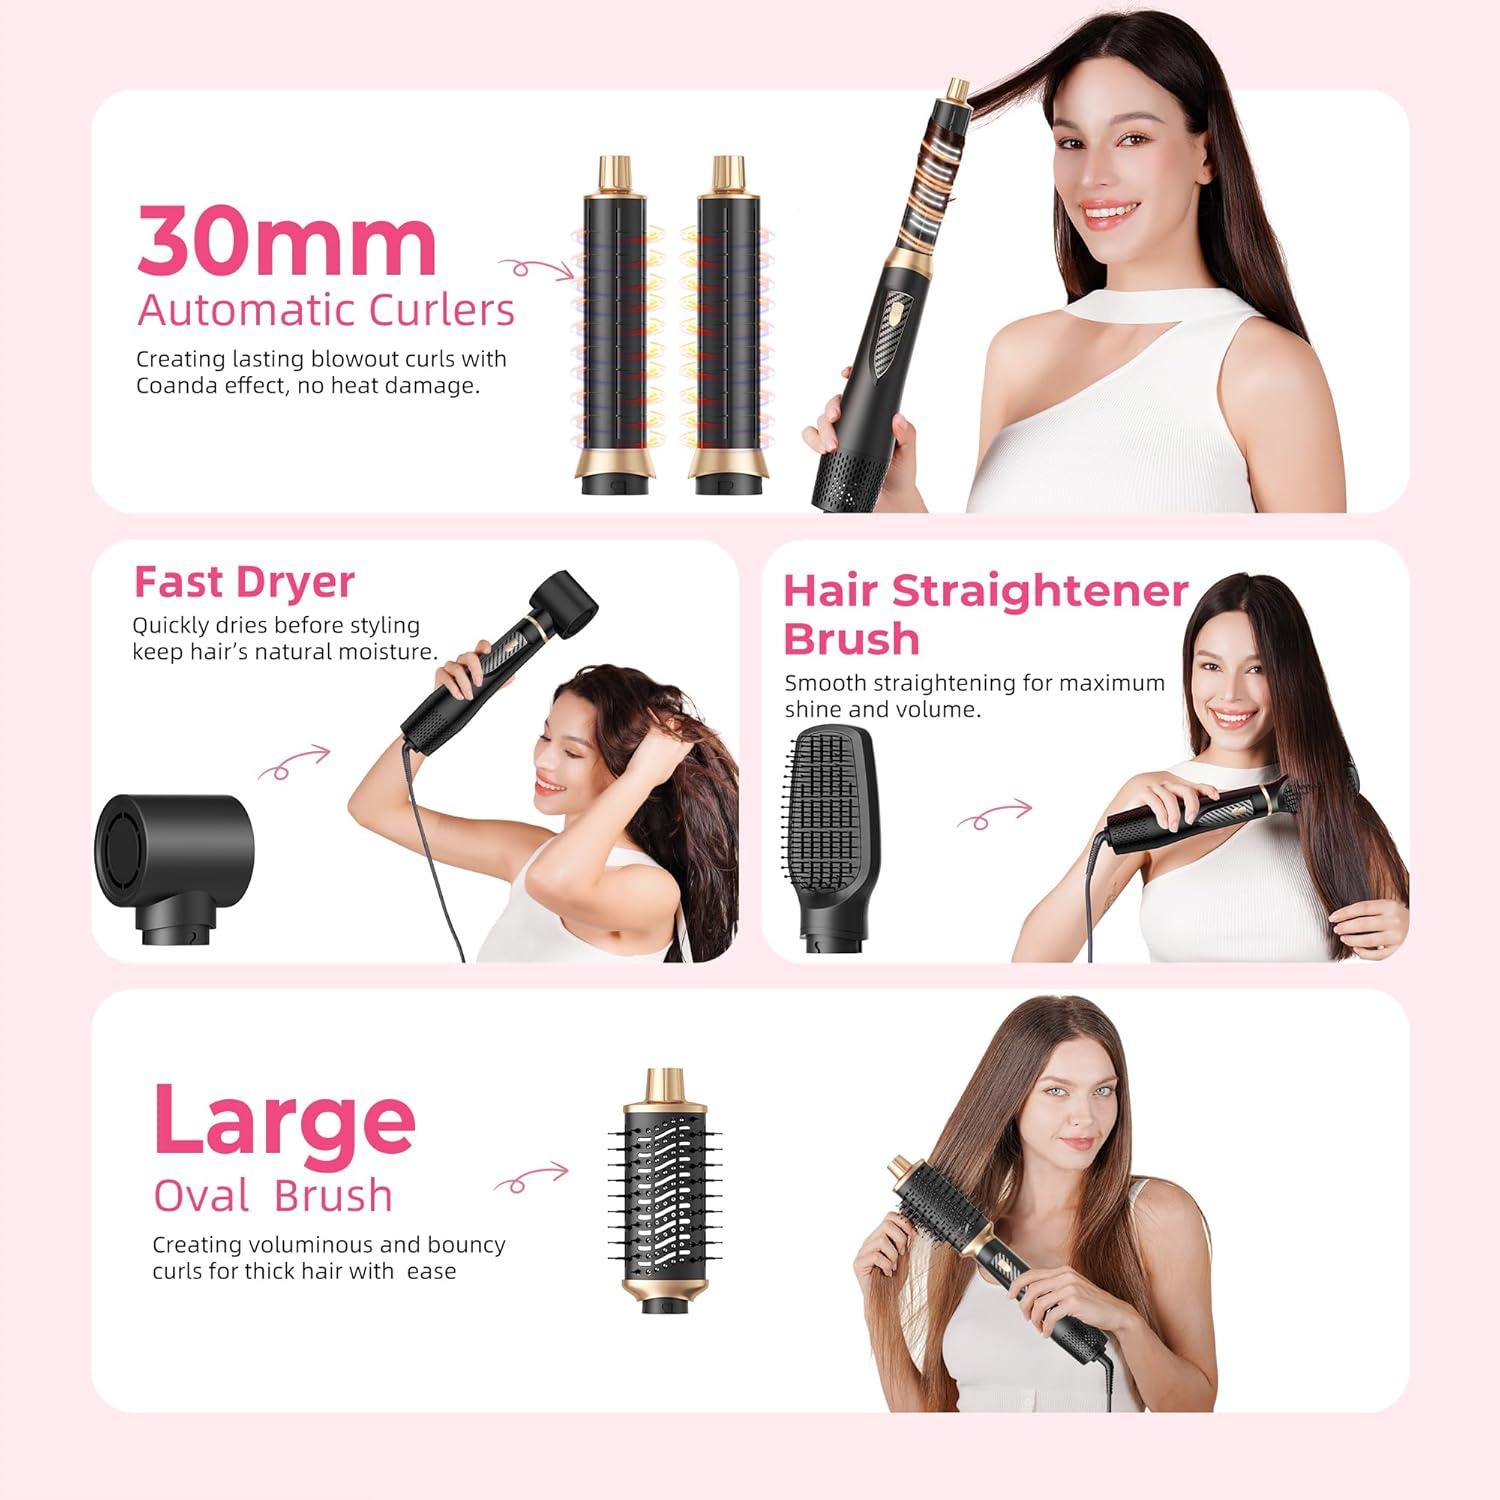
Image: Visual representation of the different attachments and their primary functions: 30mm Automatic Curlers for lasting curls, Fast Dryer for quick drying, Hair Straightener Brush for smooth hair, and Large Oval Brush for voluminous styles.
Key Features:
- Versatile 5-in-1 Design: Combines multiple styling tools into one compact device.
- Ionic & Ceramic Technology: Reduces frizz, enhances shine, and ensures even heat distribution for healthier styling.
- 3-Speed Temperature/Airflow Settings: Adjustable heat (Low: 50°C for damaged hair, Midd: 80°C for soft hair, High: 105°C for thick hair) for precise control and minimal heat damage.
- Coanda Effect Auto-Curling: Utilizes airflow to automatically wrap hair around the barrel for effortless curls.
- Portable and Safe: Ergonomic handle, 360° rotating power cord, and ALCI safety plug with automatic shut-off.

Image: Depiction of the styler's intelligent heat control technology, preventing irreversible heat damage and keeping hair strong.

Image: Illustration of the 200 million negative ions released by the styler, which help to achieve frizz-free, split-end proof, glossy, and sleek hair.
Safety Information
To reduce the risk of electric shock, burns, fire, or injury, always follow these basic safety precautions:
- Read all instructions before using this appliance.
- Keep away from water. Do not use while bathing or in a shower.
- Do not place or store appliance where it can fall or be pulled into a tub or sink.
- Do not place in or drop into water or other liquid.
- If the appliance falls into water, unplug it immediately. Do not reach into the water.
- Always unplug this appliance immediately after using.
- Unplug this appliance before cleaning.
- Do not operate any appliance with a damaged cord or plug, or if it malfunctions or has been dropped or damaged.
- Keep the cord away from heated surfaces. Do not wrap the cord around the appliance.
- Never block the air openings of the appliance or place it on a soft surface, such as a bed or couch, where the air openings may be blocked. Keep the air openings free of lint, hair, and the like.
- Never use while sleeping.
- Never drop or insert any object into any opening.
- Do not use outdoors or operate where aerosol (spray) products are being used or where oxygen is being administered.
- Do not use an extension cord with this appliance.
- This appliance is hot when in use. Do not let eyes or bare skin touch heated surfaces.
- Do not place the appliance directly on any surface while it is operating or cooling down.
- The ALCI safety plug provides additional protection. If it trips, reset it by pressing the reset button.
Setup
Before first use, unpack all components and ensure they are intact. Familiarize yourself with the main unit and the various attachments.
Attaching and Detaching Heads:
- Ensure the main styler handle is unplugged and cool.
- Align the desired attachment with the top of the main handle.
- Gently push and twist the attachment clockwise until it clicks securely into place.
- To detach, twist the attachment counter-clockwise and pull it off.

Image: A detailed diagram illustrating the process of replacing the styling heads and the location of the temperature control switch on the main unit, along with the corresponding temperature ranges for Low, Midd, and High settings.
Operating Instructions
Always ensure your hair is clean and towel-damp before styling, unless otherwise specified for a particular attachment.
Powering On/Off and Temperature Settings:
- Plug the styler into a suitable electrical outlet.
- Use the switch on the main handle to select your desired temperature/airflow setting:
- Low: Approximately 50°C, suitable for damaged or fine hair.
- Midd: Approximately 80°C, suitable for soft or normal hair.
- High: Approximately 105°C, suitable for thick or coarse hair.
- To turn off, switch to the 'Off' position and unplug the device.
Using the Attachments:
1. Fast Dryer Nozzle:
- Use this attachment to quickly dry excess water from your hair before styling.
- Hold the nozzle a few inches from your hair and move it around to distribute airflow evenly.
- Aim to get your hair about 80% dry before switching to other styling attachments.
Image: A woman using the Fast Dryer nozzle to quickly dry her hair, demonstrating its efficiency in preparing hair for styling.
2. 30mm Automatic Curling Barrels:
- There are two barrels: one for curling clockwise (right) and one for counter-clockwise (left). Ensure you use the correct barrel for the desired curl direction.
- Take a 5-8cm wide section of hair.
- Hold the barrel vertically near the ends of the hair section. The Coanda effect will automatically wrap the hair around the barrel.
- Hold for approximately 8 seconds, then pull the styler away to release the curl.
- For best results, allow curls to cool completely before brushing or styling to set them.

Image: A visual explanation of the Coanda effect, showing how airflow automatically wraps hair around the curling barrel for a faster and easier way to achieve long-lasting curls.

Image: A step-by-step visual guide showing a woman using the automatic curler, with 'During use' and 'After use' comparisons of her hair, highlighting the natural-looking curls achieved.
3. Hair Straightener Brush:
- Ensure hair is mostly dry.
- Section your hair. Take a section and place the brush underneath, close to the roots.
- Slowly glide the brush down the length of the hair, from roots to ends.
- Repeat until desired smoothness and straightness are achieved.
Image: A woman using the Hair Straightener Brush to smooth her hair, demonstrating how it provides maximum shine and volume while straightening.
4. Large Oval Volumizing Brush:
- Ideal for adding volume and bounce, especially to thick hair.
- Work with sections of towel-damp hair.
- Place the brush near the roots and brush outwards, lifting the hair as you go.
- For extra volume, hold the brush at the roots for a few seconds with the airflow on.
Image: A woman using the Large Oval Brush to create voluminous and bouncy curls, illustrating its effectiveness for thick hair.
Maintenance and Care
Proper maintenance ensures the longevity and optimal performance of your Atopskins Hot Air Styler.
- Cleaning: After each use, ensure the styler is unplugged and completely cool. Gently tap the brush heads against a sink to remove any loose hairs. For deeper cleaning, wipe the attachments and main unit with a soft, damp cloth. Do not immerse the unit in water.
- Storage: Store the styler and its attachments in a dry, safe place, away from direct sunlight and moisture. The compact design allows for easy storage or travel.
- Cord Care: Do not wrap the power cord tightly around the styler, as this can damage the cord. Store it loosely coiled.
Troubleshooting
If you encounter issues with your Atopskins 5-in-1 Hot Air Styler, refer to the following common problems and solutions:
| Problem | Possible Cause | Solution |
|---|---|---|
| Styler does not turn on. | Not plugged in correctly; Power outlet issue; ALCI plug tripped. | Ensure plug is fully inserted. Test outlet with another device. Press the 'Reset' button on the ALCI safety plug. |
| No heat or insufficient heat. | Incorrect temperature setting; Air intake/outlet blocked. | Check that the temperature switch is set to Low, Midd, or High. Ensure air intake grille and outlets are clear of lint or hair. |
| Attachments are loose or fall off. | Attachment not securely locked. | Ensure the attachment is pushed on and twisted clockwise until it clicks firmly into place. |
| Hair not curling/straightening effectively. | Hair too wet/dry; Section size too large; Incorrect technique. | Ensure hair is towel-damp for curling/volumizing, or mostly dry for straightening. Use smaller sections. Review operating instructions for specific attachment techniques. |
| Unusual noise or smell. | Internal issue; Blocked airflow. | Immediately unplug the device. Check for any obstructions in the air intake/outlet. If the issue persists, discontinue use and contact customer support. |
If the problem persists after attempting these solutions, please contact Atopskins customer support for assistance.
Specifications
| Feature | Specification |
|---|---|
| Model | B0F4WV7R5V |
| Brand | Atopskins |
| Wattage | 1000 watts |
| Power Source | Corded Electric |
| Material | Plastic |
| Product Dimensions | 9.13 x 10.04 x 3.15 inches |
| Product Weight | 2.45 Pounds |
| Temperature Settings | 3 (Low: 50°C, Midd: 80°C, High: 105°C) |
Warranty and Support
Atopskins is committed to providing high-quality products. For information regarding product warranty, returns, or technical support, please refer to the warranty card included with your purchase or visit the official Atopskins website. You can also contact Atopskins customer service directly through their contact channels for assistance.
For additional protection plans, please refer to options available at the point of purchase, such as those offered by third-party providers.