
1. Introduction
This manual provides detailed instructions for the installation, operation, and maintenance of your SIXTOP 10.1-inch Android Car Stereo. This unit is specifically designed for Hyundai Tucson IX35 models manufactured between 2010 and 2015. Please read this manual thoroughly before installation and use to ensure proper function and safety.
2. Setup and Installation
2.1 Package Contents
Verify that all components are present in the package:
- SIXTOP Android Car Stereo with Frame
- Backup Camera
- Microphone
- Power Cable
- RCA Cables
- USB Cables (x2)
- GPS Antenna
- Iron Sheet (Mounting Brackets)
- Instruction Manual

2.2 Compatibility and Pre-Installation Check
This unit is designed for Hyundai Tucson IX35 models from 2010 to 2015. It is compatible with vehicles that have an original radio without a large screen or navigation system. If your vehicle has a factory large screen or navigation system, you may require an upgraded power cord or a Canbus protocol box. Please contact customer service with pictures of your original car's center console and wiring harness for assistance.

2.3 Wiring Connections
Connect the power cable, RCA cables, USB cables, GPS antenna, and backup camera according to the wiring diagram provided in the separate installation guide. Ensure all connections are secure to prevent malfunctions.
2.4 Backup Camera Installation
Install the provided 12 LED waterproof night vision camera at the rear of your vehicle, typically near the license plate. Connect the camera's video output to the designated input on the car stereo. Ensure the camera's power is connected to the reverse light circuit so it activates automatically when reverse gear is engaged.
3. Operation
3.1 Basic Functions
The unit features a 10.1-inch 2.5D tempered glass touch screen. Power on the device by turning your vehicle's ignition. Navigate through menus and applications by tapping and swiping on the screen.
3.2 WiFi Connectivity
To connect to WiFi, go to the settings menu, select 'Network & Internet', and choose your desired WiFi network. Enter the password if prompted. Once connected, you can download applications, stream online content, and use online navigation services.

3.3 GPS Navigation
The unit has built-in GPS navigation. You can download offline maps from the Play Store for navigation without an internet connection, or use online maps when connected to WiFi.
3.4 FM/RDS Radio
Access the FM radio application to listen to local radio stations. The unit supports FM frequencies from 87.5-108 MHz. RDS (Radio Data System) functionality provides additional information such as station name and program type where available.

3.5 Bluetooth Functionality
Pair your mobile phone via Bluetooth for hands-free calling and audio streaming. Go to the Bluetooth settings, enable Bluetooth on your phone, and select the car stereo from the list of available devices. The unit supports automatic phone book loading and call record synchronization.
3.6 Mirror Link
The Mirror Link feature allows you to project your smartphone's screen onto the car stereo display. This is useful for viewing videos or using apps from your phone on the larger screen. For iOS devices, connect via WiFi. For Android devices, connect via WiFi or USB.

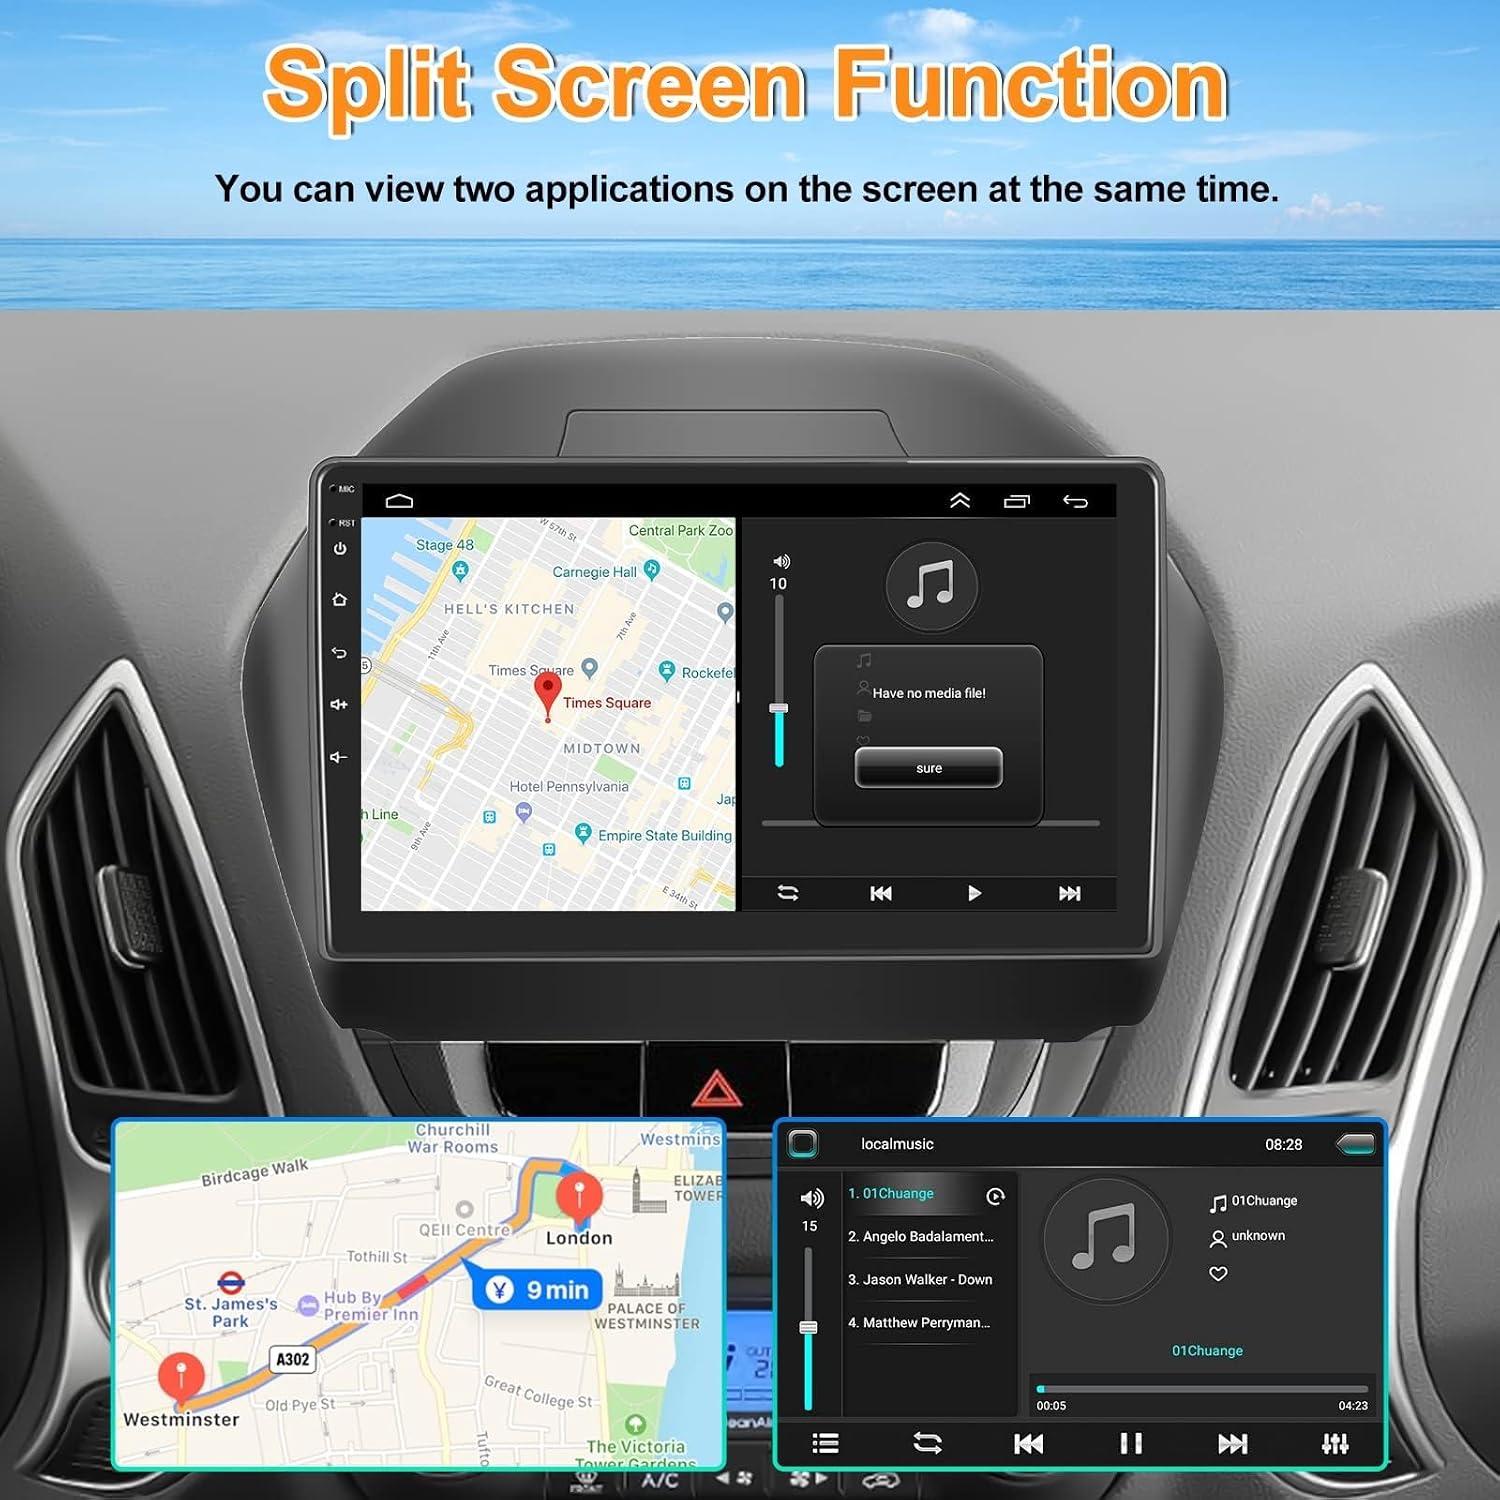
3.7 Split Screen Function
To use the split screen function, tap the rectangle icon at the top of the screen. Select a browsing page or application and drag it to either the left or right side of the screen. This allows two applications to be displayed and operated independently on the same screen.
3.8 Steering Wheel Control
If your vehicle is equipped with steering wheel controls, you can configure them to operate the car stereo. Access the 'Steering Learn' option in the settings menu to map your steering wheel buttons to various audio functions, enhancing convenience and driving safety.

3.9 Reversing Display
When reverse gear is engaged, the car stereo automatically switches to the rear view camera display. The waterproof night vision camera provides a clear image, assisting with parking and maneuvering, especially in low-light conditions.
3.10 Sound Settings (EQ)
Utilize the built-in equalizer (EQ) to customize the audio output. Access the sound settings to adjust frequency bands, balance, and fader settings to achieve your preferred sound quality.

4. Maintenance
4.1 Screen Cleaning
To clean the touch screen, power off the unit and gently wipe it with a soft, lint-free cloth. For stubborn smudges, slightly dampen the cloth with water or a screen-safe cleaning solution. Avoid using harsh chemicals or abrasive materials that could damage the screen.
4.2 General Care
Keep the unit free from dust and debris. Ensure proper ventilation around the unit to prevent overheating. Avoid exposing the unit to extreme temperatures or direct sunlight for prolonged periods.
5. Troubleshooting
5.1 No Sound Output
If there is no sound after installation, verify all wiring connections, especially the speaker wires and any RCA audio outputs. For some high-configuration vehicles, a Canbus protocol box or a specific aftermarket wiring harness may be required to integrate with the car's original sound system. Contact customer service with details of your vehicle's original stereo and wiring for further assistance.
5.2 Unit Not Powering On
Check the power cable connections and ensure the vehicle's ignition is on. Verify the fuse connected to the car stereo's power line. If the issue persists, consult a professional installer.
5.3 Screen Freezes or Reboots Randomly
If the screen freezes or the unit reboots unexpectedly, try performing a factory reset through the system settings. If the problem continues, it may indicate a software issue or hardware malfunction. Contact customer support for troubleshooting steps or potential firmware updates.
5.4 GPS Signal Issues
Ensure the GPS antenna is properly installed and has a clear line of sight to the sky (e.g., mounted on the dashboard or under the windshield). Obstructions or poor antenna placement can affect signal reception.
6. Specifications
| Model | P1=1+32G |
| Operating System | Android |
| Display Size | 10.1 Inches |
| Memory | 1GB RAM + 32GB ROM |
| Connectivity | Bluetooth, Wi-Fi |
| Special Features | 26 UI Theme Settings, Backup Camera Support, Steering Wheel Control, Built-in Bluetooth and WiFi, GPS Navigation, Mirror Link, Touchscreen, Split Screen |
| Audio Output Mode | Stereo |
| Included Components | Car Stereo with Frame, Camera, Mic, Cable Set |
| Item Weight | 7.72 pounds |
| Package Dimensions | 14.96 x 12.99 x 5.51 inches |
7. Warranty and Support
7.1 Product Warranty
This SIXTOP car stereo comes with a 1-year warranty from the date of purchase, covering manufacturing defects. Please retain your proof of purchase for warranty claims.
7.2 Customer Support
For technical assistance, troubleshooting, or warranty inquiries, please contact SIXTOP customer service. We offer lifetime technical support to ensure your satisfaction.
Email: SIXTOP123@163.com
You can also visit the SIXTOP Store on Amazon for additional resources and to contact the seller directly.


