
Introduction
This manual provides detailed instructions for the safe and efficient assembly, operation, and maintenance of your Rockland Aluminum 1-Ebike Rack with Loading Ramp. Designed for durability and ease of use, this rack can carry one ebike, fat tire bike, mountain bike, or ordinary bike weighing up to 100 lbs. It is compatible with vehicles equipped with a 2-inch receiver and accommodates ebikes up to 5 inches wide with a wheelbase up to 50 inches.
Safety Information
- Always ensure the rack is securely installed in the 2-inch hitch receiver before loading any bikes.
- Do not exceed the maximum weight capacity of 100 lbs.
- Verify that all straps, bolts, and pins are tightened and locked before driving.
- Ensure the bike's wheels are properly seated in the wheel holders and secured with the ratcheting straps.
- Check that the loading ramp is securely attached when in use and properly stored when not needed.
- Confirm that vehicle tail lights and license plate are not obstructed. If obstructed, consider auxiliary lighting or relocation.
- Drive cautiously, especially over bumps or uneven terrain, as the added weight may affect vehicle handling.
Package Contents
Please verify that all components are present before beginning assembly:
- Main Hitch Receiver Assembly
- Vertical Support Arm
- Wheel Holders (2 units)
- Adjustable Connecting Block
- Loading Ramp
- Ratcheting Straps (for wheels)
- Hitch Pin and Lock
- Assembly Hardware (bolts, washers, nuts, pins)
- Tools (wrenches, Allen keys)
Setup and Installation
1. Hitch Receiver Installation
Insert the main hitch assembly into your vehicle's 2-inch receiver. Secure it with the provided hitch pin and lock. Ensure the anti-wobble mechanism is engaged by tightening the hitch pin clockwise until snug.

Image: Inserting the bike rack into the vehicle's 2-inch hitch receiver and securing it with the hitch pin.
Video: Detailed steps for installing the hitch bike rack to the vehicle's 2-inch receiver, including securing the hitch pin and locking mechanism.
2. Rack Assembly
Attach the main beam to the hitch receiver assembly using the provided bolts and pins. Ensure all connections are tight and secure. Install the vertical support arm and adjustable connecting block, tightening all knobs and bolts to prevent movement.

Image: The fully assembled Rockland 1-Ebike Rack, ready for use.

Image: Close-up of the lightweight yet strong aluminum frame construction of the bike rack.
Video: Comprehensive assembly guide for the bike rack, showing how to connect the main components and secure them.
3. Loading Ramp Attachment
The loading ramp features two hooks at one end. Align these hooks with the designated grooves on the bike rack's main beam and slide it into place. Secure the ramp with the retaining pin to ensure stability during bike loading.

Image: The detachable loading ramp, designed for easy attachment and removal from the bike rack.
Video: Demonstrates the process of attaching the loading ramp to the bike rack for convenient bike loading.
Operating Instructions
1. Loading a Bike
Position the loading ramp on either side of the rack. Roll your ebike up the ramp until its wheels are seated in the wheel holders. The rack is designed to prevent direct contact between the rack's metal surface and your e-bike, avoiding potential scratches.

Image: A visual guide showing the steps to load a bike onto the rack using the ramp.
Video: Demonstrates the process of loading an ebike onto the rack using the integrated loading ramp.
Video: A short preview showing the ease of loading and unloading an ebike or fat tire bike using the carrier and ramp.
2. Securing the Bike
Once the bike is on the rack, use the ratcheting safety straps to firmly secure the wheels. The rack features soft padding and rubber covers to protect your bike. Adjust the sliders to fit different wheelbases (up to 50 inches) and tire widths (up to 5 inches). Ensure the buckle is facing the correct direction for proper tightening.
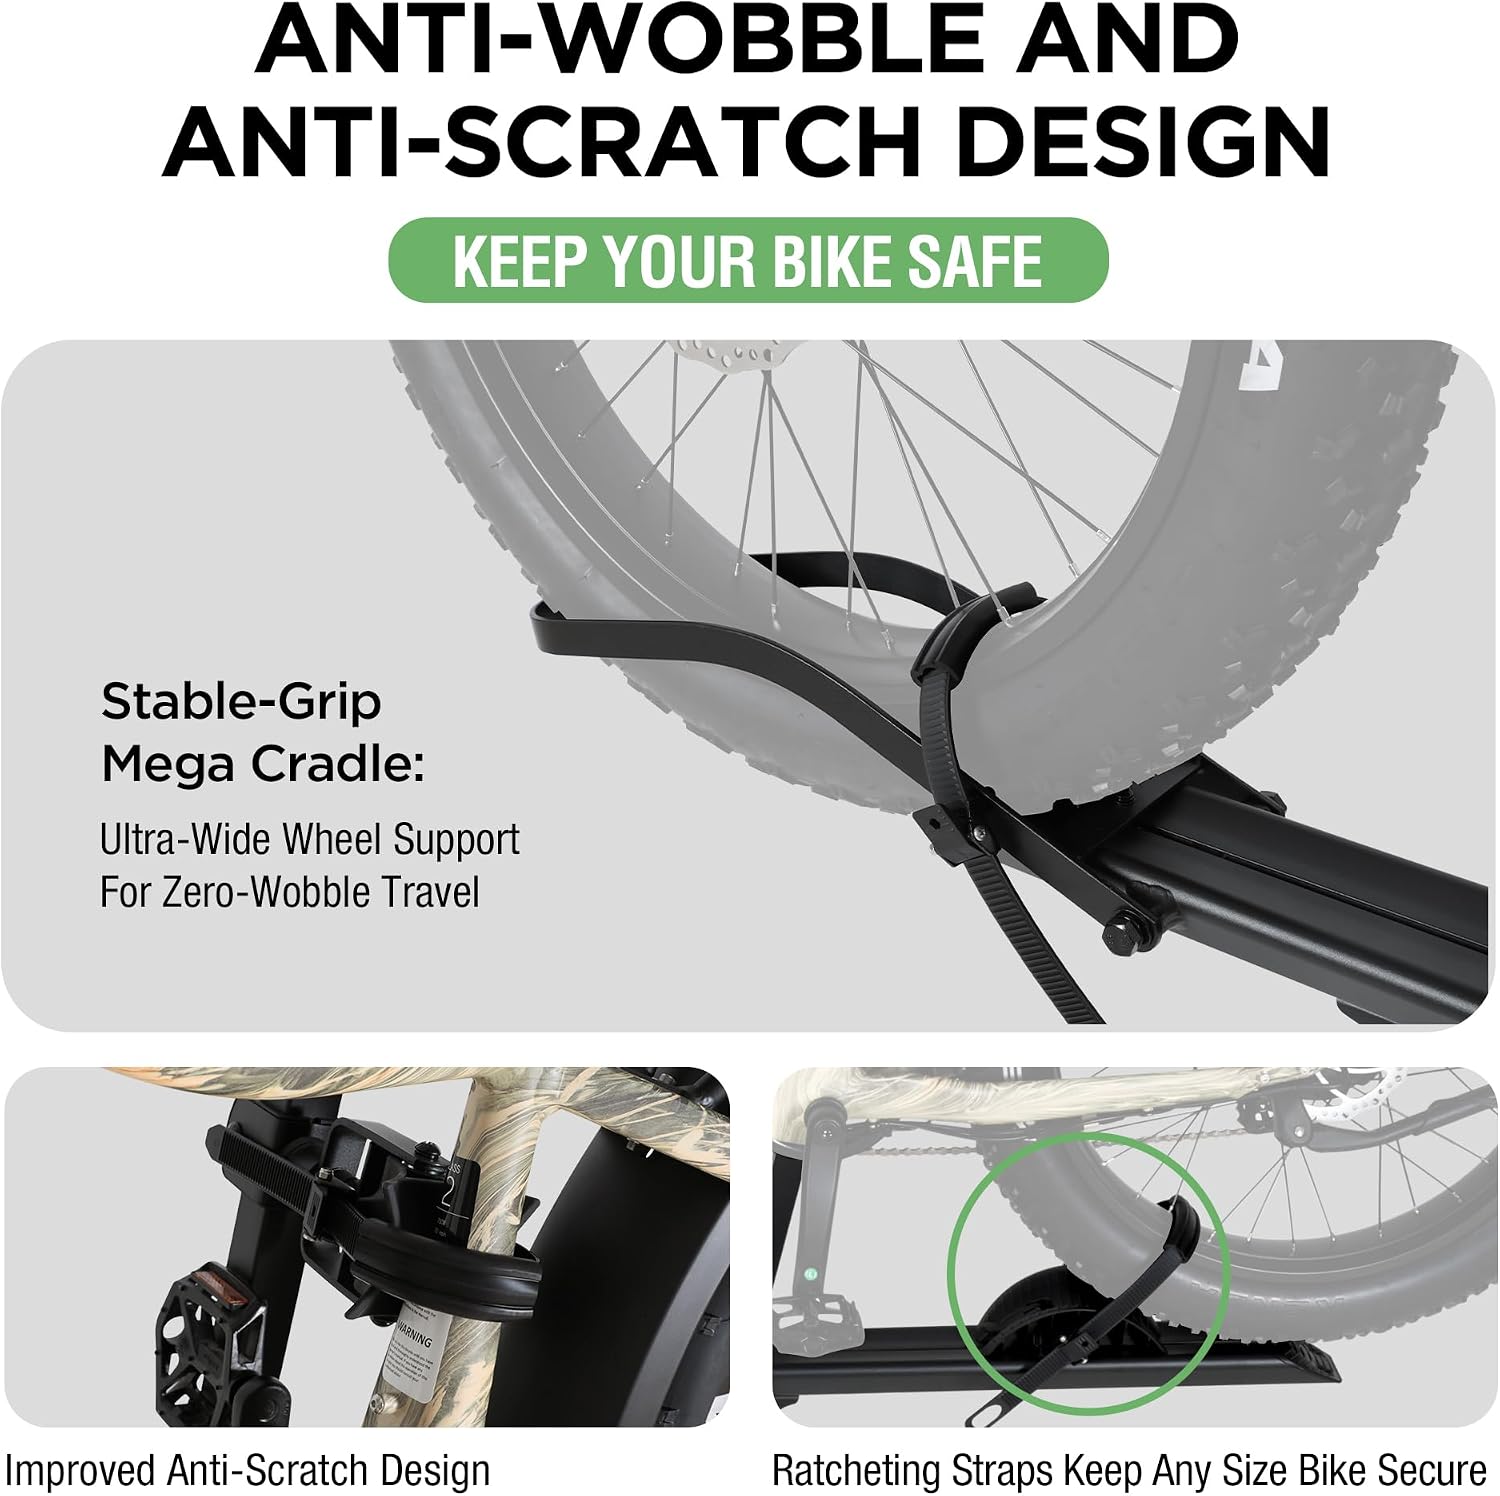
Image: Illustrates the stable-grip mega cradle with ultra-wide wheel support and ratcheting straps for secure, wobble-free travel.
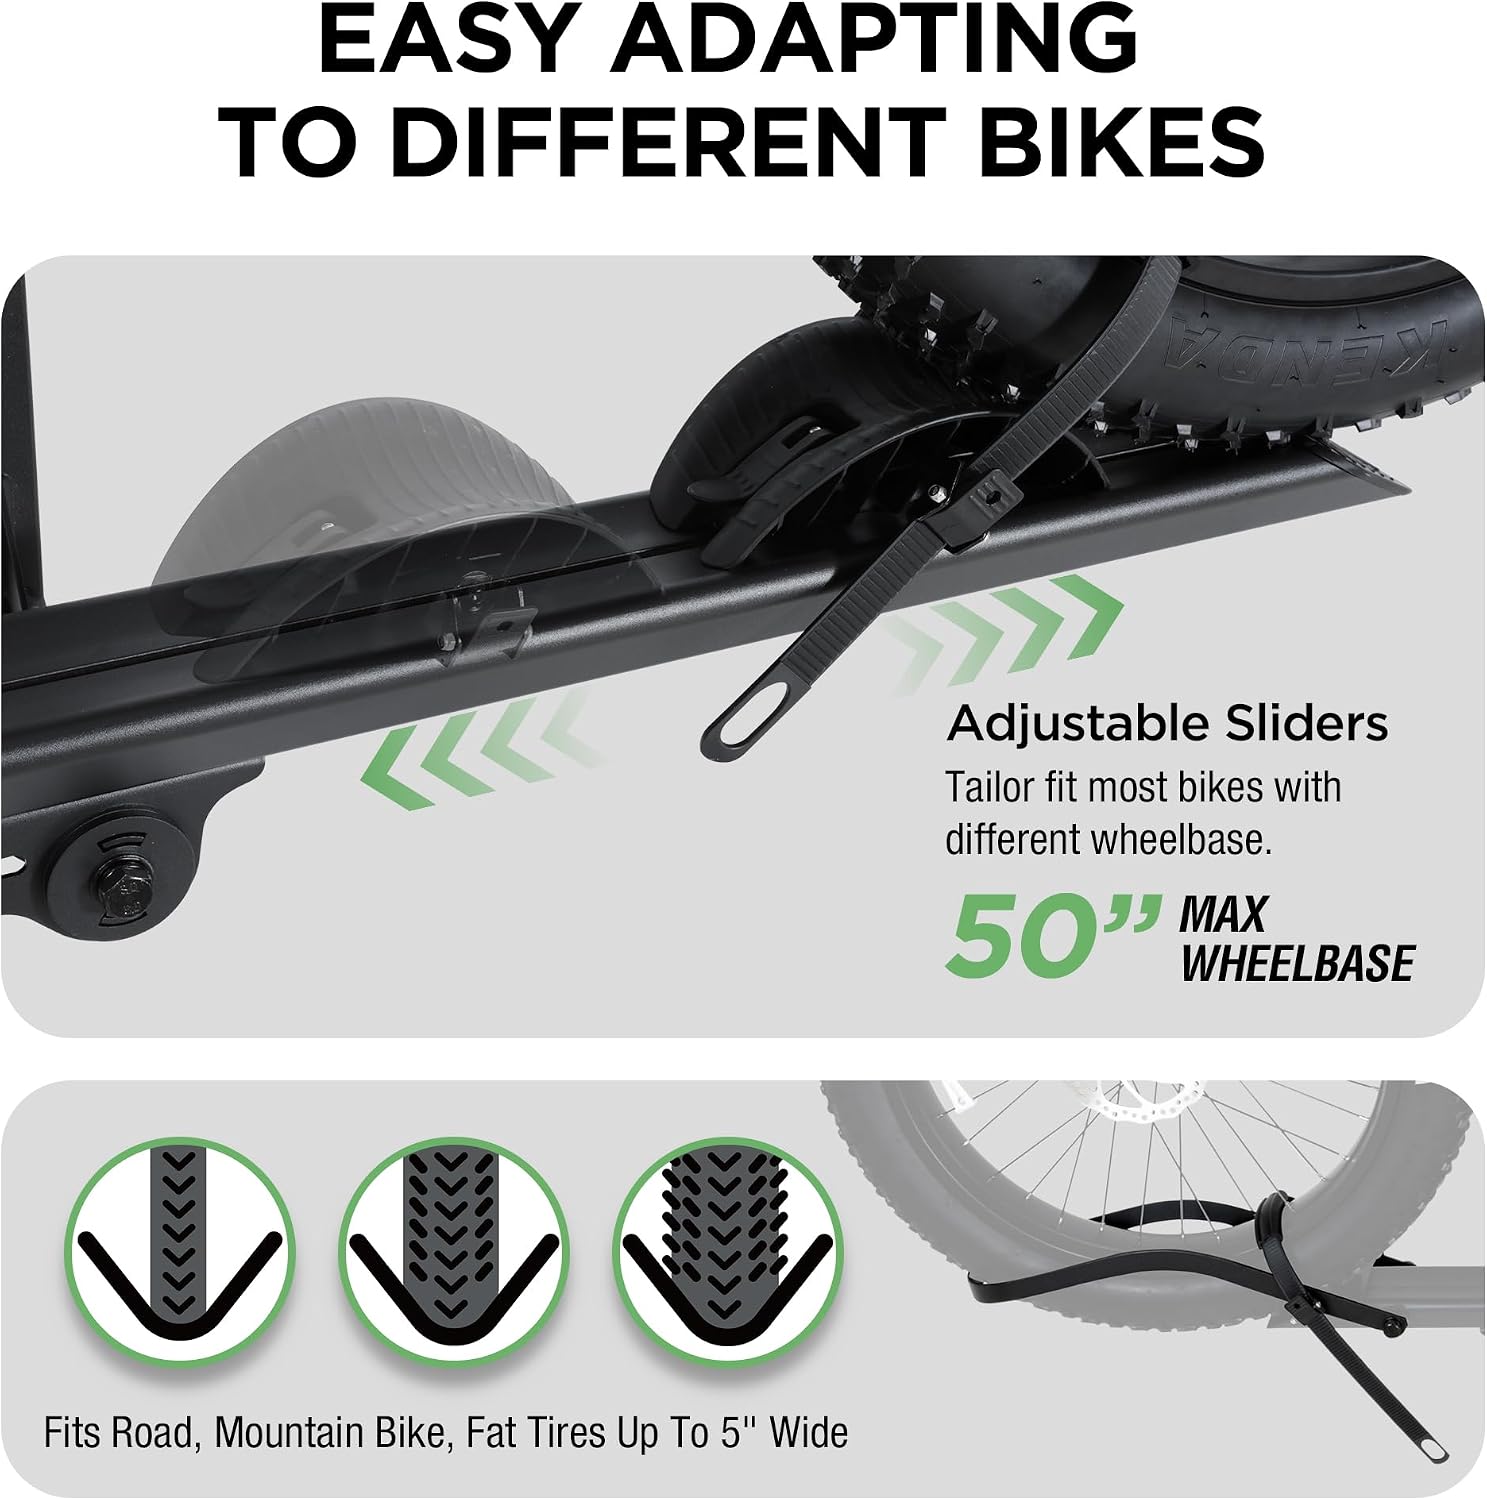
Image: Shows adjustable sliders that accommodate various bike types, including road, mountain, and fat tires up to 5 inches wide, with a maximum wheelbase of 50 inches.
3. Tilting Function
The rack features a tilting function for easy access to your vehicle's trunk or tailgate. To tilt the rack, remove the designated pin, carefully lower the rack, and then re-insert the pin to secure it in the tilted position.
Video: Demonstrates the tilting function of the bike rack, allowing access to the vehicle's rear cargo area.
4. Folding Design
When not in use, the rack can be folded upwards to save space. Release the designated pin, fold the rack into its upright position, and re-insert the pin to lock it securely.
Video: Shows how to fold the bike rack into an upright position for compact storage when not carrying bikes.
Maintenance
- Regularly inspect all bolts, pins, and straps for wear or damage. Replace any worn components immediately.
- Clean the rack periodically with mild soap and water to remove dirt and road grime.
- Lubricate moving parts, such as hinges and locking mechanisms, with a suitable lubricant to ensure smooth operation.
- Store the rack in a dry place when not in use to prevent rust and prolong its lifespan.
Troubleshooting
- Rack wobbles excessively: Ensure the hitch pin is fully tightened and the anti-wobble mechanism is engaged. Check all assembly bolts for tightness.
- Bike is not secure: Verify that ratcheting straps are properly fastened and tightened. Ensure the adjustable connecting block is firmly clamped to the bike frame.
- Ramp does not attach properly: Check that the ramp hooks are correctly aligned with the grooves on the main beam and the retaining pin is fully inserted.
- Difficulty with folding/tilting: Ensure all pins are fully disengaged before attempting to fold or tilt the rack. Lubricate hinges if movement is stiff.
Specifications
| Brand | Rockland |
| Model | B0F4QCJ9V |
| Material | Aluminum |
| Load Capacity | 100 lbs |
| Hitch Receiver Size | 2-inch |
| Max Tire Width | 5 inches |
| Max Wheelbase | 50 inches |
| Foldable | Yes |
| Color | Black |
Warranty and Support
For warranty information, technical support, or replacement parts, please refer to the manufacturer's official website or contact their customer service directly. Keep your purchase receipt for warranty claims.