
1. Introduction
This manual provides detailed instructions for the setup, operation, and maintenance of your LMBGM K-25R 8-Channel UHF Wireless Microphone System. Please read this manual thoroughly before using the product to ensure proper function and to maximize its performance and longevity. This system is designed for professional audio applications requiring multiple wireless microphones, such as stage performances, church events, DJ setups, weddings, and karaoke.

Figure 1: LMBGM K-25R 8-Channel UHF Wireless Microphone System. The image displays the main receiver unit with eight handheld wireless microphones arranged above it, showcasing the complete system.
2. Package Contents
Verify that all items listed below are included in your package. If any items are missing or damaged, please contact customer support.
- Receiver Unit (1)
- Transmitter (Handheld Microphones) (8)
- Antennas (4)
- 6.35MM Audio Cable (1)
- Power Cable (1)
- User Manual (1)
3. Product Features
- Advanced UHF Technology: Utilizes a professional UHF chip and advanced circuit design for clear, full sound with excellent high, mid, and low-frequency response. Designed to minimize reception blind spots and ensure stable signal reception.
- Adjustable Frequency Options: Each wireless microphone offers 5 selectable frequency options, providing a total of 40 distinct frequencies across 8 microphones (8 x 5). This allows for simultaneous use of up to 40 systems without interference, with seamless frequency switching capability.
- High-Performance Audio:
- Ultra-low latency: Transmission latency is less than 5ms, suitable for real-time audio processing.
- High-fidelity sound quality: Supports 24-bit/96KHz high-definition audio resolution for detailed sound reproduction.
- Wide frequency response: 50Hz-20KHz.
- Durable Construction: Handheld microphones are constructed from sturdy metal material for a firm and comfortable grip.
- Extended Wireless Range: Provides a wireless signal range of up to 50 meters (160 feet) for flexible movement during performances.
- Efficient Power Consumption: Each microphone operates on AA batteries, providing approximately 5 hours of continuous use under normal conditions.
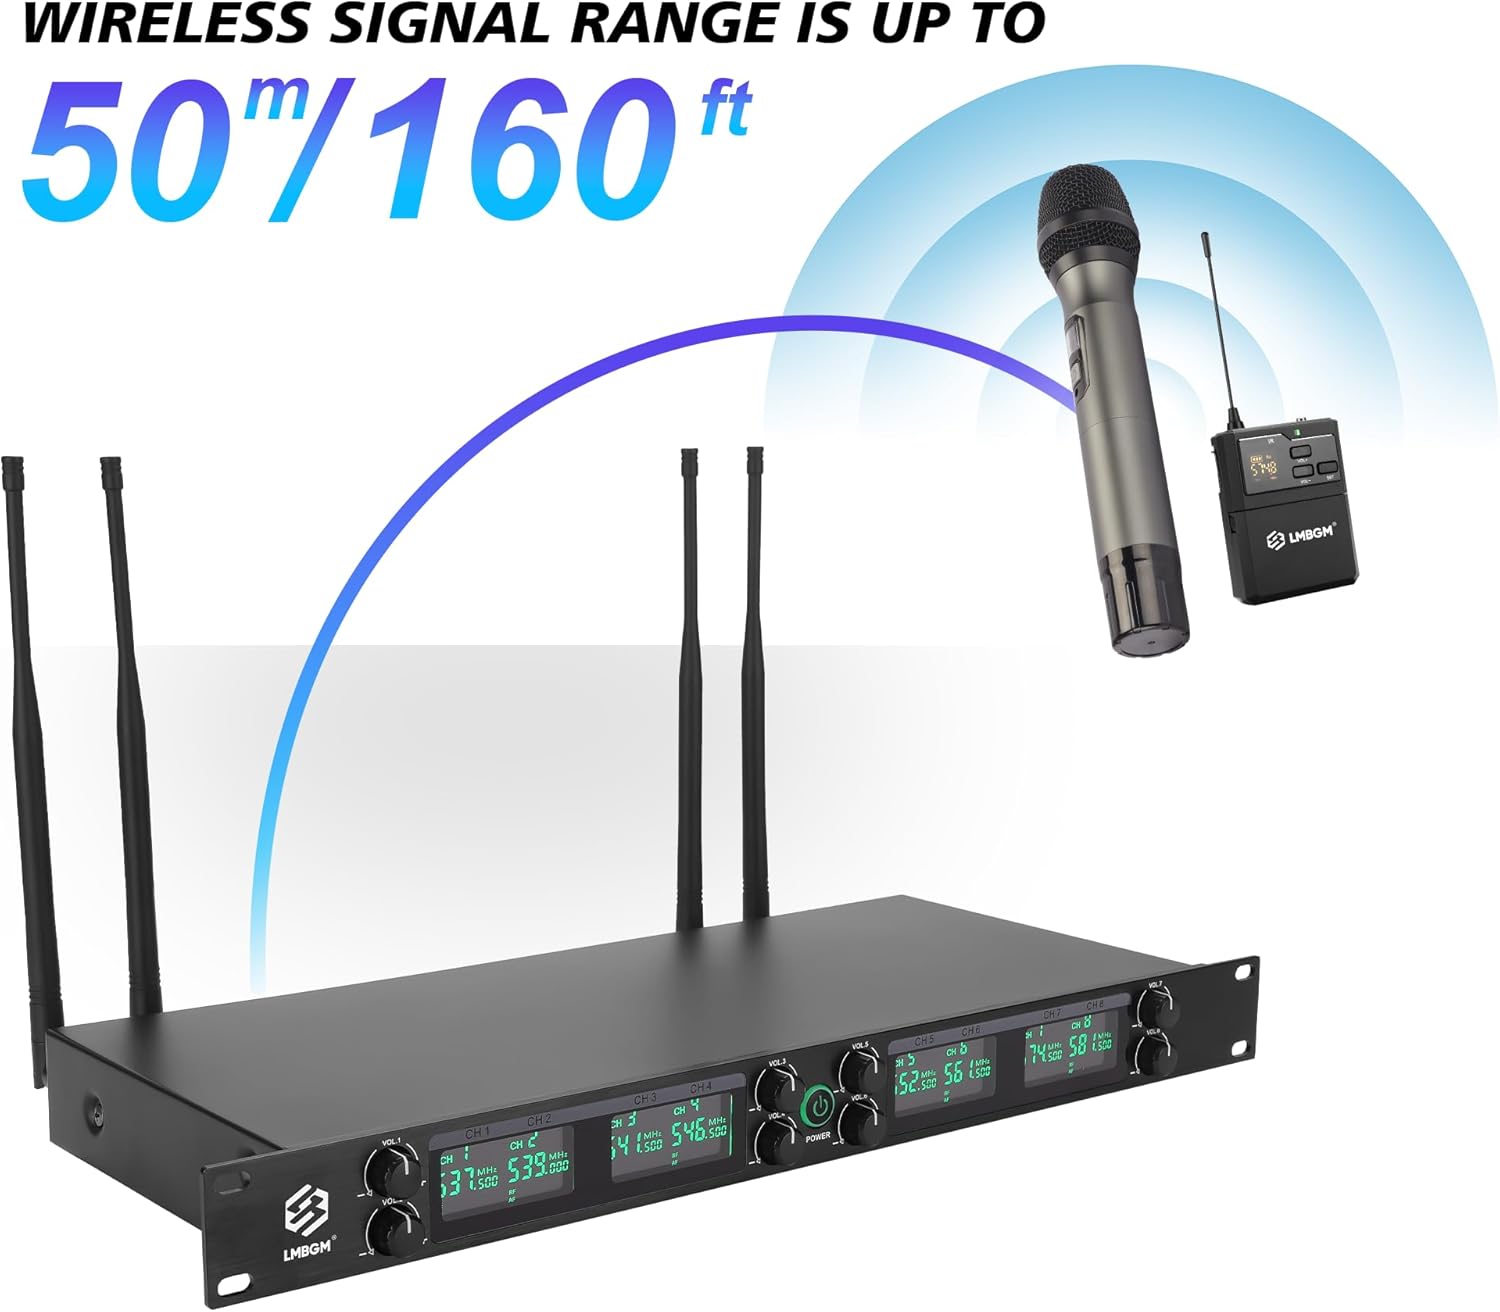
Figure 2: Wireless Signal Range. This image illustrates the effective transmission distance of the system, indicating a range of up to 50 meters (160 feet) between the microphone and the receiver.

Figure 3: Quality Construction and Technology. The image highlights the all-metal manufacturing of the microphones and the integrated UHF anti-interference chip, designed for effective noise shielding and smooth performance.
4. System Components
4.1 Receiver Unit
The receiver unit is the central hub of the wireless microphone system, processing signals from the microphones and outputting them to an audio mixer or amplifier.

Figure 4: Receiver Front and Rear Panels. This image provides a detailed view of the receiver, labeling its front panel controls (power switch, channel function buttons, information display) and rear panel connections (power input, XLR outputs, 6.35mm mix out, antenna interfaces).
Front Panel Controls:
- Information Display: Shows channel number, frequency, and signal strength for each of the 8 channels.
- Power Switch: ON/OFF button for the receiver.
- Channel Function Buttons (VOL+/SET/VOL-): Used to adjust volume and change frequency settings for individual channels.
Rear Panel Connections:
- DC 12-15V Power Input: Connect the provided power adapter here.
- Antenna Interfaces (ANT.1-4): Connect the four included antennas for optimal signal reception.
- XLR Outputs (BALANCED 1-8): Individual balanced XLR outputs for each microphone channel.
- 6.35mm Mix Out (UNBALANCED): Unbalanced 6.35mm (1/4 inch) output for mixed audio from all channels.
4.2 Handheld Microphones (Transmitters)
The system includes eight handheld wireless microphones, each acting as a transmitter.
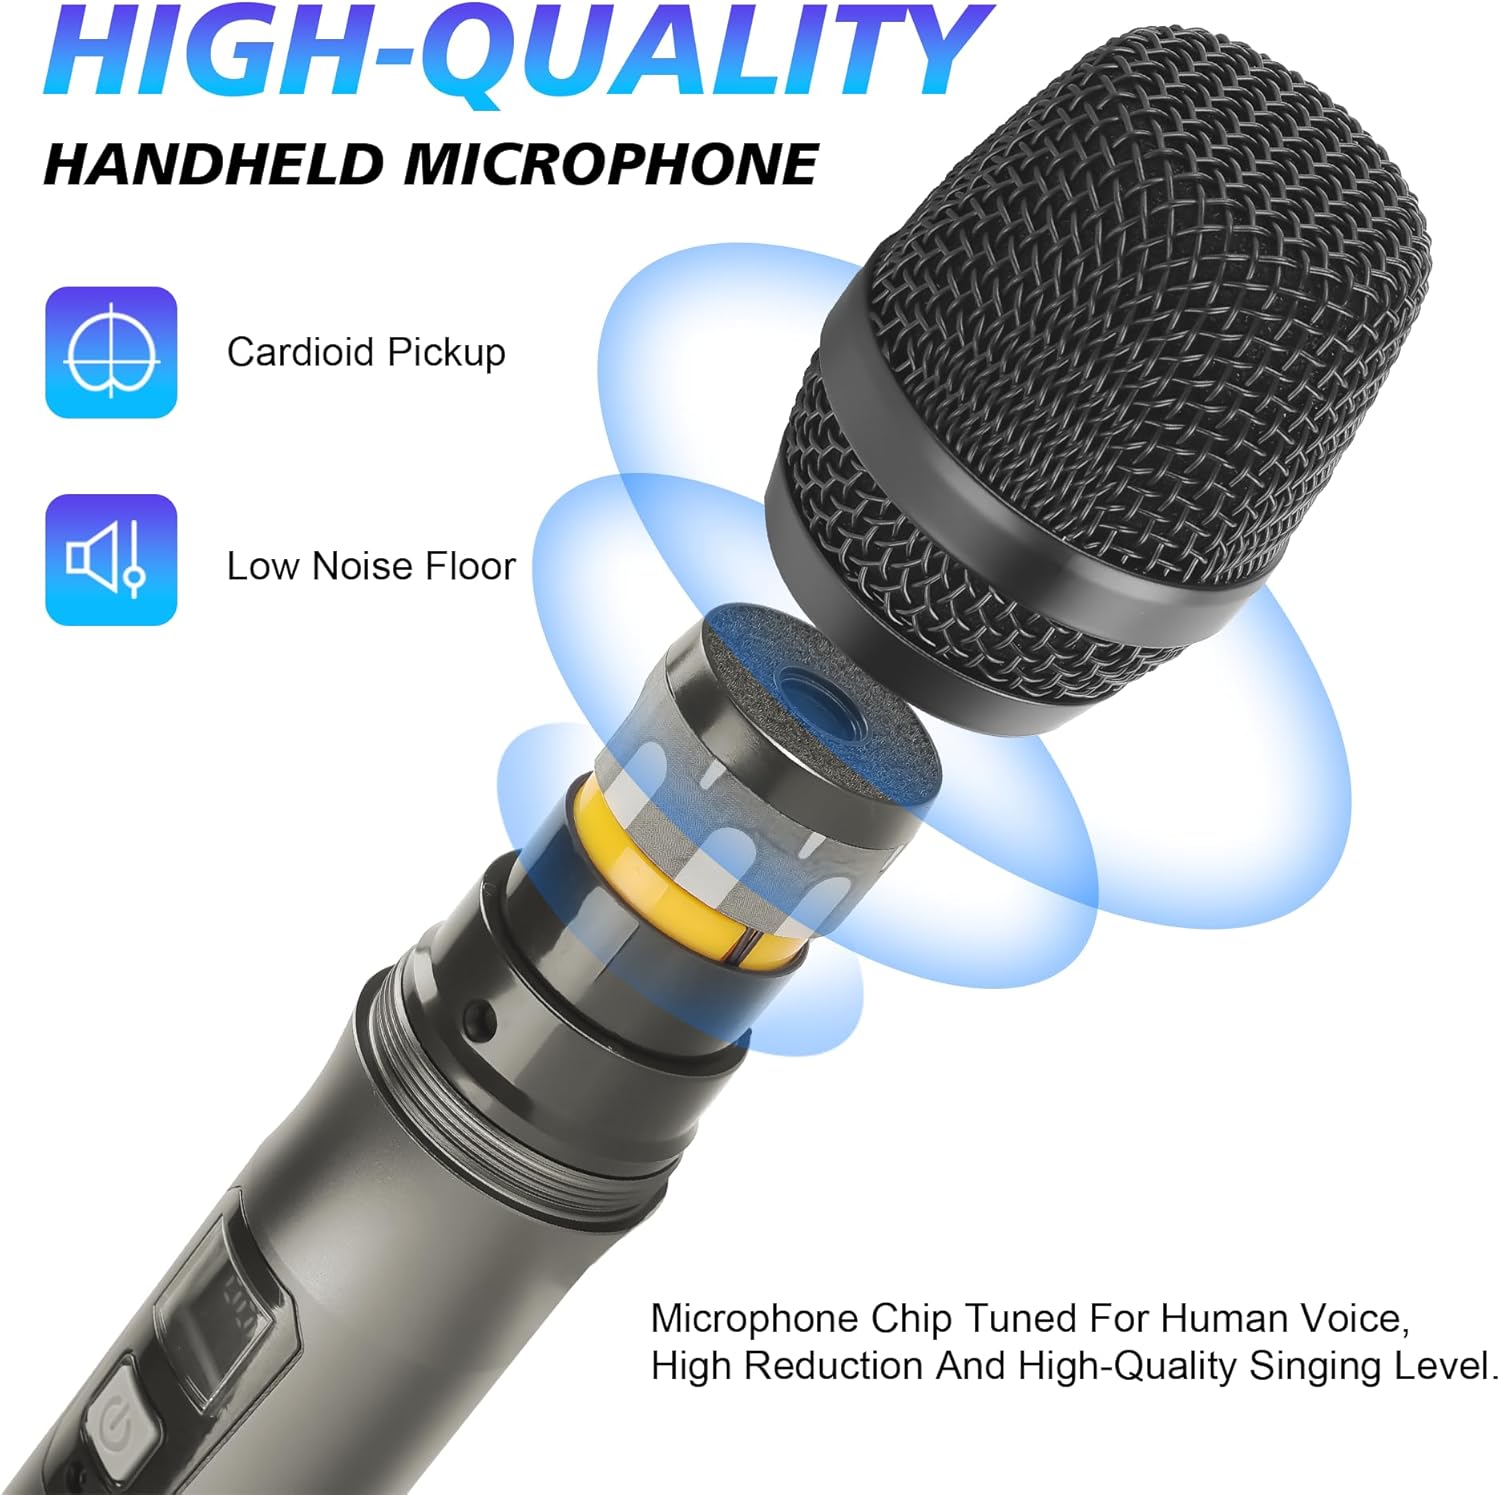
Figure 5: Handheld Microphone Design. This image details the internal structure of the handheld microphone, emphasizing its cardioid pickup pattern and low noise floor for clear vocal reproduction.
Microphone Features:
- Display Screen: Shows current channel and frequency.
- Power Button: ON/OFF switch.
- Battery Compartment: Located at the bottom, requires 2 AA batteries.
- Cardioid Pickup Pattern: Designed to capture sound primarily from the front, reducing background noise.
- Low Noise Floor: Ensures clear audio capture with minimal self-noise.

Figure 6: Microphone Battery Installation. This image illustrates the battery compartment of the handheld microphone, showing where to insert two AA batteries and indicating an approximate 5-hour operating time.
5. Setup Guide
Follow these steps to set up your LMBGM K-25R wireless microphone system:
- For individual channel control: Connect XLR cables from the BALANCED XLR outputs (1-8) on the receiver to the corresponding input channels on your audio mixer or amplifier.
- For mixed output: Connect the provided 6.35mm audio cable from the UNBALANCED 6.35mm Mix Out on the receiver to a line input on your audio mixer or amplifier.
- First, power on your audio mixer/amplifier.
- Then, press the Power Switch on the receiver unit. The display screens should illuminate.
- Finally, power on each handheld microphone by pressing its power button. The microphone display should show its channel and frequency.
6. Operation
6.1 Adjusting Channel Volume
Each channel on the receiver has dedicated volume controls:
- Press the VOL+ button to increase the volume for the corresponding channel.
- Press the VOL- button to decrease the volume for the corresponding channel.
- Observe the receiver's display for volume level indicators.
6.2 Changing Microphone Frequency
If you experience interference or need to use multiple systems, you can change the operating frequency of each microphone:
- On the receiver, press the SET button for the desired channel. The frequency display will start blinking.
- Use the VOL+ or VOL- buttons to cycle through the available frequency options for that channel. Each channel has 5 frequency options.
- Once the desired frequency is selected on the receiver, press the SET button again to confirm.
- On the corresponding handheld microphone, press and hold its SET button (if available, or follow specific microphone pairing instructions if different). The microphone should automatically sync with the new frequency set on the receiver. If not, power cycle the microphone.
- Perform a sound check to confirm the new frequency is working correctly and without interference.
The system supports up to 40 simultaneous channels (8 microphones x 5 frequencies per microphone) by carefully selecting non-overlapping frequencies across multiple systems.
7. Maintenance and Care
- Cleaning: Use a soft, dry cloth to clean the receiver and microphones. Do not use liquid cleaners or solvents.
- Battery Replacement: Replace AA batteries in the microphones when the battery indicator is low or performance degrades. Always use fresh, high-quality batteries. Remove batteries if the microphones will not be used for an extended period to prevent leakage.
- Storage: Store the system in a cool, dry place away from direct sunlight and extreme temperatures.
- Handling: Handle microphones and the receiver with care. Avoid dropping them or exposing them to excessive shock.
- Antennas: Ensure antennas are securely attached and not bent or damaged.
8. Troubleshooting
| Problem | Possible Cause | Solution |
|---|---|---|
| No sound from microphone |
|
|
| Interference or static noise |
|
|
| Short wireless range |
|
|
9. Technical Specifications

Figure 7: Comprehensive System Specifications. This image provides a visual summary of the receiver and transmitter specifications, including frequency range, power consumption, and physical dimensions.
Receiver Specifications:
- Power Supply: DC 12-15V
- Signal-to-Noise Ratio: ≥100dB
- Sensitivity: -105dBm
- Power Consumption: 3W
- Frequency Range: 537.5-581.9MHz (Note: Specific range may vary by region)
- Frequency Stability: ± 0.001%
- Dynamic Range: >100dB
- Frequency Response: 50Hz-20KHz
- Harmonic Distortion: ≤0.1%@1KHz
- Audio Output (Hybrid): 0-1500mV
- Audio Output (Balanced): 0-1500mV
- Dimensions: 18.9 x 7.09 x 1.77 inches (480 x 180 x 43 mm)
- Item Weight: 11.46 pounds (5.21 Kilograms)
- Material: Metal
- Number of Channels: 8
Transmitter (Microphone) Specifications:
- Transmitting Power: 30mW
- Modulation Mode: FM
- Maximum Modulation System: 150KHz
- Higher Harmonics: >60dB
- Supply Voltage: AA battery (two)
- Microphone Form Factor: Handheld
- Polar Pattern: Hyper Cardioid
- Dimensions: 150mm (length) x 40mm (diameter)
10. Safety Information
- Do not expose the unit to rain or moisture to prevent fire or electric shock.
- Do not open the casing. There are no user-serviceable parts inside. Refer all servicing to qualified service personnel.
- Keep the unit away from heat sources such as radiators, heat registers, stoves, or other apparatus (including amplifiers) that produce heat.
- Only use attachments/accessories specified by the manufacturer.
- Dispose of batteries responsibly according to local regulations.
11. Warranty and Support
LMBGM products are designed for reliability and performance. For specific warranty details, please refer to the warranty card included with your product or visit the official LMBGM website. If you encounter any issues or require technical assistance, please contact LMBGM customer support through the retailer where you purchased the product or via the contact information provided on the official LMBGM website.

Figure 8: Versatile Applications. This image illustrates various scenarios where the LMBGM K-25R system can be effectively used, such as group singing (Chorus), recreational singing (Karaoke), online broadcasts (Live Streaming), and educational presentations (Lectures).