
AKEYDIY BL-12
AKEYDIY 3-in-1 Auto Cap Heat Press Machine User Manual
Model: BL-12 | Brand: AKEYDIY
1. Introduction
The AKEYDIY BL-12 3-in-1 Auto Cap Heat Press Machine is designed for efficient and precise heat transfer applications on various items, primarily caps, but also suitable for T-shirts and bags with appropriate accessories. Featuring automatic press and release functions, a large touchscreen control panel, and interchangeable heating pads, this machine simplifies the heat transfer process for both beginners and experienced users.

Image: The AKEYDIY BL-12 Auto Cap Heat Press Machine and included accessories.
2. What's Included
Your AKEYDIY BL-12 package includes the following components:
- 1 x AKEYDIY Auto Cap Heat Press Machine
- 3 x Interchangeable Lower Cap Platens (sizes: 5.51 x 3 inches, 5.9 x 2.75 inches, 5.9 x 3.85 inches)
- 1 x Pair of Heat-Resistant Gloves
- 1 x Roll of Heat-Resistant Tape
- 5 x Patterned DTF Stickers
- 1 x Blank Sublimation Cap
- 1 x Power Cord
- 1 x User Manual (this document)

Image: All items included in the AKEYDIY Heat Press Machine package.
3. Setup
- Unpacking: Carefully remove all components from the packaging. Retain packaging for future storage or transport.
- Placement: Place the heat press machine on a stable, heat-resistant surface. Ensure adequate ventilation around the machine.
- Connect Power: Plug the power cord into the machine and then into a standard electrical outlet.
- Install Platen: The machine comes with three interchangeable lower cap platens. To change a platen, gently lift the top heating element and remove the current platen. Select the desired size and place it securely into the designated slot.
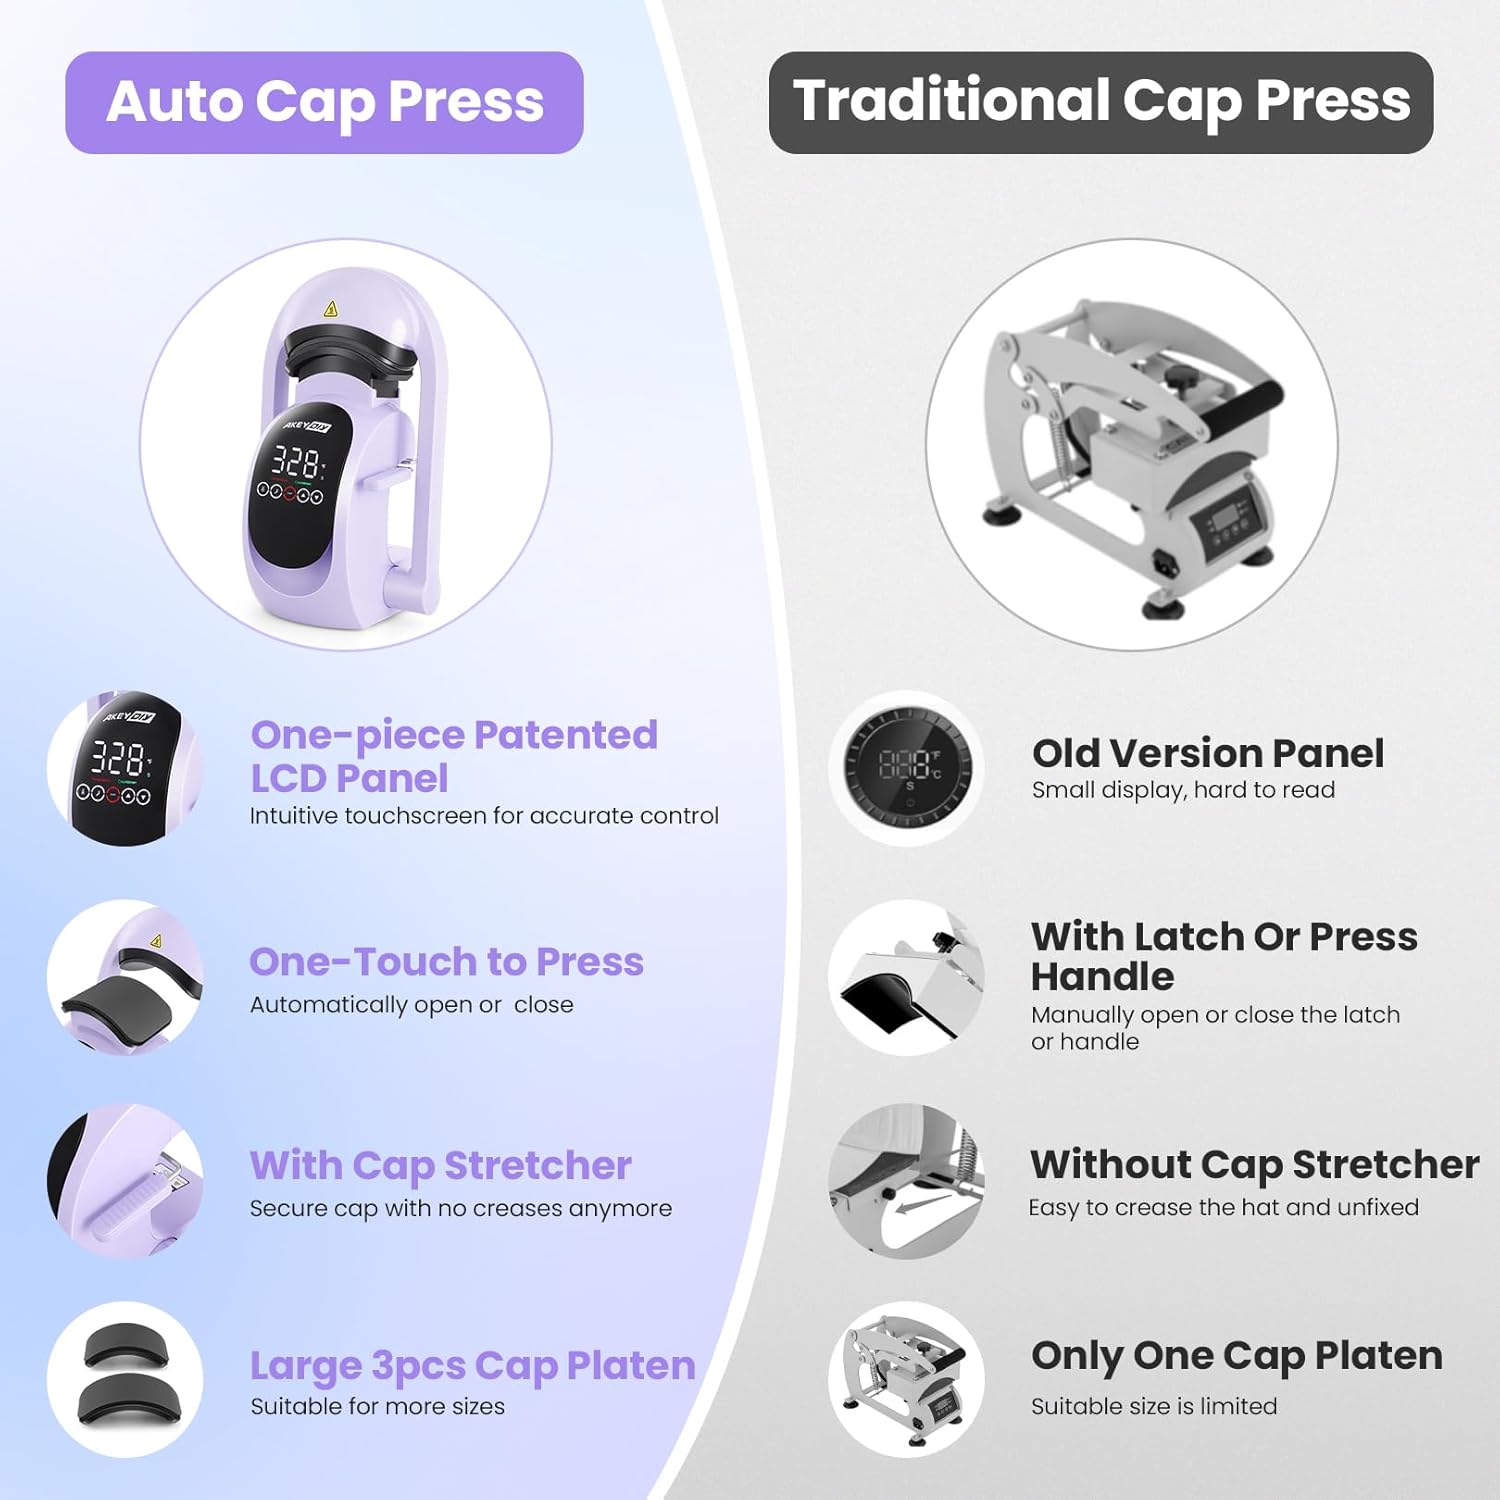
Image: The interchangeable lower cap platens and the machine's design for easy setup.
4. Operating Instructions
4.1 Power On/Off
- To Power On: Press and hold the power button on the touchscreen control panel for 3 seconds. The display will illuminate.
- To Power Off: Press and hold the power button for 3 seconds. The display will turn off.
4.2 Setting Temperature and Time
- The large touchscreen control panel allows for precise adjustments.
- Use the 'Temperature' button and the up/down arrows to set the desired temperature (Max: 401°F / 205°C). Long-press the temperature button for 3 seconds to switch between Fahrenheit and Celsius.
- Use the 'Countdown' button and the up/down arrows to set the desired transfer time (1-999 seconds).

Image: The large touchscreen display for setting temperature and time.
4.3 Heat Transfer Process
- Pre-heat: Turn on the machine and allow it to reach the set temperature.
- Prepare Item: Place your cap onto the lower platen. Utilize the built-in hat stretcher lever to secure the cap firmly and prevent wrinkles.
- Position Design: Carefully place your DTF sticker or transfer design onto the cap. Use heat-resistant tape to hold it in place if necessary.
- Start Press: With the cap and design in place, press the 'Start' button on the control panel. The machine will automatically press down, apply heat and pressure, and begin the countdown.
- Automatic Release: Once the countdown is complete, the machine will automatically release and open, signaling the end of the transfer process.
- Remove Item: Carefully remove the transferred item using the heat-resistant gloves provided. Allow the item and transfer to cool before peeling the transfer film (if applicable, follow transfer instructions).

Image: Visual steps for the heat transfer process.
4.4 Automatic Shut-Off
For safety and energy saving, the machine features an automatic shut-off function. If left in standby mode without operation for 30 minutes, the machine will automatically power down.
5. Maintenance
- Cleaning: Ensure the machine is unplugged and completely cool before cleaning. Wipe down the exterior with a soft, damp cloth. Do not use abrasive cleaners or solvents.
- Heating Plate: Gently wipe the curved heating plate with a clean, dry cloth after each use to remove any residue.
- Storage: Store the machine in a dry, dust-free environment when not in use.
6. Troubleshooting
- Machine Not Powering On: Ensure the power cord is securely plugged into both the machine and a working electrical outlet. Check if the outlet has power.
- Uneven Heat Transfer: Verify that the cap is properly secured on the platen using the hat stretcher. Ensure the design is flat and evenly pressed against the heating element. Check the temperature and time settings for your specific transfer material.
- Transfer Not Sticking: Confirm that the temperature and time settings are correct for your transfer type. Ensure sufficient pressure is applied (the automatic press handles this, but check for any obstructions).
- Machine Not Pressing Automatically: Ensure the 'Start' button has been pressed. Check for any error messages on the touchscreen display.
7. Specifications
| Feature | Detail |
|---|---|
| Model Number | BL-12 |
| Brand | AKEYDIY |
| Wattage | 350 watts |
| Upper Temperature Rating | 401°F (205°C) |
| Lower Temperature Rating | 32°F (0°C) |
| Product Dimensions | 12 x 7 x 14 inches (L x W x H) |
| Item Weight | 14.12 pounds |
| Material | Aluminum |
| Color | Blue |
8. Warranty & Support
AKEYDIY is committed to providing high-quality products. For any questions, concerns, or support needs regarding your heat press machine, please do not hesitate to contact us directly. Information regarding optional protection plans (3-Year, 4-Year, Complete Protect) is available at the point of purchase.
For further assistance, please visit the AKEYDIY Store on Amazon.
Ask a question about this manual
Ask about setup, troubleshooting, compatibility, parts, safety, or missing instructions. Manuals+ will review the question and use this page’s manual context to help answer it.