
WiMiUS K13
WiMiUS K13 Projector User Manual
Model: K13 | Brand: WiMiUS
Introduction
Thank you for purchasing the WiMiUS K13 Projector. This manual provides detailed instructions for setting up, operating, and maintaining your projector to ensure optimal performance and longevity. Please read this manual thoroughly before using the product and keep it for future reference.
Important Safety Information
- Do not block ventilation openings.
- Do not expose the projector to rain or moisture.
- Avoid looking directly into the lens when the projector is on.
- Use only attachments/accessories specified by the manufacturer.
- Unplug the projector during lightning storms or when unused for long periods.
- Refer all servicing to qualified service personnel.
Package Contents
Please check that all items are included in your package:
- WiMiUS K13 Projector
- Remote Control
- Power Cable
- HDMI Cable
- User Manual (this document)
- (Optional: 100-inch screen or Bluetooth speaker, depending on campaign)
Product Overview
Familiarize yourself with the components of your WiMiUS K13 Projector.
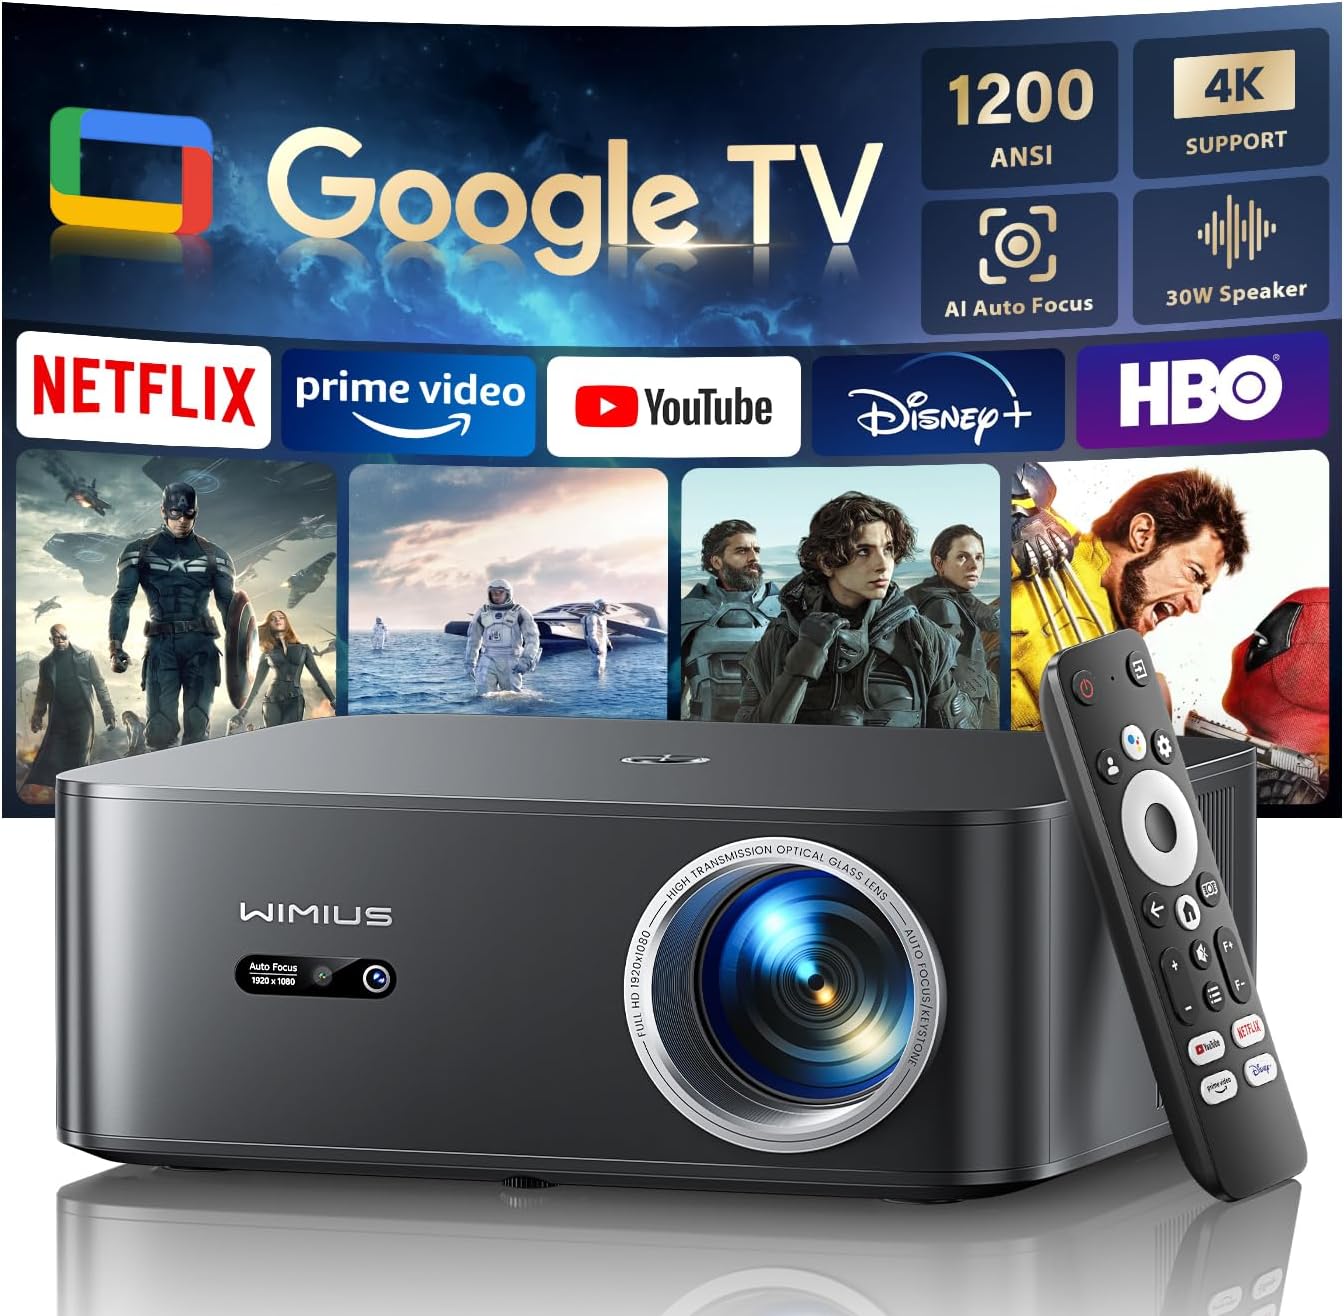
Figure 1: WiMiUS K13 Projector with its remote control and a projected image displaying various streaming service logos.
Front View
The front features the projection lens and the auto-focus sensor.
Rear View (Ports)
The rear panel includes various input/output ports:
- HDMI ARC Port: For connecting devices like Blu-ray players, game consoles, or soundbars.
- USB Ports: For connecting USB drives to play media files.
- 3.5mm Audio Output: For connecting external headphones or speakers.
Top Panel
The top panel typically houses control buttons for basic navigation and power.
Bottom Panel
The bottom panel features mounting points (4 M5 screw holes) for ceiling, tripod, or stand installation.
Setup
1. Placement Options
The K13 projector offers flexible placement options:
- Tabletop Projection: Place the projector on a flat surface in front of the screen or wall.
- Ceiling Mount: Use the M5 screw holes on the bottom for ceiling installation.
- Tripod/Stand Mount: Attach to a compatible tripod or stand using the M5 screw holes.
- Wall Mount: Secure the projector to a wall using appropriate mounting hardware.

Figure 2: Multiple setup options for the WiMiUS K13 Projector, including stand, tabletop, and ceiling mounting.
2. Power Connection
Connect the power cable to the projector's power input and then to a power outlet.
3. Initial Setup & Network Connection
Upon first power-on, the projector will guide you through the initial Google TV setup. Follow the on-screen prompts to connect to your Wi-Fi network (WiFi 6 supported for faster, smoother streaming).
4. Automatic Focus and Keystone Correction
The K13 projector features automatic focus and auto keystone correction. Once powered on and placed, the projector will automatically adjust the image for optimal clarity and a perfectly rectangular shape. This eliminates manual adjustments, making setup quick and effortless.

Figure 3: The projector's automatic focus and keystone correction features ensure a clear and properly shaped image without manual intervention.
Operating Instructions
1. Remote Control Usage
The included remote control allows full navigation of the Google TV interface and projector settings. It features dedicated buttons for popular streaming services and a voice control button.

Figure 4: The remote control provides easy access to Google Voice Assistant and popular streaming applications.
2. Google TV Interface
Your K13 projector comes with official Google TV built-in, providing a seamless streaming experience. Access Netflix, Disney+, YouTube, Prime Video, and many other apps directly from the home screen.

Figure 5: The Google TV interface offers a wide selection of streaming applications for instant access.
3. Voice Control with Google Assistant
Press the voice control button on the remote and speak commands like "Open Netflix," "Play Inside Out 2," "What's the weather?", or "Increase volume" for hands-free operation.
4. Screen Mirroring (Wireless Connection)
The projector supports WiFi 6 for high-speed wireless connections, enabling screen mirroring from your mobile devices:
- Airplay (iOS): Mirror content from your iPhone or iPad.
- Miracast (Android & Windows): Mirror content from compatible Android smartphones, tablets, or Windows PCs.
Figure 6: Seamlessly cast content from your smartphone or other devices to the large screen using WiFi 6 and Bluetooth 5.3.
5. Connecting External Devices (Wired)
Use the available ports to connect various devices:
- HDMI: Connect laptops, game consoles (PS5, Switch), Blu-ray players.
- USB: Play media directly from USB flash drives.
- 3.5mm Audio: Connect external speakers or headphones for enhanced audio.
6. Adjusting Display Settings
While auto-correction handles most adjustments, you can fine-tune settings via the Google TV menu:
- Zoom (50%-100%): Adjust the image size without moving the projector.
- Aspect Ratio (4:3 / 16:9): Select the appropriate ratio for your content.
- Brightness & Contrast: Customize image quality to your preference.
- Sleep Timer: Set a timer for automatic shutdown.
Maintenance
1. Cleaning the Lens
Gently wipe the projector lens with a soft, lint-free cloth designed for optical surfaces. Do not use abrasive cleaners or excessive force.
2. Cleaning the Projector Body
Use a soft, dry cloth to clean the exterior of the projector. For stubborn marks, a slightly damp cloth can be used, followed by a dry cloth.
3. Ventilation
Ensure the ventilation openings are clear of dust and obstructions to prevent overheating. Use a soft brush or compressed air to gently clean the vents.
4. Storage
When not in use for extended periods, store the projector in a cool, dry place, away from direct sunlight and extreme temperatures. It is recommended to use the original packaging or a protective case.
Troubleshooting
| Problem | Possible Cause | Solution |
|---|---|---|
| No image projected | Power cable not connected; Input source incorrect; Lens cap on. | Check power connection; Select correct input source (HDMI, USB); Remove lens cap. |
| Image is blurry | Auto-focus issue; Lens dirty. | Restart projector to re-trigger auto-focus; Clean the lens. |
| No sound | Volume too low; External audio device not connected properly; Muted. | Increase volume; Check audio cable connections; Unmute the projector. |
| Cannot connect to Wi-Fi | Incorrect password; Router too far; Network issue. | Verify password; Move projector closer to router; Restart router. |
Specifications
| Feature | Detail |
|---|---|
| Brand | WiMiUS |
| Model Number | K13 |
| Brightness | 1200 ANSI Lumens |
| Native Resolution | 1920 x 1080 pixels (Full HD) |
| Supported Resolution | Up to 4K |
| Operating System | Official Google TV |
| Connectivity | WiFi 6, Bluetooth 5.3, HDMI ARC, USB, 3.5mm Audio |
| Auto Features | Auto Focus, Auto Keystone Correction |
| Zoom Function | 50% - 100% |
| Recommended Projection Size | Up to 300 inches |
| Product Dimensions | 40.11 x 30.3 x 16.79 cm |
| Product Weight | 3.31 kg |
Warranty and Support
WiMiUS is committed to providing excellent customer service. Your K13 Projector comes with comprehensive support:
- 24/7/365 After-Sales Service: Contact us anytime for assistance.
- 2-Year Refund Guarantee: Full refund within two years of purchase.
- 3-Year Repair Guarantee: Free repair service for three years.
- Lifetime Technical Support: Ongoing technical assistance for the lifespan of your product.
- For any inquiries, please contact our support team at support01@wimius.com.
Related documentsK13


Ask a question about this manual
Ask about setup, troubleshooting, compatibility, parts, safety, or missing instructions. Manuals+ will review the question and use this page’s manual context to help answer it.