1. Introduction
Thank you for choosing the AURIOL Color Display Weather Station. This device provides comprehensive weather information, including indoor and outdoor temperature and humidity, animated weather forecasts, moon phase, and a clock with alarm functions. Please read this manual carefully before use to ensure proper operation and to maximize the lifespan of your product.
2. Safety Information
- Keep the device away from extreme temperatures, direct sunlight, strong vibrations, and impacts.
- The main unit is designed for indoor use only. The outdoor sensor is splash-proof (IPX4) but should not be submerged in water.
- Do not attempt to open or repair the device yourself. Refer all servicing to qualified personnel.
- Keep batteries out of reach of children. Dispose of used batteries according to local regulations.
- Use only the provided power adapter for the main unit.
3. Package Contents
Please check the package for the following items:
- AURIOL Color Display Weather Station (Main Unit)
- Wireless Outdoor Sensor (IPX4 splash-proof)
- Power Adapter for Main Unit
- 4 x Alkaline Batteries (2 x 1.5 V AA for sensor, 2 x 1.5 V AAA for main unit backup)
- User Manual (this document)
4. Product Overview
Familiarize yourself with the main components of your weather station.

Figure 4.1: Main unit (right) displaying time, date, indoor/outdoor temperature, humidity, and weather forecast. Wireless outdoor sensor (left) showing its own temperature and humidity.

Figure 4.2: Close-up of the main unit's color display, highlighting the animated weather forecast symbols, moon phase indicator, and alarm icons (AL1, AL2).
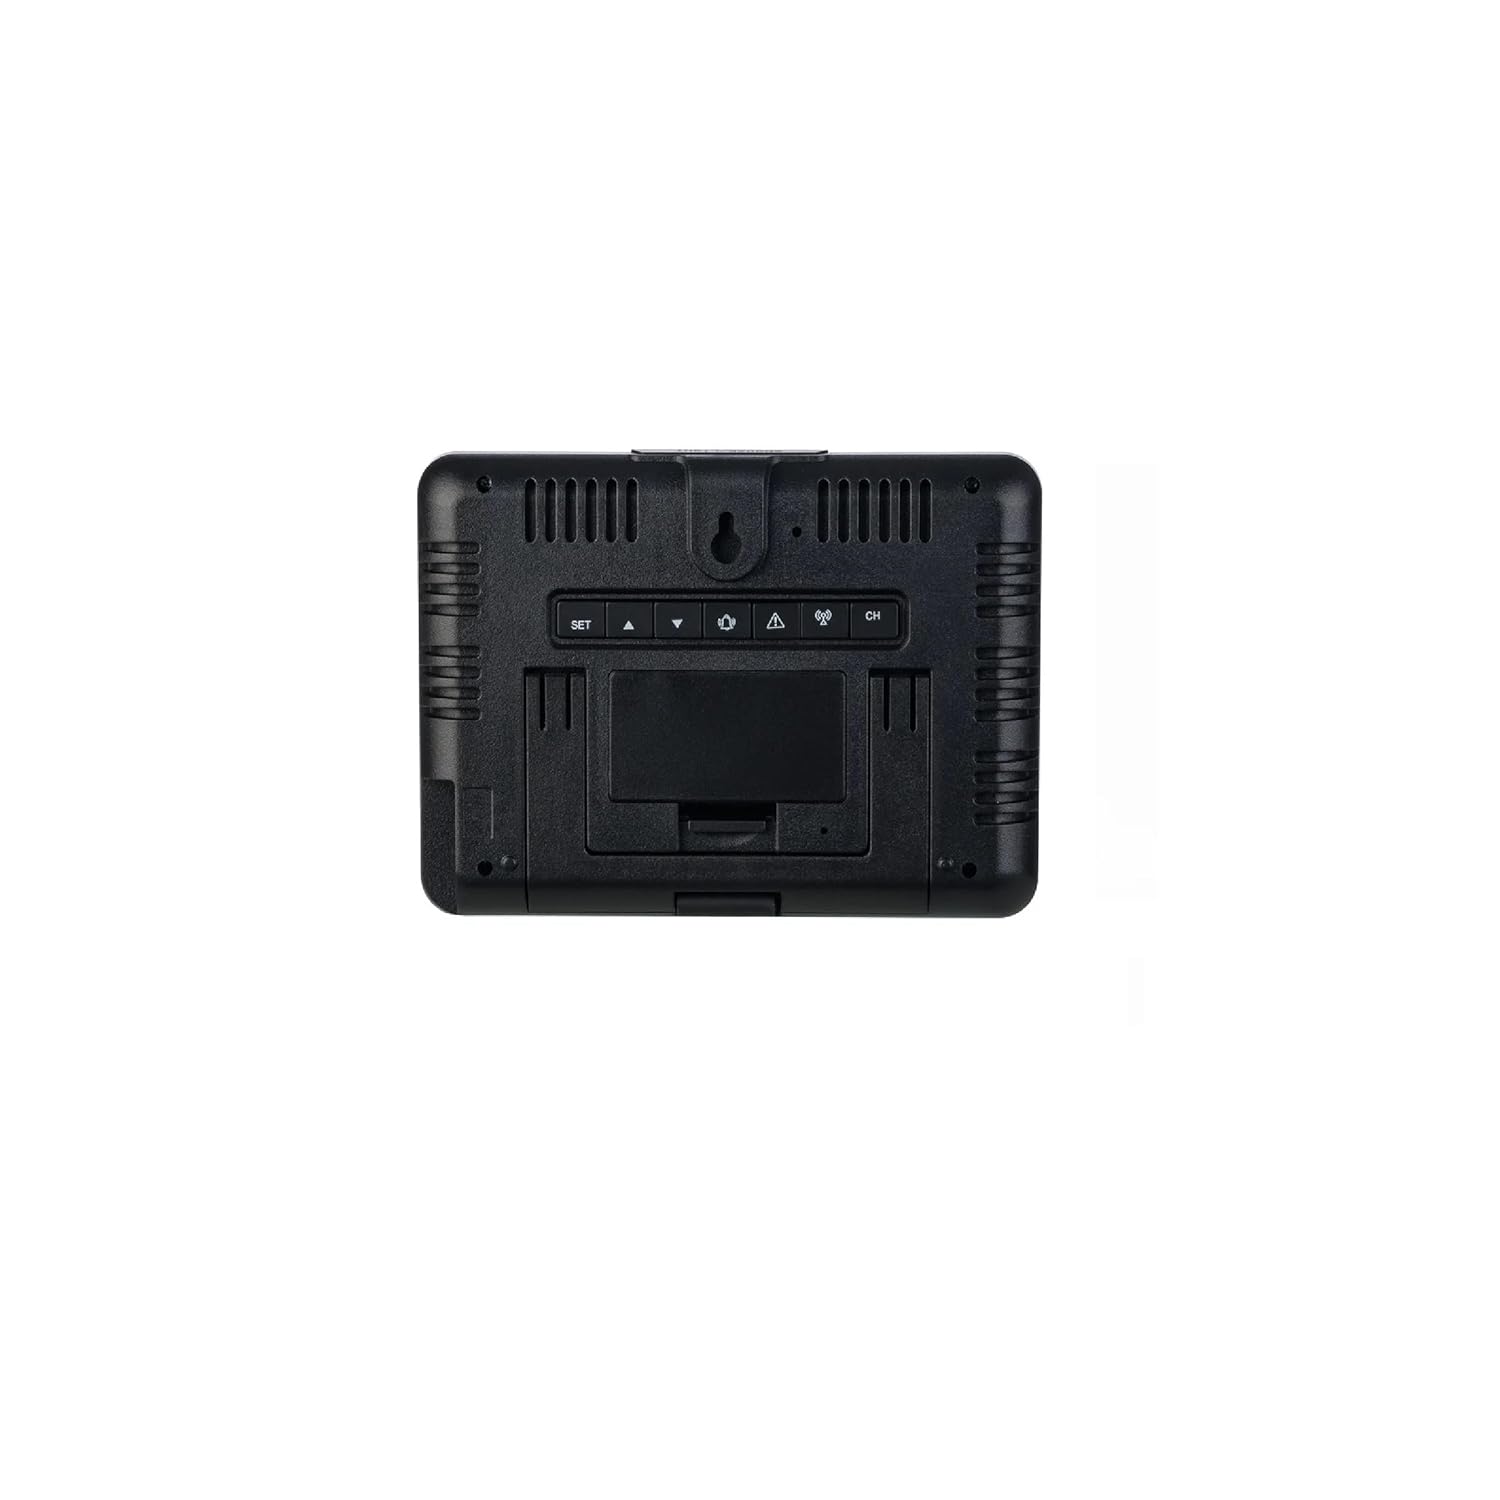
Figure 4.3: Rear view of the main unit. Visible are the control buttons (SET, UP, DOWN, ALARM, CH) and the battery compartment cover. The unit can be placed on a flat surface or wall-mounted.
5. Setup
5.1. Battery Installation
- Outdoor Sensor: Open the battery compartment on the back of the wireless outdoor sensor. Insert 2 x 1.5 V AA alkaline batteries, observing the correct polarity (+/-). Close the compartment securely.
- Main Unit (Backup): Open the battery compartment on the back of the main unit (refer to Figure 4.3). Insert 2 x 1.5 V AAA alkaline batteries, observing the correct polarity (+/-). These batteries serve as a backup in case of power outage. Close the compartment.
5.2. Powering On the Main Unit
Connect the provided power adapter to the DC input port on the back of the main unit and then plug it into a wall outlet. The display will light up permanently. The backup batteries will ensure settings are retained if the power adapter is disconnected.
5.3. Sensor Synchronization
Once both the sensor and main unit are powered, the main unit will automatically attempt to connect with the outdoor sensor. This process may take a few minutes. The outdoor temperature and humidity readings will appear on the main unit's display once connected. If synchronization fails, press and hold the "CH" button on the main unit to initiate a manual search for the sensor.
5.4. Sensor Placement
Place the outdoor sensor in a shaded, dry location, protected from direct sunlight and rain, but within the 100m wireless range of the main unit. Avoid placing it near large metal objects or electrical appliances that could interfere with the signal. The sensor can be placed on a flat surface or mounted to a wall using the integrated hanging hole.
6. Operating Instructions
6.1. Display Overview
The color display is divided into several sections:
- Top Left: Animated Weather Forecast symbols.
- Top Right: Outdoor Temperature and Humidity.
- Middle Left: Moon Phase.
- Middle Right: Indoor Temperature and Humidity.
- Bottom: Time, Date, Day of the Week, Alarm Indicators (AL1, AL2).
6.2. Setting Time, Date, and Day of the Week
- Press and hold the "SET" button (refer to Figure 4.3) for 3 seconds to enter time setting mode. The hour digit will flash.
- Use the "UP" or "DOWN" buttons to adjust the value.
- Press "SET" again to confirm and move to the next setting (minutes, 12/24-hour format, year, month, day, day of week language).
- Repeat steps 2 and 3 until all settings are configured. Press "SET" one last time to exit.
6.3. Alarm Settings
The weather station features two separate alarms (AL1, AL2).
- Press the "ALARM" button repeatedly to cycle through AL1, AL2, and alarm off.
- To set an alarm, press and hold the "ALARM" button for 3 seconds when the desired alarm (AL1 or AL2) is displayed. The hour digit will flash.
- Use "UP" or "DOWN" to adjust the hour, then press "ALARM" to confirm and move to minutes.
- Adjust minutes with "UP" or "DOWN", then press "ALARM" to confirm and exit.
- When an alarm sounds, press any button (except "SNOOZE") to stop it. Press "SNOOZE" for a temporary pause.
6.4. Temperature and Humidity Display
- The main unit displays both indoor and outdoor temperature and humidity.
- Press the "UP" button to switch between Celsius (°C) and Fahrenheit (°F) temperature units.
- The display also shows minimum and maximum recorded temperatures and humidity for both indoor and outdoor. These values reset automatically every 24 hours or can be manually reset by pressing and holding the "DOWN" button.
6.5. Weather Forecast
The weather station predicts weather conditions for the next 12-24 hours based on atmospheric pressure changes. The animated symbols (e.g., sunny, partly cloudy, cloudy, rainy, snowy) indicate the forecast. This is a prediction and may not always be 100% accurate.
6.6. Moon Phase Display
The moon phase icon on the display changes to reflect the current lunar phase.
6.7. Temperature/Freeze Alarm
The device features a temperature alarm and a freeze alarm. When the outdoor temperature drops to a certain threshold (typically near freezing point), a special icon or sound may activate to warn of potential frost conditions. Refer to the specific settings menu (usually accessed via "SET" or "ALARM" button in conjunction with "UP"/"DOWN") to configure these thresholds.
6.8. Battery Status Indicator
Battery icons on the display will indicate the battery status for both the main unit (backup) and the outdoor sensor. Replace batteries promptly when the low battery indicator appears to ensure continuous operation.
7. Maintenance
- Cleaning: Wipe the device with a soft, damp cloth. Do not use abrasive cleaners or solvents.
- Battery Replacement: Replace batteries in both the main unit (backup) and the outdoor sensor when the low battery indicator appears. Ensure correct polarity.
- Storage: If storing the device for an extended period, remove all batteries to prevent leakage.
8. Troubleshooting
| Problem | Possible Cause | Solution |
|---|---|---|
| No display on main unit. | Power adapter not connected or faulty; backup batteries depleted or incorrectly inserted. | Ensure power adapter is securely connected. Check and replace backup batteries if necessary, verifying polarity. |
| Outdoor readings not displayed or inaccurate. | Sensor out of range; sensor batteries depleted; interference; sensor not synchronized. | Move sensor closer to the main unit. Replace sensor batteries. Relocate sensor away from interference sources. Press and hold "CH" button on main unit to re-synchronize. |
| Weather forecast seems incorrect. | Forecast is a prediction based on atmospheric pressure and may not always match actual conditions. | This is normal. The forecast is an estimation. Ensure the unit has been operating for at least 24 hours for initial pressure calibration. |
| Alarm does not sound. | Alarm not activated or set incorrectly. | Verify that the alarm (AL1 or AL2) is enabled and the time is set correctly. |
9. Specifications
- Model: 456364
- Brand: Auriol
- Connectivity Technology: 433 MHz, 868 MHz (Wireless)
- Outdoor Sensor Range: Up to 100 m (open field)
- Power Source (Main Unit): Power Adapter (included), 2 x 1.5 V AAA Alkaline Batteries (backup, included)
- Power Source (Outdoor Sensor): 2 x 1.5 V AA Alkaline Batteries (included)
- Special Feature: Color Display, Min/Max Temperature/Humidity, Animated Weather Forecast, Moon Phase, Dual Alarms, Temperature/Freeze Alarm
- Material: Plastic
- Color: Black
- Outdoor Sensor Protection: IPX4 (Splash-proof)
- Recommended Use: Home
- Specific Use: Temperature monitoring
10. Warranty and Support
This AURIOL product comes with a standard manufacturer's warranty. For detailed warranty terms and conditions, please refer to the warranty card included in your package or contact your retailer. For technical support, troubleshooting assistance, or to inquire about replacement parts, please contact AURIOL customer service through their official website or the contact information provided with your purchase documentation.


