
1. Introduction
This manual provides essential information for the installation, operation, and maintenance of your new Generic replacement primer bulb. This primer bulb is designed for use with Powersmart 25.4cc 2-stroke gas string strimmers. Please read these instructions carefully before attempting any installation or use to ensure proper function and safety.
Important Note: This is a replacement part and not a genuine Powersmart component. Compatibility is based on the model number and visual appearance. Always verify the item's appearance and size against your original part before installation.
2. Product Overview
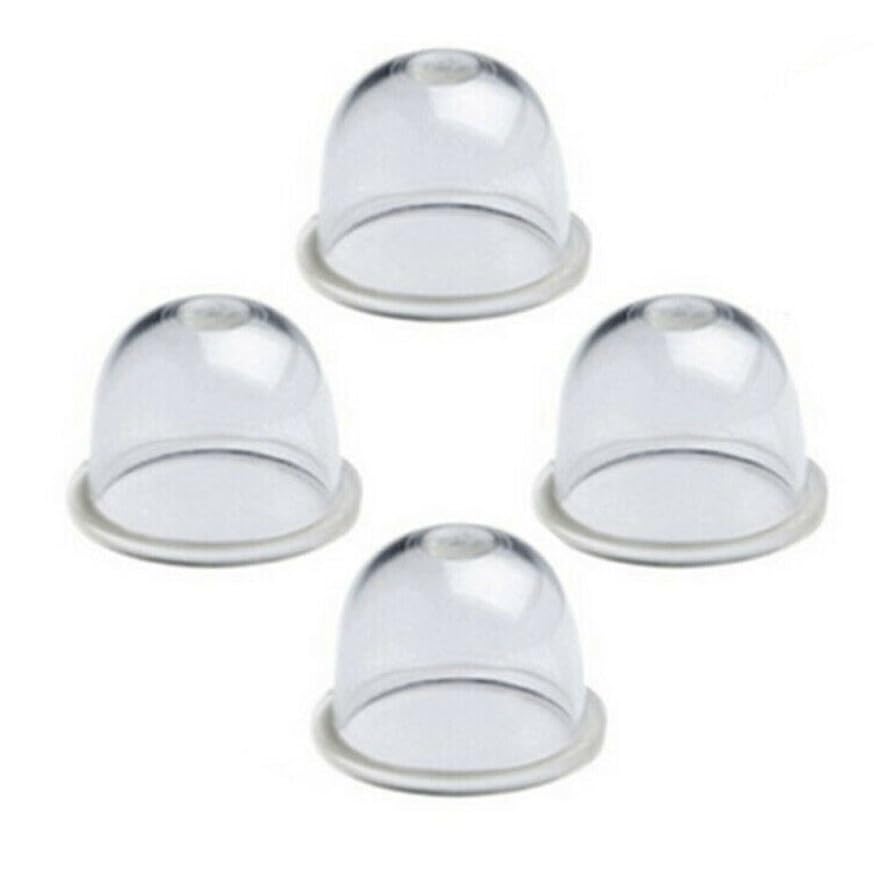
Image 1: Generic Replacement Primer Bulb. This image displays the primer bulb, which is a small, clear or translucent component typically made of rubber or plastic, designed to draw fuel into the carburetor for easier starting of a gas-powered engine.
The primer bulb is a crucial component in the fuel system of a 2-stroke gas string strimmer. Its primary function is to manually pump a small amount of fuel into the carburetor, which helps to start the engine more easily, especially after the strimmer has been stored for a period or has run out of fuel.
This replacement primer bulb is manufactured to provide a reliable and durable solution for worn or damaged original parts. It features high precision and temperature resistance for consistent performance.
3. Safety Information
Always prioritize safety when working with fuel systems and power tools. Failure to follow these safety guidelines may result in injury or damage to equipment.
- Disconnect Spark Plug: Before performing any maintenance or installation, always disconnect the spark plug wire to prevent accidental engine starting.
- Work in a Well-Ventilated Area: Fuel vapors are flammable and hazardous. Ensure adequate ventilation when handling fuel or working on the fuel system.
- Wear Protective Gear: Use appropriate personal protective equipment, including safety glasses and gloves.
- Handle Fuel Carefully: Avoid spills. Clean up any spilled fuel immediately. Do not smoke or use open flames near fuel.
- Allow Engine to Cool: Ensure the engine is completely cool before working on it to prevent burns.
- Professional Assistance: If you are unsure about any step, consult a qualified technician.
4. Setup and Installation
Replacing the primer bulb typically involves a few steps. The exact procedure may vary slightly depending on your specific strimmer model. Refer to your strimmer's original service manual for detailed instructions if available.
- Prepare the Strimmer: Ensure the engine is off and cool. Disconnect the spark plug wire. Drain any fuel from the tank if necessary.
- Locate the Primer Bulb: The primer bulb is usually located on the carburetor or near the fuel tank.
- Remove Old Primer Bulb: Carefully detach the fuel lines connected to the old primer bulb. Note their positions for correct reattachment. Gently pry or twist the old primer bulb out of its housing. Some models may require removing a retaining clip or screws.
- Inspect Housing: Clean the primer bulb housing area to remove any debris or old fuel residue.
- Install New Primer Bulb: Press the new primer bulb firmly into its housing until it is securely seated. Ensure any retaining clips or screws are reinstalled if applicable.
- Reconnect Fuel Lines: Reattach the fuel lines to the new primer bulb in their original positions. Ensure connections are snug to prevent leaks.
- Check for Leaks: After installation, add a small amount of fuel to the tank and check for any leaks around the new primer bulb and fuel lines.
- Reconnect Spark Plug: Once installation is complete and no leaks are detected, reconnect the spark plug wire.
Note: Adjustments may sometimes be needed for proper fitment on certain models. If the bulb does not fit perfectly, do not force it, as this may cause damage.
5. Operating Instructions (Priming the Engine)
The primer bulb is used to prepare the engine for starting, especially when cold or after refueling.
- Fill Fuel Tank: Ensure the fuel tank contains the correct fuel mixture for your 2-stroke engine.
- Locate Primer Bulb: Identify the primer bulb on your strimmer.
- Press Primer Bulb: Press the primer bulb repeatedly (typically 5-10 times) until fuel is visible in the bulb and/or the fuel return line. You should see fuel flowing through the clear lines.
- Start Engine: Follow your strimmer's specific starting procedure (e.g., choke setting, pull cord). The engine should start more easily after priming.
Do not over-prime the engine, as this can flood the carburetor and make starting more difficult.
6. Maintenance
Regular inspection of the primer bulb can help prevent starting issues.
- Visual Inspection: Periodically check the primer bulb for cracks, hardening, or signs of fuel leakage. A cracked or stiff bulb will not prime effectively.
- Fuel Line Inspection: While inspecting the bulb, also check the fuel lines for cracks, kinks, or loose connections.
- Replacement: If the primer bulb shows signs of wear or damage, replace it promptly to maintain optimal engine starting performance.
7. Troubleshooting
| Problem | Possible Cause | Solution |
|---|---|---|
| Primer bulb does not draw fuel. | Cracked or hardened primer bulb; clogged fuel filter; disconnected or cracked fuel line; empty fuel tank. | Inspect and replace primer bulb if damaged. Check and clean/replace fuel filter. Inspect and reconnect/replace fuel lines. Fill fuel tank. |
| Fuel leaks around primer bulb. | Improperly seated primer bulb; cracked primer bulb; loose fuel line connection. | Ensure primer bulb is fully seated. Replace cracked bulb. Tighten fuel line connections. |
| Engine still hard to start after priming. | Carburetor issues; spark plug issues; incorrect fuel mixture; engine flooded. | Check carburetor settings. Inspect/replace spark plug. Verify fuel mixture. If flooded, remove spark plug, pull starter cord several times to clear cylinders, then reinstall plug and try again without priming. |
For issues beyond the primer bulb, consult your strimmer's main instruction manual or a qualified service technician.
8. Specifications
- Brand: Generic
- Model Number: nvduq2803-22252
- Compatibility: Powersmart 25.4cc 2-Stroke Gas String Strimmer (reference only)
- Material: High-quality, durable material (typically rubber/plastic)
- Features: High precision, low noise, high temperature-resistance
- Color: Black/white (as per product listing, actual part may vary slightly)
These specifications are provided for reference. Always compare the physical appearance and dimensions of this replacement part with your original component before purchase and installation.
9. Warranty and Support
As this is a Generic replacement part, specific warranty information may not be provided by the manufacturer. Please refer to the seller's return policy or contact the seller directly for any questions regarding product defects, returns, or support.
For technical assistance related to your Powersmart strimmer, please consult the original manufacturer's documentation or authorized service centers.