
PELONIS PSFW16R2AWW
PELONIS 9-inch Wall Mount Fan User Manual
Model: PSFW16R2AWW
Introduction
Thank you for purchasing the PELONIS 9-inch Wall Mount Fan. This manual provides important information regarding the safe operation, installation, maintenance, and troubleshooting of your new fan. Please read this manual thoroughly before use and retain it for future reference.
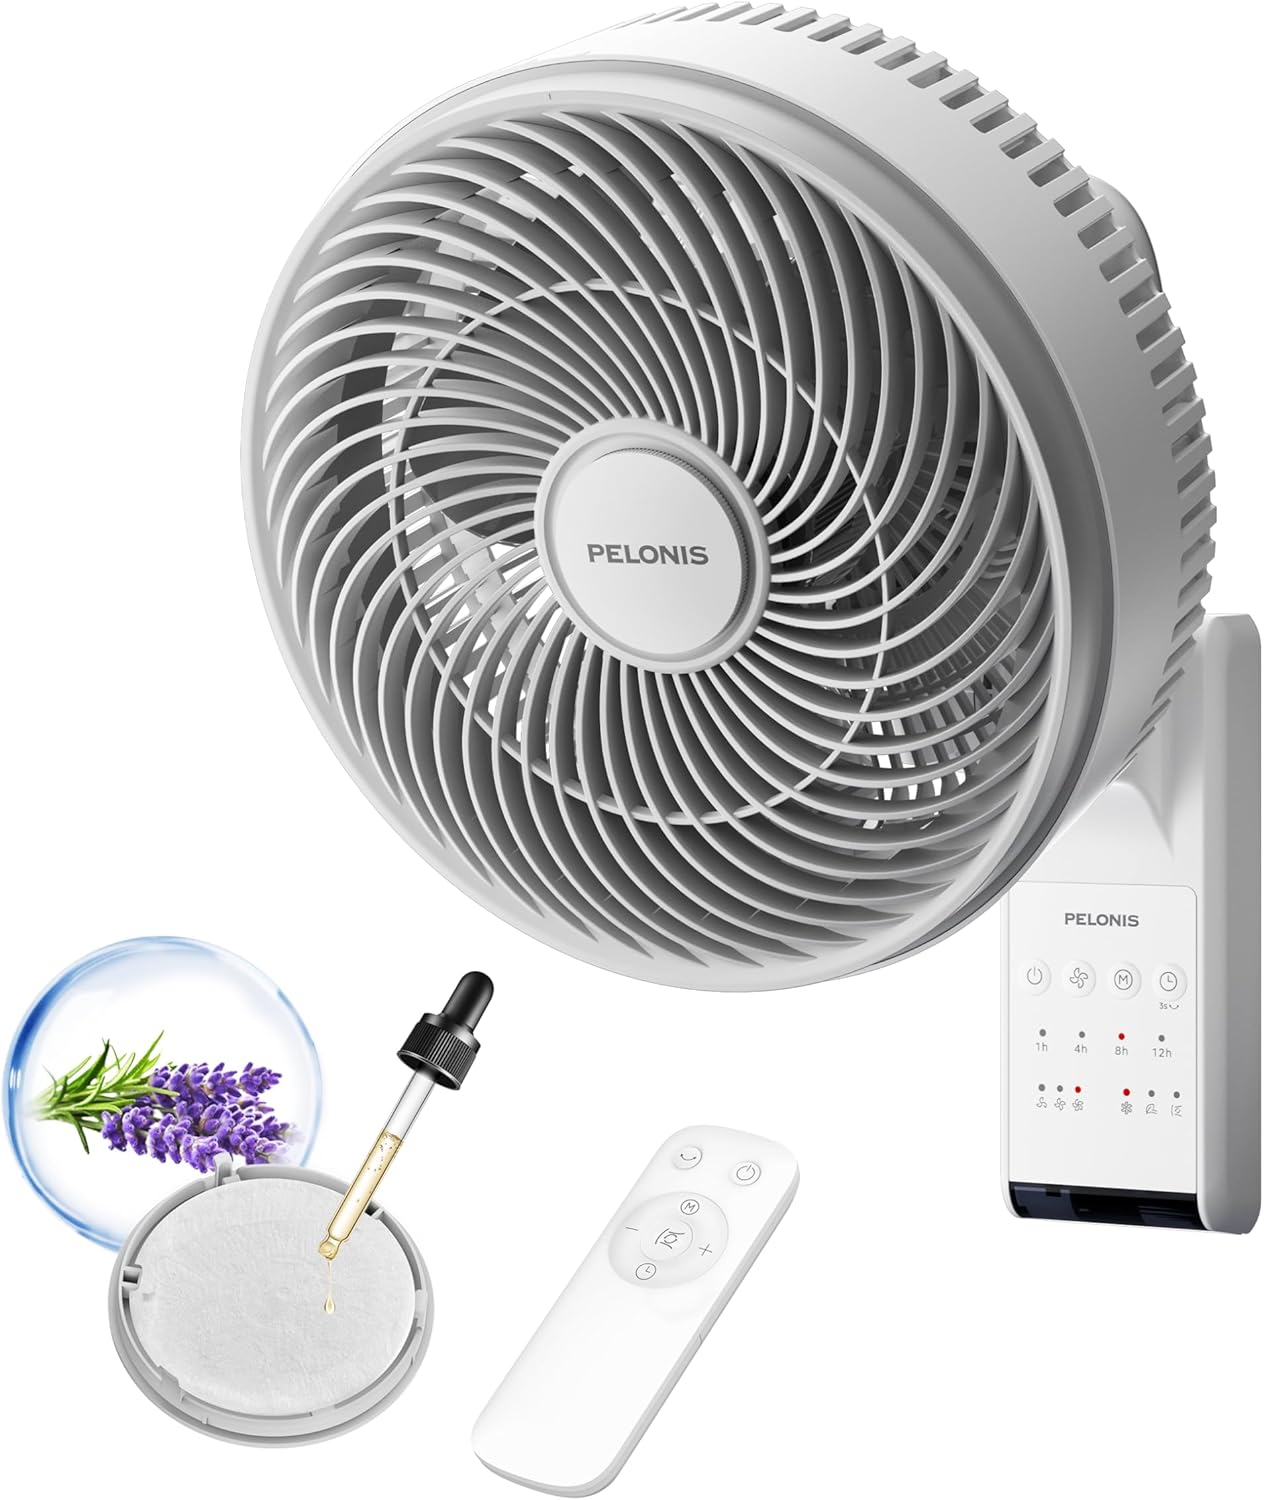
The PELONIS 9-inch Wall Mount Fan, shown with its remote control and an aroma pad for essential oils.
Safety Instructions
To reduce the risk of fire, electric shock, or injury, please observe the following safety precautions:
- Always unplug the fan before cleaning or performing any maintenance.
- Do not operate the fan with a damaged cord or plug.
- Keep the power cord away from heated surfaces.
- Do not use the fan in wet or damp locations, such as bathrooms.
- Ensure the fan is securely mounted to a wall stud or appropriate anchor before operation.
- Do not insert fingers or any objects into the grille when the fan is operating.
- This appliance is not intended for use by persons (including children) with reduced physical, sensory or mental capabilities, or lack of experience and knowledge, unless they have been given supervision or instruction concerning use of the appliance by a person responsible for their safety.
Package Contents
- PELONIS 9-inch Wall Mount Fan Unit
- Remote Control
- Wall Mounting Bracket
- Mounting Hardware (screws, anchors)
- User Manual
Product Overview
Familiarize yourself with the main components of your PELONIS wall mount fan:
- Fan Head: Contains the blades and grilles.
- Wall Mount Base: Secures the fan to the wall and houses the control panel.
- Remote Control: Allows convenient operation from a distance.
- Aroma Pad Container: Located at the center of the fan grille, designed for essential oils.
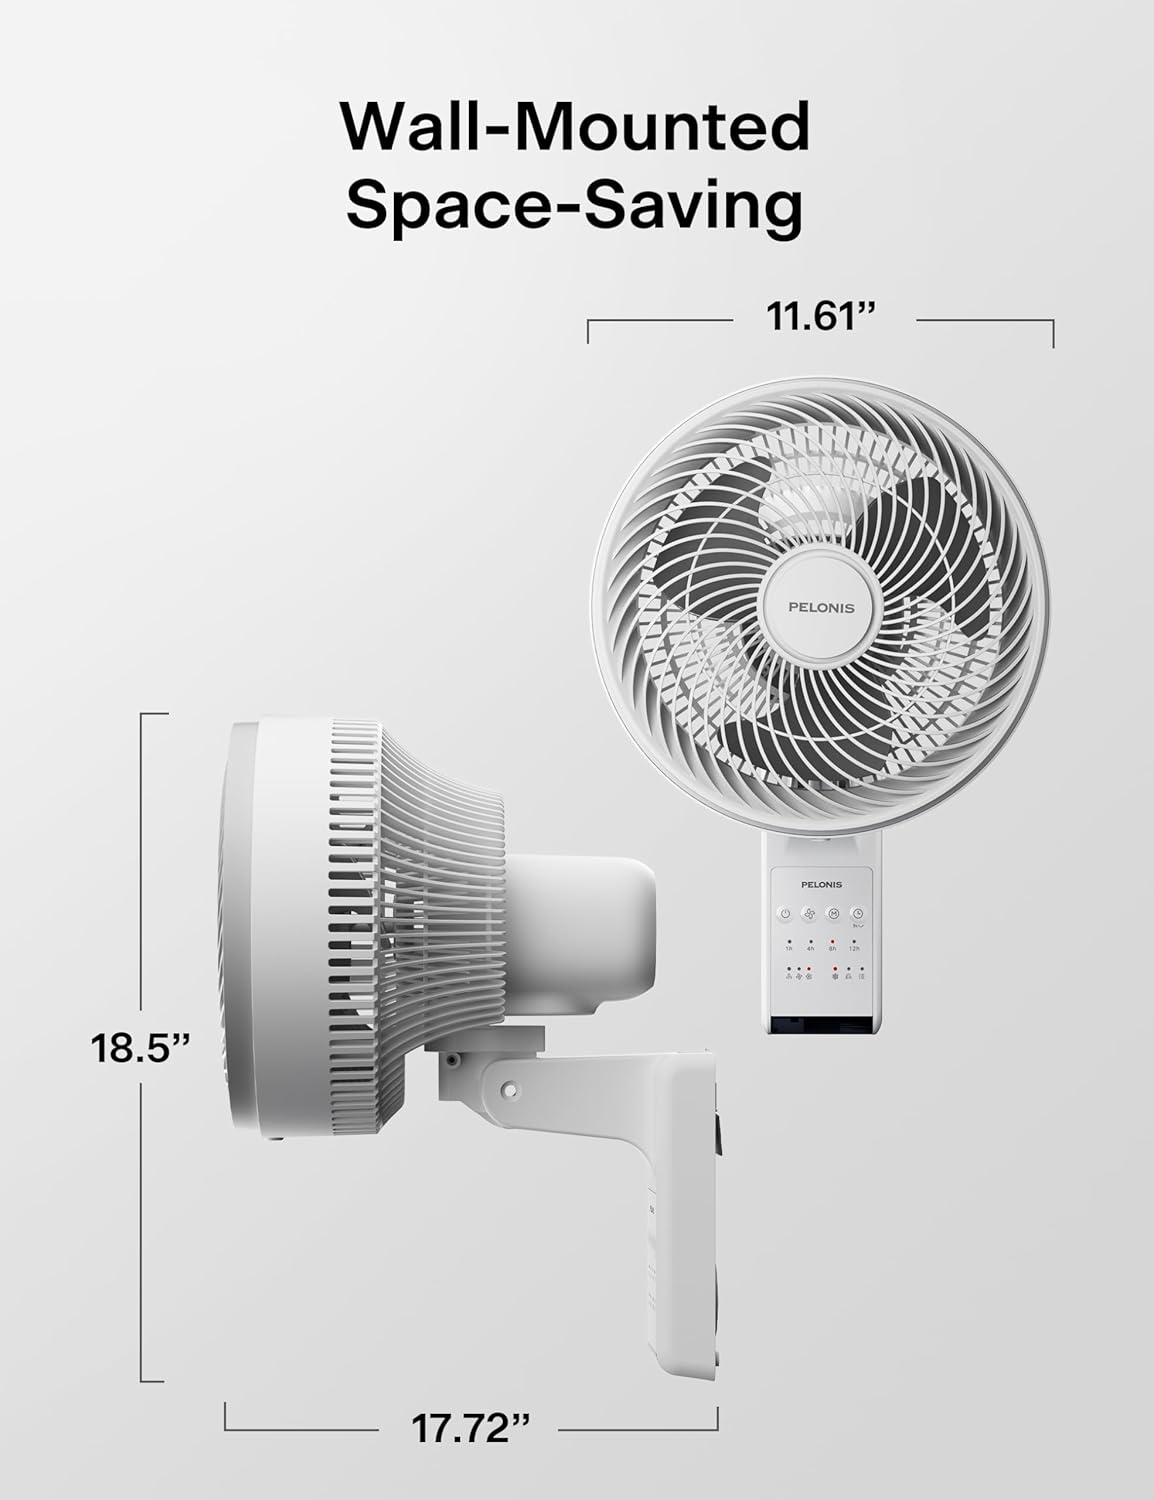
Dimensions of the PELONIS 9-inch Wall Mount Fan, illustrating its compact, space-saving design.
Setup and Installation
Follow these steps for proper assembly and wall mounting:
- Assemble the Fan Unit: If the fan head components (grille, blades) are separate, carefully assemble them according to the diagrams provided in the packaging. Ensure all parts are securely fastened.
- Mount the Wall Bracket: Choose a suitable location on a wall, preferably near a power outlet. Use the provided mounting hardware to securely attach the wall bracket to a wall stud. If a stud is not available, use appropriate wall anchors for drywall.
- Attach the Fan to the Bracket: Align the fan unit with the mounted wall bracket and slide it down until it clicks securely into place. Ensure the fan is stable and does not wobble.

Visual guide for the three-step installation process: assembling the fan, mounting the bracket, and attaching the fan.
Operating Instructions
Your PELONIS wall mount fan offers various settings for customized comfort. Use the control panel on the fan base or the remote control.
Power On/Off
- Press the Power button (
 ) to turn the fan on or off.
Speed Settings
The fan features 3 speed settings:
- Press the Speed button (
 ) repeatedly to cycle through Low, Medium, and High speeds.
Wind Modes
Select from 3 distinct wind modes:
- Press the Mode button (
 ) to switch between:
 - Normal: Consistent airflow.
- Slumberous: Gentle, quiet airflow for sleep.
- Natural: Simulates natural breeze with varying speeds.
Oscillation
Control the fan's movement for wider air distribution:
- Press the Oscillation button (
 ) for automatic 90° horizontal oscillation.
 - The vertical tilt can be adjusted manually up to 60°.

Illustration of the fan's automatic 90° horizontal oscillation and manual 60° vertical tilt capabilities.
Timer Function
Set the fan to automatically turn off after a set period:
- Press the Timer button (
 ) repeatedly to set the desired operating time up to 12 hours.
Aroma Pad Usage
Enhance your environment with essential oils:
- Locate the aroma pad container at the center of the front grille.
- Twist and remove the cover. Place a few drops of your preferred essential oil onto the felt pad.
- Replace the cover securely. The fan's airflow will diffuse the scent.
Maintenance
Regular cleaning ensures optimal performance and longevity of your fan.
Cleaning
- Always unplug the fan before cleaning.
- The front grille and fan blades can be easily removed for cleaning. Twist the front grille counter-clockwise to detach.
- Wipe the fan's exterior surfaces with a soft, damp cloth. Do not use abrasive cleaners or solvents.
- For thorough cleaning, the fan blades and grilles can be rinsed with water. Ensure all parts are completely dry before reassembling.

The fan's removable grille and blades can be easily cleaned with water for effortless maintenance.
Storage
- When not in use, store the fan in a cool, dry place.
- It is recommended to store the fan in its original packaging to protect it from dust and damage.
Troubleshooting
If your fan is not operating correctly, please refer to the following common issues and solutions:
| Problem | Possible Cause | Solution |
|---|---|---|
| Fan does not turn on. | No power supply. | Ensure the fan is plugged into a working electrical outlet. Check the circuit breaker. |
| Weak airflow. | Fan grilles are dusty or blocked. | Clean the fan grilles and blades as described in the Maintenance section. |
| Fan is noisy. | Loose parts or debris. | Unplug the fan and check for any loose parts or foreign objects within the grilles or around the blades. Ensure the fan is securely mounted. |
| Remote control not working. | Batteries are dead or incorrectly inserted. | Replace the batteries in the remote control. Ensure they are inserted with correct polarity. |
Specifications
| Feature | Description |
|---|---|
| Brand | PELONIS |
| Model Name | PSFW16R2AWW |
| Product Dimensions | 13.38"D x 11.65"W x 18"H |
| Item Weight | 8.18 pounds |
| Power Source | AC/DC |
| Voltage | 120 Volts |
| Wattage | 35 watts |
| Noise Level | 36 dB |
| Air Flow Capacity | 549 Cubic Feet Per Minute (CFM) |
| Wind Speed | 15 ft/s (approx. 16 Feet Per Second) |
| Airflow Range | Up to 33 feet |
| Speed Settings | 3 |
| Wind Modes | Normal, Slumberous, Natural |
| Horizontal Oscillation | Auto 90° |
| Vertical Tilt | Manual 60° |
| Timer | Up to 12 hours |
| Control Method | Touch, Remote Control |
| Indoor/Outdoor Usage | Indoor |
| Assembly Required | Yes |
| Color | White |
| Material | Plastic |
Warranty and Support
PELONIS products are designed for reliability and performance. For warranty information or technical support, please refer to the warranty card included with your product or visit the official PELONIS website. Do not attempt to repair the fan yourself, as this may void the warranty and pose safety risks.

PELONIS, a trusted brand with over 30 years of experience in home comfort products.
Related Documents - PSFW16R2AWW
 |
VEVOR Heavy Duty Carport KD-TPQC-007-13*26FT Installation Manual Comprehensive installation and safety guide for the VEVOR Heavy Duty Carport (Model: KD-TPQC-007-13*26FT). Learn how to assemble, anchor, and maintain your carport safely. |
 |
VEVOR Heavy Duty Carport (Model: KD-TPQC-007-13*26FT) User Manual Official user manual and assembly guide for the VEVOR Heavy Duty Carport, model KD-TPQC-007-13*26FT. Includes safety instructions, parts list, and step-by-step installation procedures for setting up your outdoor shelter. |
 |
Scag Tiger Cat II Operator's Manual: Operating, Maintenance, and Safety Guide Comprehensive operator's manual for Scag Tiger Cat II zero-turn mowers. Covers operating instructions, safety guidelines, maintenance procedures, specifications, and parts lists for models STCII-48V, STCII-52V, and STCII-61V. |
 |
13ft x 26ft Carport Assembly Guide: Step-by-Step Instructions Comprehensive assembly guide for the 13ft x 26ft carport. Includes safety precautions, part list, detailed step-by-step instructions, and cover installation tips. |
 |
Vanguard Models 26ft Launch Model Boat Kit - Assembly Instructions Detailed step-by-step assembly instructions for the Vanguard Models 26ft Launch scale model boat kit. Includes recommended tools, paints, and comprehensive building guidance. |
 |
ACON Big Airtracks User Manual: Setup, Inflation, Care & Support This user manual provides comprehensive instructions for ACON Big Airtracks. It covers essential information on setup, inflation and deflation using the electric pump, general care and maintenance, recommended usage temperatures, and weight capacity. Contact details for ACON customer support in Europe and the USA are also included. |
Ask a question about this manual
Ask about setup, troubleshooting, compatibility, parts, safety, or missing instructions. Manuals+ will review the question and use this page’s manual context to help answer it.