
Introduction
This manual provides comprehensive instructions for the safe and effective installation, operation, and maintenance of your Sprouterie Extra Tall Cat Gate. Designed for doorways, hallways, and stairs, this pressure-mounted gate offers a secure barrier for pets without requiring wall drilling. Please read all instructions carefully before assembly and use.
Important Safety Information
- Always ensure the gate is securely installed and tightened before use.
- Regularly check all components for wear, damage, or loose parts. Do not use if any part is damaged.
- This gate is designed for pets. While it offers a strong barrier, constant supervision is recommended.
- Do not allow pets to climb on or hang from the gate.
- Install away from heat sources, open flames, or electrical outlets.
- Keep small children away from the gate during installation to prevent injury from small parts.
Package Contents
Please verify that all components are present before beginning installation:

Figure 1: Package Contents. This image displays all the components of the Sprouterie Extra Tall Cat Gate, including upper and lower frames, rods with adjusters, joint rods, anti-slip sockets, extension parts, door lock rods, extension part lockers, door lock fixing parts, and adjusters.
- Upper Frame (2 pcs)
- Bottom Frame (2 pcs)
- Rod with Adjuster (3 pcs)
- Joint Rod (3 pcs)
- Anti-slip Socket (2 pcs)
- Extension Parts (2 pcs)
- Door Lock Rod (3 pcs)
- Extension Parts Locker (2 pcs)
- Door Lock Fixing Part (3 pcs)
- Adjuster (4 pcs)
Setup and Installation
The Sprouterie Extra Tall Cat Gate features a pressure-mount system for easy, drill-free installation. Follow these steps carefully:
1. Measure Your Opening
Before installation, measure the height and width of your doorway or opening to ensure proper fit. This gate is adjustable from 74.8" to 90.5" in height and 30.3" to 47.2" in width.

Figure 2: Measuring the Installation Area. Ensure your doorway or hallway fits within the gate's adjustable height (74.8"-90.5") and width (30.3"-47.2") before proceeding.
2. Assemble the Gate Panels
Connect the upper and lower frame sections using the joint rods. Ensure the spring-loaded steel pins lock into place for a secure connection.
Video 1: Cat Gate Installation Guide. This video demonstrates the step-by-step assembly process, including connecting frame sections and installing tension bolts.
- Insert the joint rod into the lower frame (just insert to bottom).
- Insert the rod with adjuster into the upper frame (insert the bottom first, then the top).
- Align the slots and connect the upper and lower frames.
- Insert the socket to the rod securely.
- Insert the bolt with the nut into the top of the adjuster rod.
3. Install Extension Panels (if needed)
If your opening is wider than the main gate, use the provided extension panels. These attach similarly to the main panels, expanding the gate's width. Ensure the gap between the extension part and the main panel is between 0.55in to 1.28in for optimal stability.

Figure 3: Different Installation for Different Widths. This diagram shows how to use extension panels to adapt the gate to various opening sizes, from 30.31"-31.88" to 42.52"-47.24".
4. Secure the Gate in Opening
Place the assembled gate vertically in your desired opening. Push up the toggle on the adjuster rod, extend the rod to the desired height, and then rotate the adjust nut counterclockwise to secure it tightly against the ceiling/door frame. Repeat for all adjusters.

Figure 4: Pressure-Mount Installation. This image illustrates the three steps for securing the gate: pushing up the toggle, extending the adjusting rod, and rotating the nut counterclockwise for a tight fit.
Video 2: Extra Tall Cat Gate Installation. This video provides a visual guide to the installation process, demonstrating how to assemble and secure the gate in a doorway.
Operating Instructions
1. Opening and Closing the Gate
The gate features a convenient two-way opening mechanism. To open, simply lift the latch and push the gate in either direction. The auto-close function ensures the gate securely closes behind you when released, preventing accidental openings.

Figure 5: Auto-Close and Stay-Open Feature. The gate automatically closes when released (less than 90 degrees) and stays open when pushed to 90 degrees.
2. Double Lock Mechanism
For enhanced security, the gate is equipped with a double lock design. Ensure both locking mechanisms are engaged to prevent pets from opening the gate. The locks are designed for one-handed operation for adult convenience.
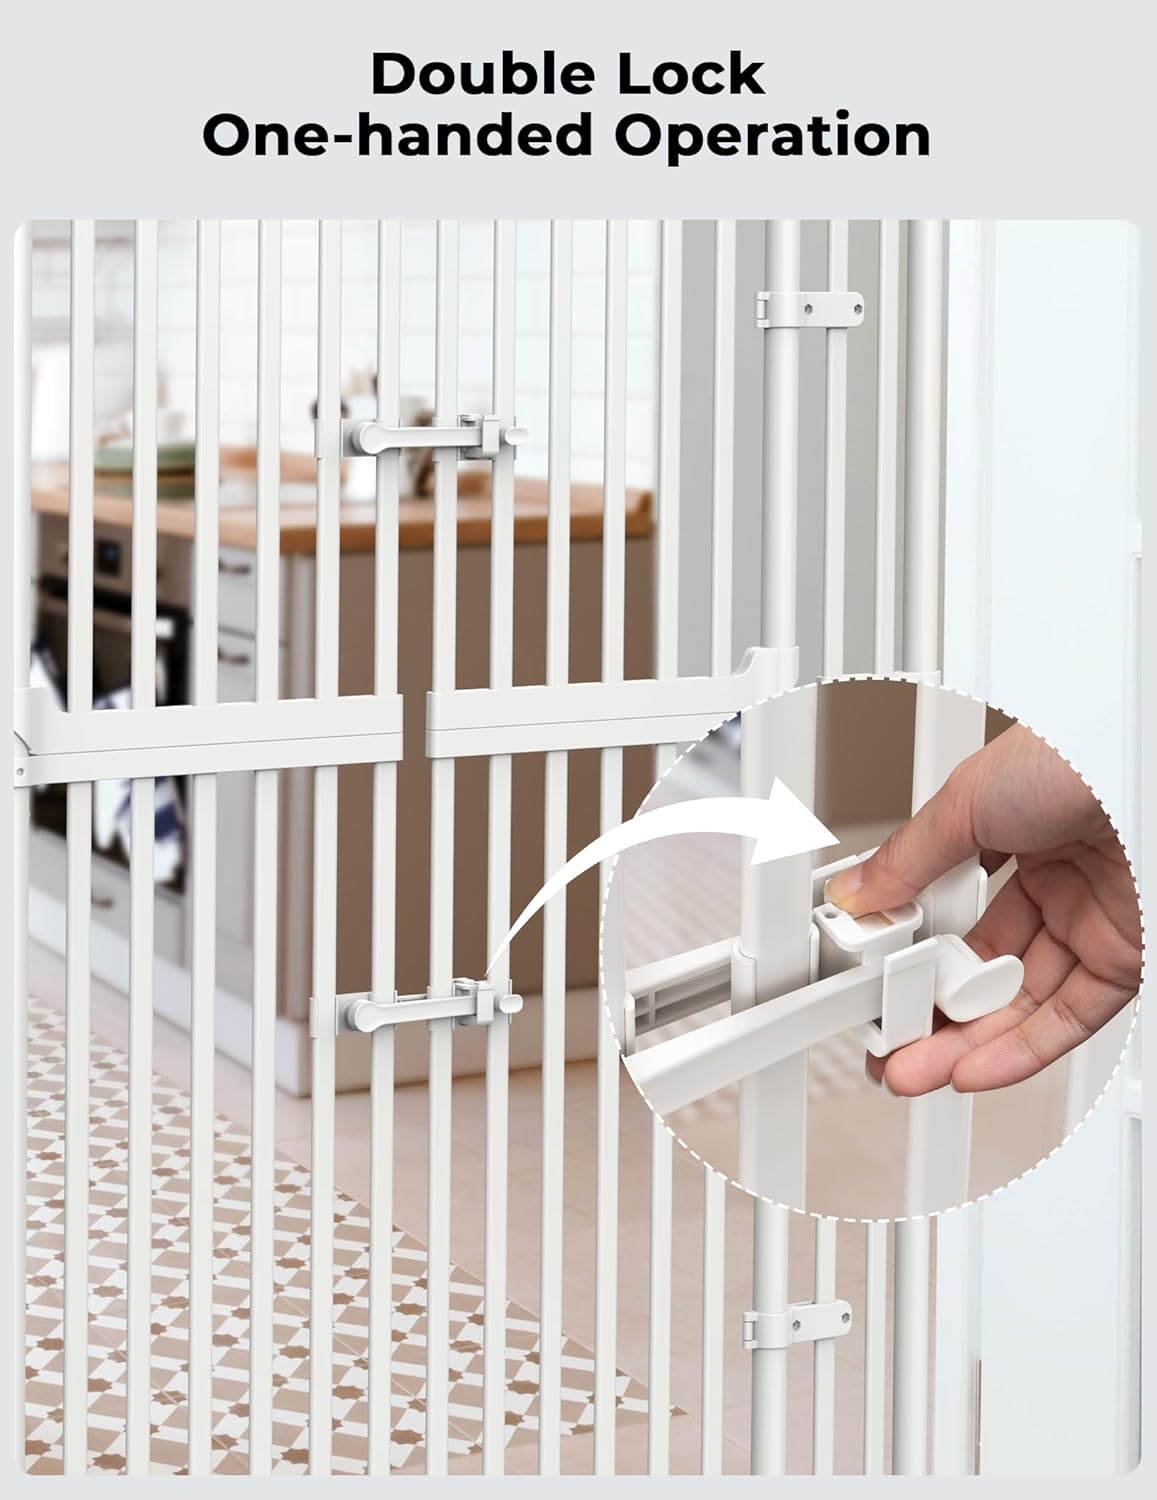
Figure 6: Double Lock, One-handed Operation. This image highlights the double lock feature, designed for secure containment while allowing adults easy, one-handed access.

Figure 7: Triple Locks Design. This diagram illustrates the secure locking mechanism, showing the steps to lock and open the gate for pets and babies.
Maintenance
- Clean the gate regularly with a damp cloth and mild soap. Avoid abrasive cleaners.
- Periodically check the tension of the pressure mounts and tighten if necessary to maintain stability.
- Inspect the locking mechanisms and hinges for smooth operation and any signs of wear.
Troubleshooting
| Problem | Possible Cause | Solution |
|---|---|---|
| Gate feels loose or unstable. | Pressure mounts are not tight enough. | Retighten the adjusters by rotating the nuts counterclockwise until secure. |
| Gate does not close automatically. | Gate is installed at an angle or hinges are obstructed. | Ensure the gate is installed perfectly vertical and clear any obstructions around the hinges. |
| Pets are squeezing through the bars. | Incorrect gate size or improper installation. | Verify the narrow 1.34" gap is maintained. Re-measure your opening and ensure the correct extension panels are used. |
Specifications
- Brand: Sprouterie
- Model Number: SP006-W
- Material: Plastic
- Color: White
- Adjustable Height: 74.8" - 90.5"
- Adjustable Width: 30.3" - 47.2"
- Mounting Type: Pressure Mount
- Bar Spacing: 1.34" (narrow gap)
- Closure Type: Auto-Close
- Target Species: Cat, Dog
Warranty and Support
Warranty information for this product is not explicitly specified in the provided details. For any support inquiries, please refer to the contact information provided with your product packaging or visit the official Sprouterie website.
