
1. Introduction
This instruction manual provides essential information for the safe and correct assembly, operation, and maintenance of your DWVO 8x4 FT Outdoor Weatherproof Storage Shed. Please read this manual thoroughly before beginning assembly or use, and retain it for future reference.
1.1 Safety Warnings
WARNING: Safety warnings are included with the product. Always adhere to all provided safety guidelines to prevent injury or damage. Ensure the assembly area is clear and stable. Wear appropriate personal protective equipment, such as gloves, during assembly.
2. Product Overview
The DWVO 8x4 FT Outdoor Weatherproof Storage Shed is designed for secure outdoor storage of garden tools, bicycles, lawnmowers, and other equipment. It features a robust construction and thoughtful design elements for durability and functionality.
2.1 Key Features
- Dual-Door Access & Security: Equipped with a double-door layout for easy entry and exit, accommodating large items. A robust locking mechanism enhances security.
- Generous Storage Capacity: Provides ample space for various outdoor items.
- Enhanced Materials: Constructed from galvanized steel for corrosion resistance and stability against wind. Anti-collision rubber pads are included for safety.
- Innovative Roof & Ventilation: Features a sloped roof to prevent water and snow accumulation, and two top ventilation openings for improved air circulation.
2.2 Components
Before assembly, verify that all components listed in the packing list are present and undamaged. Refer to the parts diagram provided in your product packaging for identification.

Figure 1: Exploded view of shed components. Ensure all parts are accounted for before starting assembly.
3. Setup and Assembly
Assembly of the DWVO storage shed requires careful attention to detail. It is highly recommended that two people perform the assembly to ensure stability and correct alignment.
3.1 Tools Required
- Work gloves (provided, but consider thicker alternatives for better protection)
- Cordless drill with low torque setting
- Magnetic tip screwdriver bits
- Measuring tape
- Level
- Step ladder (optional, for roof assembly)
3.2 Site Preparation
- Select a flat, level surface for the shed. An uneven base can lead to misalignment of panels and doors.
- Clear the area of any debris, rocks, or vegetation.
- Consider laying a foundation (e.g., concrete slab, wooden deck) for optimal stability and longevity.
3.3 Assembly Steps
Follow the step-by-step instructions provided in your product packaging. Pay close attention to diagrams and part numbers.
- Unpack and Inspect: Carefully unpack all components. Remove all protective plastic film from each panel before assembly. Verify all parts against the packing list. If any parts are missing or damaged, contact customer support immediately.
- Base Frame Assembly: Assemble the base frame according to the instructions. Ensure it is square and level.
- Wall Panel Installation: Attach the wall panels to the base frame. Ensure panels are correctly oriented and aligned. Note: Some users have reported issues with pre-drilled holes not aligning. If this occurs, carefully re-check panel orientation. If necessary, minor adjustments or drilling new pilot holes may be required, but proceed with caution to avoid damaging the material.
- Roof Frame Assembly: Assemble the roof frame. Important: Some instructions may incorrectly guide the installation of the front top frame. Ensure the frame is oriented so that the doors will latch correctly once installed. Test door alignment before fully securing the roof.
- Roof Panel Installation: Attach the roof panels. The sloped design helps prevent water and snow buildup.
- Door Installation: Install the double doors. Ensure they open and close smoothly and the locking mechanism functions correctly. Adjust hinges if necessary for proper alignment.
- Ventilation and Finishing: Install the top ventilation openings and any remaining trim or safety features, such as anti-collision rubber pads.

Figure 2: Partial assembly of the shed, illustrating the installation of wall and roof panels.

Figure 3: The assembled DWVO storage shed with doors open, showcasing its interior capacity.
4. Operation
4.1 Opening and Closing Doors
The shed features dual hinged doors. To open, unlatch the locking mechanism and pull the doors outwards. To close, push the doors inward until they meet, then engage the locking mechanism.
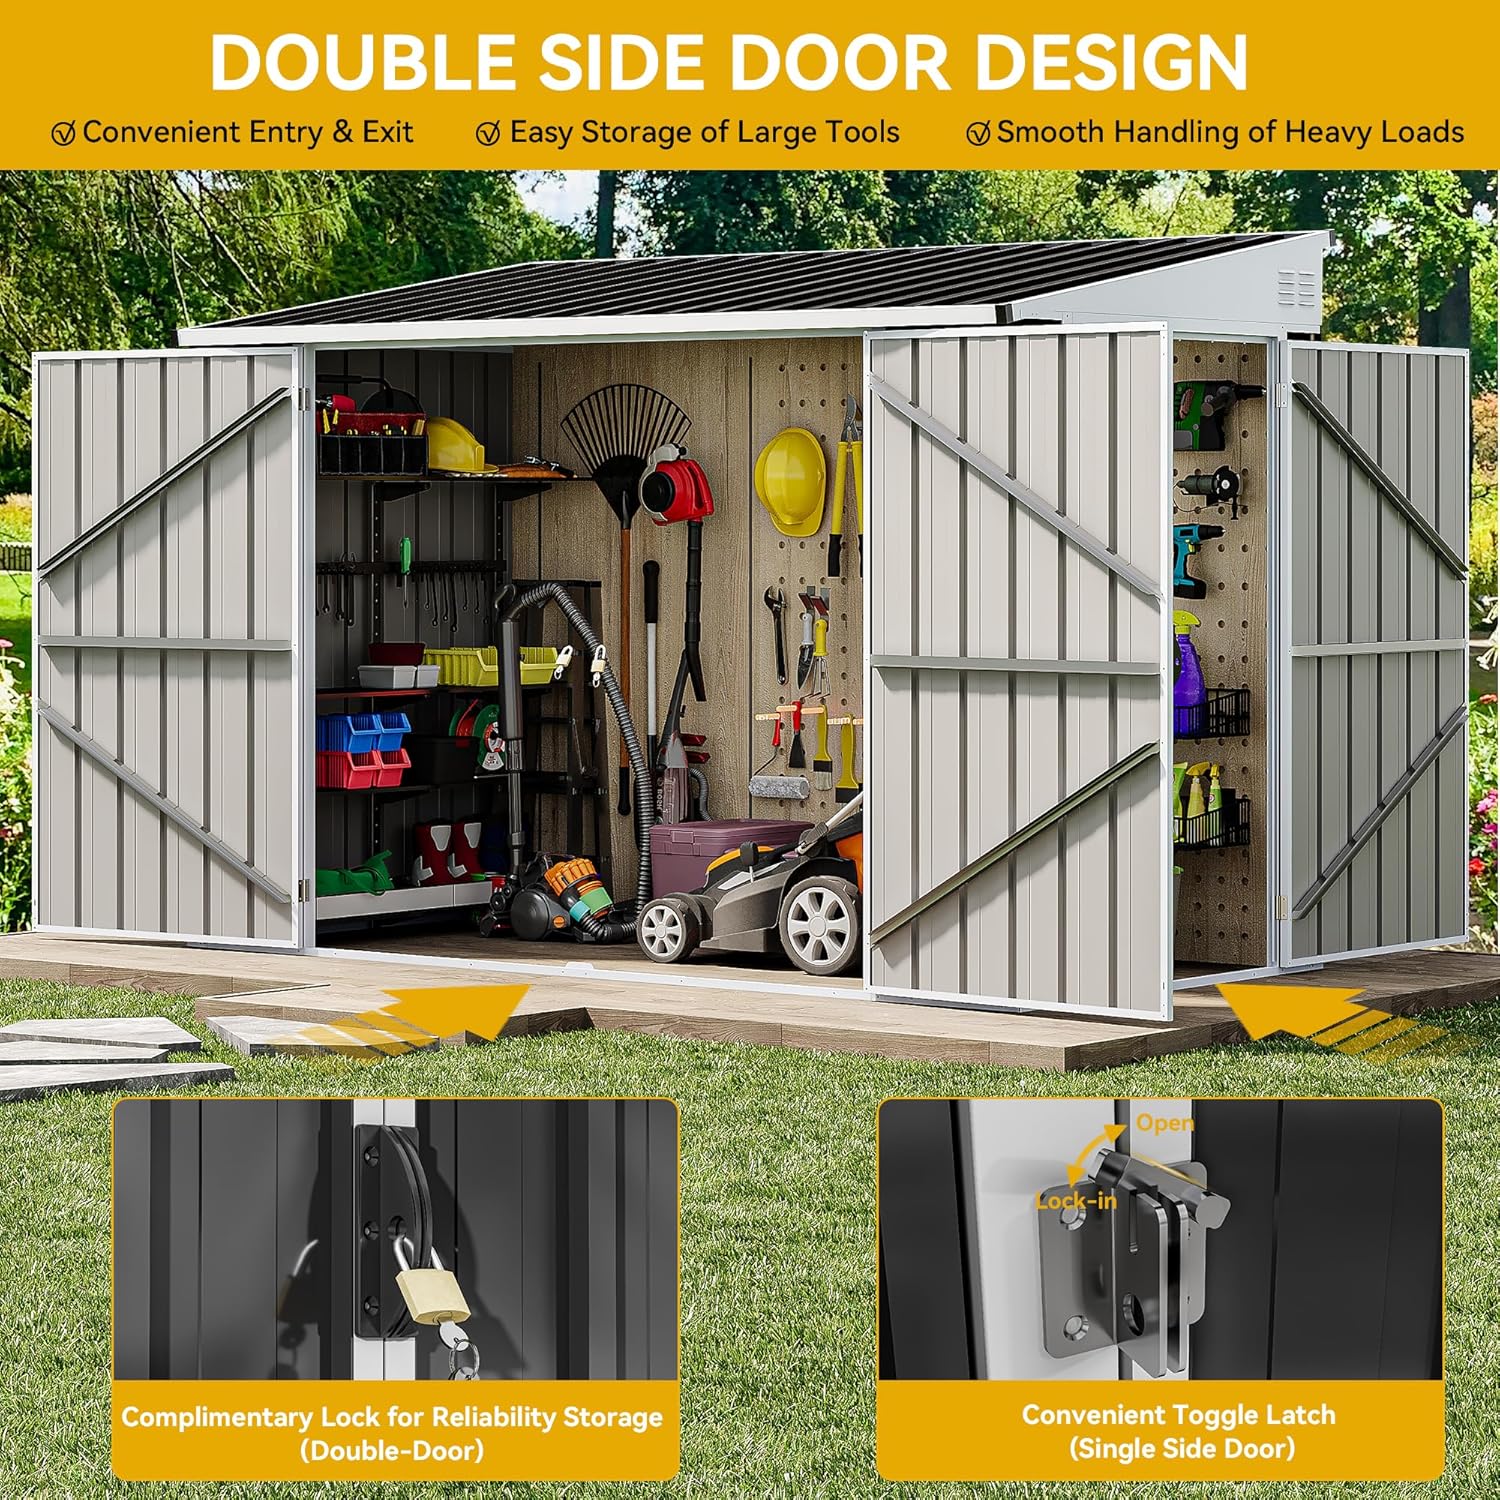
Figure 4: Detail of the double door design and the integrated locking mechanism for secure storage.
4.2 Securing the Shed
Utilize the provided locking mechanism to secure the shed. For enhanced security, an additional padlock (not included) can be used with the integrated hasp.
5. Maintenance
Regular maintenance will ensure the longevity and optimal performance of your DWVO storage shed.
5.1 Cleaning
- Clean the exterior surfaces periodically with mild soap and water. Avoid abrasive cleaners or harsh chemicals that could damage the galvanized steel finish.
- Rinse thoroughly with clean water and allow to air dry.
- Clear any debris from the roof and around the base to prevent water accumulation and ensure proper drainage.
5.2 Inspection
- Periodically inspect all screws, bolts, and fasteners to ensure they are tight. Re-tighten as necessary.
- Check door hinges and latches for smooth operation. Lubricate with a silicone-based spray if they become stiff.
- Examine the galvanized steel panels for any signs of damage or corrosion. Address minor scratches with appropriate touch-up paint to prevent rust.
6. Troubleshooting
This section addresses common issues you might encounter with your storage shed.
6.1 Misaligned Panels or Doors
- Issue: Panels do not align, or pre-drilled holes do not match up.
- Solution:
- Ensure the shed's base is perfectly level. An uneven foundation is a primary cause of misalignment.
- Double-check the orientation of all panels against the assembly diagrams. It is easy to install a panel incorrectly.
- Loosen adjacent fasteners, adjust the panel into position, and then re-tighten. For significant misalignment, partial disassembly and reassembly may be required.
- If holes are slightly off, carefully use a drill to widen pilot holes slightly, but avoid creating large, unstable openings.
6.2 Doors Do Not Latch or Close Properly
- Issue: Doors are stiff, do not close completely, or the latch mechanism does not engage.
- Solution:
- Verify the shed is level. An unlevel shed can cause the door frame to twist.
- Inspect door hinges for proper installation and tightness. Adjust if necessary.
- Check the door frame for any bending or obstruction.
- Ensure the front top frame (above the doors) was installed in the correct orientation during assembly. Incorrect installation can prevent proper latching.
6.3 Missing or Damaged Parts
- Issue: Components are missing from the package or arrived damaged.
- Solution:
- Immediately contact DWVO customer support with your purchase details and a list of the missing/damaged parts. Do not attempt to force assembly with incorrect or damaged parts.
7. Specifications
| Attribute | Detail |
|---|---|
| Brand | DWVO |
| Model Number | MADWVCZfeV |
| Color | Dark Gray |
| Material | Alloy Steel (Galvanized) |
| Product Dimensions (D x W x H) | 45.7"D x 90.5"W x 63.4"H (116cm D x 230cm W x 161cm H) |
| Item Weight | 122.6 pounds |
| Water Resistance Level | Waterproof |
| Door Style | Double Hinged Doors |
| Assembly Required | Yes |

Figure 5: Detailed dimensions and capacity information for the storage shed.
8. Warranty and Support
8.1 Warranty Information
Specific warranty details are typically provided with your purchase documentation. Please refer to the warranty card or contact DWVO customer support for information regarding warranty coverage and terms.
8.2 Customer Support
For assistance with assembly, missing parts, troubleshooting, or any other inquiries, please contact DWVO customer support. Refer to your purchase receipt or the product packaging for contact information, or visit the official DWVO website.
You can also find general support information on the DWVO Store on Amazon.