1. Introduction
Thank you for choosing the HYCHIKA Mattress Vacuum Cleaner. This manual provides essential information for the safe and effective operation, maintenance, and troubleshooting of your device. Please read it thoroughly before first use and keep it for future reference.
2. Safety Instructions
- Always ensure the power supply matches the voltage specified on the appliance.
- Do not operate the vacuum cleaner with a damaged cord or plug.
- Keep the appliance away from water or other liquids. Do not immerse.
- This appliance is for household use only. Do not use it for commercial or industrial purposes.
- Do not vacuum flammable or combustible materials, hot ashes, or sharp objects.
- Keep hair, loose clothing, fingers, and all parts of the body away from openings and moving parts.
- Unplug the appliance from the power outlet before cleaning or performing maintenance.
- The UV-C light should not be exposed to skin or eyes. The safety mechanism ensures the UV light only activates when the vacuum is in contact with a surface.
3. Product Overview
Familiarize yourself with the components of your HYCHIKA Mattress Vacuum Cleaner.

Image 3.1: Overview of the HYCHIKA Mattress Vacuum Cleaner. This image displays the main unit, including the handle with control buttons, the transparent dual dust collection cups, and the wide suction nozzle with integrated features.
- Handle: Ergonomic grip for comfortable operation.
- Power Button: To turn the vacuum on or off.
- Mode Selection Button: To switch between different cleaning modes (e.g., suction, hot air, UV-C).
- Dual Dust Cups: Transparent containers for collecting dust and debris, designed for efficient separation.
- HEPA Filter: Located within the dust cup, filters fine particles.
- Suction Nozzle: Wide base for covering larger areas, equipped with beating pads.
- UV-C Light: Integrated into the base for sterilization, activates upon contact with surface.
- Hot Air Outlet: Emits heated air for drying and dehumidification.
- Power Cord: Provides continuous power during operation.
4. Setup
- Unpack: Carefully remove all components from the packaging.
- Inspect: Check the vacuum cleaner for any signs of damage. Do not use if damaged.
- Assemble (if necessary): Ensure the dust cups and filters are correctly installed. Refer to the 'Maintenance' section for filter installation details.
- Connect Power: Plug the power cord into a suitable electrical outlet.
5. Operating Instructions
The HYCHIKA Mattress Vacuum Cleaner offers multiple functions for thorough cleaning.
5.1 Powering On/Off
- Press the Power Button once to turn the vacuum cleaner on.
- Press the Power Button again to turn the vacuum cleaner off.
5.2 Using Strong Suction and High-Frequency Beating
The vacuum cleaner features 16kPa strong suction combined with high-frequency beating (36,000 beats/minute) to dislodge and remove deeply embedded dust and allergens.

Image 5.1: Depiction of the vacuum's strong suction and high-frequency beating mechanism penetrating deep into mattress layers to extract dust and particles.
- Ensure the vacuum is powered on.
- Place the suction nozzle firmly against the surface to be cleaned (e.g., mattress, sofa).
- Move the vacuum slowly and steadily across the surface to allow the beating function to effectively dislodge particles and the suction to collect them.
5.3 Activating 140°F Hot Air
The hot air function helps to dry and dehumidify surfaces, contributing to a cleaner environment.

Image 5.2: Visual representation of the vacuum emitting 140°F hot air, indicating its drying and dehumidification capabilities on a mattress surface.
- With the vacuum powered on, press the Mode Selection Button until the hot air indicator light illuminates (if applicable).
- Move the vacuum over the desired area to apply hot air.
5.4 Utilizing Ultrasonic Technology
The integrated ultrasonic technology assists in creating an environment less favorable for allergens.

Image 5.3: Diagram showing ultrasonic waves emanating from the vacuum's base, penetrating the mattress to aid in allergen control.
- The ultrasonic function operates automatically when the vacuum is in use. No specific button press is required for this feature.
5.5 Activating 273nm UV-C Light
The UV-C light provides an additional layer of cleaning by targeting microorganisms. For safety, the UV-C light only activates when the vacuum is pressed against a surface.
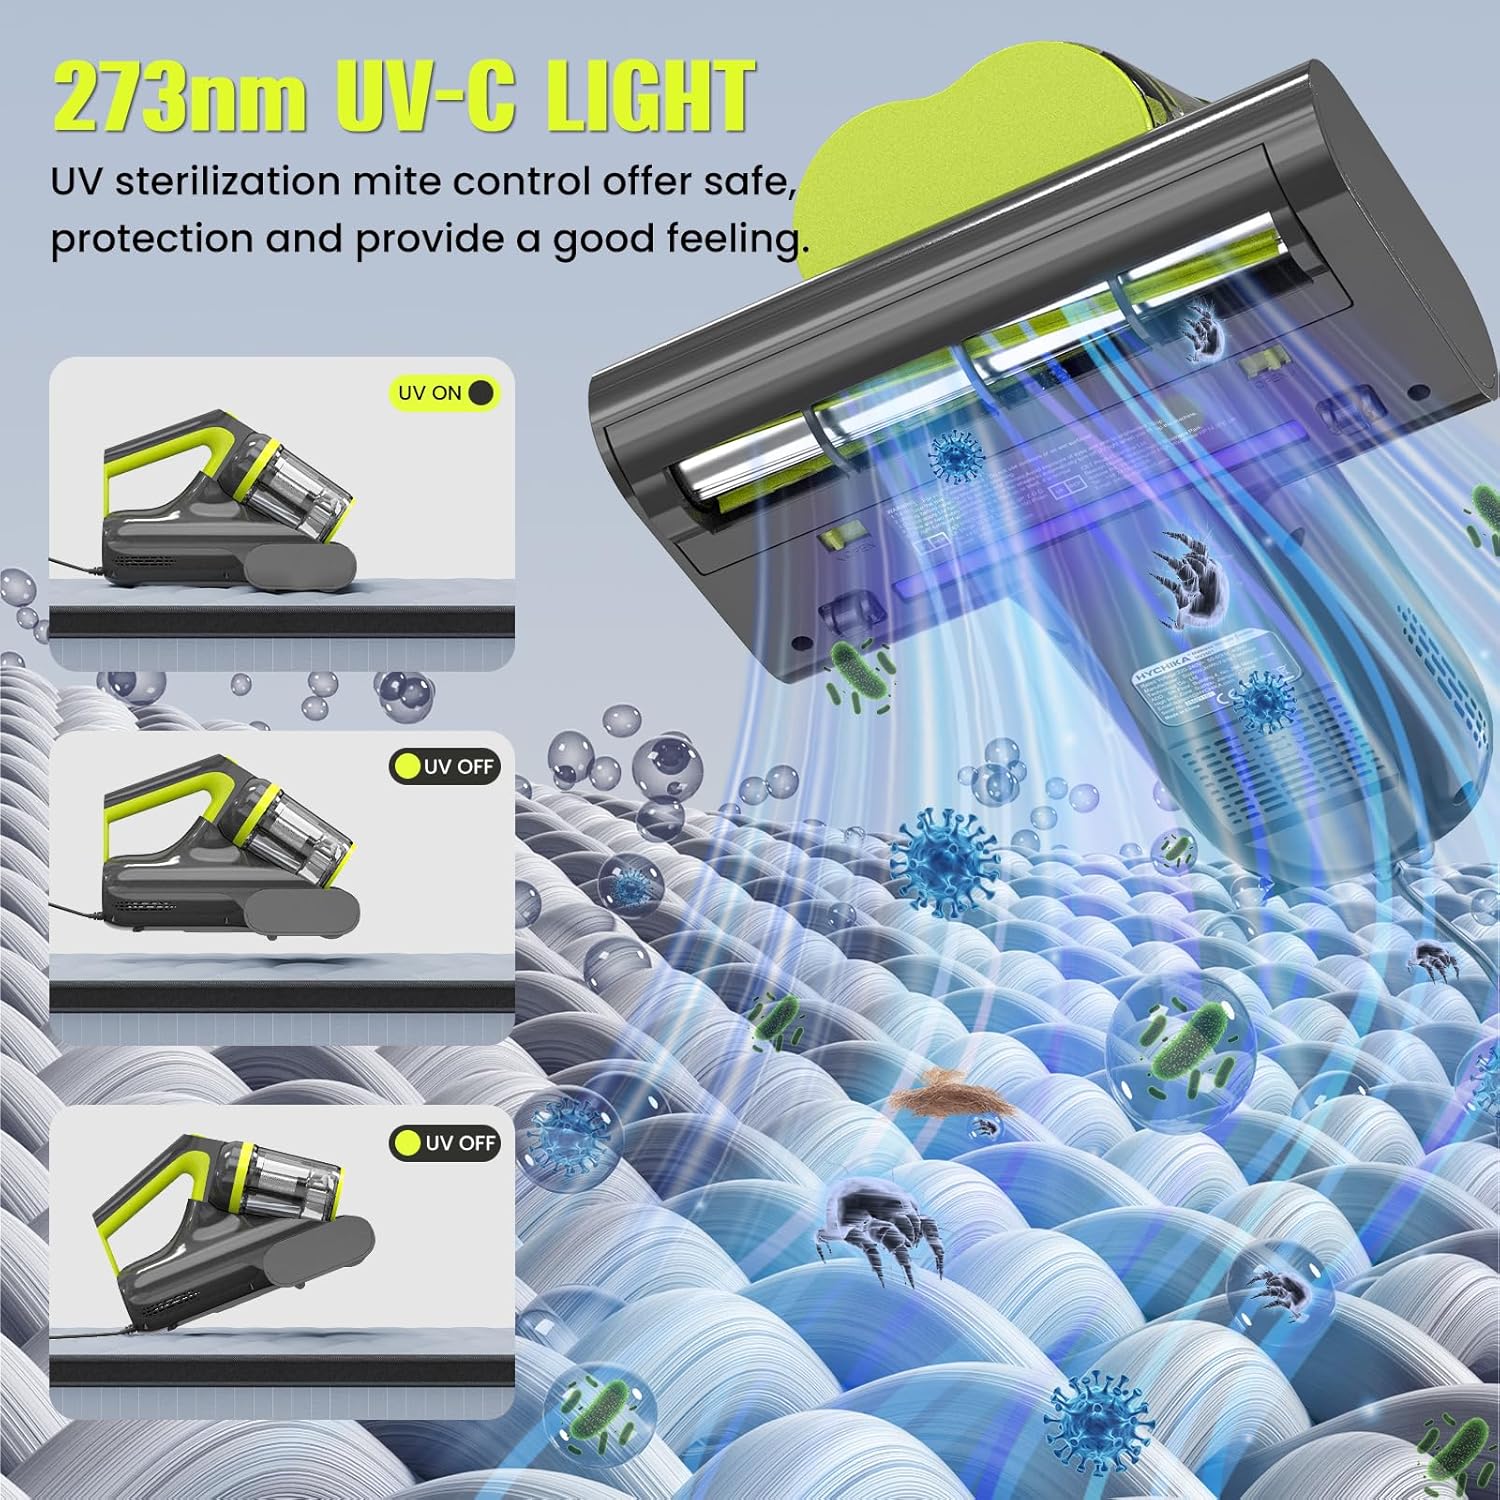
Image 5.4: This image illustrates the safety mechanism of the 273nm UV-C light, showing it is active when the vacuum is pressed against a surface and automatically turns off when lifted.
- Ensure the vacuum is powered on.
- Press the Mode Selection Button to activate the UV-C light function.
- Place the vacuum firmly on the surface. The UV-C light will automatically turn on.
- Lift the vacuum from the surface, and the UV-C light will automatically turn off as a safety measure.
6. Maintenance
Regular maintenance ensures optimal performance and extends the lifespan of your vacuum cleaner.
6.1 Emptying and Cleaning the Dual Dust Cups
The vacuum features a dual-cup design for efficient dust separation and collection.

Image 6.1: This image highlights the vacuum's dual dust cup design, which separates dust for improved filtration and prevents blockages.

Image 6.2: A visual guide demonstrating how to empty collected dust into a bin and how to wash the removable dust cup and HEPA filter under running water.
- Disconnect Power: Always unplug the vacuum cleaner before performing any maintenance.
- Remove Dust Cups: Locate the release button or latch for the dust cup assembly and detach it from the main unit.
- Empty Contents: Open the dust cups and empty the collected debris into a waste bin.
- Clean Filters: Remove the HEPA filter and any pre-filters. Tap them gently to remove loose dust.
- Wash Components: Rinse the dust cups and filters under cool, running water until clean. Do not use hot water or harsh detergents.
- Dry Thoroughly: Allow all washed components to air dry completely for at least 24 hours before reassembling. Ensure they are absolutely dry to prevent mold growth and damage to the motor.
- Reassemble: Once dry, reinsert the filters into the dust cups and attach the dust cup assembly back onto the vacuum cleaner, ensuring it clicks securely into place.
6.2 General Cleaning
- Wipe the exterior of the vacuum cleaner with a soft, damp cloth. Do not use abrasive cleaners or solvents.
- Periodically check the suction nozzle for any blockages and remove them carefully.
7. Troubleshooting
If you encounter issues with your vacuum cleaner, refer to the following table for common problems and solutions.
| Problem | Possible Cause | Solution |
|---|---|---|
| Vacuum does not turn on | No power supply; Power cord not plugged in; Power button not pressed. | Check power outlet; Ensure cord is securely plugged in; Press the power button firmly. |
| Weak suction | Dust cup full; Filter clogged; Nozzle blocked. | Empty dust cup; Clean or replace filter; Clear any blockages from the nozzle. |
| UV-C light not working | Vacuum not in contact with surface; UV-C function not activated. | Ensure the vacuum is pressed firmly against the surface; Activate UV-C mode using the mode selection button. |
| Unusual noise | Blockage in nozzle or hose; Motor issue. | Check for and remove any blockages; If noise persists, discontinue use and contact support. |
8. Specifications
- Model: B0F3CK5TDN
- Power: 400W
- Suction Power: 15-16 kPa
- UV-C Wavelength: 273-275 nm
- Hot Air Temperature: Approximately 140°F (60°C)
- Cord Length: 197 inches (approximately 5 meters)
- Filtration: HEPA Filter
- Features: High-frequency beating, Ultrasonic technology, Dual Dust Cups
9. Warranty and Support
For warranty information or technical support, please refer to the contact details provided with your purchase or visit the official HYCHIKA website. Keep your proof of purchase for warranty claims.


