
Ajgvq ZCM-02
Ajgvq 1000W Commercial Cotton Candy Machine ZCM-02 User Manual
Model: ZCM-02
1. Introduction
Thank you for choosing the Ajgvq 1000W Commercial Cotton Candy Machine. This manual provides essential information for the safe and efficient operation, maintenance, and troubleshooting of your new cotton candy maker. Please read these instructions thoroughly before first use and retain them for future reference.

Image 1.1: The Ajgvq Commercial Cotton Candy Machine in use, bringing joy to children.
2. Safety Instructions
WARNING: To reduce the risk of fire, electric shock, or injury, always follow these basic safety precautions.
- Read all instructions before operating the appliance.
- Do not touch hot surfaces. Use handles or knobs.
- To protect against electrical hazards, do not immerse cord, plugs, or the appliance in water or other liquid.
- Close supervision is necessary when any appliance is used by or near children.
- Unplug from outlet when not in use and before cleaning. Allow to cool before putting on or taking off parts.
- Do not operate any appliance with a damaged cord or plug, or after the appliance malfunctions or has been damaged in any manner.
- The use of accessory attachments not recommended by the appliance manufacturer may cause injuries.
- Do not use outdoors.
- Do not let cord hang over edge of table or counter, or touch hot surfaces.
- Do not place on or near a hot gas or electric burner, or in a heated oven.
- Extreme caution must be used when moving an appliance containing hot oil or other hot liquids.
- Always attach plug to appliance first, then plug cord into the wall outlet. To disconnect, turn any control to “off”, then remove plug from wall outlet.
- Do not use appliance for other than intended use.
- Ensure the machine is placed on a stable, level surface during operation.
- Keep hands and foreign objects away from the spinning head during operation.
3. Package Contents
Carefully unpack all items and ensure you have received the following components:
- 1 x Cotton Candy Machine (Main Unit)
- 1 x Stainless Steel Bowl
- 1 x Bowl Cover
- 1 x Sugar Scoop
- 1 x Extra Fuse
- 1 x User Manual (this document)

Image 3.1: All components included in the package.
4. Product Overview
Familiarize yourself with the main parts and controls of your cotton candy machine.

Image 4.1: Control Panel Details.
- Voltmeter: Displays the current voltage.
- Fuse: Safety feature to protect against electrical overload. An extra fuse is provided.
- Temperature Control Knob: Adjusts the heating temperature. Turn clockwise to increase temperature.
- ON/OFF Switch: Powers the machine on or off.
- Stainless Steel Bowl: The large bowl where cotton candy is collected. Detachable for cleaning.
- Spinning Head: Located in the center of the bowl, this heats and spins the sugar into floss.
- Locking Clips: Secure the stainless steel bowl to the main unit.
- Heat Dissipation Windows: Vents on the side of the machine to prevent overheating.
- Rubber Feet: Non-slip feet on the bottom for stability.

Image 4.2: Key structural features for stability and safety.
5. Setup
Follow these steps to set up your cotton candy machine before first use:
- Placement: Place the machine on a stable, level, and heat-resistant surface. Ensure there is adequate ventilation around the unit.
- Attach Bowl: Carefully place the stainless steel bowl onto the main unit. Secure it using the two locking clips on the sides. Ensure the bowl is firmly attached and does not wobble.
- Power Connection: Ensure the ON/OFF switch is in the 'OFF' position. Plug the power cord into a grounded electrical outlet.
6. Operating Instructions
Making delicious cotton candy is a simple process with your Ajgvq machine.

Image 6.1: Step-by-step guide to making cotton candy.
- Turn On: Flip the ON/OFF switch to the 'ON' position. The voltmeter will illuminate.
- Preheat: Turn the Temperature Control Knob to the 'Max' setting. Allow the machine to preheat for 3-4 minutes. This ensures the spinning head reaches the optimal temperature for melting sugar.
- Add Sugar: Once preheated, use the provided sugar scoop to add one scoop of sugar directly into the center spinning head. Do not overfill. You can use regular granulated sugar, floss sugar, or crushed hard candies.
- Collect Cotton Candy: Within approximately 10 seconds, fine sugar strands will begin to emerge from the spinning head. Take a cotton candy stick (not included) and hold it horizontally above the spinning head. Rotate the stick to collect the cotton candy floss as it forms.
- Adjust Temperature (Optional): You can adjust the temperature knob to control the speed of cotton candy production. Higher temperatures generally produce cotton candy faster.
- Repeat: To make more cotton candy, simply add another scoop of sugar to the spinning head and repeat step 4.
Tips for Best Results:
- Ensure the sugar is dry. Moisture can affect the quality of the cotton candy.
- For flavored cotton candy, use floss sugar specifically designed for cotton candy machines.
- Keep the area around the machine clear to prevent sugar strands from sticking to unwanted surfaces.
7. Cleaning and Maintenance
Regular cleaning ensures optimal performance and extends the lifespan of your cotton candy machine.

Image 7.1: Basic cleaning steps for the cotton candy machine.
- Initial Rinse (Optional): While the machine is still warm (but after turning off the heat and before unplugging), you can pour a small amount of water into the spinning head inlet. Let the machine run for 3-5 minutes. The water will help dissolve residual sugar.
- Power Off and Unplug: Turn the ON/OFF switch to 'OFF' and unplug the power cord from the outlet.
- Cool Down: Allow the machine to cool completely before proceeding with cleaning.
- Remove Bowl: Unclip the locking clips and carefully remove the stainless steel bowl.
- Clean Bowl: Wash the stainless steel bowl with warm, soapy water. Rinse thoroughly and dry completely.
- Clean Spinning Head: Use a damp cloth to wipe down the spinning head and the interior of the main unit. For stubborn sugar residue, a small amount of warm water can be used. Ensure no water enters the motor housing.
- External Cleaning: Wipe the exterior of the machine with a soft, damp cloth.
- Drying: Ensure all parts are completely dry before reassembling or storing the machine.
Important Notes:
- You can remove the center bowl cover (if applicable) and clean it with a small wrench (package includes small wrench).
- Never immerse the main unit (motor housing) in water or any other liquid.
- Do not use abrasive cleaners or scouring pads, as they may damage the surfaces.
8. Troubleshooting
If you encounter issues with your cotton candy machine, refer to the following common problems and solutions:
| Problem | Possible Cause | Solution |
|---|---|---|
| Machine does not turn on. | No power, loose connection, blown fuse. | Check if the power cord is securely plugged in. Ensure the outlet is functional. Check and replace the fuse if blown (an extra fuse is provided). |
| No cotton candy produced. | Insufficient preheating, not enough sugar, sugar is wet, temperature too low. | Allow the machine to preheat for the full 3-4 minutes. Ensure you add a full scoop of dry sugar. Increase the temperature setting. |
| Sugar flies out of the bowl. | Too much sugar added, temperature too high, bowl not properly secured. | Add only one scoop of sugar at a time. Reduce the temperature slightly. Ensure the stainless steel bowl is securely fastened with the locking clips. Consider using a plastic shield (not included) if available. |
| Cotton candy is hard or grainy. | Temperature too low, sugar not fully melted. | Ensure the machine is fully preheated. Increase the temperature setting slightly. |
| Machine vibrates excessively. | Bowl not properly secured, uneven surface. | Ensure the stainless steel bowl is securely fastened with the locking clips. Place the machine on a flat, stable surface. |
9. Specifications
Technical details for the Ajgvq Commercial Cotton Candy Machine ZCM-02:
- Model: ZCM-02
- Power: 1000W
- Motor Rotation Speed: 3500 RPM
- Preheating Time: 3-4 minutes
- Output: Up to 5 cotton candies per minute
- Candy Bowl Capacity: 3.5 Ounces
- Product Weight: Approximately 15.07 pounds (6.83 kg)
- Product Dimensions (L x W x H): Approximately 15 x 15 x 13 inches (38 x 38 x 33 cm)
- Material: Food-grade Stainless Steel Bowl
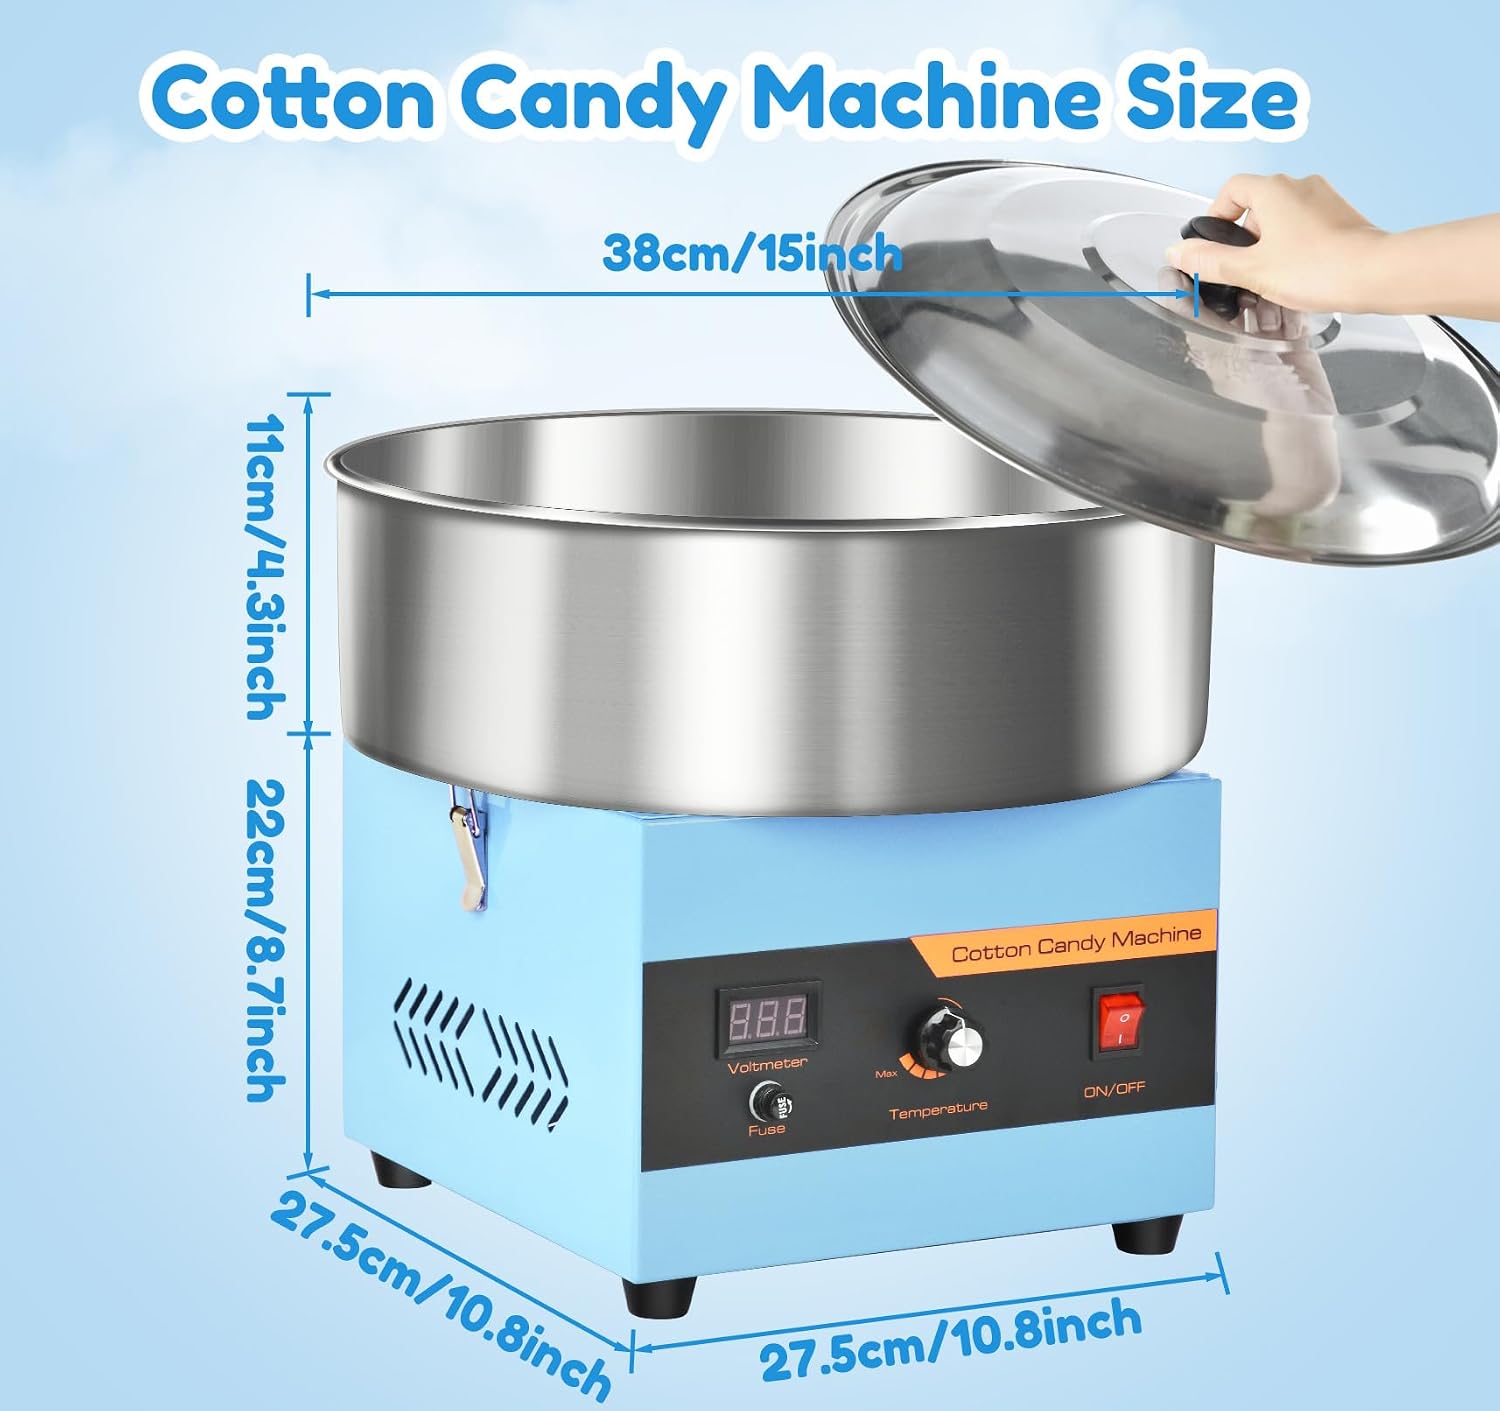
Image 9.1: Product dimensions.
10. Warranty and Support
For any questions, concerns, or issues regarding your Ajgvq Cotton Candy Machine, please contact our customer support. Refer to your purchase documentation for specific warranty details and contact information.
We are committed to providing high-quality products and support to ensure your satisfaction.
Ask a question about this manual
Ask about setup, troubleshooting, compatibility, parts, safety, or missing instructions. Manuals+ will review the question and use this page’s manual context to help answer it.