
1. Introduction
Thank you for choosing the SJOYBRING QLED Double Din Car Stereo (Model W018). This manual provides essential information for the proper installation, operation, and maintenance of your new car stereo system, including its integrated dash cam and backup camera. Please read this manual thoroughly before use to ensure optimal performance and safety.
2. Safety Information
- Professional Installation Recommended: Due to the complexity of car audio systems and vehicle electrical wiring, professional installation is highly recommended. Incorrect installation can lead to damage to the unit, vehicle, or personal injury.
- Power Supply: Ensure the unit is connected to a 12V DC power supply with a negative ground.
- Avoid Distractions: Do not operate the unit or view videos while driving. Always prioritize safe driving.
- Temperature: Avoid exposing the unit to extreme temperatures or direct sunlight for extended periods.
- Moisture: Keep the unit away from water and moisture to prevent electrical hazards.
3. Package Contents
Verify that all items are present in the package:
- SJOYBRING Car Stereo Unit
- Backup Camera
- Dash Cam
- Remote Control
- ISO Stereo Harness
- Mounting Brackets and Screws
- User Manual

Image: Contents of the SJOYBRING car stereo package, including the main stereo unit, dash cam, backup camera, remote control, wiring harness, mounting brackets, and user manual.
4. Product Overview
The SJOYBRING QLED Double Din Car Stereo features a 7-inch QLED touchscreen, offering a vibrant display and intuitive control. It integrates advanced connectivity options and safety features for an enhanced in-car experience.
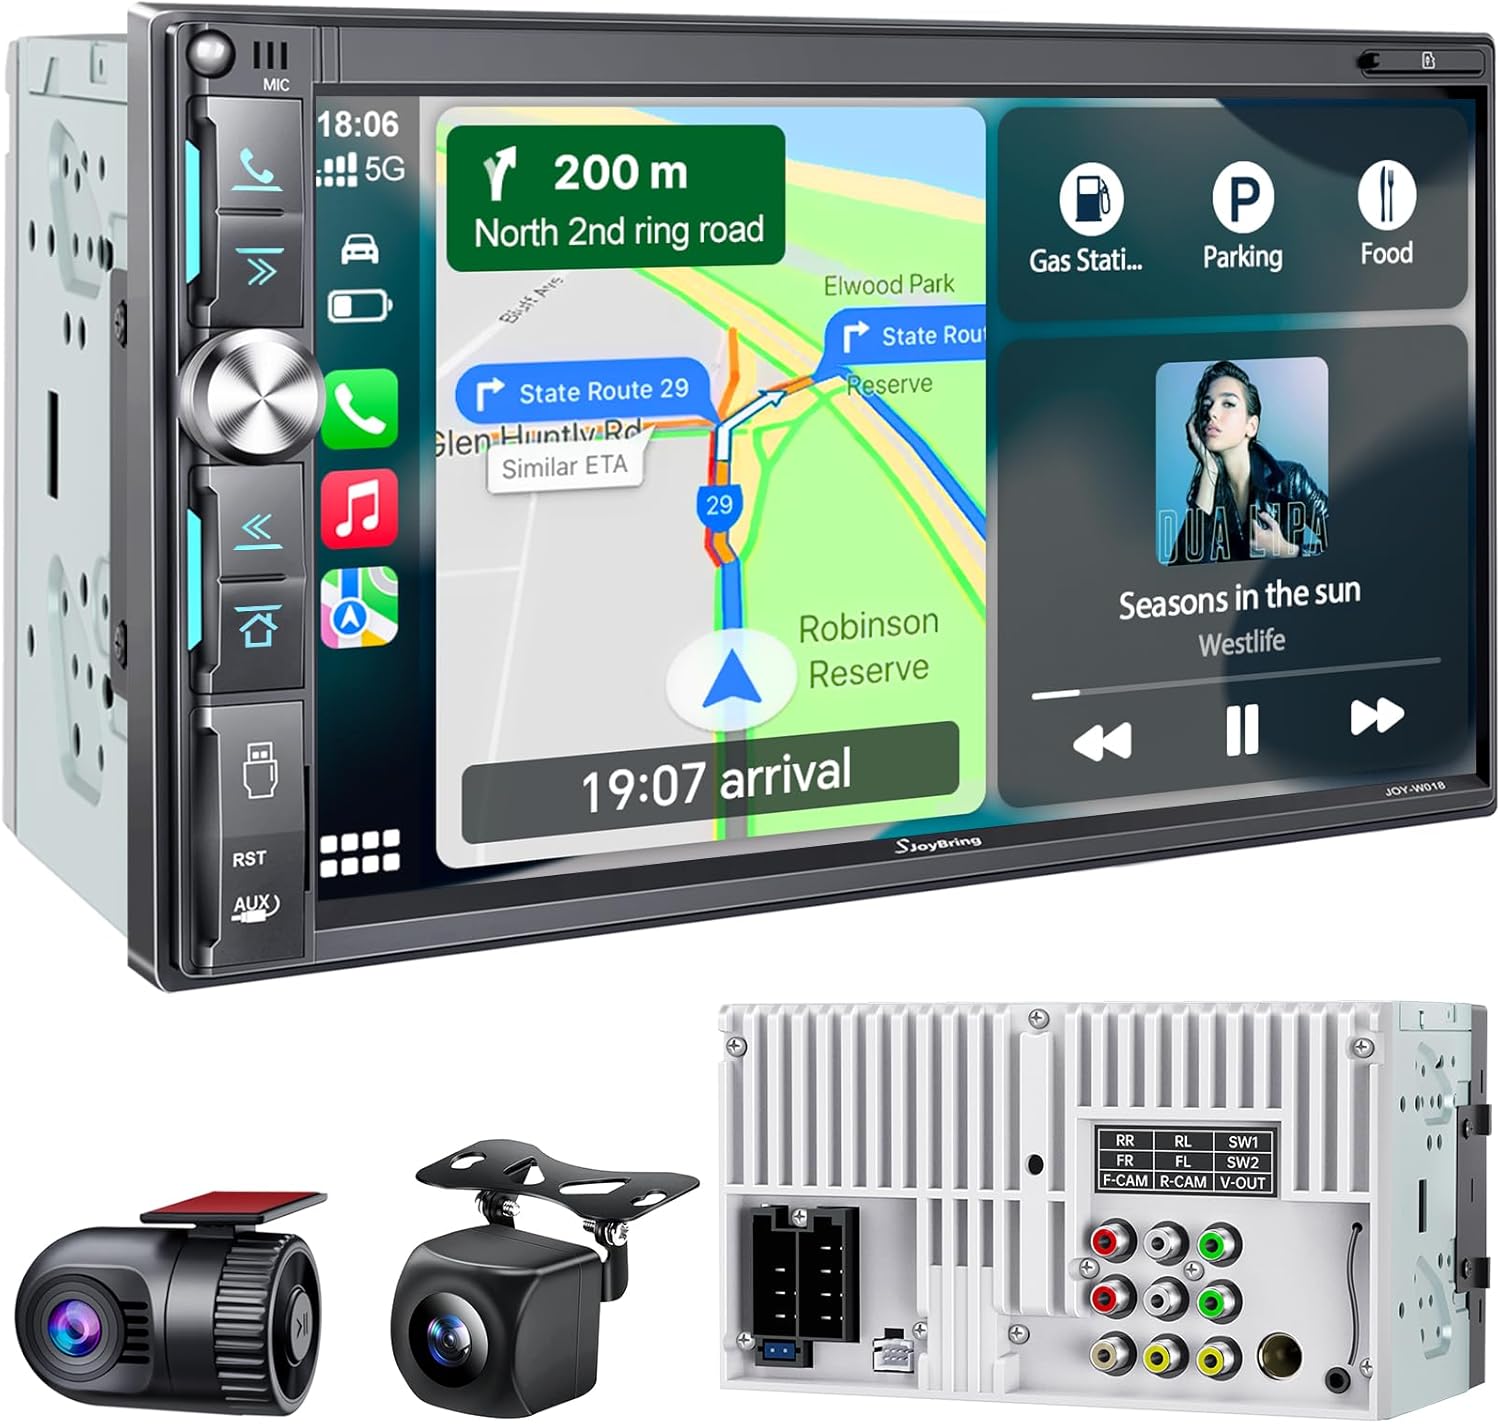
Image: Front view of the SJOYBRING car stereo unit, showcasing the 7-inch QLED display and physical controls, alongside the included dash cam and backup camera.
Key Features:
- 7-inch QLED Touchscreen (1024x600P resolution)
- Wireless Apple CarPlay & Android Auto
- Bluetooth 5.3 for hands-free calling and audio streaming
- MirrorLink support
- Integrated Dash Cam (1280x720P, 170° wide-angle)
- Backup Camera (HD night vision, waterproof, 170° wide-angle)
- 4.2-Channel Audio Output with 2 Subwoofer Outputs
- FM/AM Radio Tuner
- Steering Wheel Control compatibility (requires separate interface module)
5. Installation
Proper installation is crucial for the functionality and longevity of your car stereo. Refer to the following guidelines and diagrams.
5.1 General Installation Notes
- Dashboard Opening: Ensure your vehicle's dashboard opening size is compatible with the double din stereo (Product Dimensions: 3.66 x 7 x 3.93 inches). An additional dash kit may be required for a proper fit in some car models.
- Additional Accessories: Some vehicles may require a separate wire harness adapter and a radio antenna adapter for complete installation.
- Heatsink: The unit features an oversized heatsink for optimal cooling. Ensure adequate ventilation around the unit during installation.

Image: Rear view of the car stereo highlighting the large heatsink design for efficient cooling, compared to a smaller heatsink on another unit.
5.2 Main Unit Wiring Diagram
Connect the provided ISO stereo harness to the car stereo and then to your vehicle's wiring. Refer to the diagram for correct connections.

Image: Comprehensive wiring diagram for the car stereo, illustrating connections for power (12V constant, ignition switch, ground), speaker outputs (front/rear left/right), and control wires (brake detect, reverse, steering wheel control).
- Power Connections: Yellow (12V+ Constant Power), Red (ACC +12V Ignition Switch), Black (Ground).
- Speaker Outputs: Connect to your vehicle's speakers (e.g., White/White-Black for Left Front, Grey/Grey-Black for Right Front).
- Control Wires: Brown (Brake Detect), Pink (Back Car Control for backup camera trigger), Green (Steering Wheel Control 1), Green/Black (Steering Wheel Control 2).
5.3 Dash Cam Installation
Connect the dash cam to the designated 'F-CAM' video input on the rear of the stereo unit. Ensure power connections are made as per the diagram.

Image: Diagram illustrating the wiring for the dash cam, connecting its video output to the 'F-CAM' RCA input on the car stereo and its power wires (Yellow for Battery Positive, Red for ACC, Black for Ground).
5.4 Backup Camera Installation
Mount the backup camera at the rear of your vehicle. Connect its video output to the 'R-CAM' input on the stereo. The pink reversing trigger wire from the stereo harness must be connected to the vehicle's reversing light +12V to enable automatic display when reversing.

Image: Diagram detailing the installation of the backup camera, showing its connection to the 'R-CAM' video input on the stereo and the crucial connection of the stereo's pink reversing trigger wire to the vehicle's +12V reversing light circuit.
6. Setup
6.1 Initial Power On
After successful installation, turn on your vehicle's ignition. The stereo should power on automatically. Follow any on-screen prompts for initial setup, such as language selection.
6.2 Steering Wheel Control (SWC) Setup
If your vehicle has steering wheel controls, you can configure them to operate the stereo. This feature typically requires a separate SWC interface module (not included). Once the module is installed and wired, access the 'Steering Wheel' settings in the stereo's menu. Follow the on-screen instructions to program each button.

Image: The steering wheel control configuration screen on the car stereo, showing options to program buttons like 'Pre', 'Next', 'Vol+', 'Vol-', 'Mute', 'Dial', 'Reject', and 'Mode'.
7. Operating Instructions
7.1 Wireless Apple CarPlay & Android Auto
Connect your compatible iOS or Android smartphone wirelessly to access navigation, music, calls, and other apps directly on the stereo's screen. Ensure Bluetooth and Wi-Fi are enabled on your phone.
- Apple CarPlay: On your iPhone, go to Settings > General > CarPlay and select your car stereo.
- Android Auto: On your Android phone, open the Android Auto app and follow the pairing instructions.
- Voice Control: Use voice commands (Siri for CarPlay, Google Assistant for Android Auto) for hands-free operation.

Image: The car stereo display showing the user interface for Wireless Apple CarPlay and Android Auto, along with MirrorLink functionality, demonstrating seamless smartphone integration.
7.2 Bluetooth 5.3
The unit features Bluetooth 5.3 for stable and high-quality wireless connections.
- Pairing: Go to the Bluetooth menu on the stereo and your phone. Select the stereo's name from your phone's Bluetooth device list to pair.
- Hands-Free Calling: Make and receive calls directly through the stereo.
- Audio Streaming: Play music from your phone via Bluetooth.
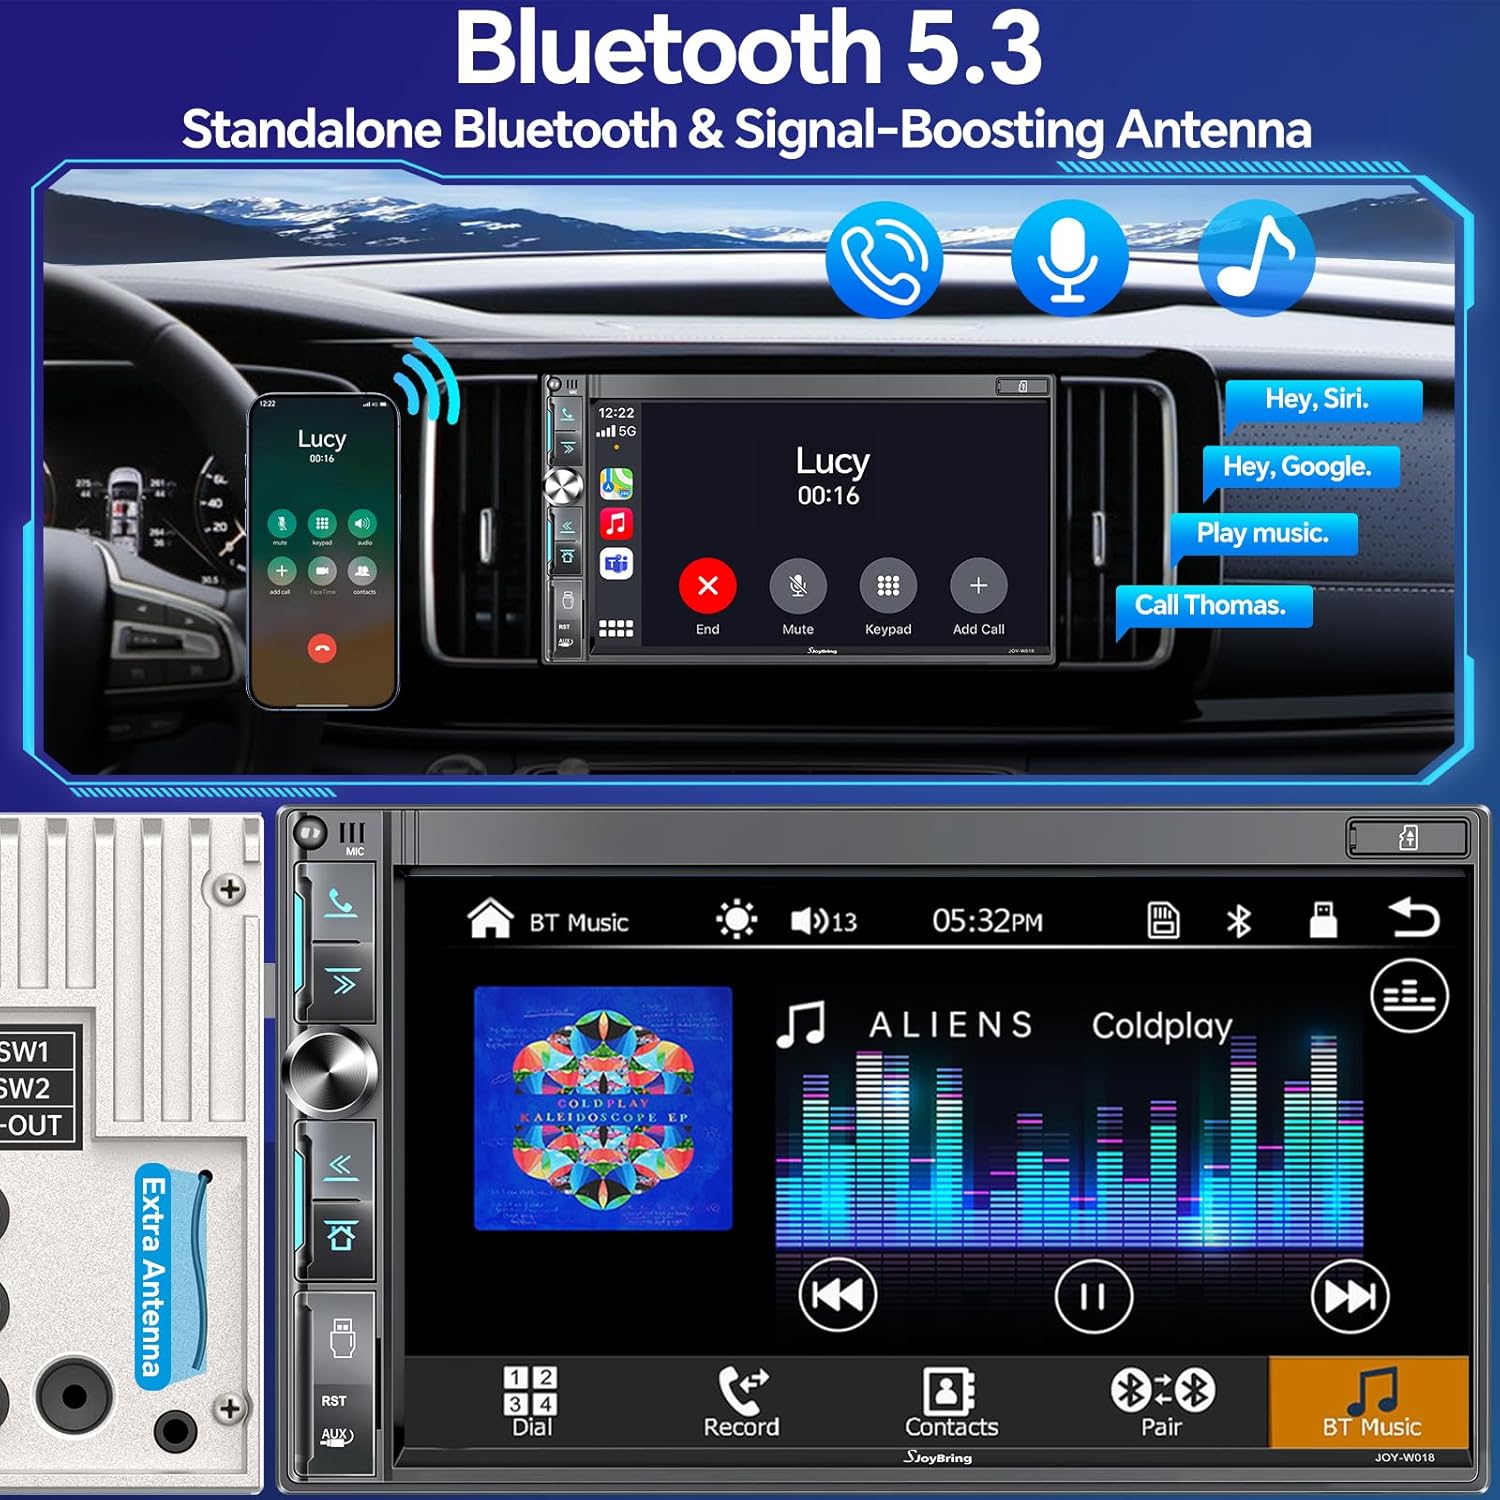
Image: The car stereo display showing the Bluetooth 5.3 interface, with options for phone calls, music playback, and voice assistant integration (Hey Siri, Hey Google).
7.3 MirrorLink
MirrorLink allows you to mirror your smartphone's screen onto the car stereo display. Connect your phone via USB and follow the on-screen instructions to activate MirrorLink.
7.4 FM/AM Radio
Access the radio function from the main menu. You can manually tune to stations or use the scan function to find available frequencies. Save your favorite stations for quick access.

Image: The car stereo's FM/AM radio interface, displaying frequency tuning, preset stations, and scan options.
7.5 Audio Settings (EQ, Subwoofer)
Customize your audio experience using the built-in equalizer and subwoofer controls. The unit supports 4.2-channel audio output.
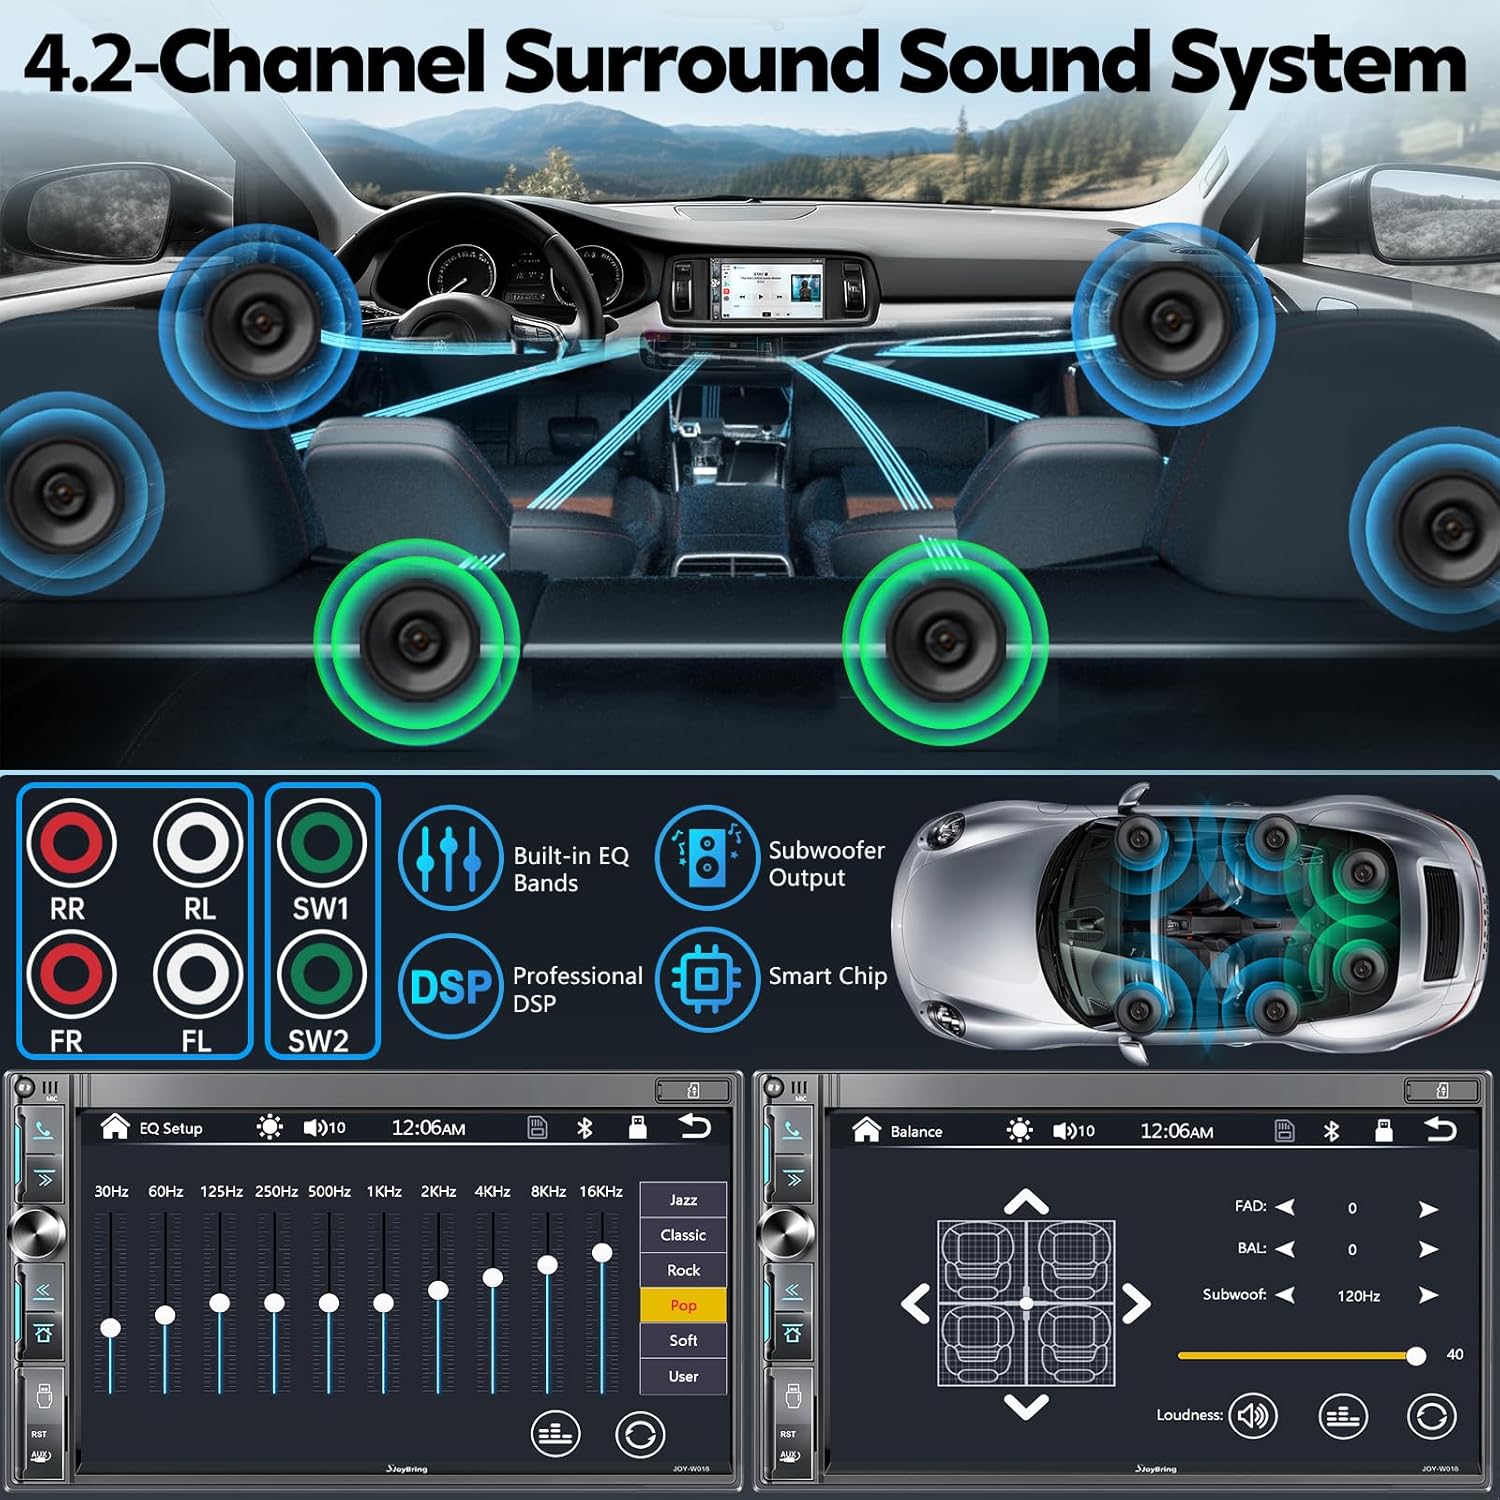
Image: The audio settings interface of the car stereo, showing the graphic equalizer with various presets (Jazz, Classic, Rock, Pop, Soft, User) and controls for subwoofer output and loudness.
7.6 Dash Cam Operation
The integrated dash cam records in 1280x720P Ultra HD with a 170° wide-angle lens. It supports loop recording (requires Class 10 or above MicroSD card, up to 64GB FAT32). Access dash cam footage and settings through the dedicated application on the stereo.
7.7 Backup Camera Operation
When the vehicle is shifted into reverse, the stereo automatically displays the feed from the HD backup camera. The camera features night vision and a waterproof design for clear visibility in various conditions.

Image: Overview of the dash cam and backup camera functionalities, highlighting features like HD recording, loop recording, waterproof design, and night vision for both cameras.
7.8 QLED Touchscreen
The 7-inch QLED touchscreen provides a responsive and vivid display with 1024x600P resolution. Navigate through menus and applications with touch gestures.

Image: A visual comparison demonstrating the superior color reproduction and clarity of the QLED touchscreen (1024x600P) compared to a standard LCD screen, featuring a colorful parrot image.
8. Maintenance
- Screen Cleaning: Use a soft, lint-free cloth to gently wipe the touchscreen. For stubborn smudges, slightly dampen the cloth with water or a screen-safe cleaner. Avoid abrasive materials or harsh chemicals.
- General Care: Keep the unit free from dust and debris. Ensure all connections remain secure.
9. Troubleshooting
If you encounter issues, refer to the following common problems and solutions:
| Problem | Possible Cause | Solution |
|---|---|---|
| No Power | Incorrect wiring, blown fuse, loose connection. | Check power (Yellow, Red, Black) and ground connections. Inspect vehicle's fuse box and stereo's fuse. Ensure all wires are securely connected. |
| No Sound | Incorrect speaker wiring, volume too low, mute activated, incorrect audio source. | Verify speaker connections. Increase volume. Check if mute is active. Select the correct audio source (e.g., Radio, Bluetooth, CarPlay). |
| Bluetooth Connection Issues | Phone not discoverable, incorrect pairing, interference. | Ensure Bluetooth is enabled on both devices. Delete previous pairings and re-pair. Move closer to the unit. Restart both devices. |
| Backup Camera Not Displaying | Incorrect wiring, faulty camera, trigger wire not connected. | Check R-CAM video input. Ensure the pink reversing trigger wire is correctly connected to the vehicle's +12V reversing light. Verify camera power. |
| Touchscreen Unresponsive | System freeze, debris on screen. | Perform a soft reset (locate the reset button, usually a small pinhole). Clean the screen. |
10. Specifications
Technical specifications for the SJOYBRING QLED Double Din Car Stereo (Model JOY-W018):
| Feature | Specification |
|---|---|
| Model Number | JOY-W018 |
| Product Dimensions | 3.66 x 7 x 3.93 inches |
| Item Weight | 2 pounds |
| Display Type | 7-inch QLED Touchscreen |
| Display Resolution | 1024x600P (supports 1920x1080P video playback) |
| Connectivity Technology | Bluetooth 5.3, USB, Wi-Fi |
| Controller Type | Android Auto, Apple CarPlay |
| Special Features | Android Auto, Apple CarPlay, Built-In Bluetooth, DSP, Screen Mirroring, Dash Cam, Backup Camera |
| Compatible Devices | Amplifier, Headphone, Smartphone, Speaker |
| Audio Output Mode | Stereo |
| Surround Sound Channel Configuration | 4.2 |
| Video Encoding Support | MPEG-4, RMVB, DivX, AVI, 1080P, MP3, WMA, JPEG |
| FM Radio Range | 87.5 ~ 107.9 MHz |
| AM Radio Range | 530 ~ 1710 KHz |
11. Warranty and Support
SJOYBRING provides the following support for your product:
- 90-Day Return Policy: Eligible for return within 90 days of purchase.
- 12-Month Replacement: Product replacement available within 12 months for manufacturing defects.
- Lifetime Consult and Support: Ongoing technical assistance for the product's lifespan.
For any issues or technical assistance, please contact the seller or SJOYBRING customer support. Our dedicated after-sales team is available 24/7.

Image: SJOYBRING customer support details, outlining quick reply times, return policy, replacement period, and lifetime consultation and support.