
Introduction
Thank you for choosing the ATTACK SHARK G6 Wireless Gaming Mouse. This manual provides detailed instructions for setting up, operating, maintaining, and troubleshooting your new gaming mouse. Please read this manual carefully to ensure optimal performance and longevity of your device.

Image: The ATTACK SHARK G6 Wireless Gaming Mouse, showcasing its ergonomic design and key features.
Product Overview
Key Features
- Tri-Mode Connectivity: Supports 2.4GHz wireless, Bluetooth 5.0, and USB-C wired connections.
- High-Precision Sensor: Equipped with PixArt PAW3311 optical sensor, offering 800-24000 DPI.
- Adjustable Polling Rate: Up to 1000Hz polling rate for responsive performance.
- Lightweight Design: Weighs approximately 72g for reduced hand fatigue.
- Long Battery Life: 750mAh battery provides extended wireless usage.
- Durable Switches: 10 million click lifespan micro switches.
- Customizable RGB Lighting: Rear RGB lighting with various effects.
- Programmable Buttons: 5 remappable buttons via driver software.
- Universal Compatibility: Works with Windows, macOS, Linux, Chrome OS.
Components and Buttons
Familiarize yourself with the mouse's components and button layout:

Image: Diagram illustrating the multi-function buttons and interfaces on the ATTACK SHARK G6 mouse, including Left Button, Right Button, Scroll Wheel, Forward Button, Backward Button, Type-C Interface, DPI Button, 2.4G/OFF/BT Button, Atmosphere Light Switch, and USB Receiver storage.
- Left Button: Standard left-click function.
- Right Button: Standard right-click function.
- Scroll Wheel: Scroll up/down, and middle-click function.
- Forward Button: Navigates forward in web browsers or applications.
- Backward Button: Navigates backward in web browsers or applications.
- Type-C Interface: For wired connection and charging.
- DPI Button: Cycles through DPI settings.
- 2.4G/OFF/BT Button: Switch between 2.4GHz wireless, Off, and Bluetooth modes.
- Atmosphere Light Switch & Wireless Mode Binding Button: Controls RGB lighting and initiates wireless pairing.
- USB Receiver: Stores inside the mouse for 2.4GHz wireless connection.
Setup
1. Charging the Mouse
Before first use, it is recommended to fully charge the mouse. Connect the provided USB-C cable to the mouse's Type-C interface and the other end to a USB power source (e.g., computer USB port, wall adapter). The charging indicator light will show charging status.
2. Connecting the Mouse
The G6 mouse supports three connection modes: 2.4GHz wireless, Bluetooth, and USB-C wired. Use the switch on the bottom of the mouse to select your desired mode.

Image: Illustration detailing the Tri-Mode Wireless Connection options for the ATTACK SHARK G6 mouse, including 2.4GHz Wireless Mode, USB-C Wired Mode, and Bluetooth Mode.
2.1. 2.4GHz Wireless Mode
- Locate the USB receiver stored in the bottom compartment of the mouse.
- Plug the USB receiver into an available USB port on your computer.
- Slide the switch on the bottom of the mouse to the '2.4G' position.
- The mouse should automatically connect. If not, press the 'Atmosphere Light Switch & Wireless Mode Binding Button' on the bottom to initiate pairing.
2.2. Bluetooth Mode
- Slide the switch on the bottom of the mouse to the 'BT' position.
- The mouse will enter pairing mode (indicator light may flash).
- On your device (computer, tablet, smartphone), open Bluetooth settings and search for new devices.
- Select 'ATTACK SHARK G6' (or similar) from the list of available devices to pair.
2.3. USB-C Wired Mode
- Connect the provided USB-C cable to the mouse's Type-C interface.
- Connect the other end of the cable to a USB port on your computer.
- The mouse will automatically switch to wired mode and function without needing to select a mode via the bottom switch.
Operating Instructions
1. Adjusting DPI (Sensitivity)
The G6 mouse features a dedicated DPI button to cycle through six preset DPI levels. Each level is indicated by a specific LED color.
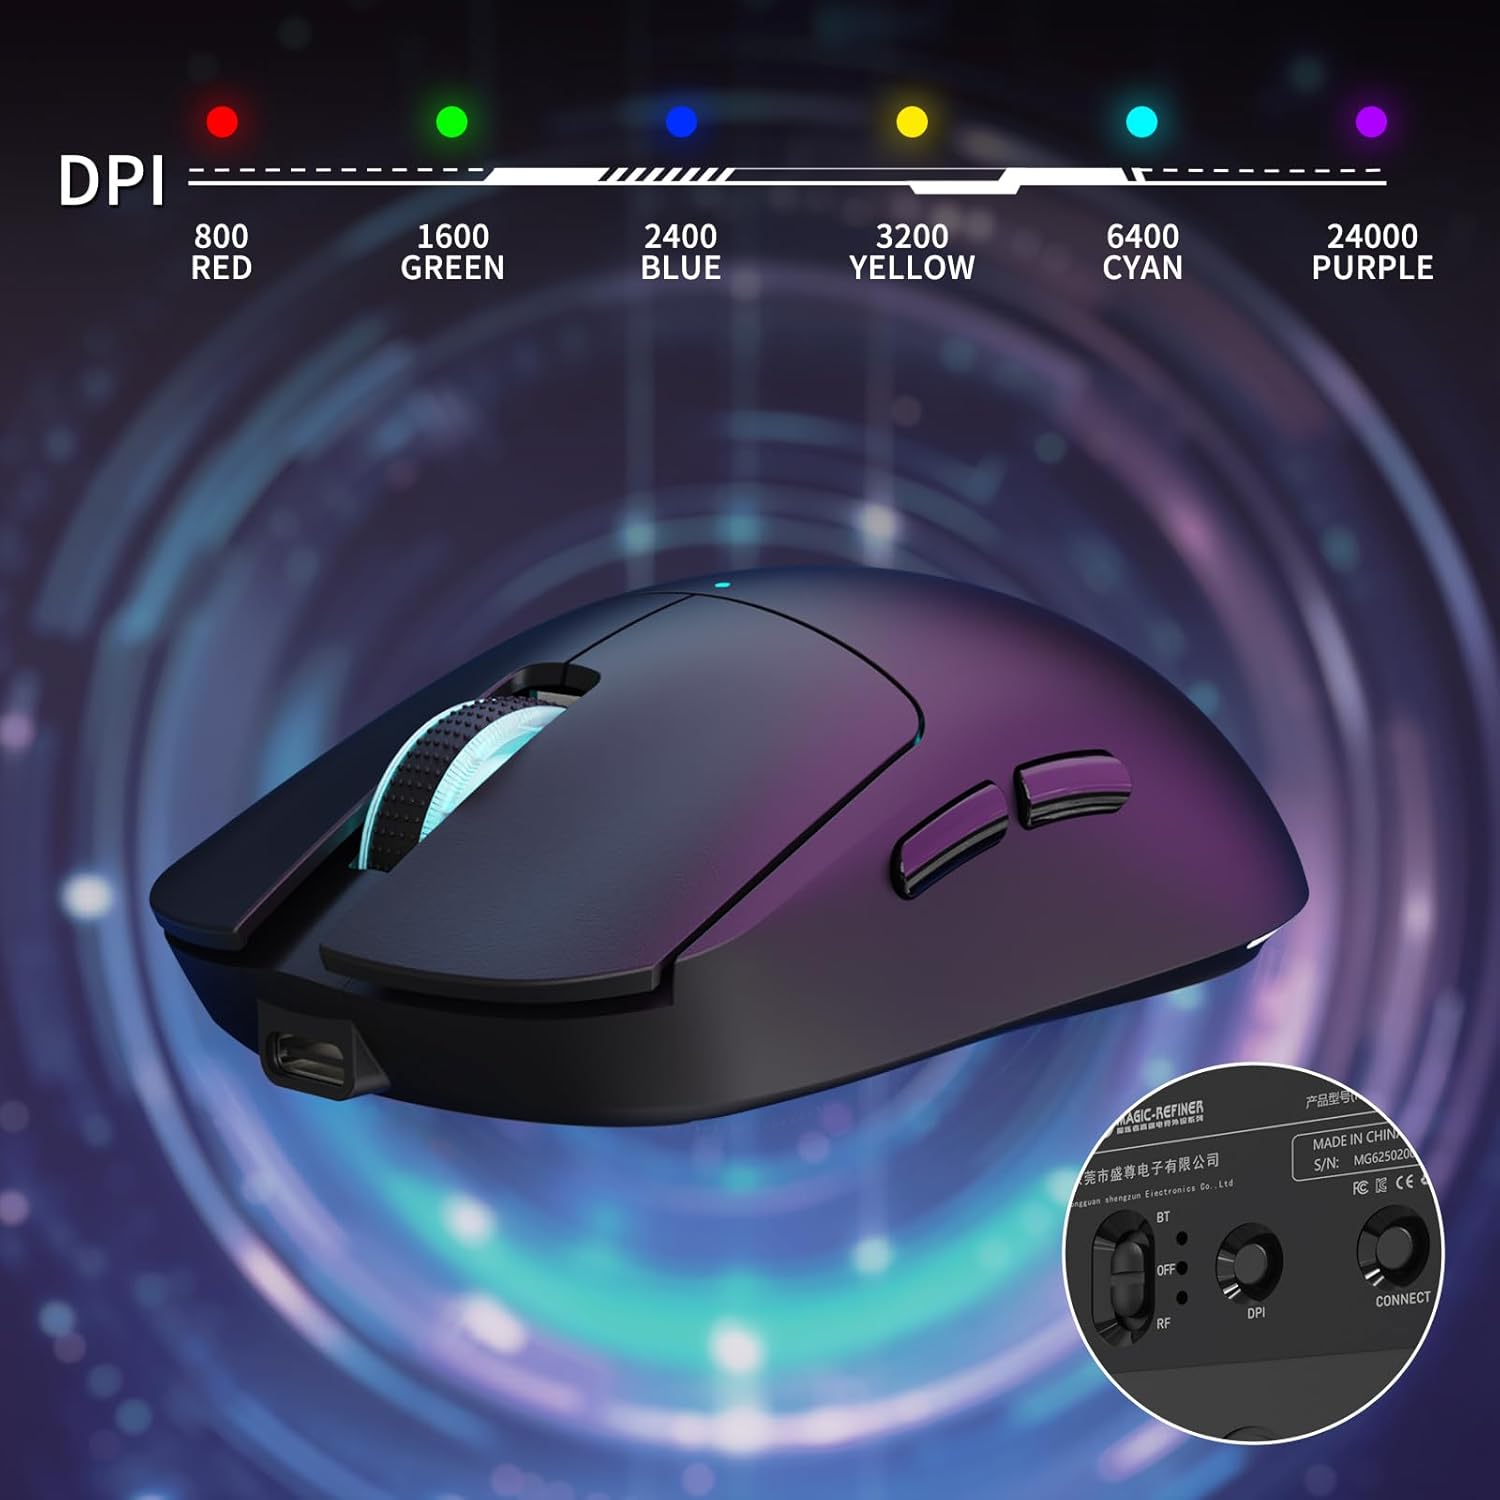
Image: The ATTACK SHARK G6 mouse displaying its DPI settings, with corresponding LED colors for 800 (Red), 1600 (Green), 2400 (Blue), 3200 (Yellow), 6400 (Cyan), and 24000 (Purple).
- Press the DPI button (located on the top of the mouse, behind the scroll wheel) to cycle through the following DPI settings:
- 800 DPI (Red LED)
- 1600 DPI (Green LED)
- 2400 DPI (Blue LED)
- 3200 DPI (Yellow LED)
- 6400 DPI (Cyan LED)
- 24000 DPI (Purple LED)
- You can customize these DPI levels and add more via the driver software.
2. Customizing RGB Lighting
The G6 mouse features customizable RGB lighting. Use the dedicated button on the bottom of the mouse to change lighting effects.

Image: The ATTACK SHARK G6 mouse showcasing its 6 customizable lighting effects, including rainbow and single-color options.
- Press the 'Atmosphere Light Switch' button on the bottom of the mouse to cycle through different RGB lighting modes, including rainbow effects, single colors, and turning the lighting off.
- Further customization of lighting effects and colors can be done through the official driver software.
3. Programmable Buttons
The G6 mouse has 5 programmable buttons. To remap these buttons and create custom macros, download and install the official ATTACK SHARK driver software from the manufacturer's website. The software allows you to save multiple profiles for different applications or games.
Maintenance
1. Cleaning the Mouse
- Ensure the mouse is turned off or disconnected before cleaning.
- Use a soft, dry, lint-free cloth to wipe the surface of the mouse.
- For stubborn dirt, lightly dampen the cloth with water or a mild cleaning solution. Avoid excessive moisture.
- Use a cotton swab or compressed air to clean around buttons, scroll wheel, and the optical sensor.
- Do not use harsh chemicals, abrasive cleaners, or solvents.
2. Battery Care
- Recharge the mouse when the battery indicator shows low power.
- Avoid fully discharging the battery frequently to prolong its lifespan.
- Store the mouse in a cool, dry place when not in use for extended periods.

Image: Illustration highlighting the ATTACK SHARK G6 mouse's extra-long battery life and durability, featuring a 750mAh rechargeable battery.
3. Applying Anti-Slip Grips
The G6 mouse includes DIY anti-slip grips for enhanced control and comfort. To apply them:

Image: The ATTACK SHARK G6 mouse with practical non-slip stickers applied, designed to absorb hand sweat and provide an anti-slip effect during use.
- Ensure the mouse surface is clean and dry.
- Carefully peel off the backing from the anti-slip grips.
- Align the grips with the corresponding areas on the mouse (typically sides and buttons).
- Press firmly to ensure proper adhesion.
Troubleshooting
| Problem | Possible Cause | Solution |
|---|---|---|
| Mouse not responding in 2.4GHz mode | USB receiver not plugged in, incorrect mode selected, low battery, pairing issue. | Ensure receiver is plugged in. Switch mouse to '2.4G' mode. Charge the mouse. Press the binding button on the bottom of the mouse to re-pair. Try a different USB port. |
| Mouse not connecting via Bluetooth | Incorrect mode selected, not in pairing mode, device Bluetooth off, low battery. | Switch mouse to 'BT' mode. Ensure mouse is in pairing mode (flashing light). Enable Bluetooth on your device. Charge the mouse. Remove and re-add the mouse in your device's Bluetooth settings. |
| DPI not changing | DPI button not pressed correctly, software conflict. | Ensure you are pressing the DPI button firmly. If using custom software, check settings. |
| RGB lighting not working | Lighting turned off, low battery, software conflict. | Press the 'Atmosphere Light Switch' button on the bottom of the mouse to cycle modes. Charge the mouse. Check software settings if applicable. |
| Mouse cursor erratic or unresponsive | Dirty optical sensor, unsuitable surface, low battery, interference. | Clean the optical sensor. Use a mouse pad or a smooth, non-reflective surface. Charge the mouse. Reduce interference by moving closer to the receiver/device or moving other wireless devices. |
Specifications
Below are the technical specifications for the ATTACK SHARK G6 Wireless Gaming Mouse:

Image: Illustration detailing the PixArt PAW3311 Professional Game Sensor in the ATTACK SHARK G6 mouse, highlighting 24000 DPI, 300 IPS tracking, 1000Hz polling rate, and 35G acceleration.
| Feature | Specification |
|---|---|
| Model Number | G6 |
| Connectivity Technology | 2.4G Wireless, Bluetooth 5.0, USB-C Wired |
| Sensor | PixArt PAW3311 Optical Sensor |
| DPI Range | 800-24000 DPI (6 adjustable levels) |
| Polling Rate | 125-1000Hz (software configurable) |
| Tracking Speed | 300 IPS |
| Acceleration | 35G |
| Battery Capacity | 750mAh |
| Switch Lifespan | 10 Million Clicks |
| Buttons | 8 (5 programmable) |
| Weight | 72 ± 3g (0.29 Kilograms) |
| Dimensions | 116.2 x 62.2 x 37.3mm (approximate) |
| Cable Length | 1.5m Braided USB-C |
| Compatibility | Windows, macOS, Linux, Chrome OS |
| Material | Plastic |
Warranty and Support
Warranty Information
The ATTACK SHARK G6 Wireless Gaming Mouse comes with a limited warranty. For specific details regarding warranty coverage and duration, please refer to the product packaging or the official ATTACK SHARK website. Please retain your proof of purchase for warranty claims.
Customer Support
If you encounter any issues not covered in the troubleshooting section or require further assistance, please contact ATTACK SHARK customer support. You can typically find contact information on the official ATTACK SHARK website or through your retailer.
For additional resources, including driver downloads and FAQs, visit the official ATTACK SHARK website.
Important Safety Information
- Do not expose the mouse to extreme temperatures, humidity, or liquids.
- Avoid dropping or subjecting the mouse to strong impacts.
- Do not attempt to disassemble or modify the mouse. This will void the warranty.
- Keep the mouse away from children and pets.
- Dispose of the mouse and its battery according to local regulations.
Video Resources
No official product videos from the seller were found in the provided data for this product.


