
Introduction
This manual provides essential information for the safe and efficient operation, assembly, maintenance, and troubleshooting of your SENIX 22" Gas Lawn Mower. Please read this manual thoroughly before operating the mower and keep it for future reference.

Figure 1: SENIX 22-inch Gas Lawn Mower, Model LSSG-H1.
Safety Information
WARNING: Read and understand all safety warnings and instructions before operating this product. Failure to follow the warnings and instructions may result in serious injury.
- Always wear appropriate personal protective equipment, including eye protection and sturdy footwear.
- Keep hands, feet, and clothing away from moving parts.
- Never operate the mower in wet grass or rain.
- Ensure the area is clear of debris, children, and pets before mowing.
- Refuel in a well-ventilated area with the engine off and cool.
- Familiarize yourself with the location and function of all controls, especially the engine stop lever.

Figure 2: Observe all danger and warning labels on the mower before operation.
Product Overview and Features
The SENIX 22" Gas Lawn Mower is designed for efficient lawn care, featuring a robust Briggs & Stratton engine and versatile cutting options.
- Engine: Powered by a 163cc Briggs & Stratton 4-Cycle EXi675 engine, offering reliable power with a "No Prime, No Choke" starting system.
- Cutting Width: A wide 22-inch cutting deck allows for efficient mowing of small to medium-sized yards.
- Self-Propelled: Rear-wheel drive self-propelled system for effortless maneuvering, especially on slopes and uneven terrain.
- 3-in-1 System: Offers mulching, side-discharge, and rear bagging capabilities. A 19-gallon bagger is included.
- Height Adjustment: Single-lever 6-position height adjustment, ranging from 1.25 inches to 4 inches, for customized lawn height.
- Wheels: Equipped with oversized all-terrain wheels (8-inch front and 11-inch rear) for improved handling.
- Storage: Features a fold-down handle for compact vertical storage, saving garage space.
- Cleaning: Includes a washout port for quick and easy deck cleaning.

Figure 3: Key features of the SENIX 22" Gas Lawn Mower.

Figure 4: The 3-in-1 cutting system allows for versatile grass management.
Assembly
Your SENIX lawn mower requires some assembly before first use. Ensure you have the following tools:
- 10mm Socket Wrench
- 13mm Socket Wrench
- Crescent Wrench (adjustable to 13mm)
Follow the detailed instructions provided in the separate assembly guide for your specific model. Key steps typically include:
- Attaching the handle assembly.
- Mounting the grass collection bag (if not pre-assembled).
- Checking all fasteners for tightness.
Note: Some components may be pre-assembled. Refer to the included assembly diagram for precise instructions.
Setup
1. Adding Engine Oil
Before starting the engine for the first time, you must add engine oil. The mower comes with engine oil included.
- Locate the oil fill cap/dipstick on the engine.
- Remove the cap and slowly pour the entire bottle of engine oil into the oil fill opening.
- Replace the oil fill cap securely.
2. Adding Fuel
Use fresh, clean unleaded gasoline with an octane rating of 87 or higher. Do not use E85 or any gasoline containing more than 10% ethanol.
- Ensure the engine is off and cool.
- Locate the fuel tank cap (often labeled with a fuel pump icon).
- Unscrew the cap and carefully fill the tank, leaving a small space for expansion. Do not overfill.
- Securely replace the fuel tank cap.
3. Adjusting Cutting Height
The mower features a single-lever height adjustment system.
- Ensure the engine is off.
- Locate the height adjustment lever near one of the rear wheels.
- Pull the lever outwards and move it to the desired cutting height position (1.25" to 4").
- Ensure all four wheels are set to the same height for an even cut.
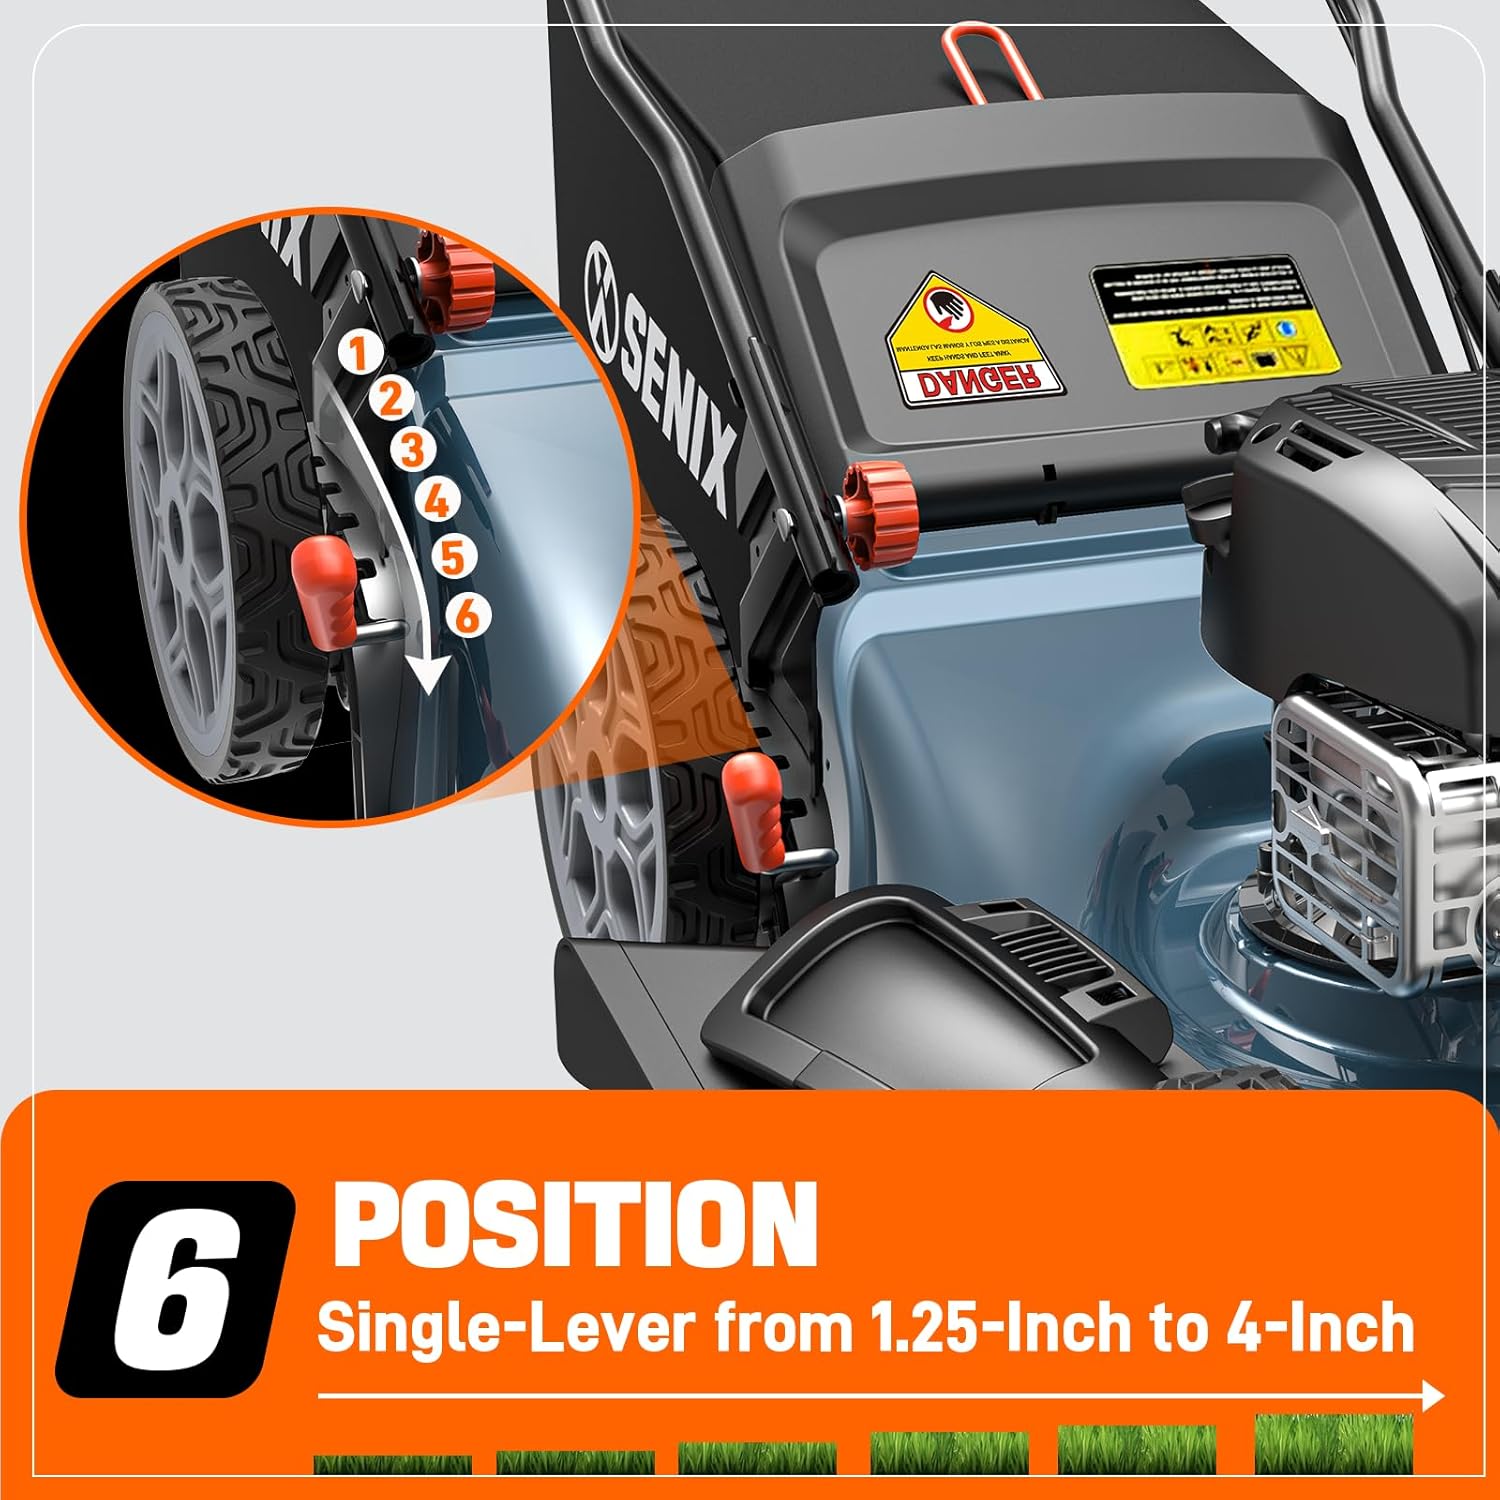
Figure 5: Adjusting the cutting height using the single-lever system.
Operating Instructions
1. Starting the Engine
- Ensure the fuel tank is filled and oil level is correct.
- Stand behind the mower and firmly grasp the upper handle.
- Pull the engine stop lever (bail bar) towards the upper handle and hold it.
- Grasp the starter rope handle and pull it quickly and smoothly until the engine starts.
- Once the engine starts, slowly release the starter rope handle.
2. Engaging Self-Propel
To engage the self-propelled function, pull the self-propel lever (often located below the main handle) towards the upper handle. The mower will begin to move forward. Release the lever to disengage the self-propel.

Figure 6: The rear-wheel self-propelled drive assists in effortless mowing.
3. Mowing Techniques
- For best results, mow when the grass is dry.
- Overlap cutting swaths slightly to ensure an even cut.
- Avoid cutting more than one-third of the grass blade length at a time. If grass is tall, make multiple passes.
- When using the bagging feature, empty the 19-gallon bagger regularly to maintain optimal performance.
- For mulching, ensure the mulch plug is installed. For side discharge, attach the side discharge chute.

Figure 7: The detachable collection bag for easy grass disposal.
Maintenance
Regular maintenance ensures the longevity and optimal performance of your lawn mower.
- After Each Use: Clean the underside of the mower deck using the washout port. Remove any grass clippings or debris from the engine and cooling fins.
- Check Oil Level: Before each use, check the engine oil level and add more if necessary.
- Blade Inspection: Periodically inspect the cutting blade for sharpness and damage. Sharpen or replace as needed.
- Air Filter: Check and clean or replace the air filter as recommended in the engine manual.
- Spark Plug: Inspect and clean or replace the spark plug annually.
- Storage: For extended storage, drain the fuel or use a fuel stabilizer. Clean the mower thoroughly and store it in a dry, protected area. The foldable handle allows for vertical storage.

Figure 8: The foldable design allows for convenient storage.
Troubleshooting
| Problem | Possible Cause | Solution |
|---|---|---|
| Engine will not start | No fuel; old fuel; incorrect oil level; spark plug issue; engine stop lever not engaged. | Add fresh fuel; check oil level; inspect/replace spark plug; ensure engine stop lever is fully pulled. |
| Uneven cut | Incorrect cutting height setting; dull or damaged blade; uneven terrain. | Ensure all wheels are at the same height; sharpen or replace blade; adjust mowing pattern for terrain. |
| Mower not self-propelling | Self-propel lever not engaged; drive belt issue. | Ensure self-propel lever is fully pulled; inspect drive belt for wear or damage. |
| Excessive vibration | Bent or unbalanced blade; loose components. | Inspect blade for damage and replace if necessary; check all bolts and nuts for tightness. |
Specifications
| Feature | Detail |
|---|---|
| Brand | SENIX |
| Model Number | LSSG-H1 |
| Power Source | Gasoline-Powered |
| Engine | Briggs & Stratton 163cc EXi675 4-Cycle |
| Cutting Width | 22 Inches |
| Height Adjustment Positions | 6 (1.25" - 4") |
| Operation Mode | Automatic (Self-Propelled) |
| Item Weight | 66 Pounds |
| Product Dimensions | 37.5"D x 23.75"W x 15.87"H |
| Material | Alloy Steel |
| UPC | 843212113249 |
Warranty and Support
All SENIX gas lawn mowers are backed by a 2-year limited warranty for your peace of mind. For warranty claims, technical support, or replacement parts, please contact SENIX customer service through their official website or the contact information provided with your purchase.
Additional support resources, including FAQs and product registration, may be available on the SENIX Store.


